TrackMe User Interfaces Design
Note
TrackMe Design
This document describes the essential concepts and design principles behind TrackMe’s user interfaces.
TrackMe 2.3.0 introduced a complete rewrite of the user interfaces, based on Splunk UI native React.
Throught this document, we will cover the key things to know about how to use the new user interfaces, and navigate throught the different features.
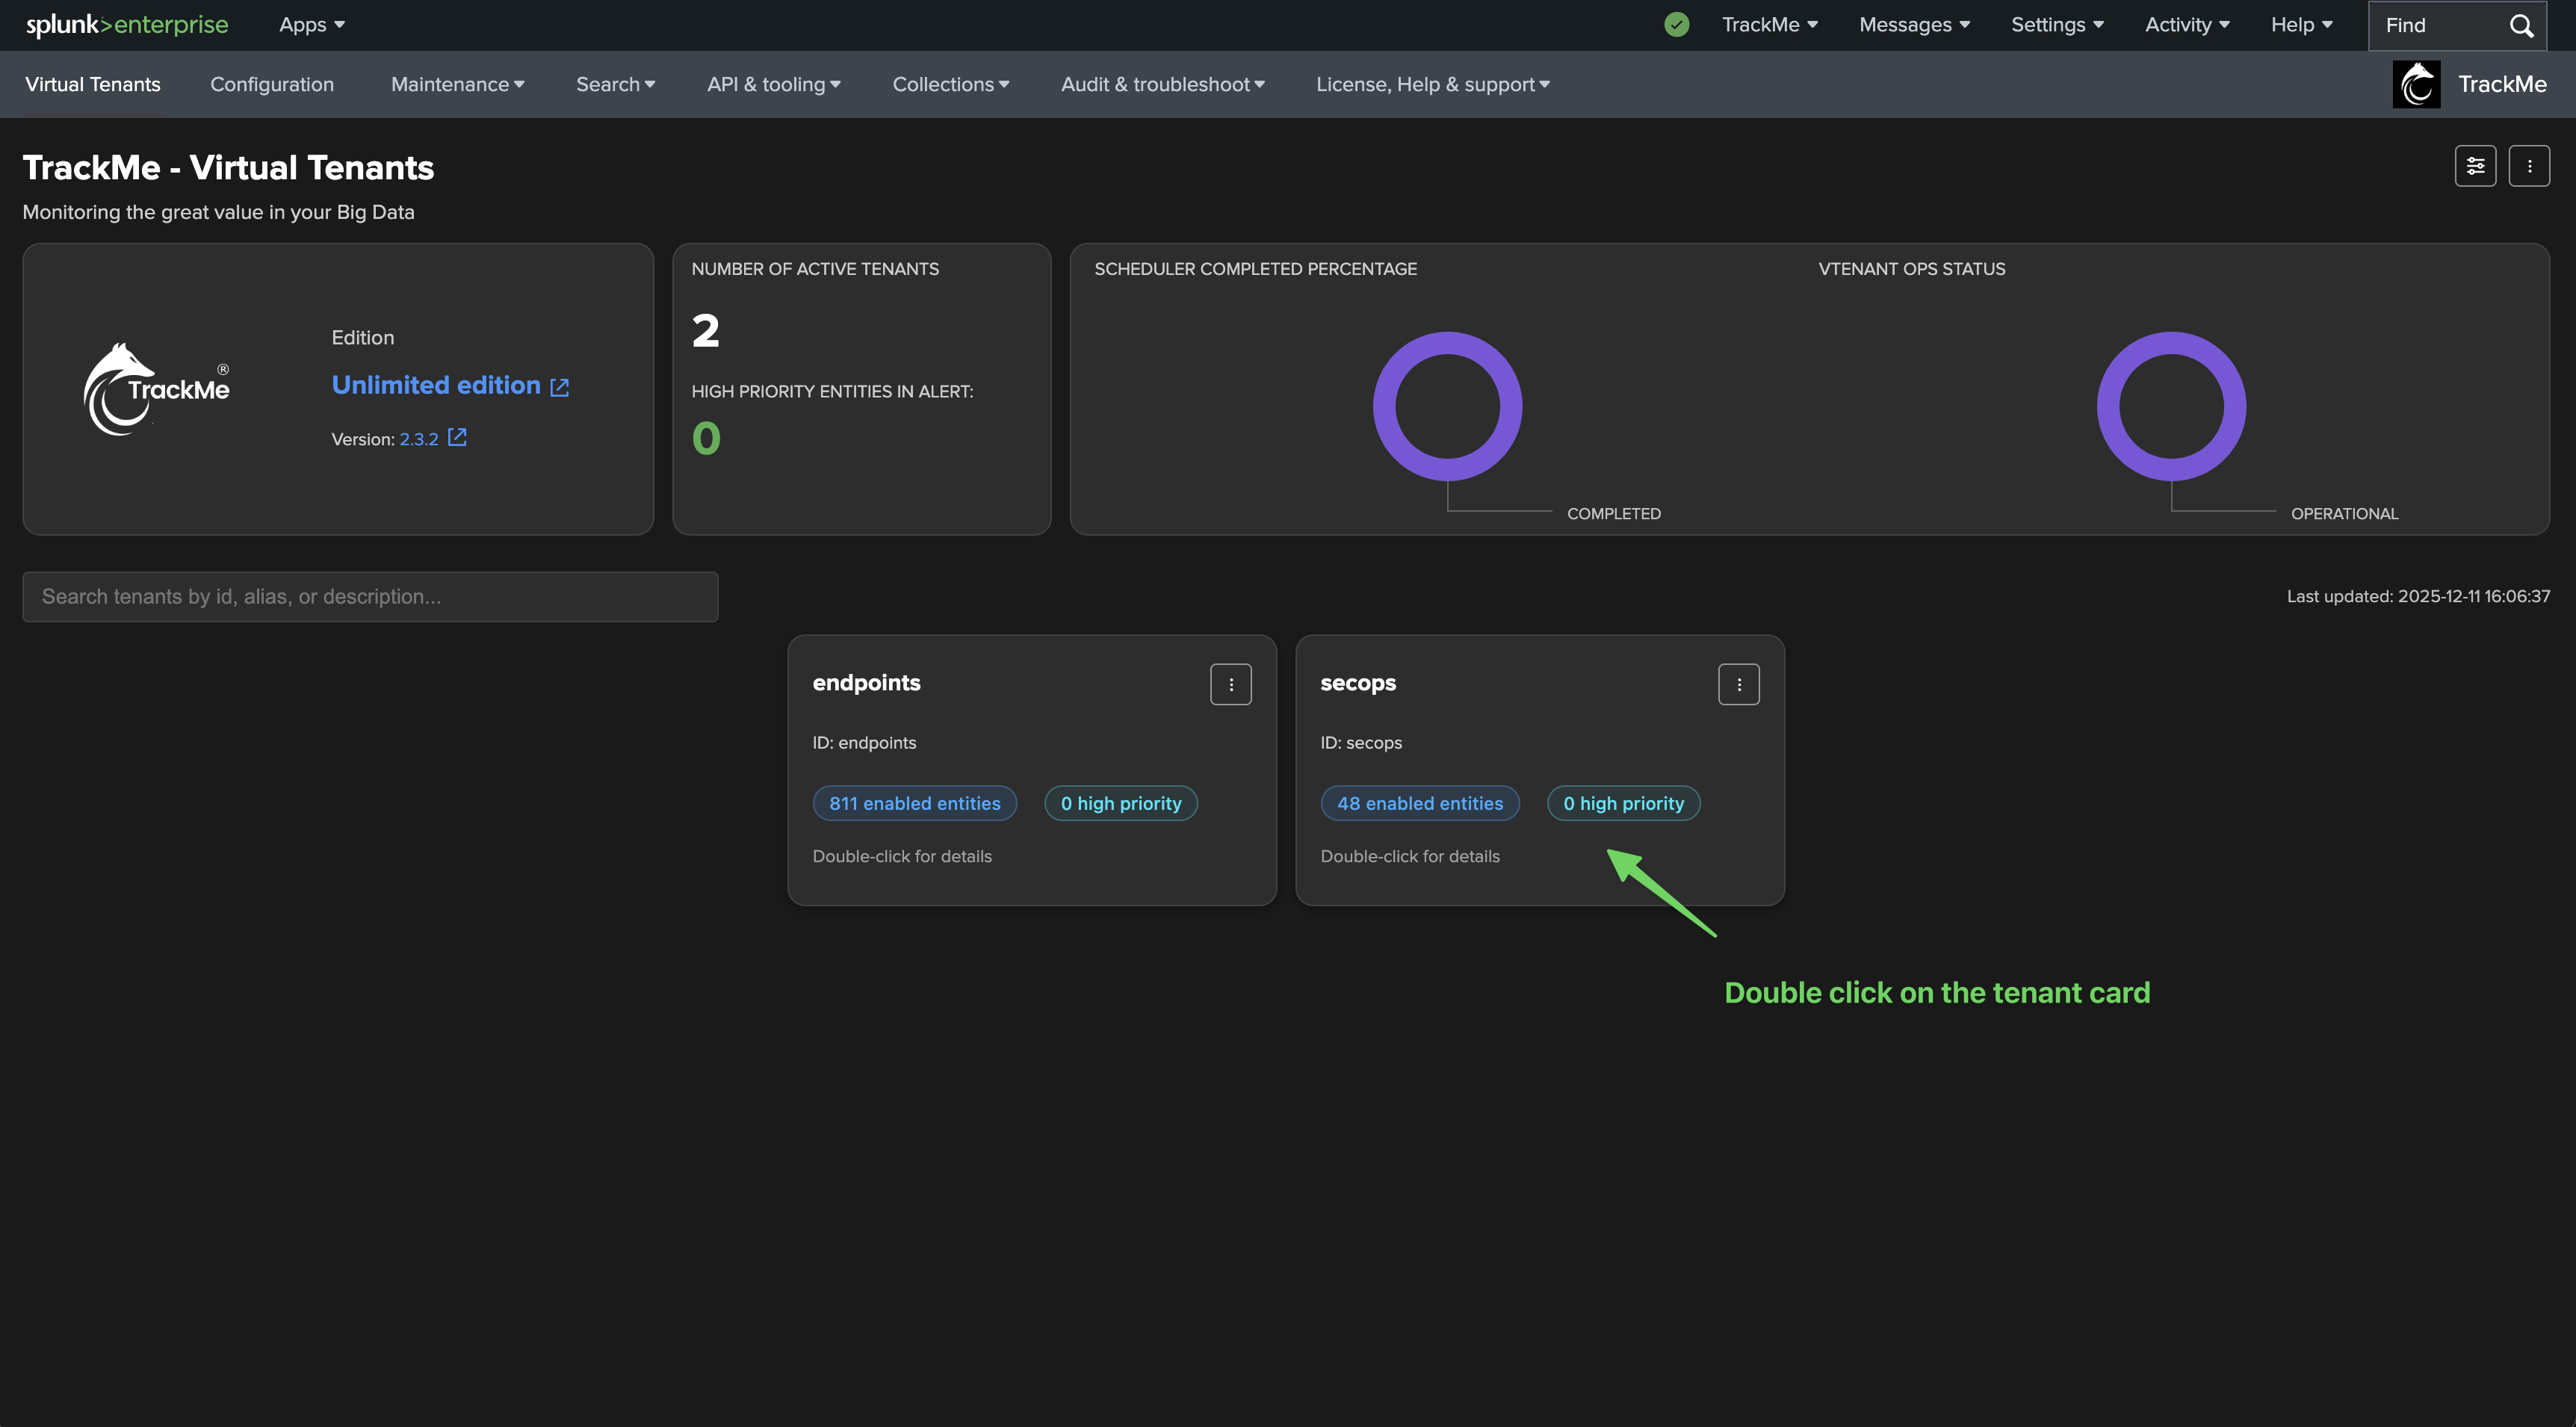
Accessing TrackMe’s home page, the Virtual Tenant interface
When you open TrackMe, the default page is called the “Virtual Tenant” interface.
It provides an overview of the different Virtual Tenants, as well as various actions that can be performed, such as creating, managing or entering a specific Virtual Tenant.

Key interactions in the Virtual Tenant interface
The following shows the key interactions in the Virtual Tenant interface:
main screen:
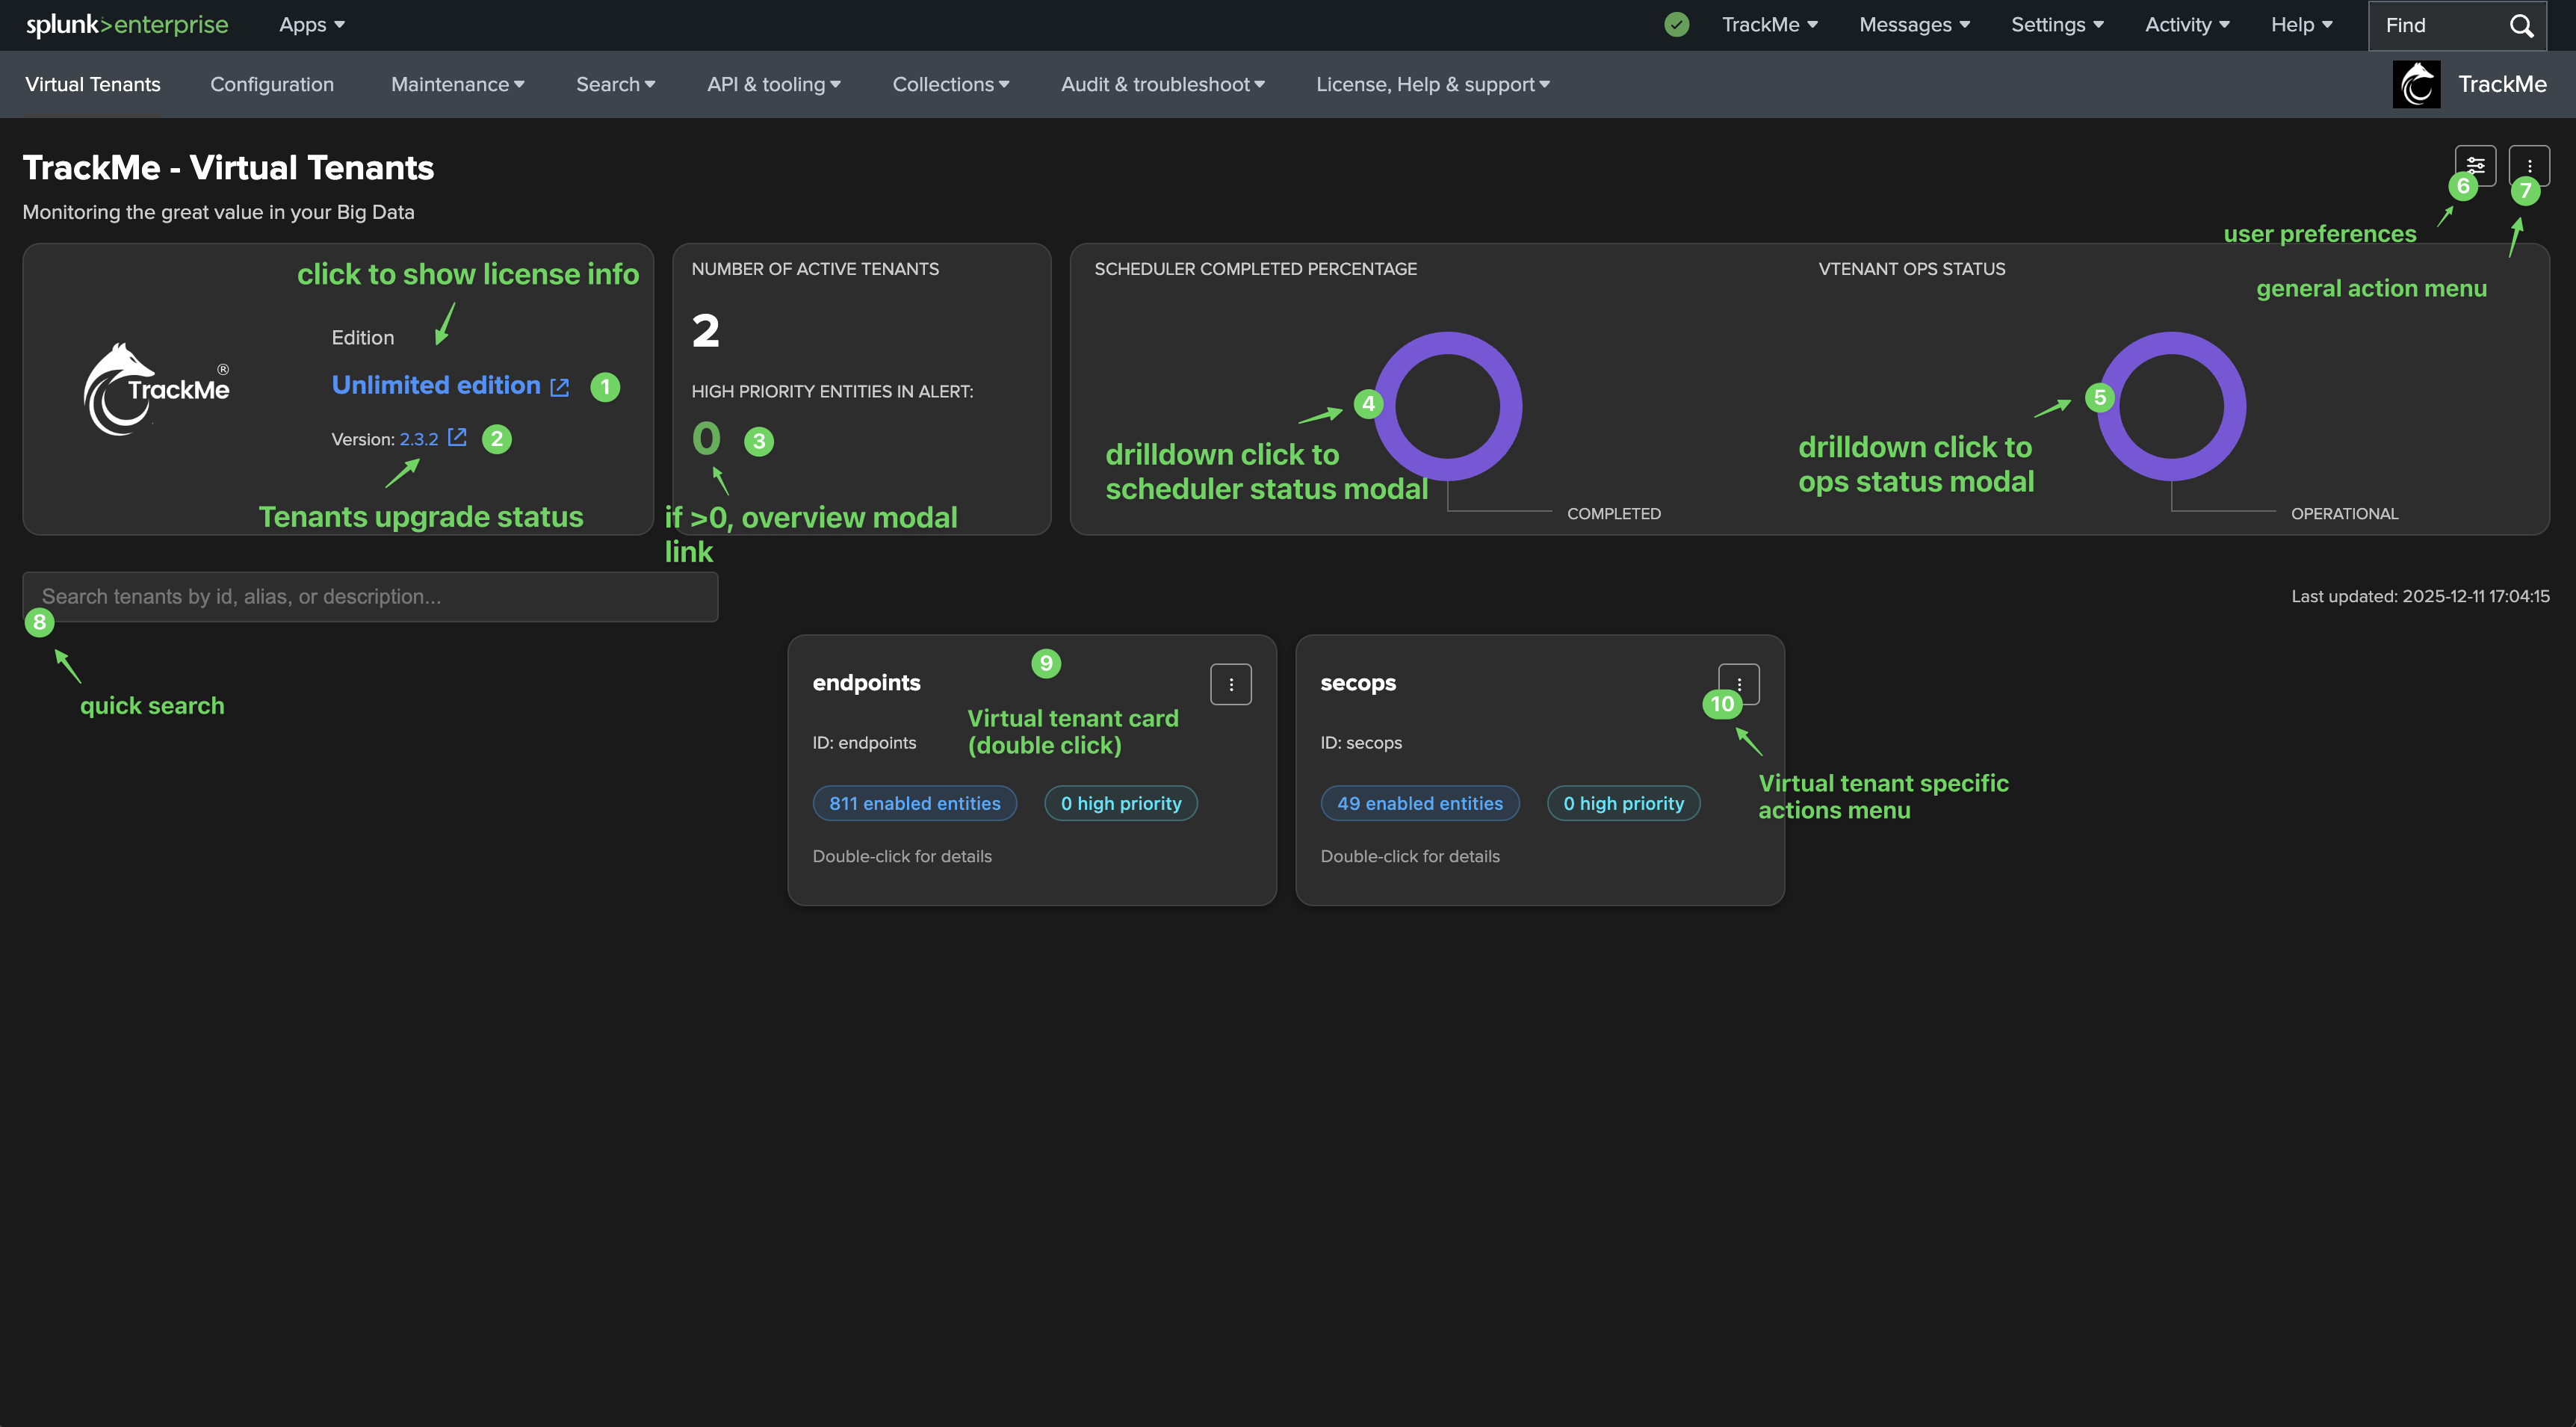
tenant overview:
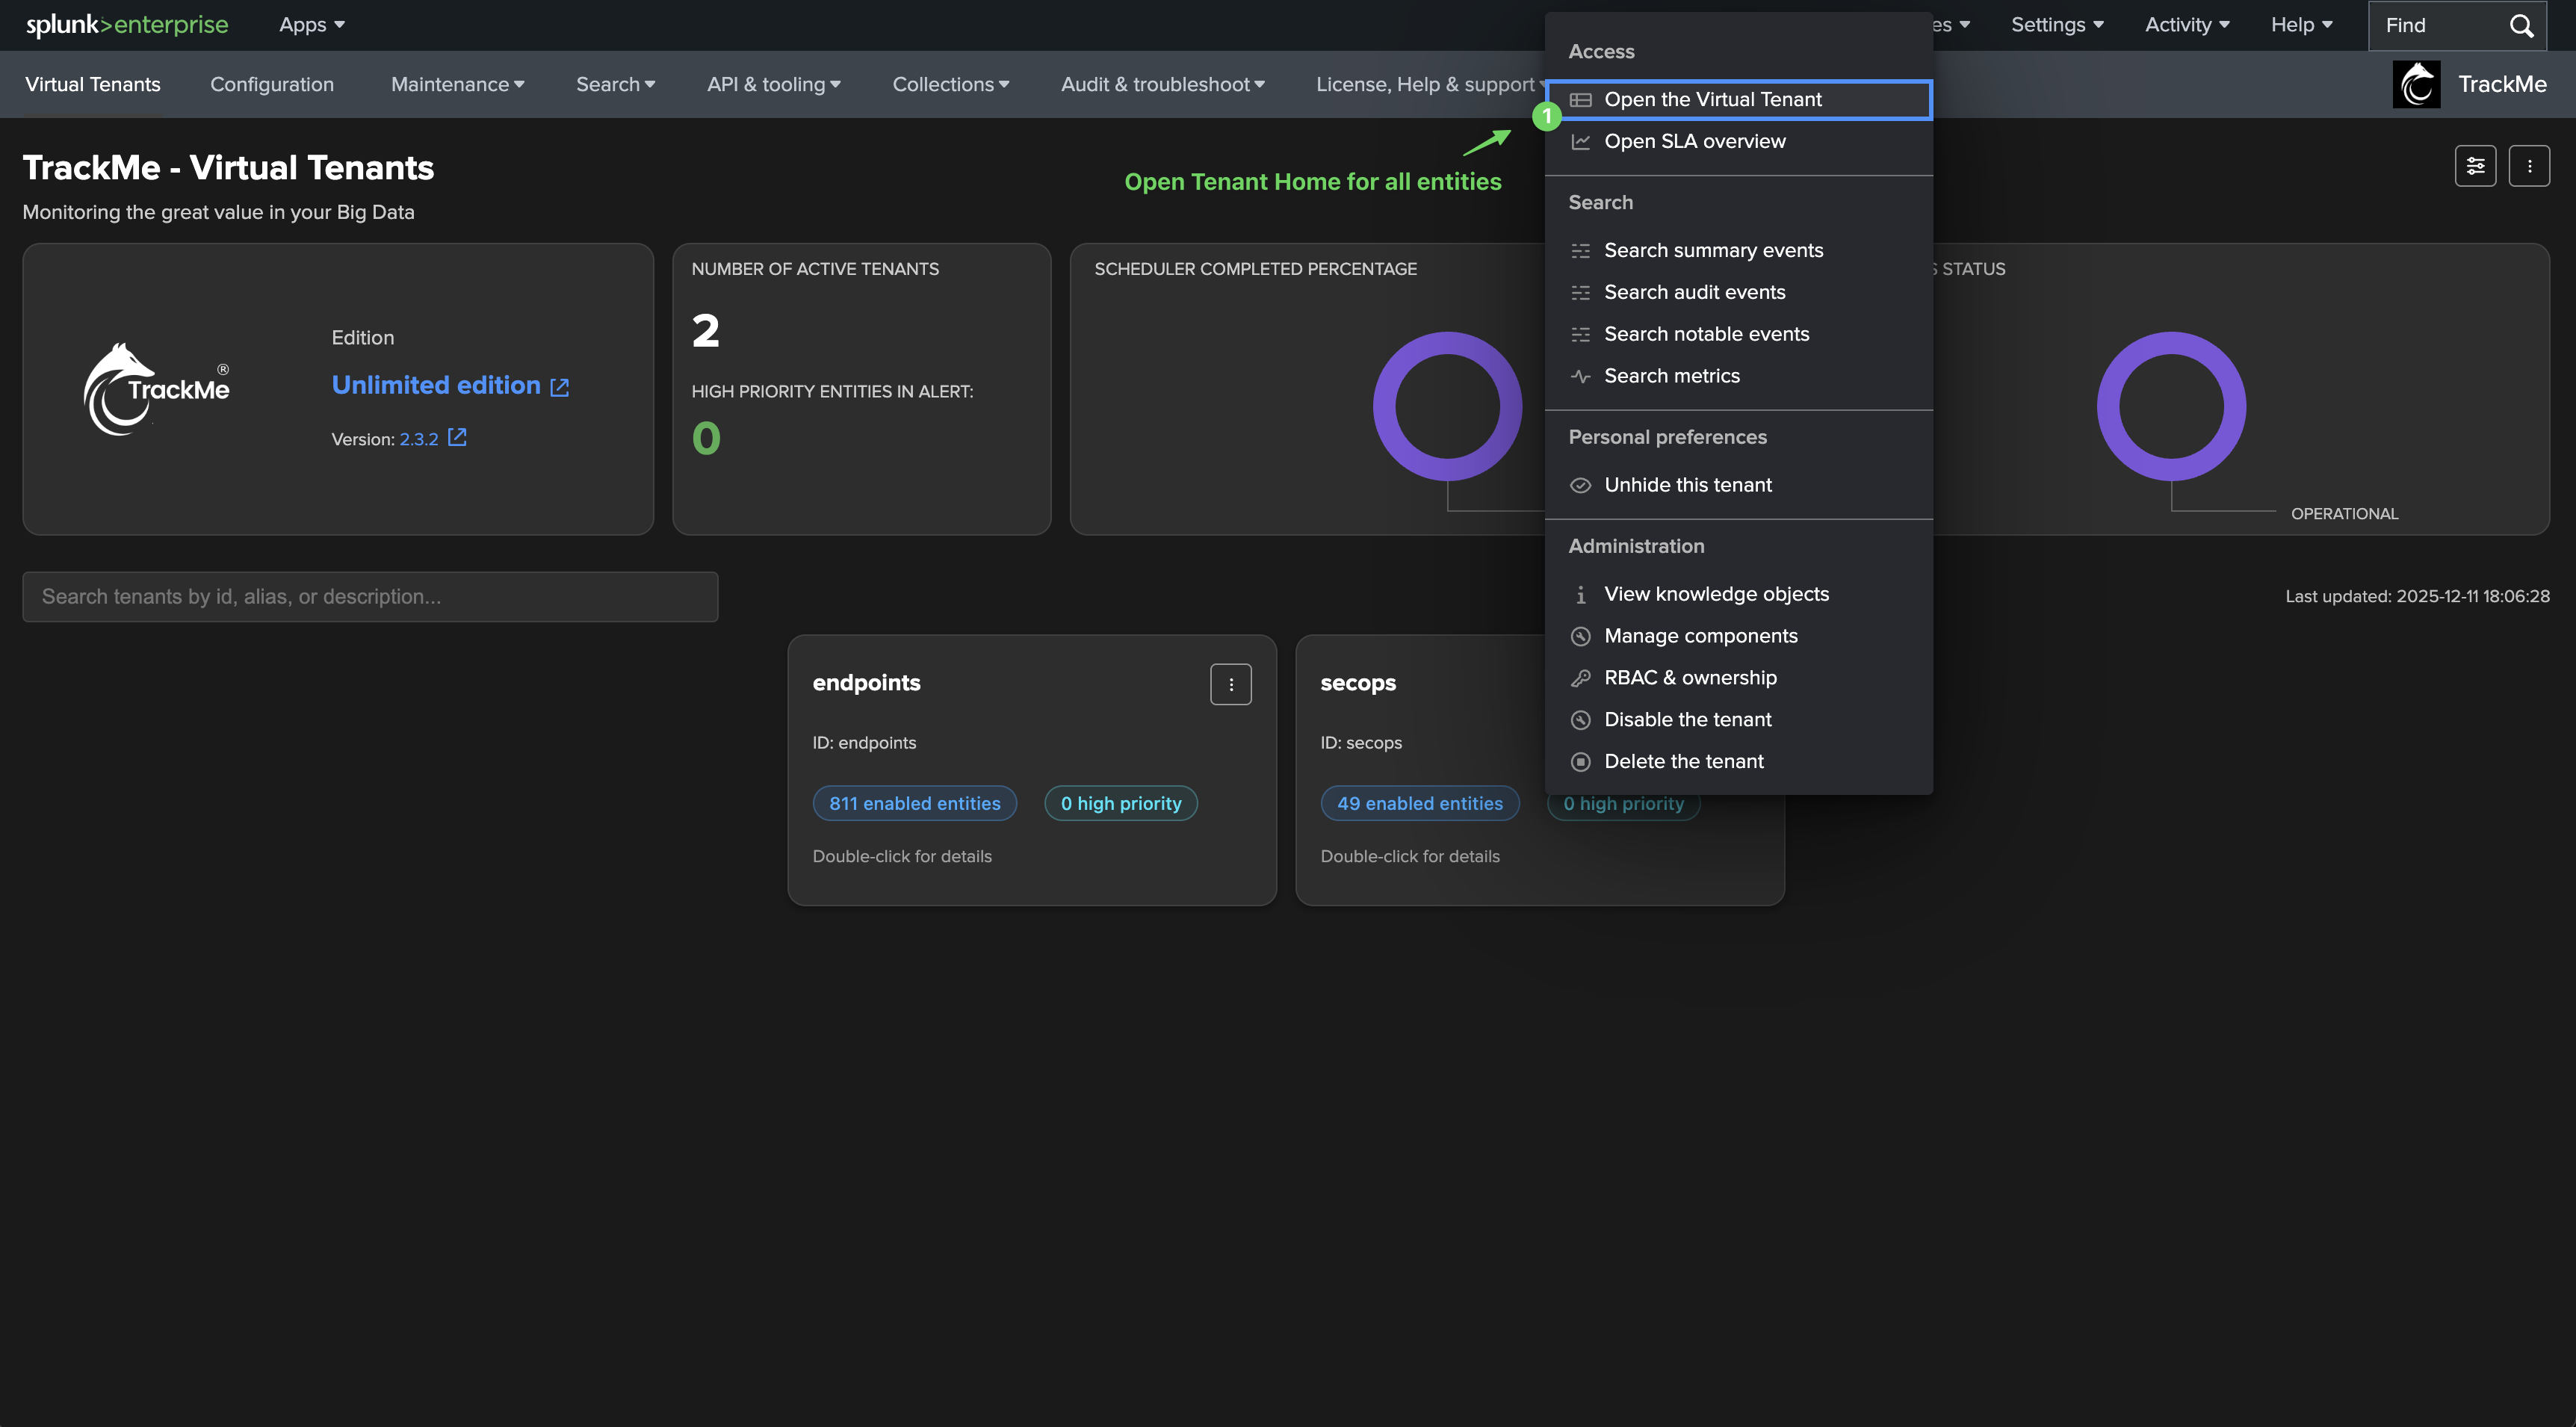
Main selector menu
The three vertical dot icon in the top right of the screen is the main selector menu.
It provides quick access to main actions, such as creating a new Virtual Tenant:
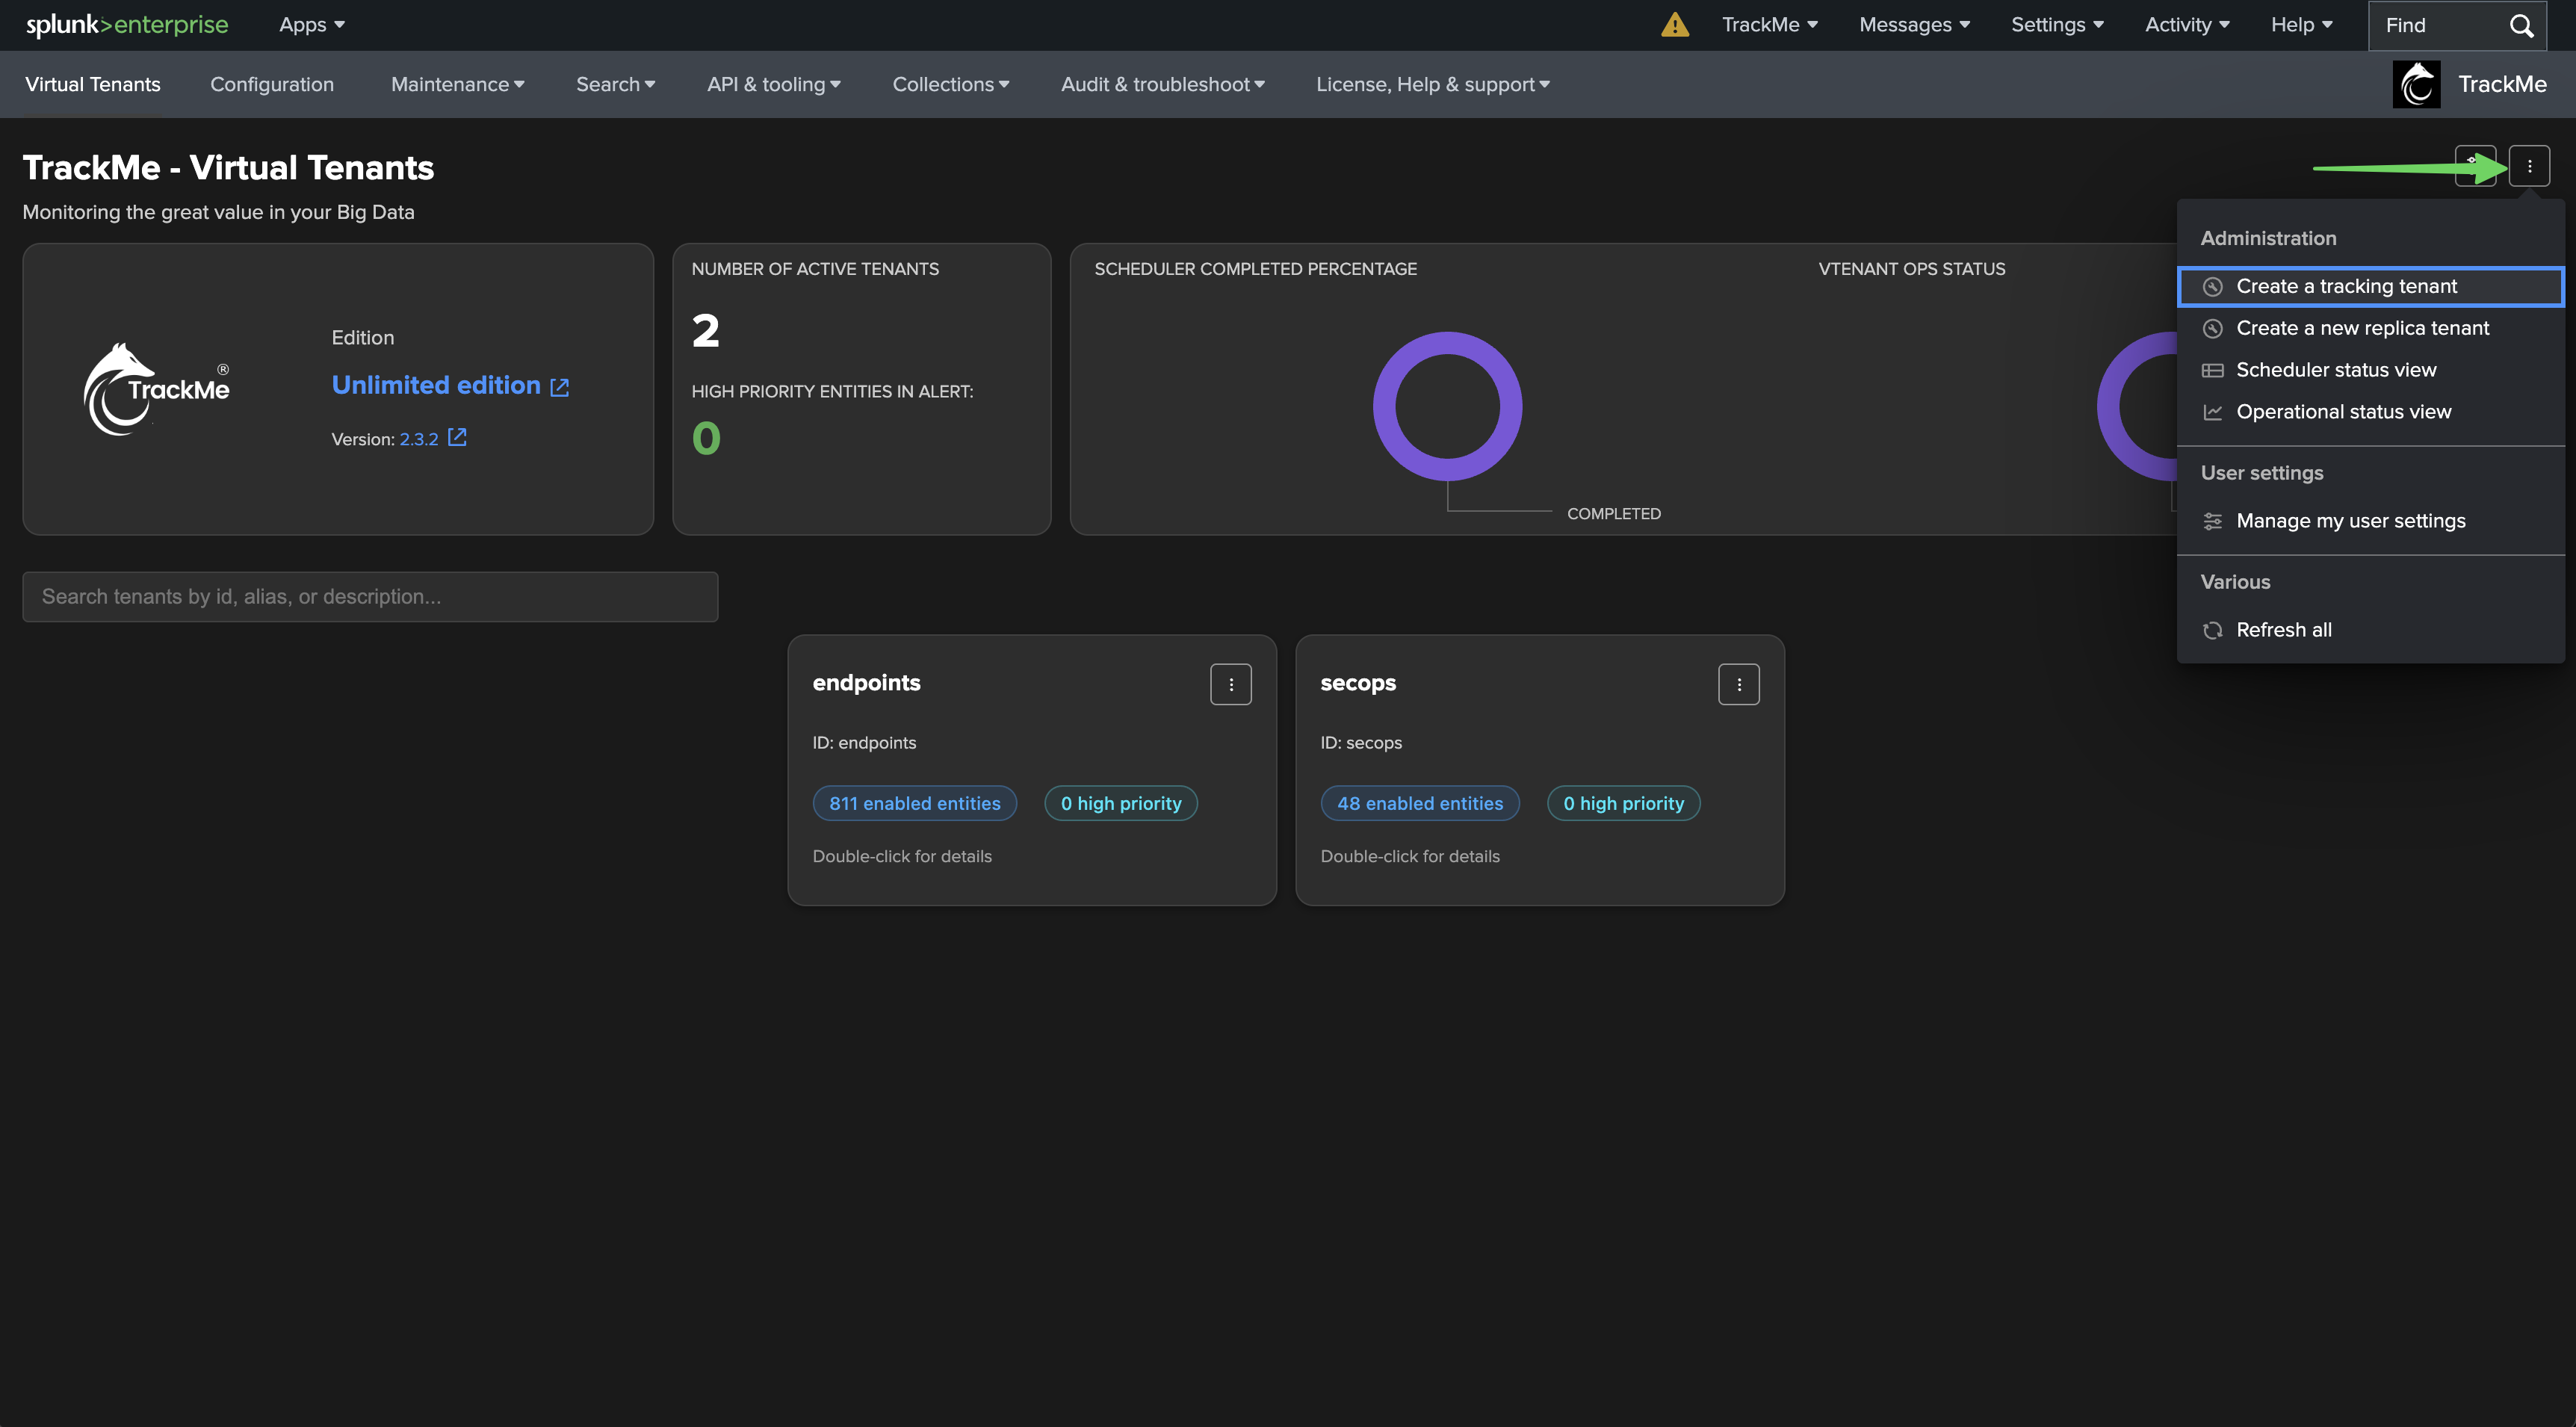

As a key design principle, every action in TrackMe whenever related to a Virtual Tenant, entities and so forth are made available through the same three vertical dot icon menu, placed in elements, charts, etc.
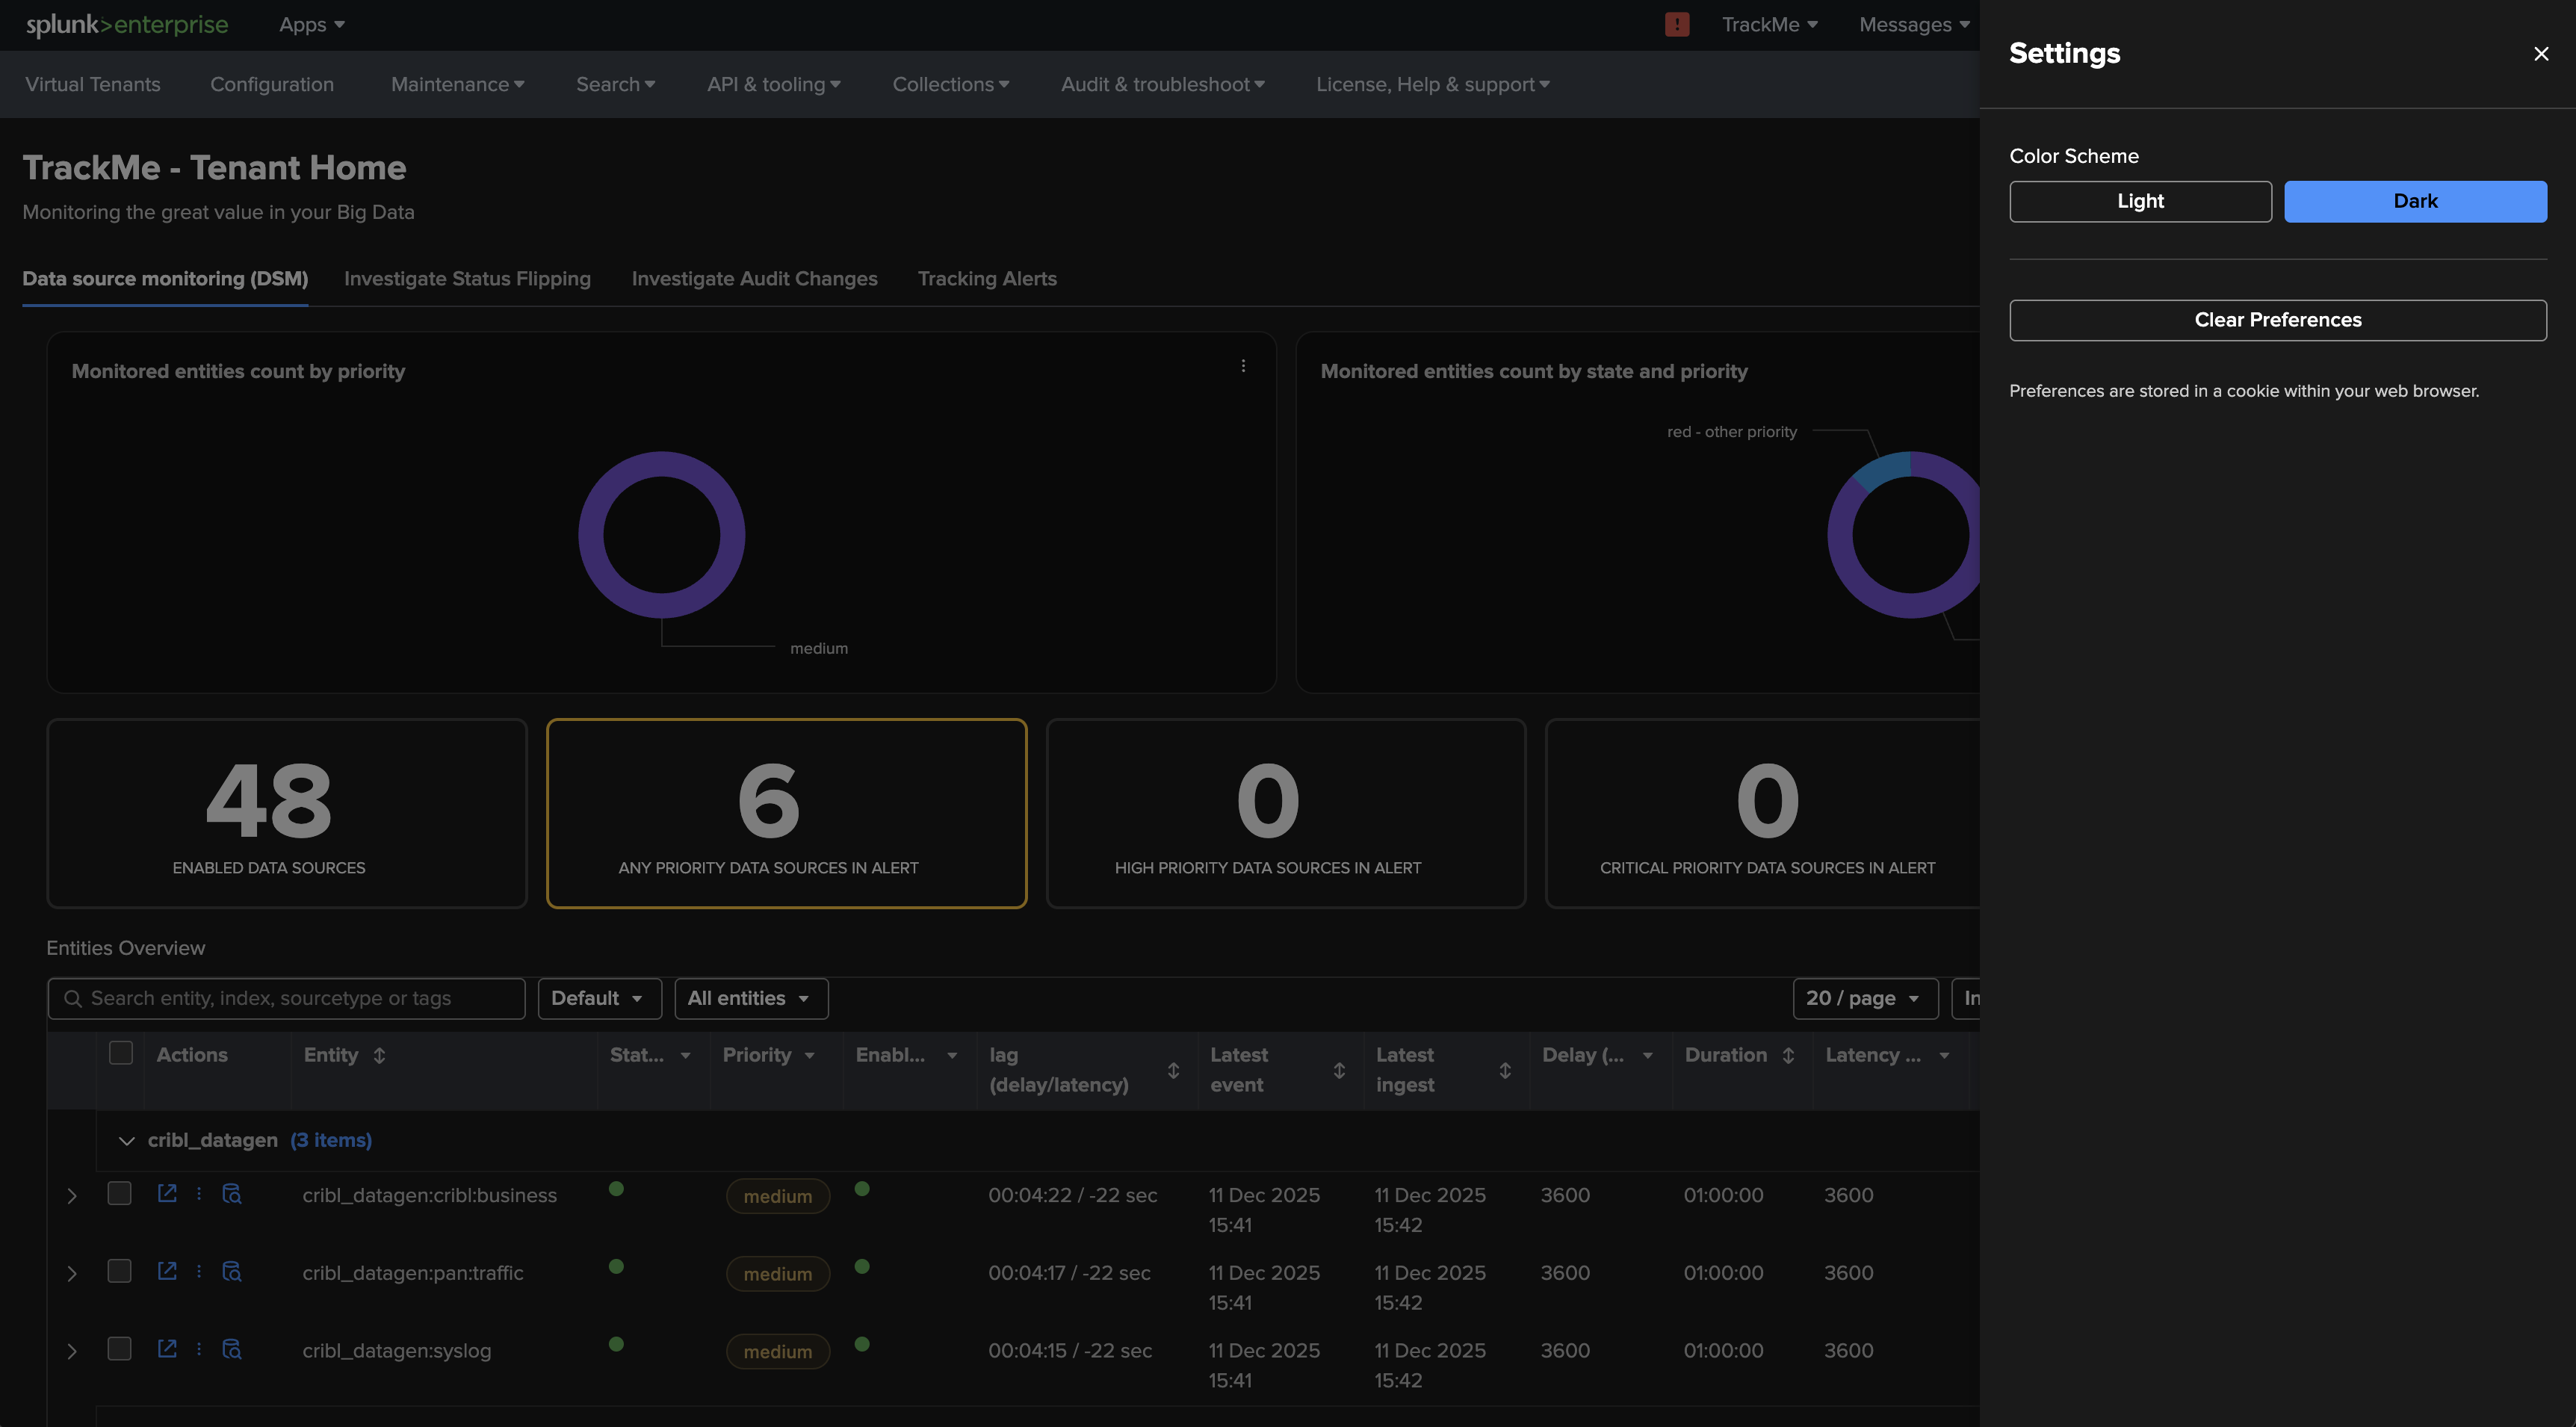
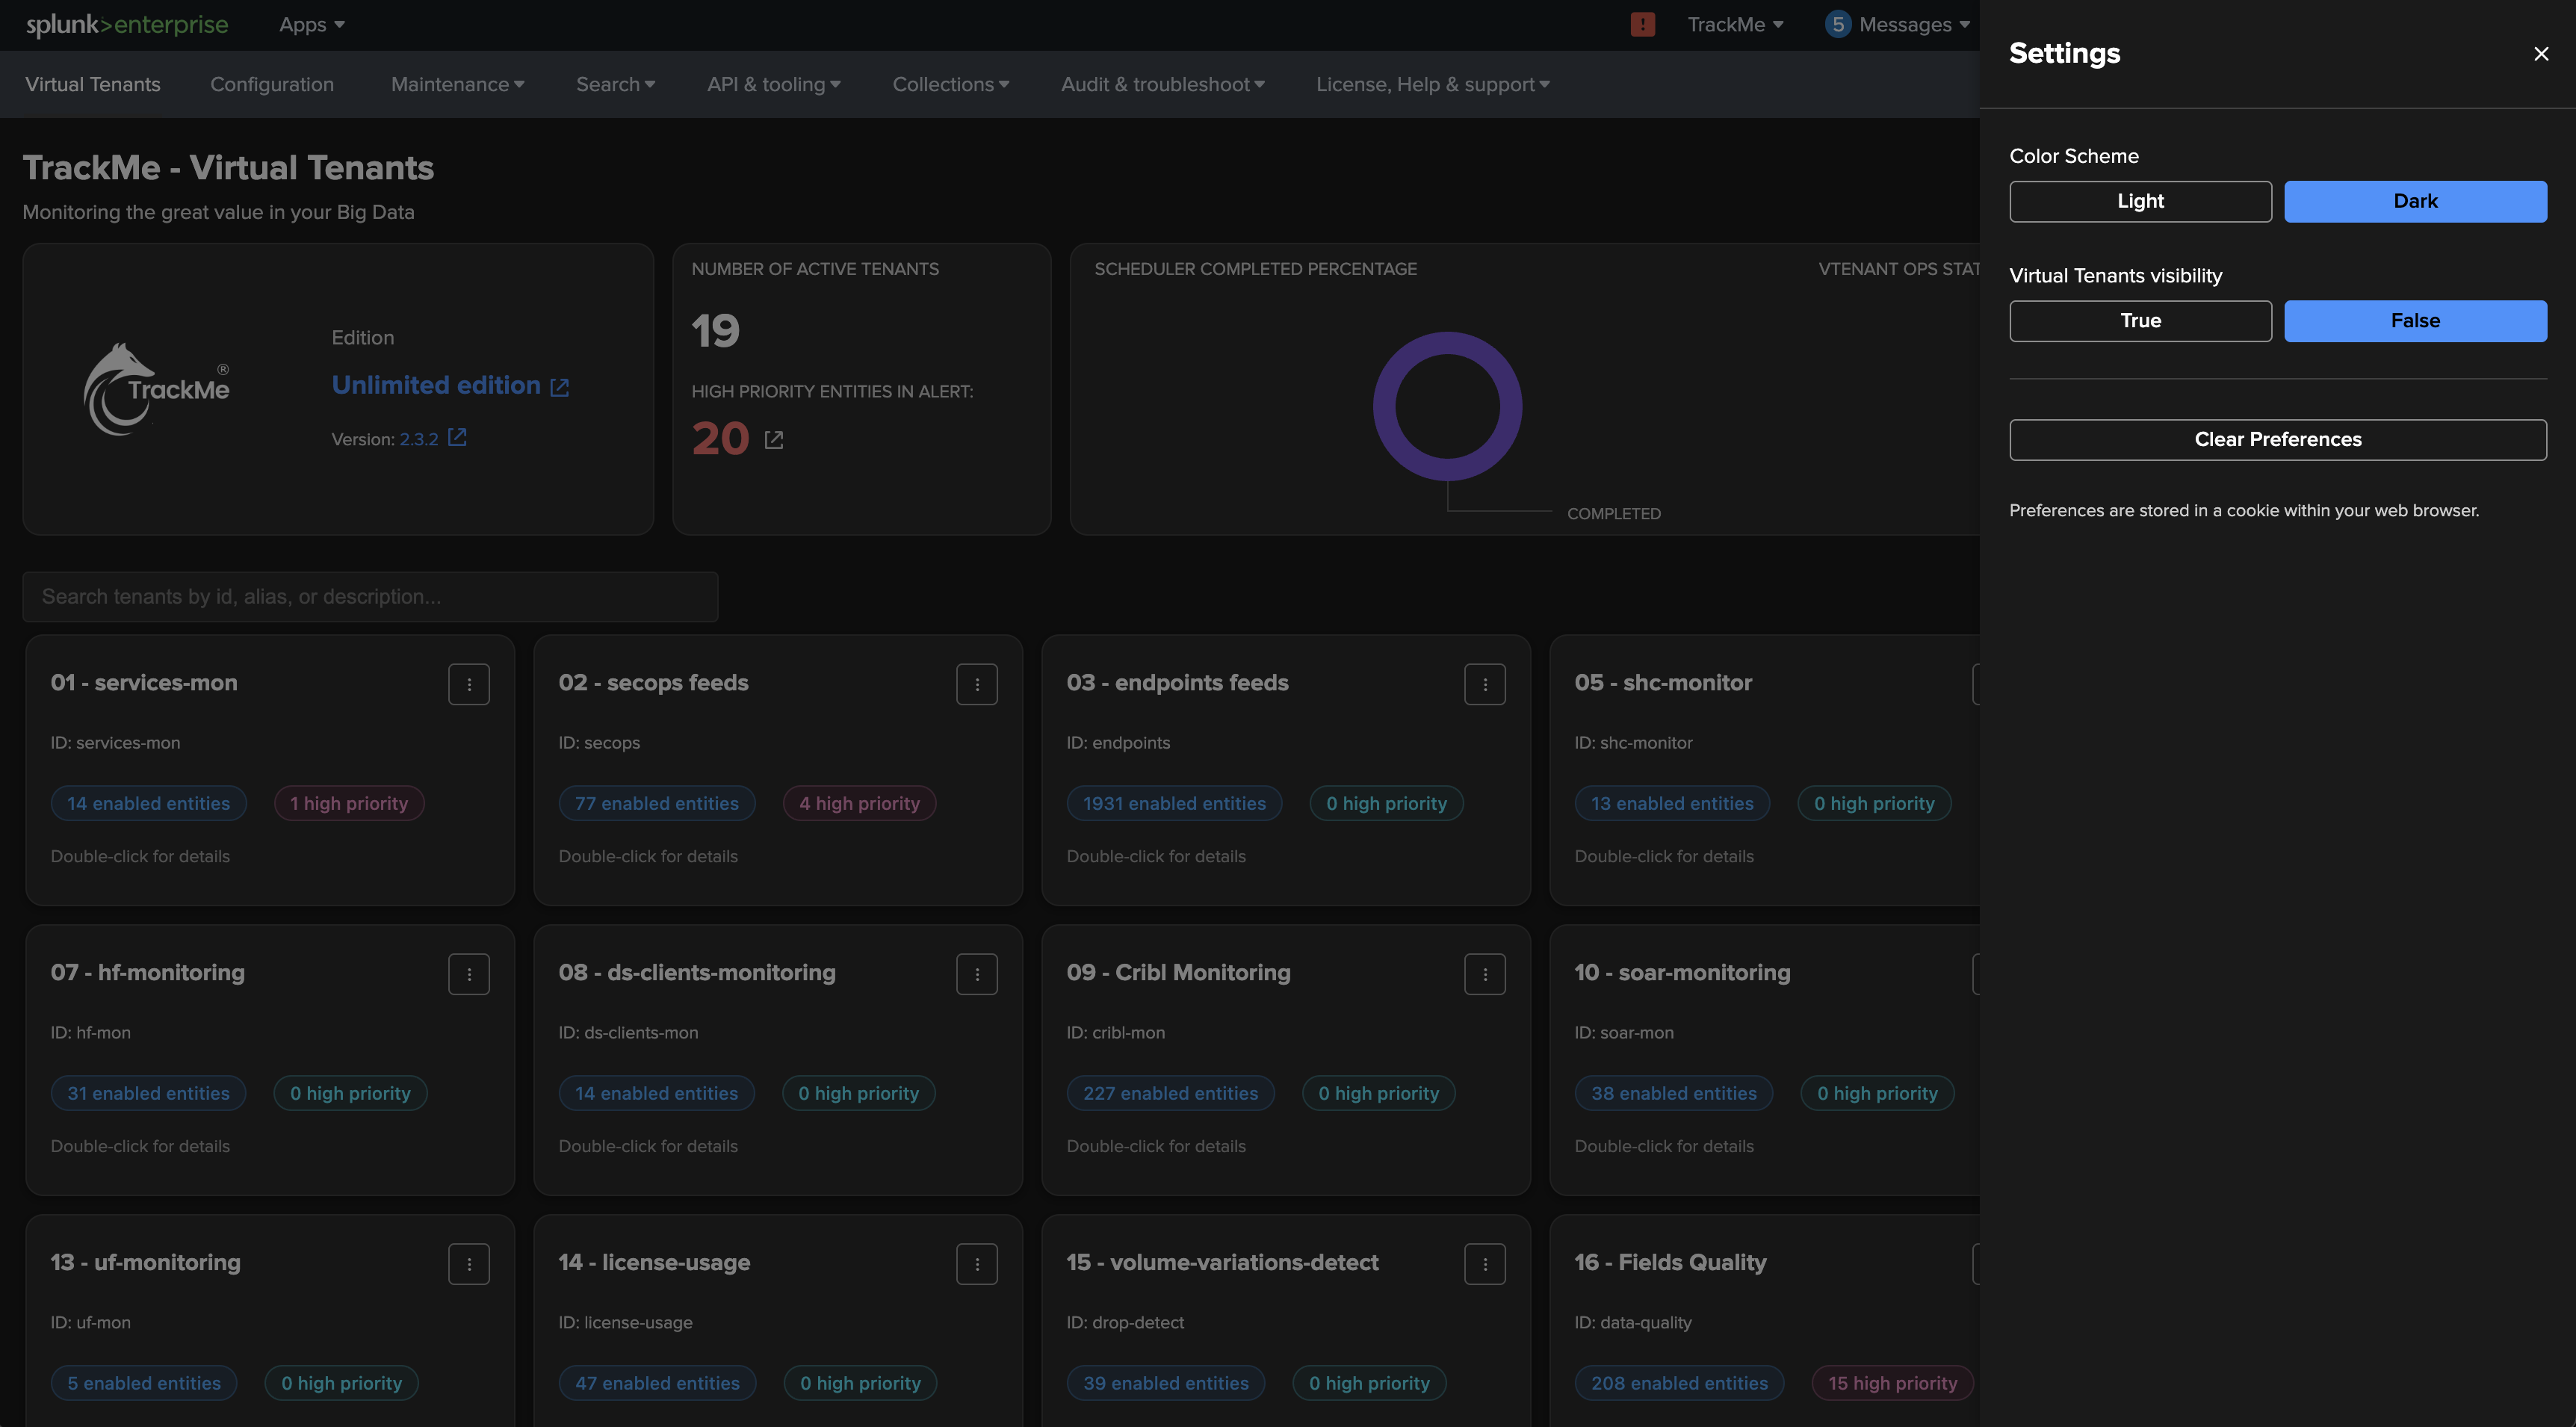
User preferences: Dark mode versus Light mode and persistent preferences
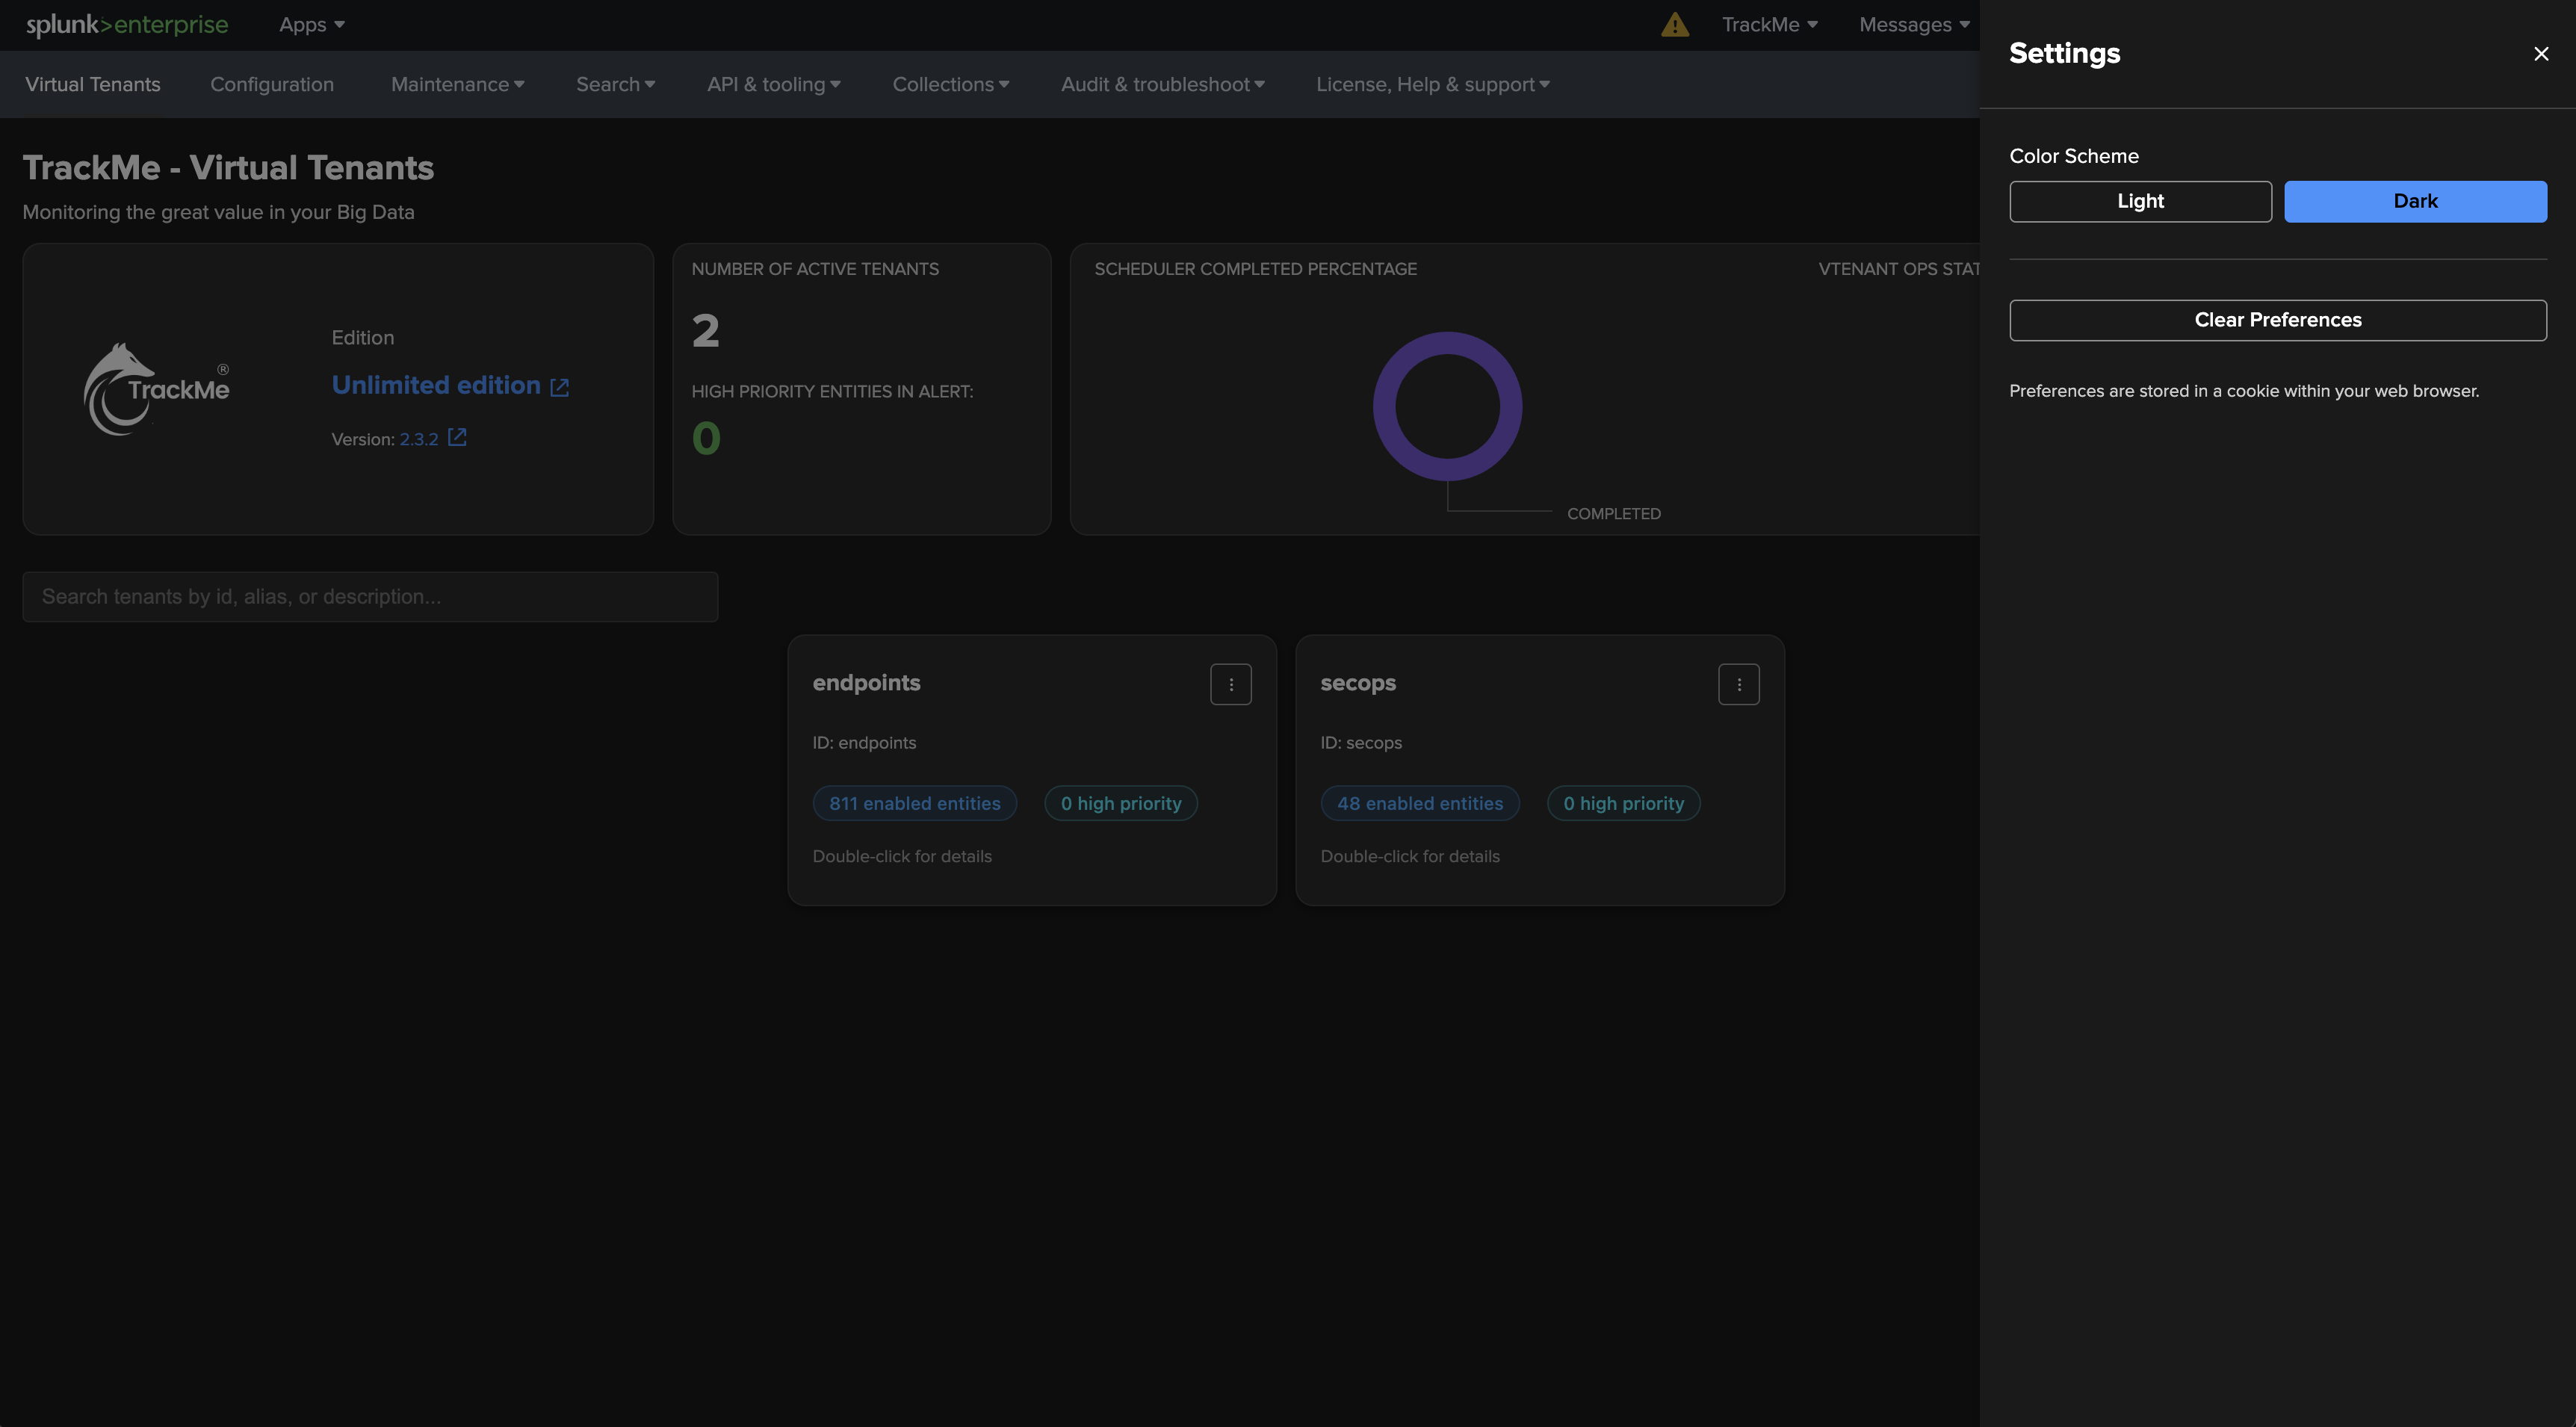
TrackMe globally supports two different themes: Dark mode and Light mode.
Preferences can be set for each user in a persistent manner, and are stored in a user cookie of the Web browser. Administrators can also choose to set the default theme for all users landing into TrackMe for the first time, the default theme is dark mode after the installation of TrackMe.
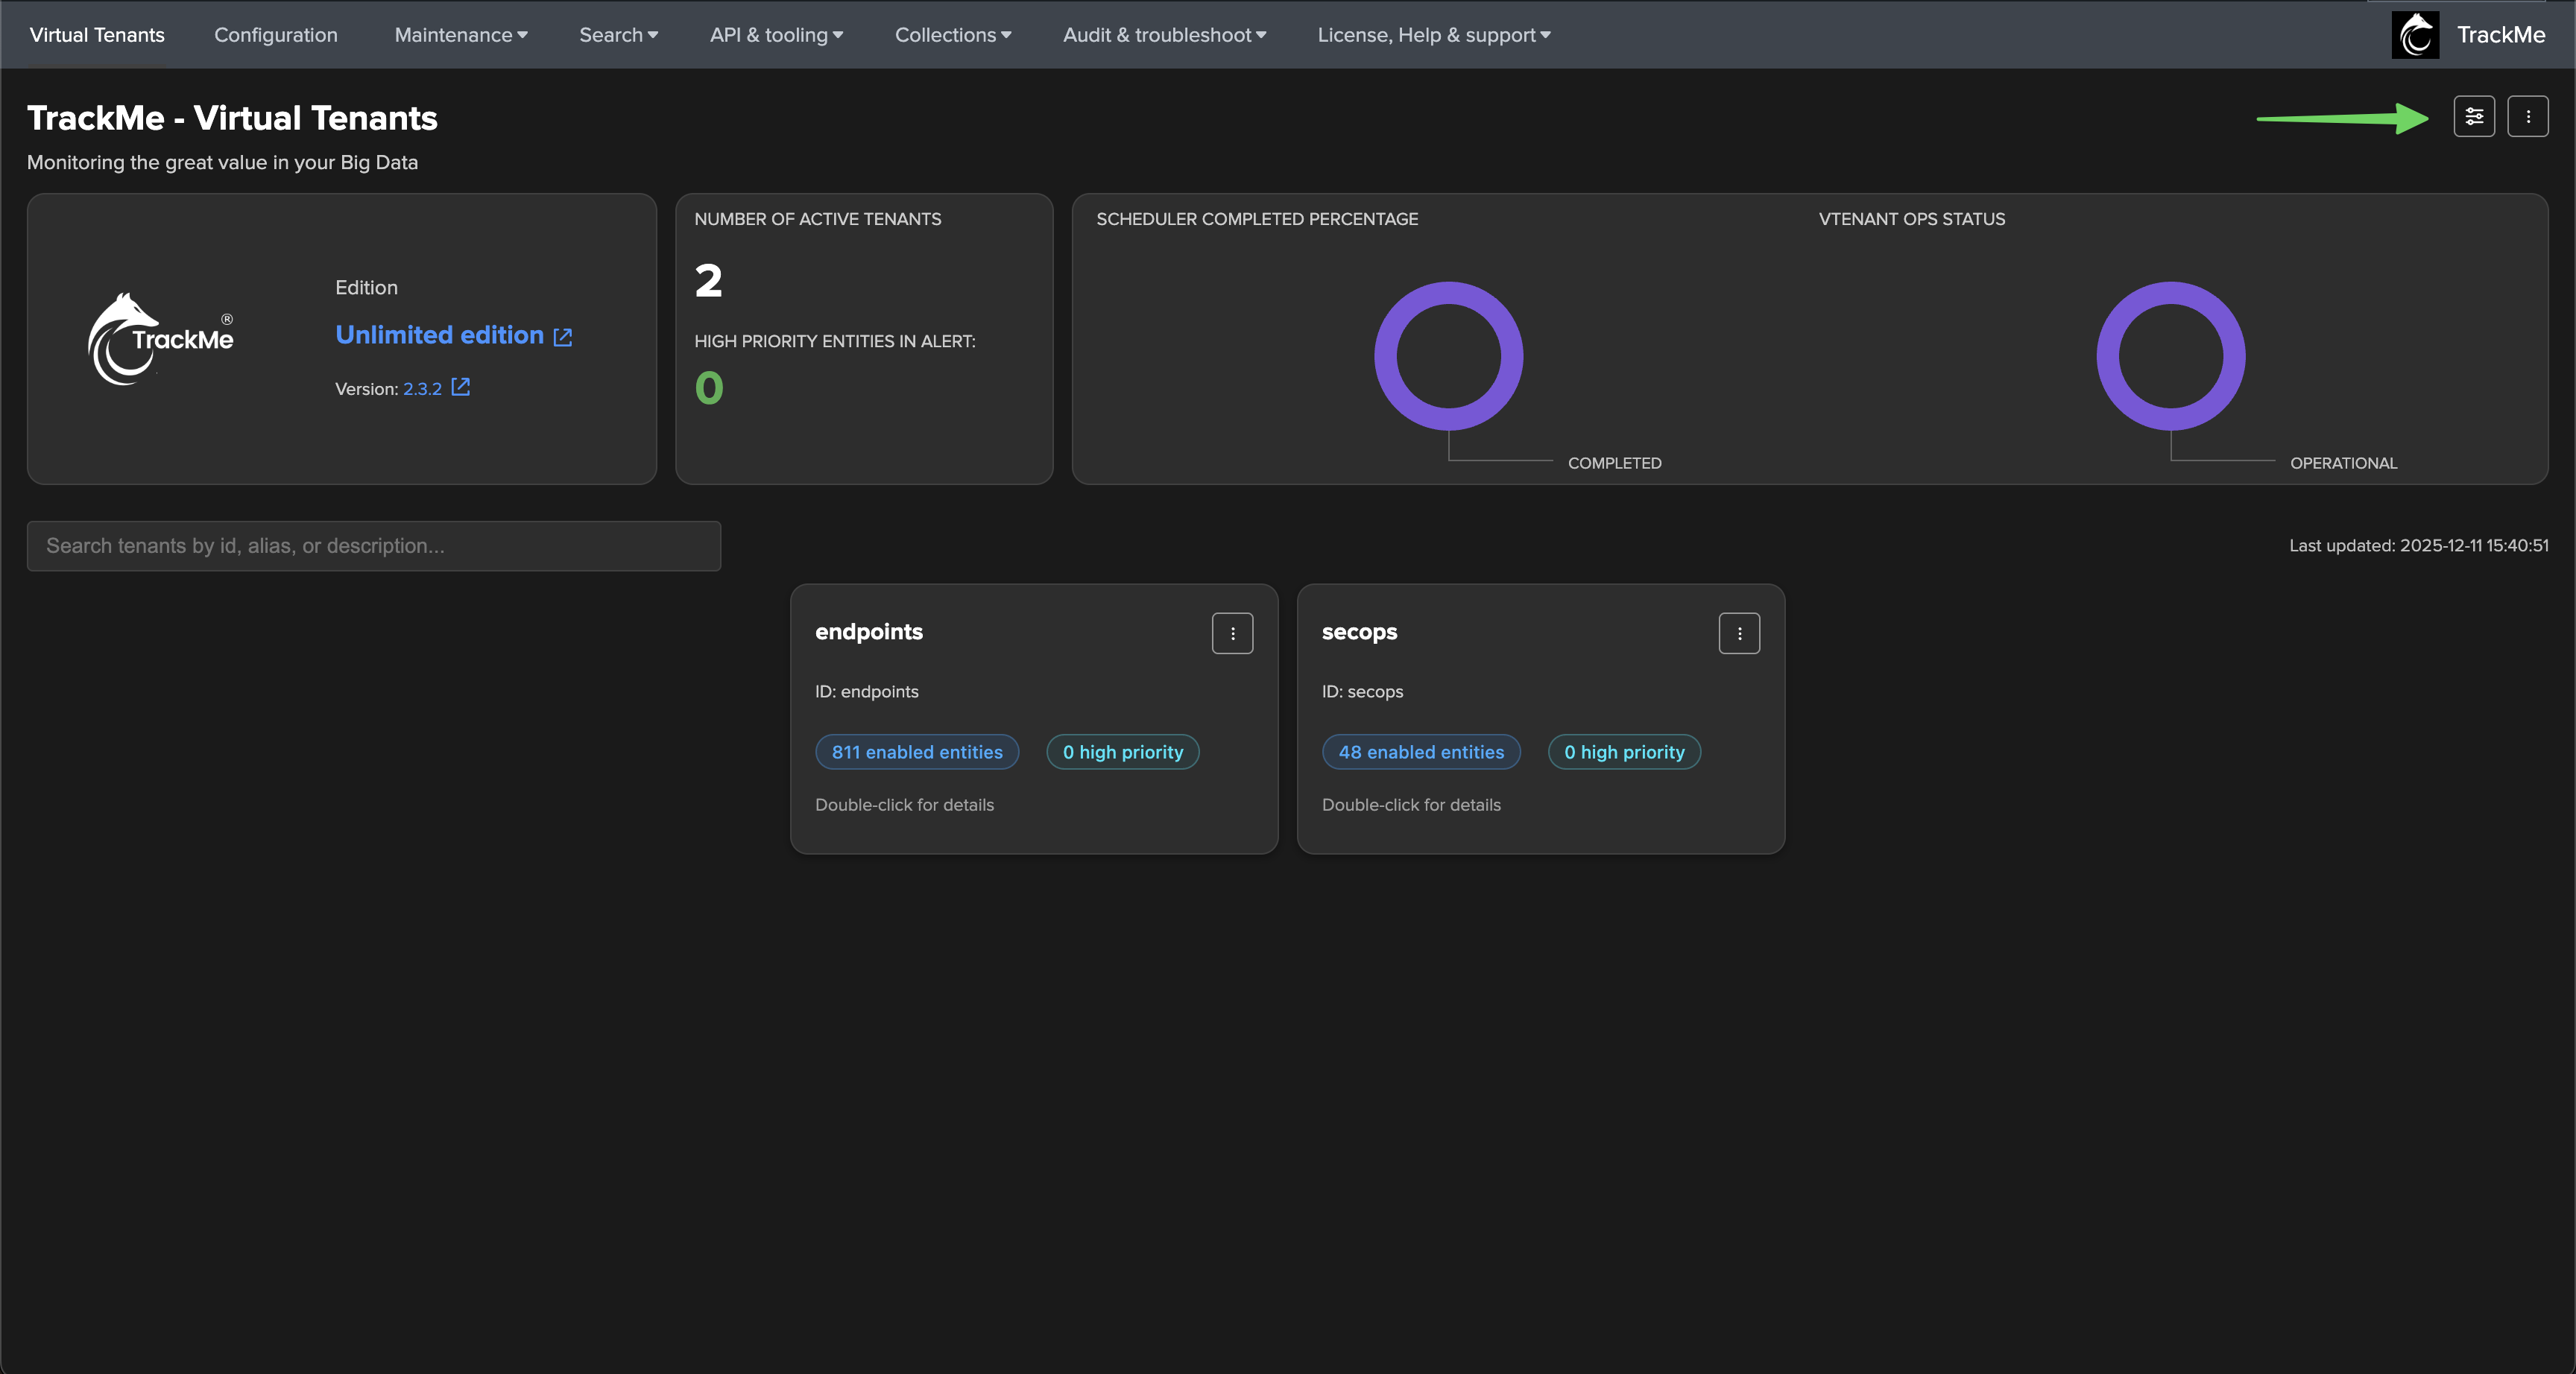
Accessing your theme preferences
From either the Virtual Tenant interface, or equally from the Tenant Home interface, you can easily access your user preferences by clicking on the settings icon on the top right of the screen:
From the Virtual Tenant interface:
From the Tenant Home interface:
TrackMe in Light mode:
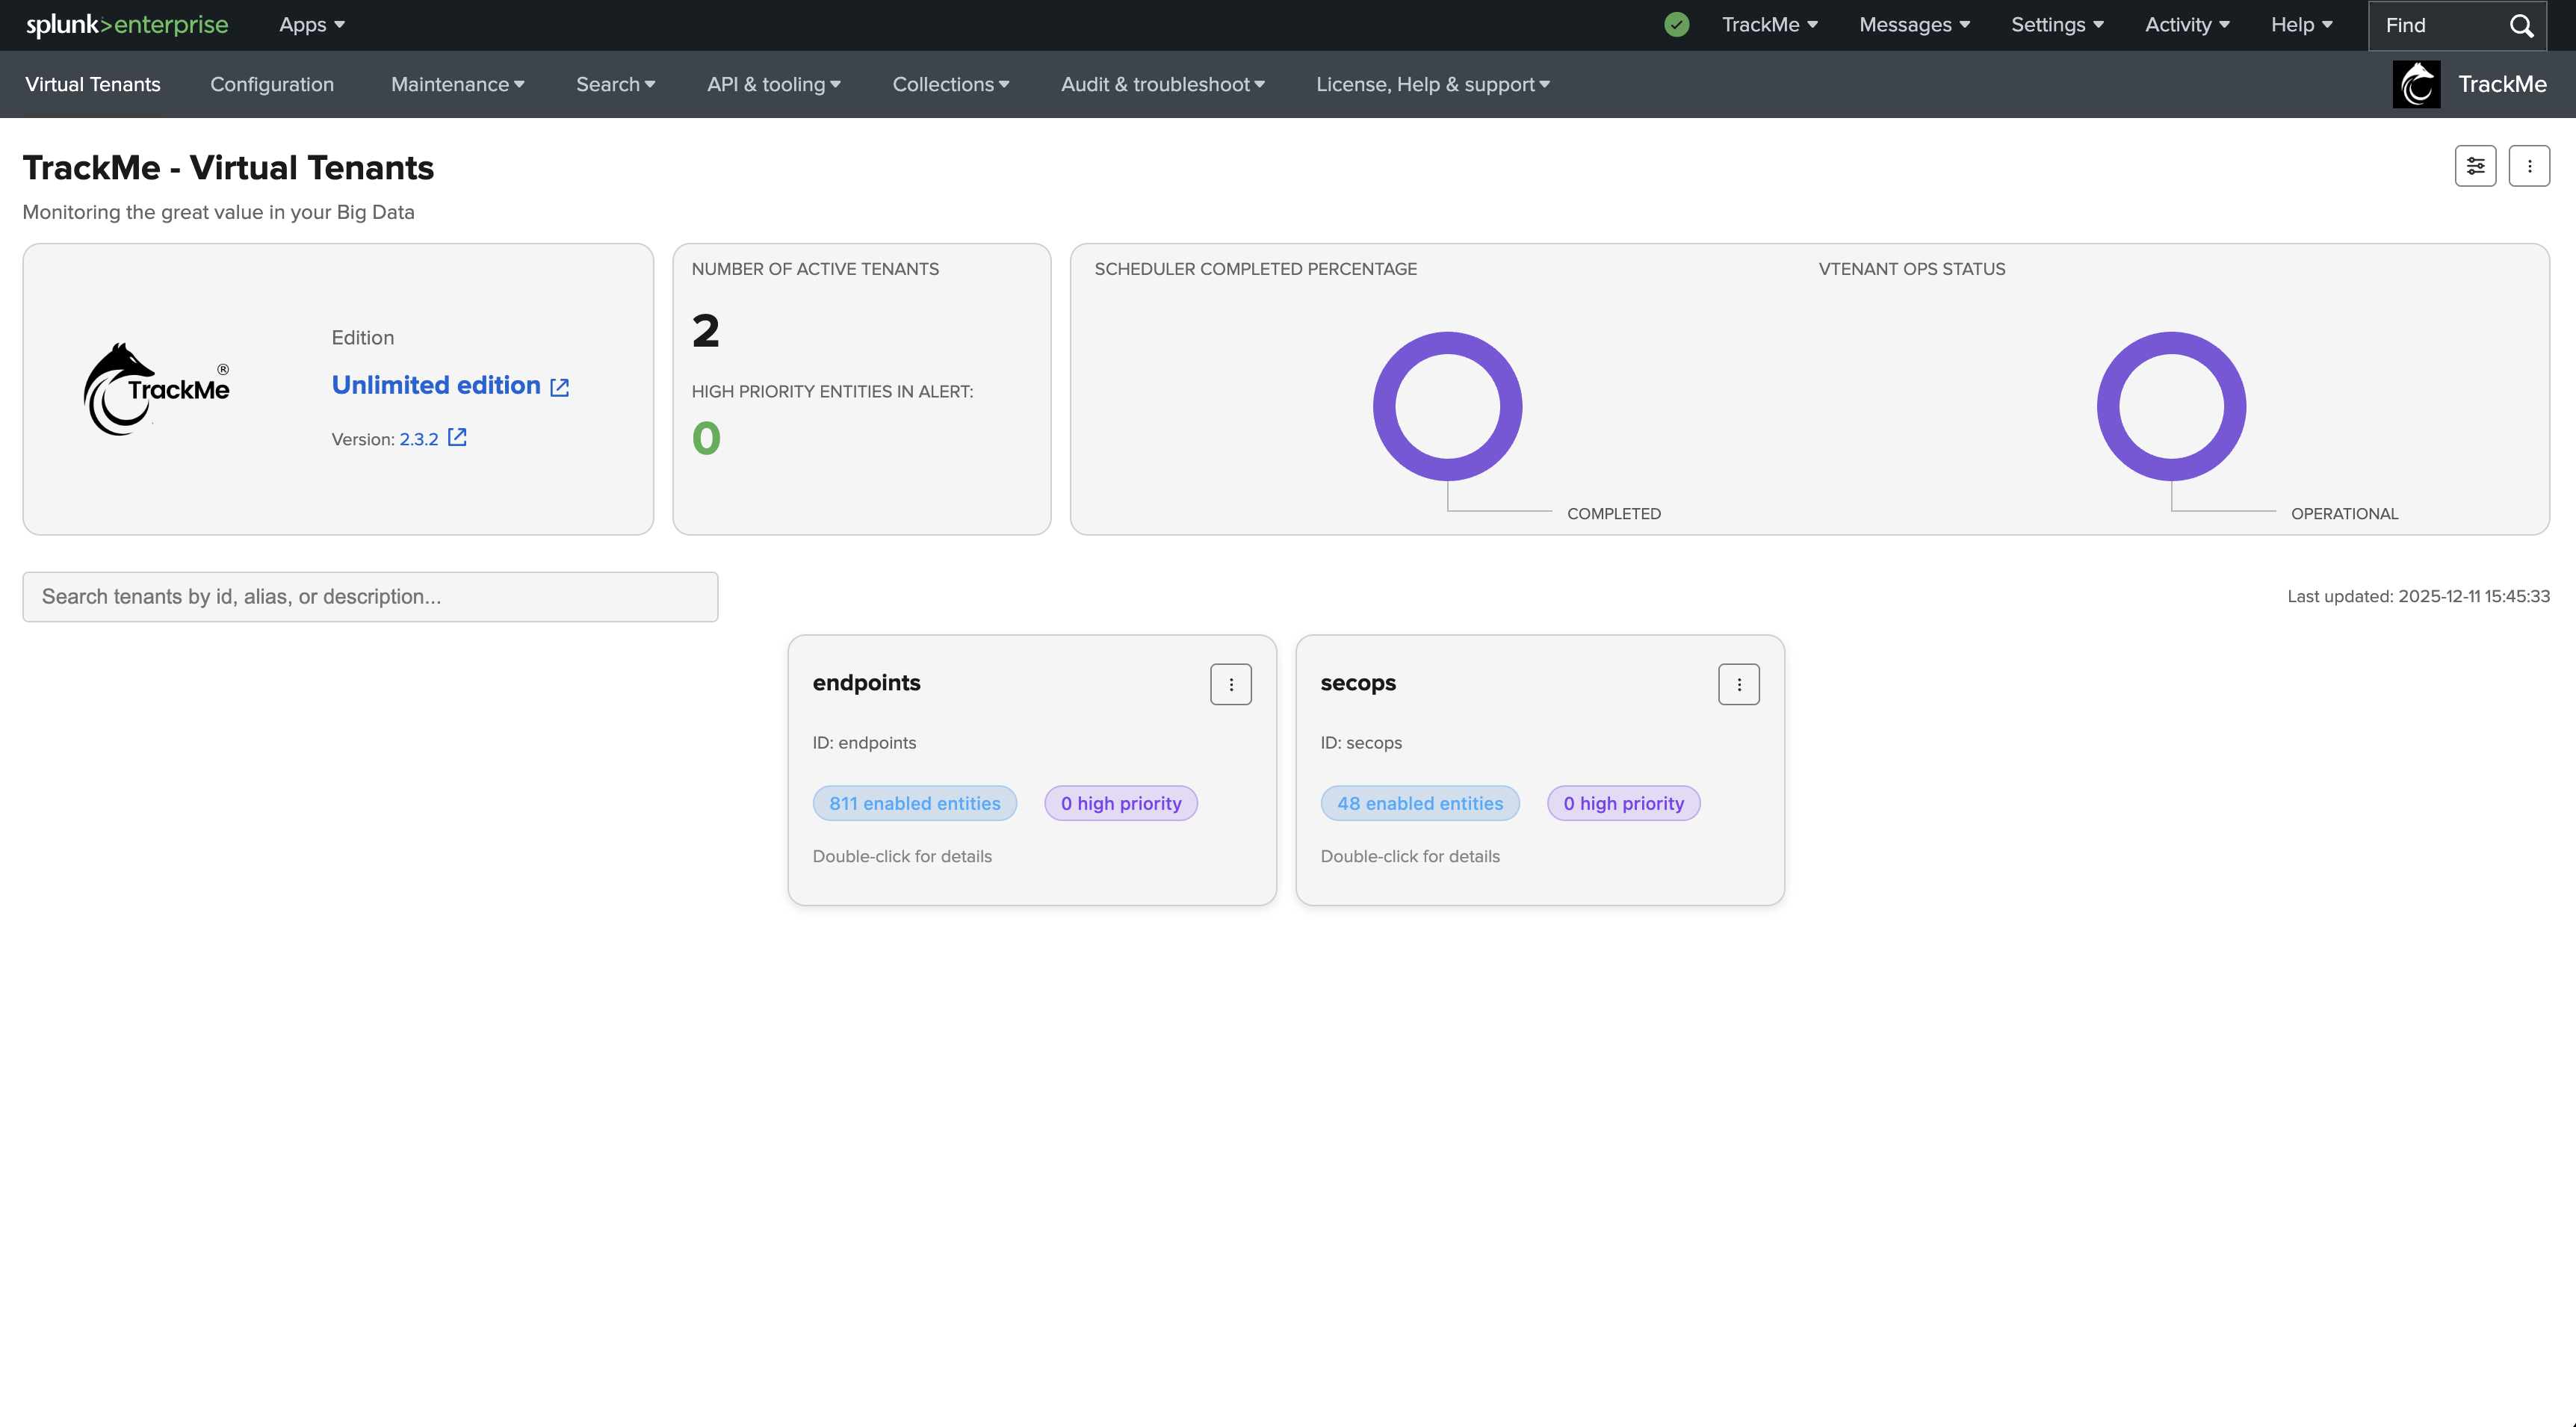
Accessing Virtual Tenants
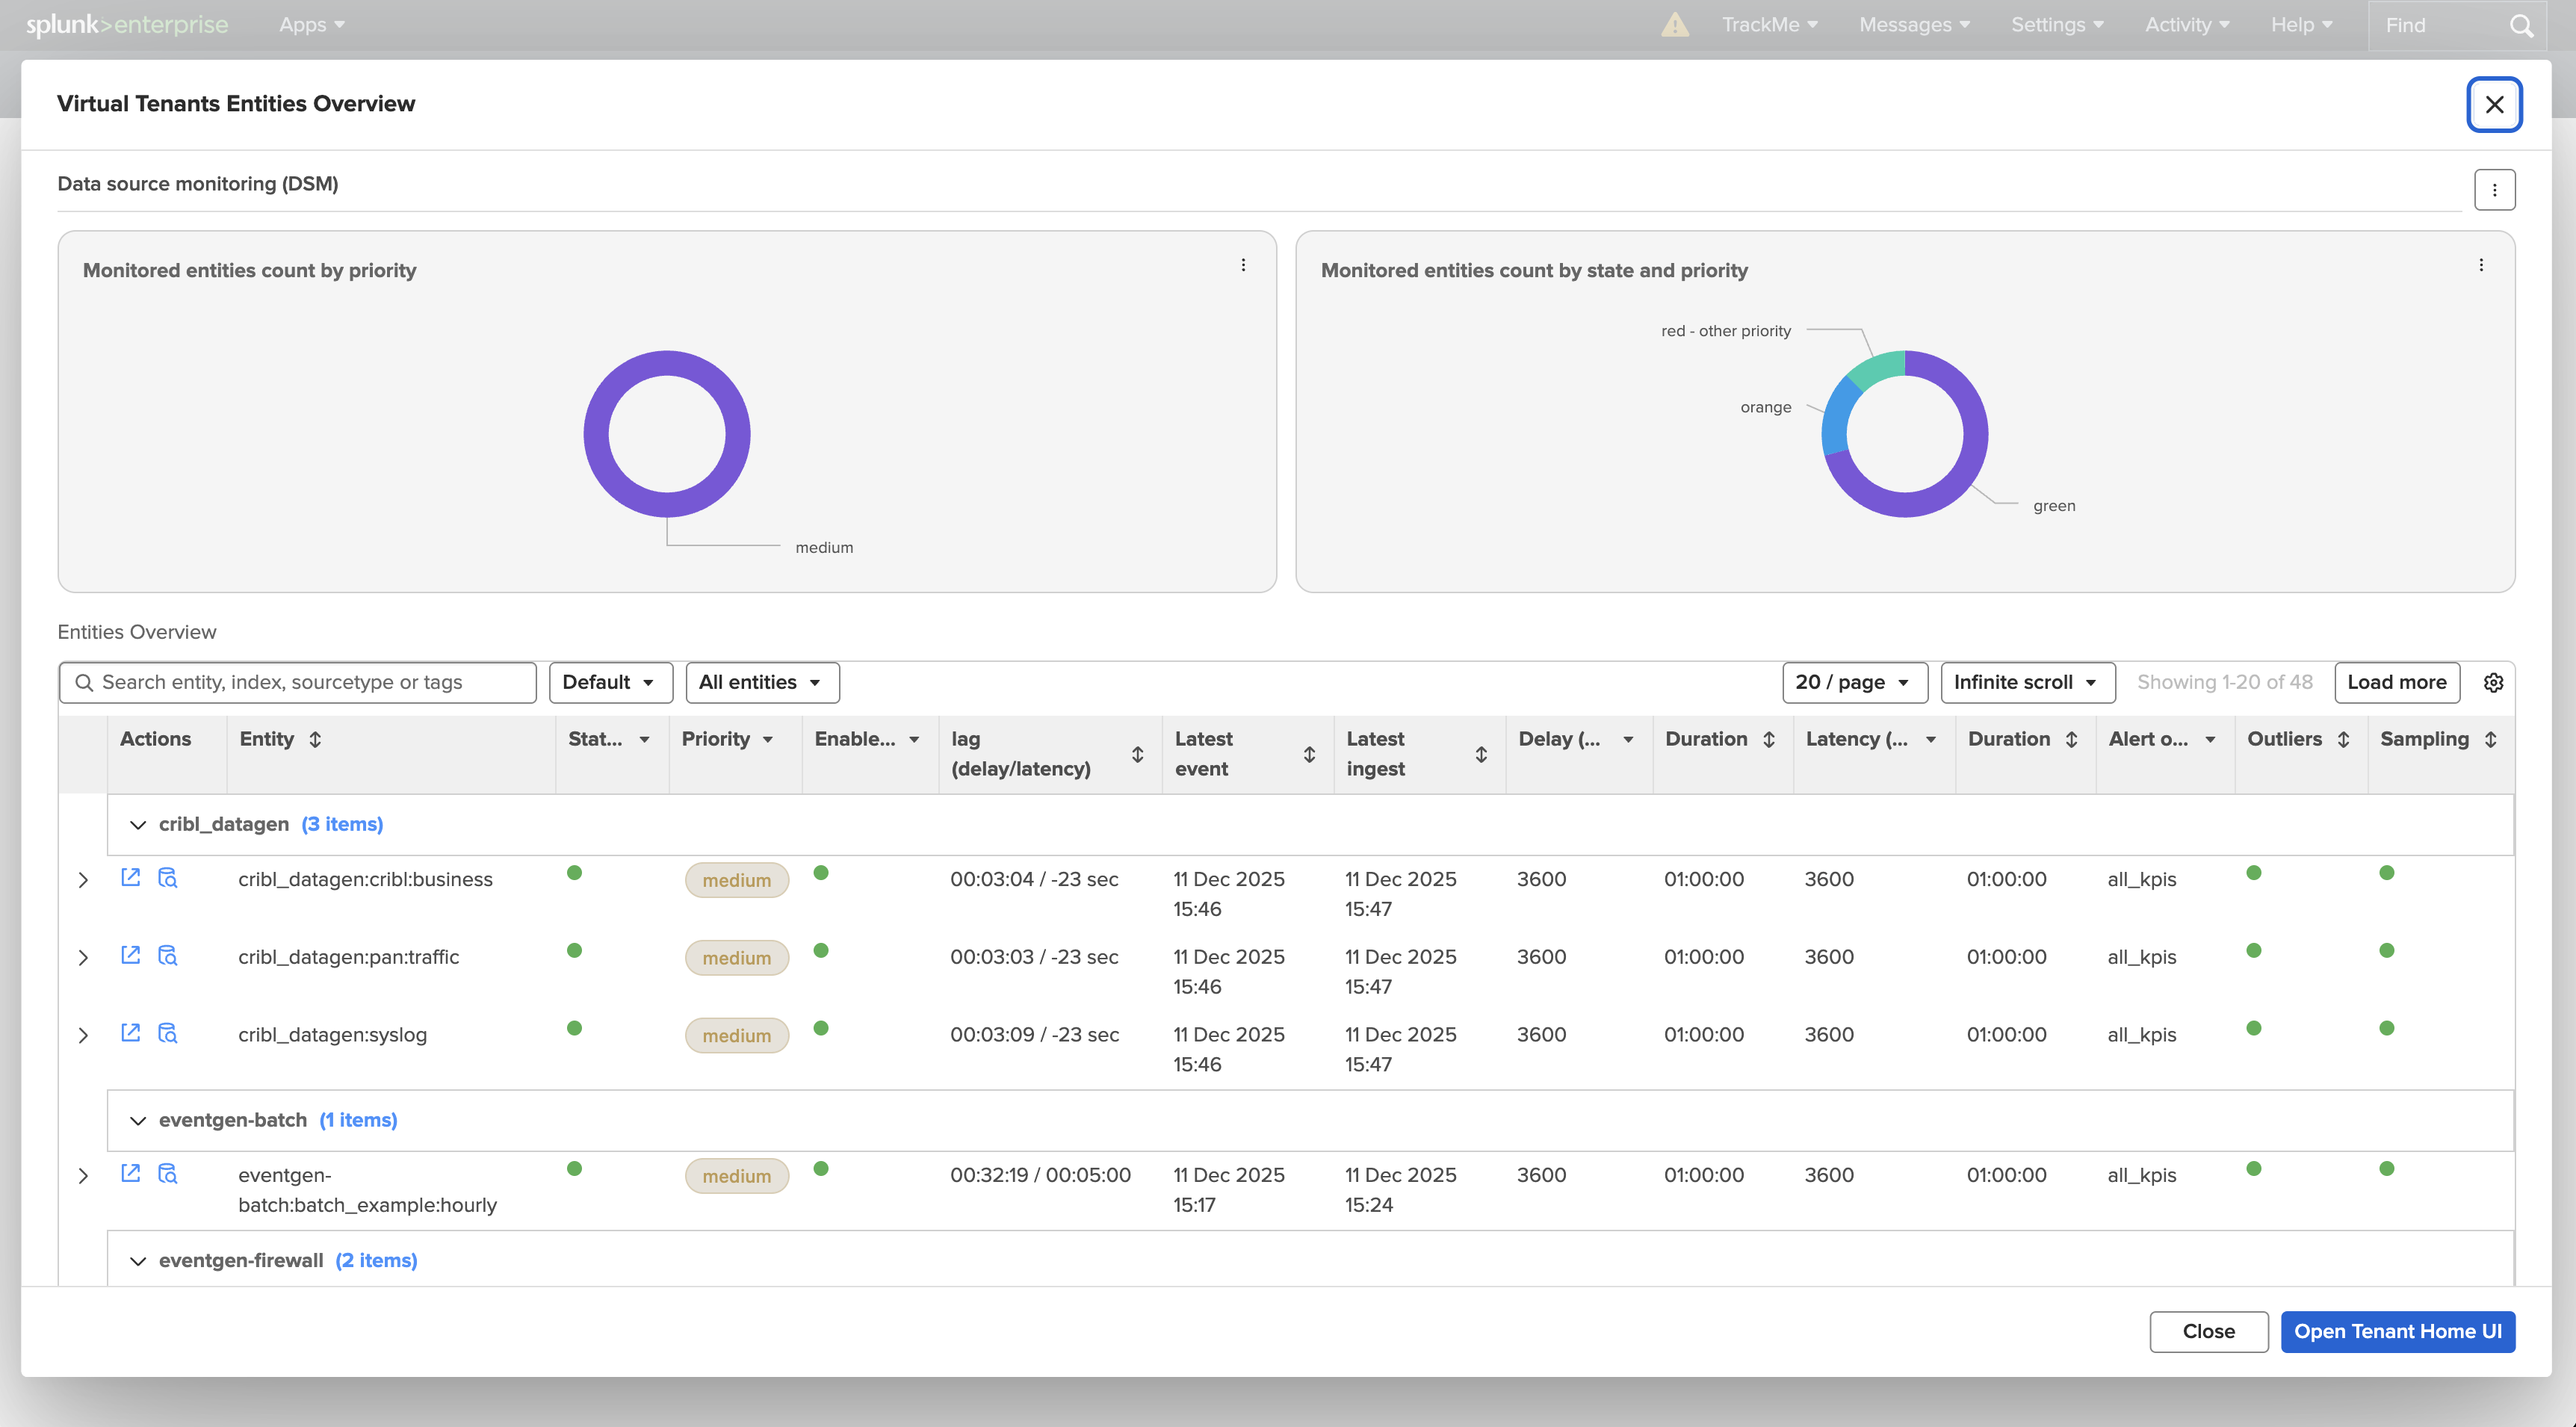
Virtual Tenant overview
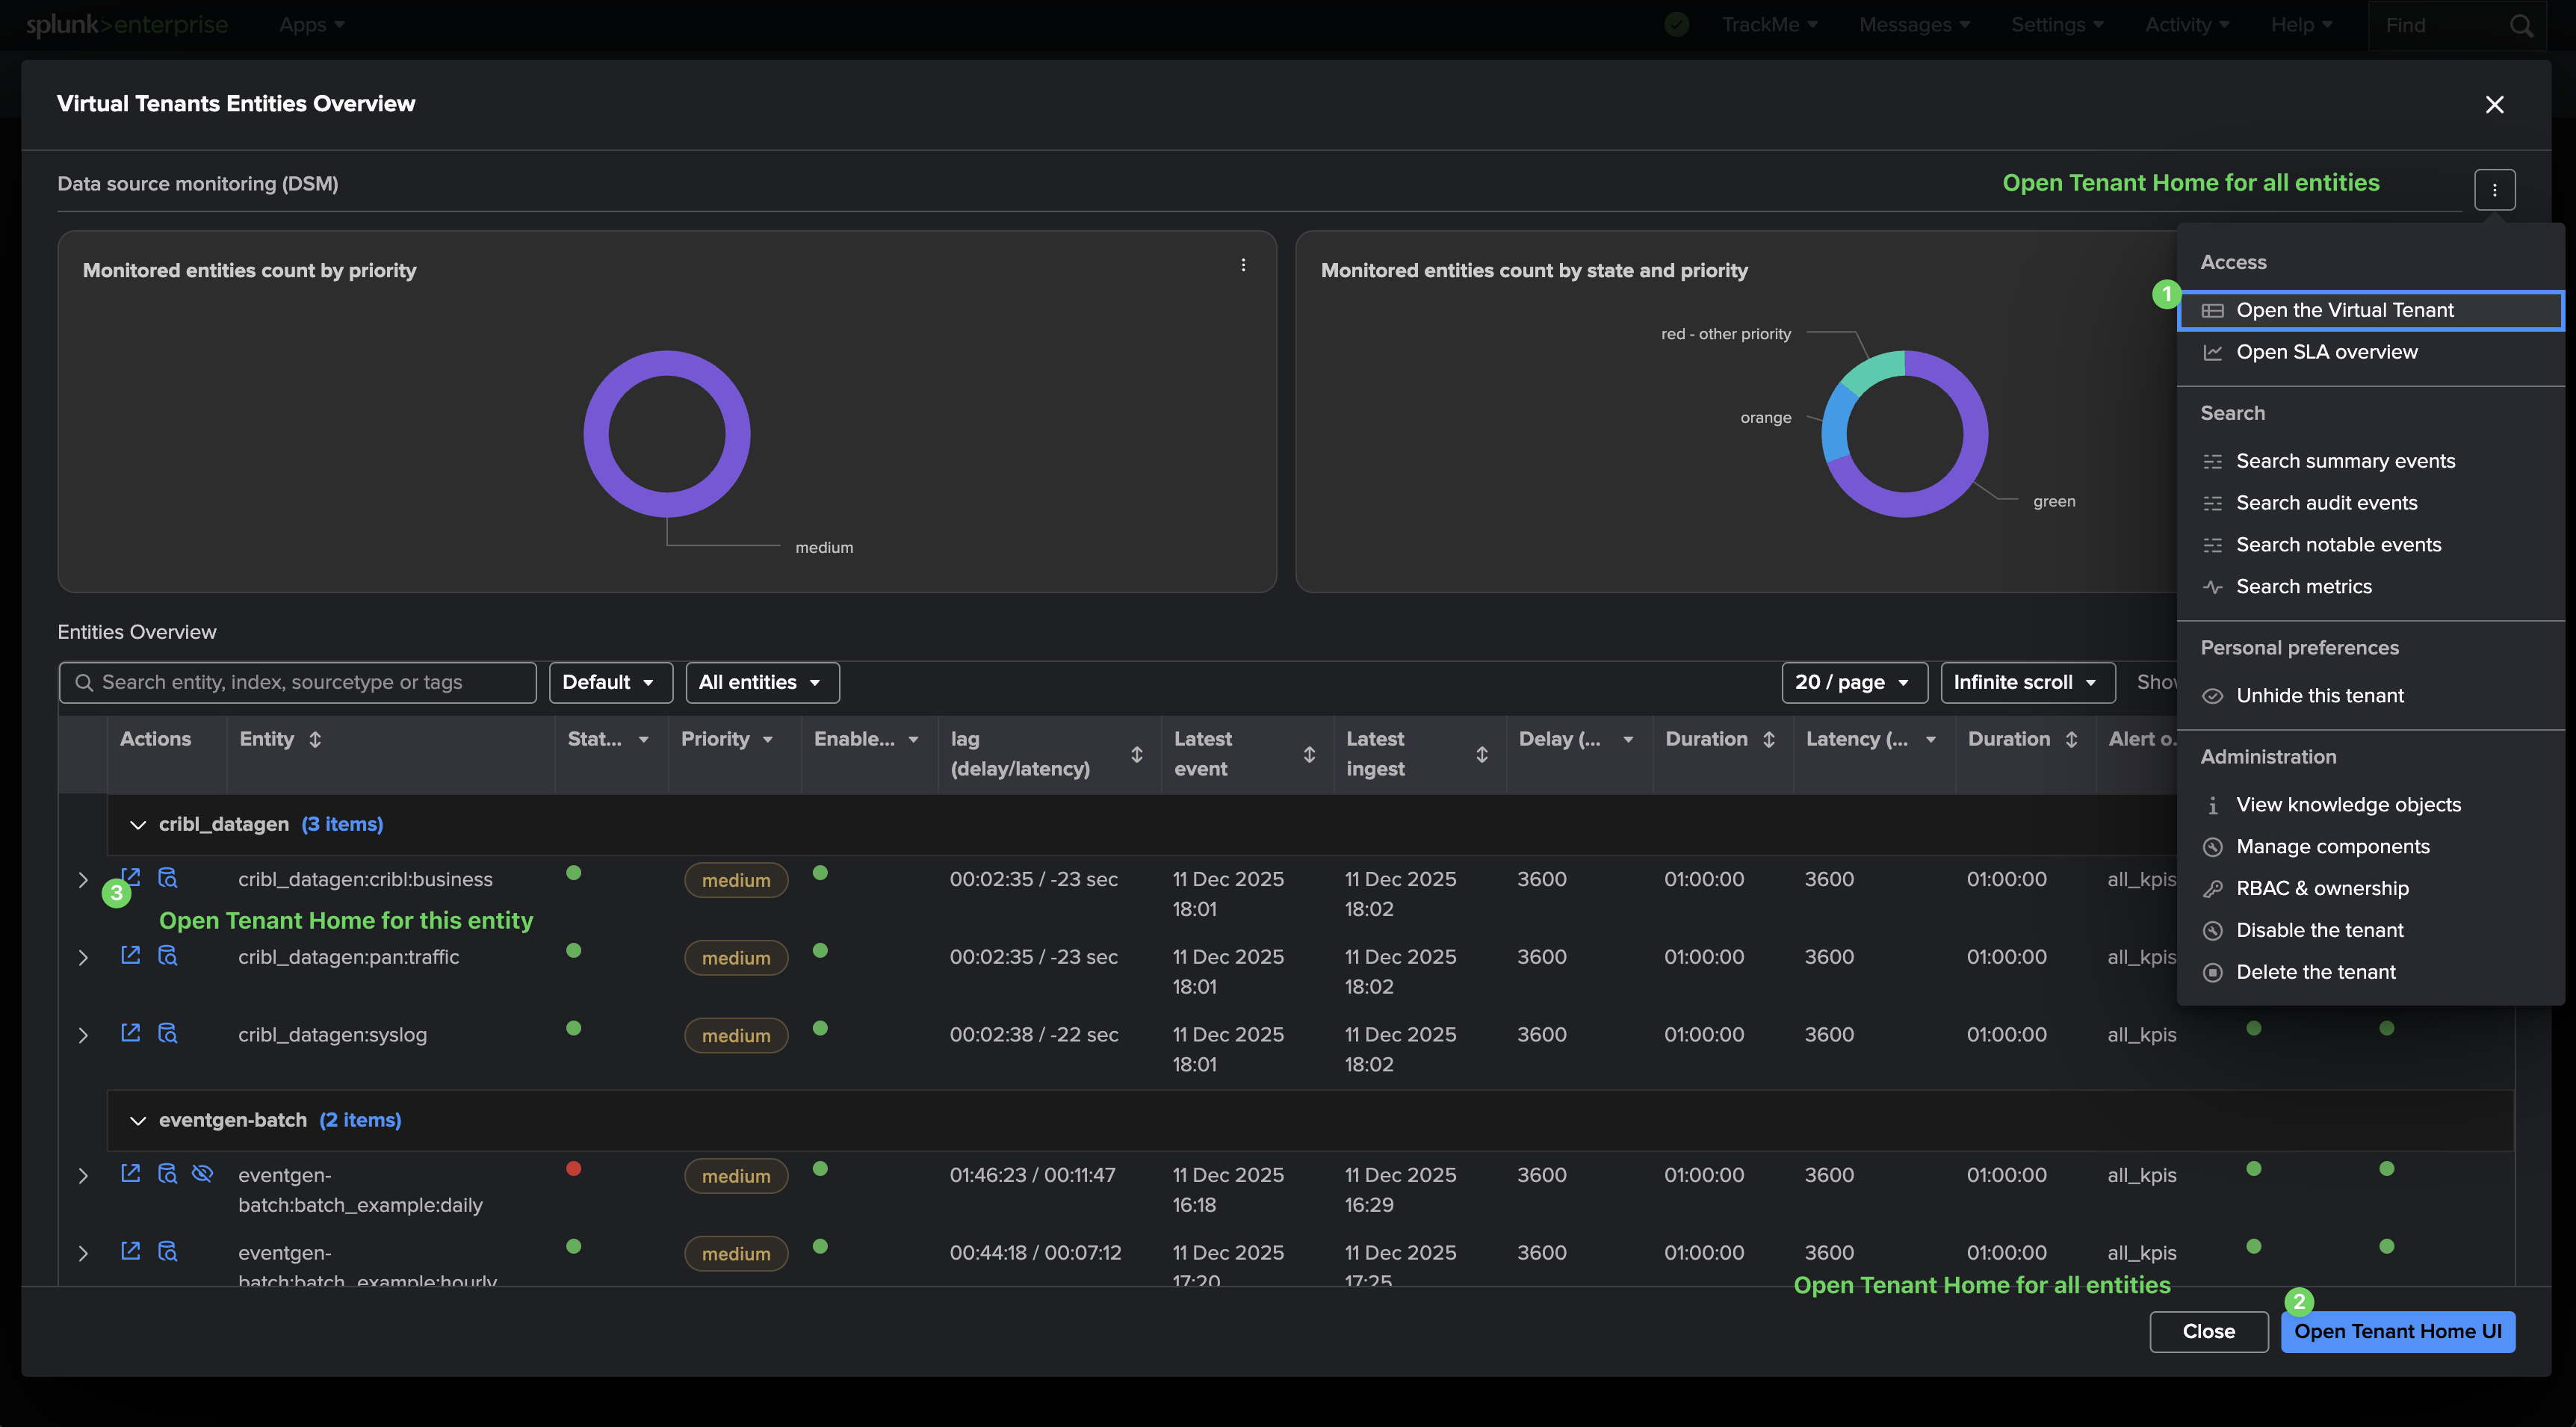
From the Virtual Tenant interface, you can access to the Virtual Tenant overview by double clicking on the Virtual Tenant card.
This opens a modal screen providing the overview of the Virtual Tenant, as well as various actions that can be performed, such as creating, managing or entering a specific Virtual Tenant.

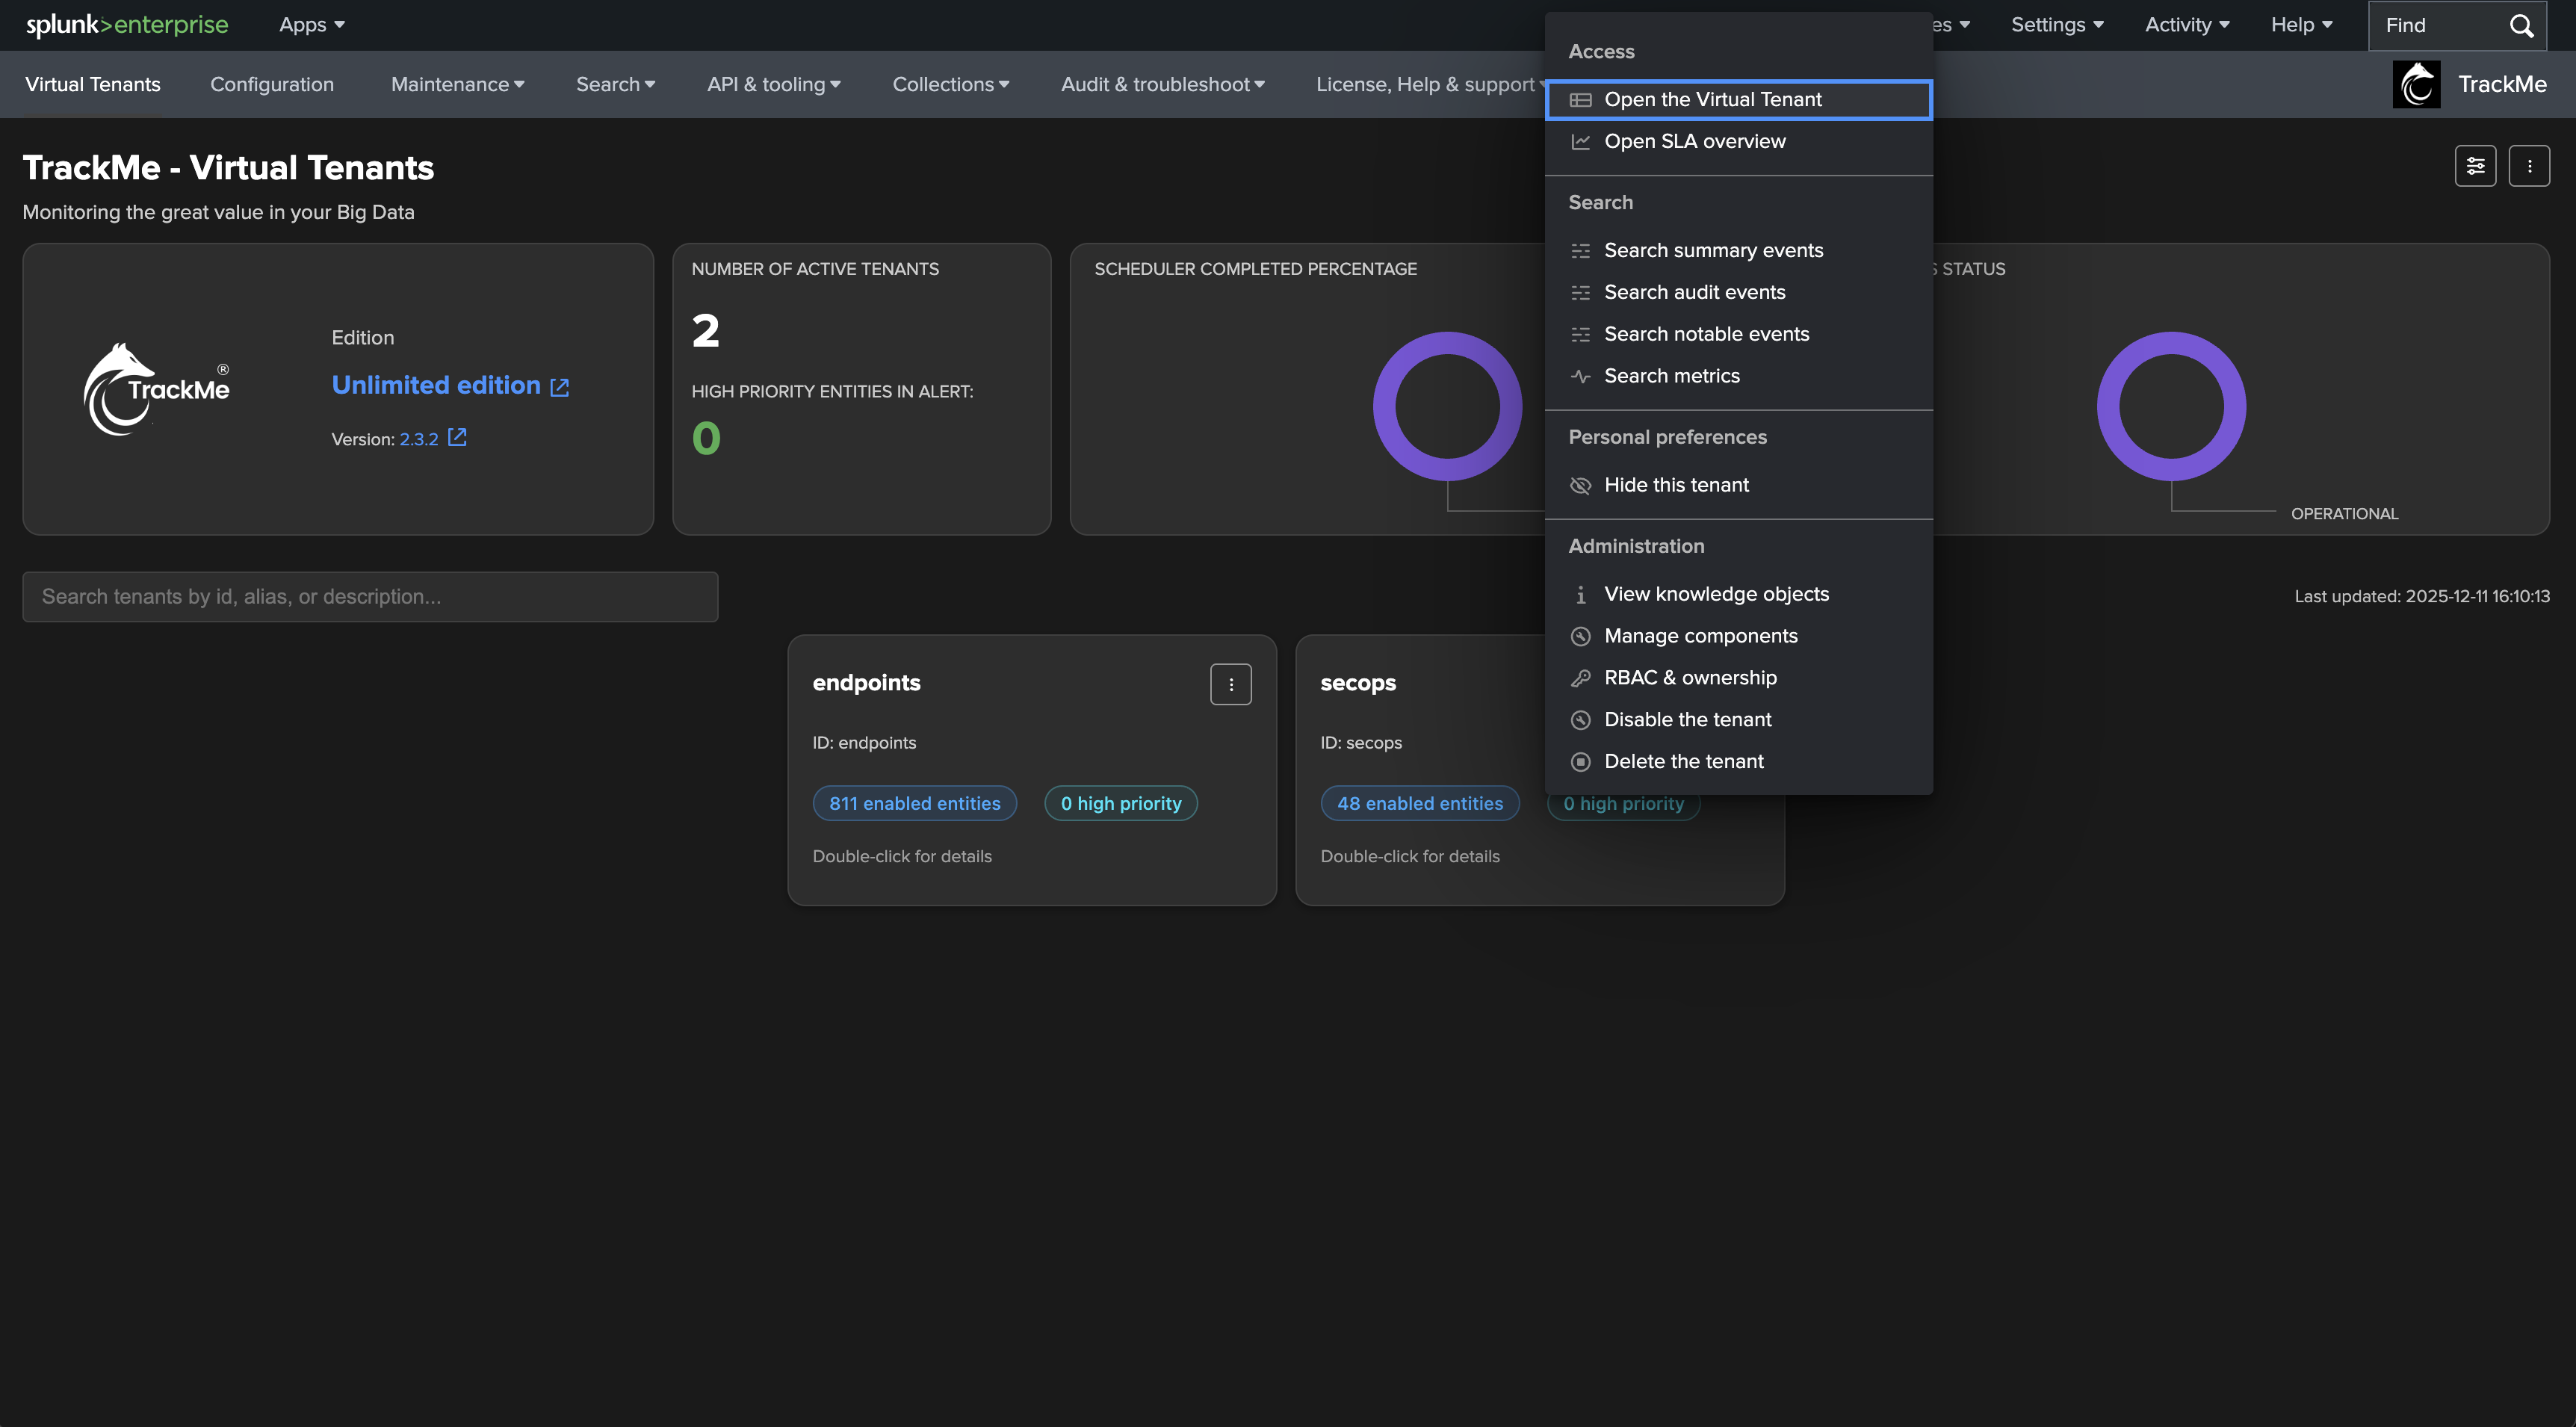
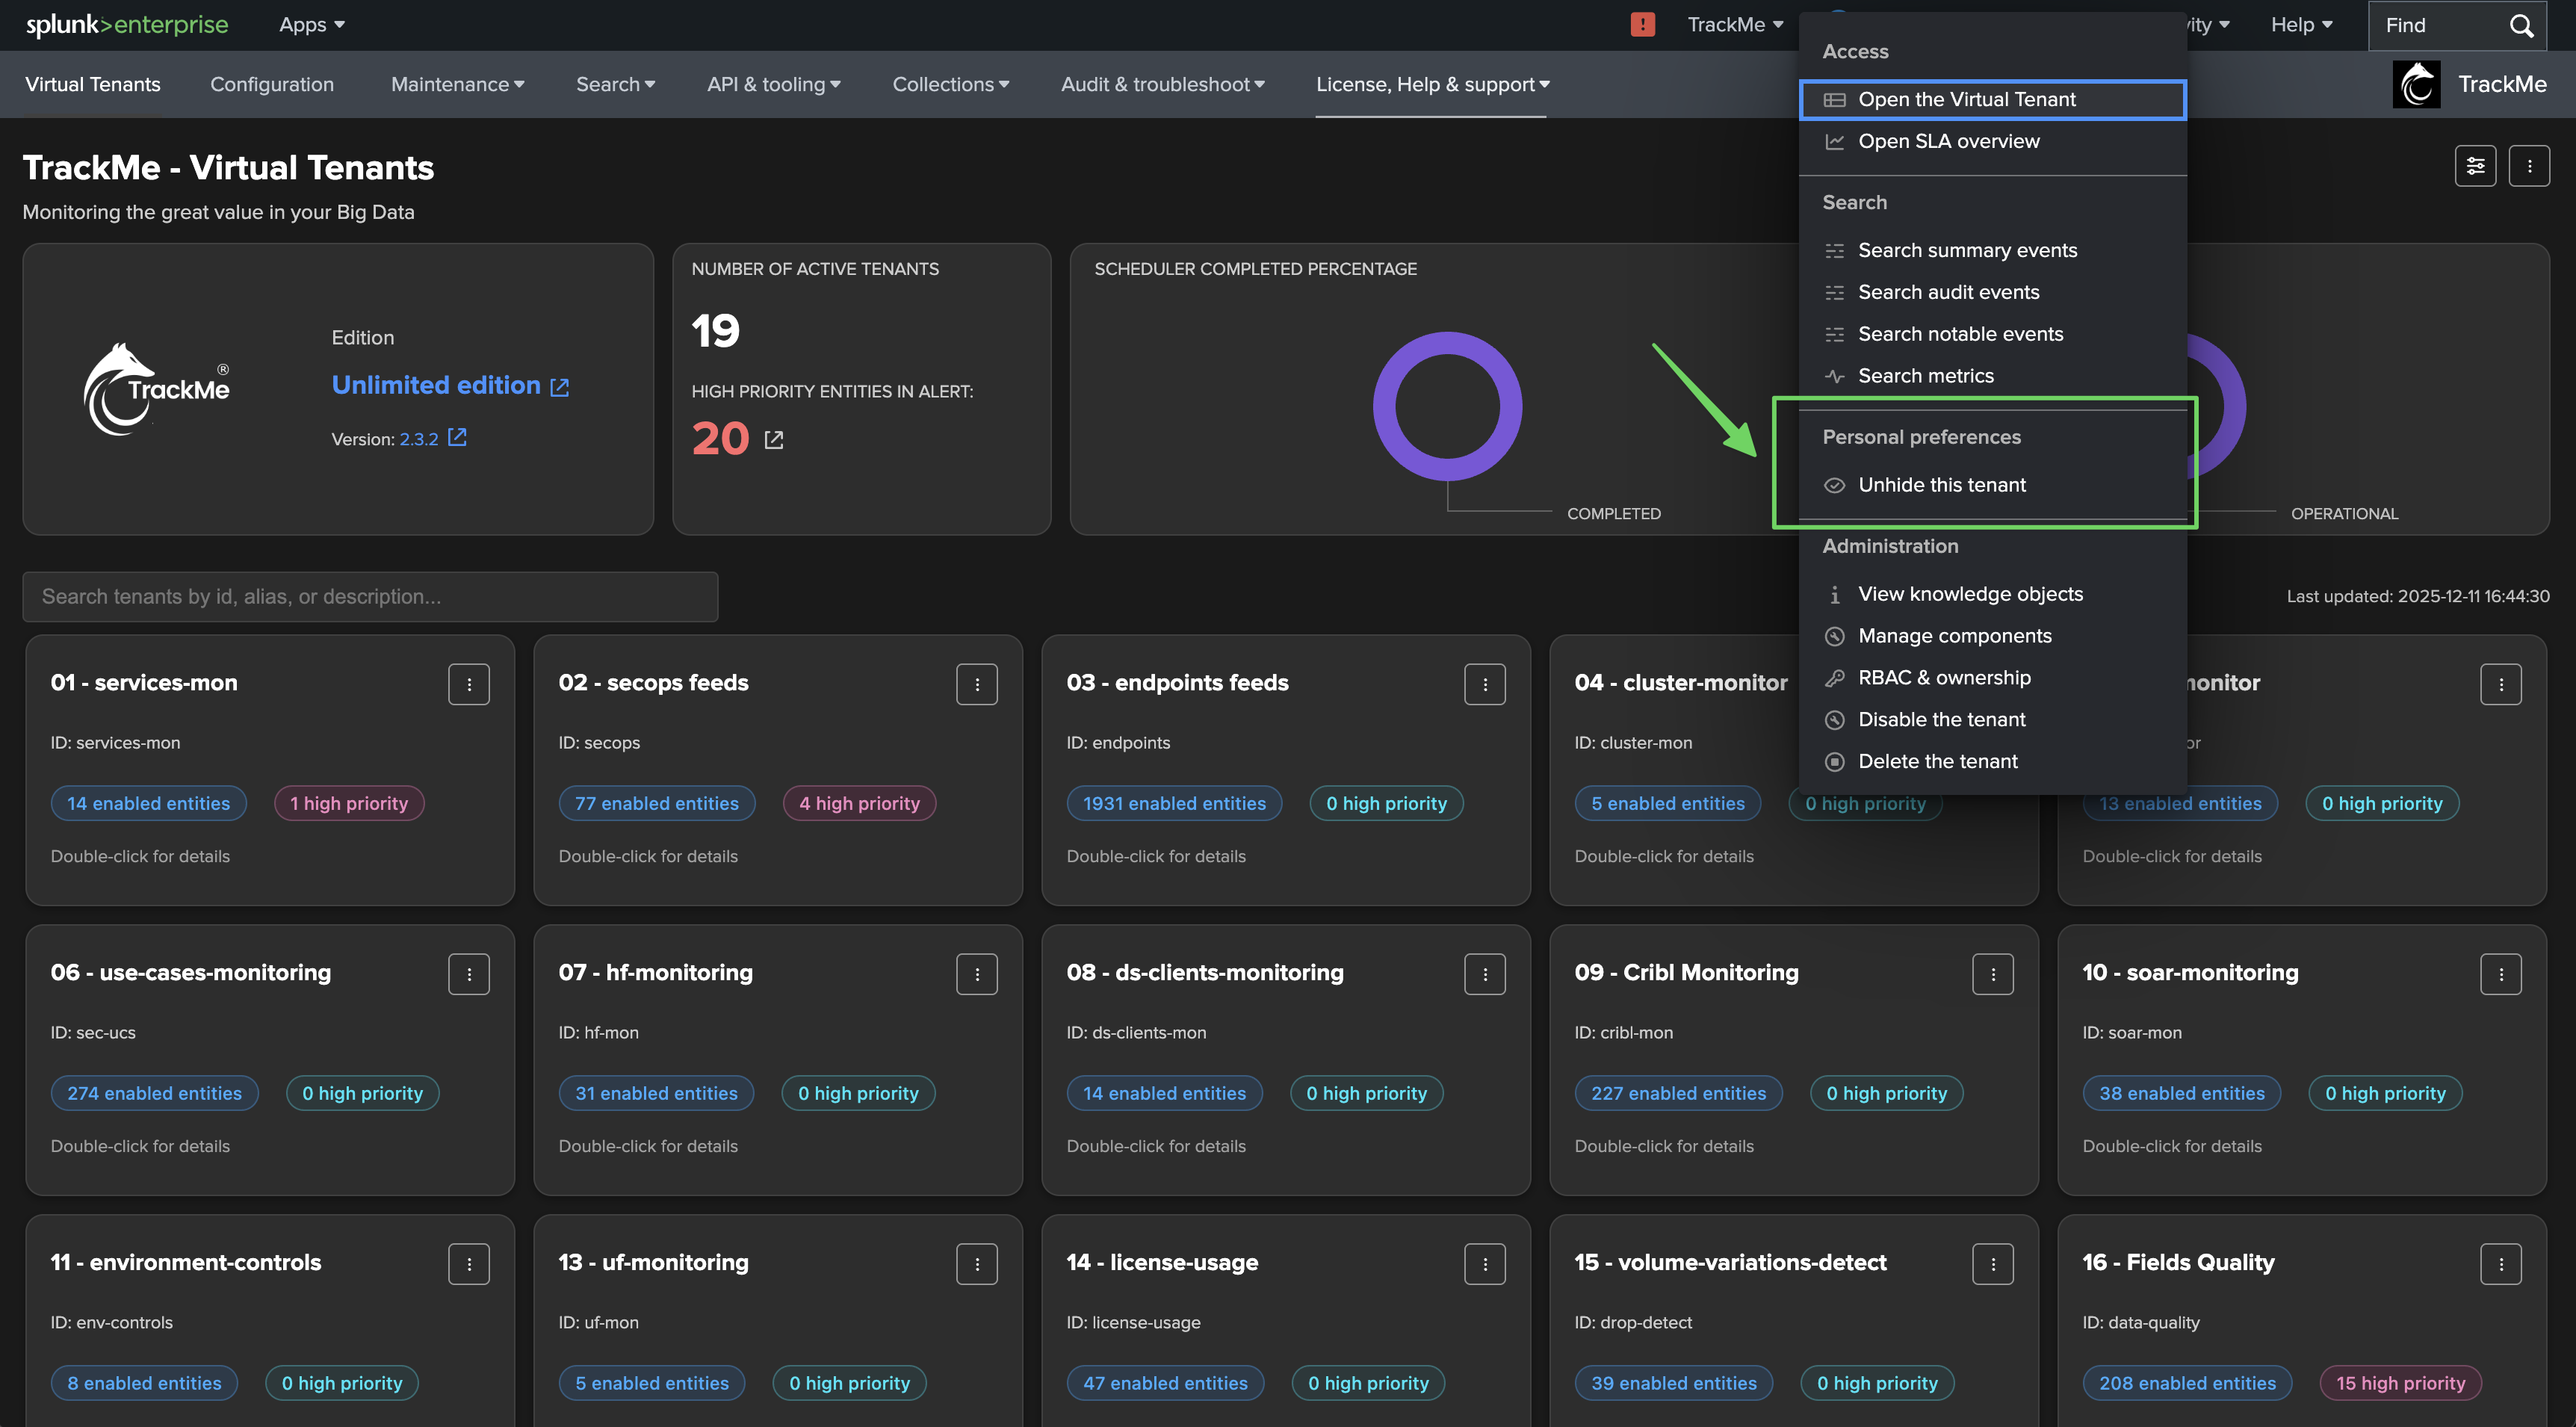
Virtual Tenant actions menu
To access the tenant menu, simply click on the tenant three dot vertical icon, which opens the menu specific to the tenant.
Various actions are available, depending the user privileges and the tenant status.
Hidding a Virtual Tenant (stored in user preferences)
You can choose to hide a specific Virtual Tenant from the Virtual Tenant interface, this preference is stored in the user preferences and is persistent.
In a large environment, this can be useful if the user does not need to view a specific tenant appearing in the user interface while in the same time having access to it. (Roles Based Access Control)
When the user has hidden one or more Virtual Tenants, the user preferences will be updated accordingly to allow showing or hidding selected tenants, the three dot vertical menu will then adapt the show/hide action accordingly.
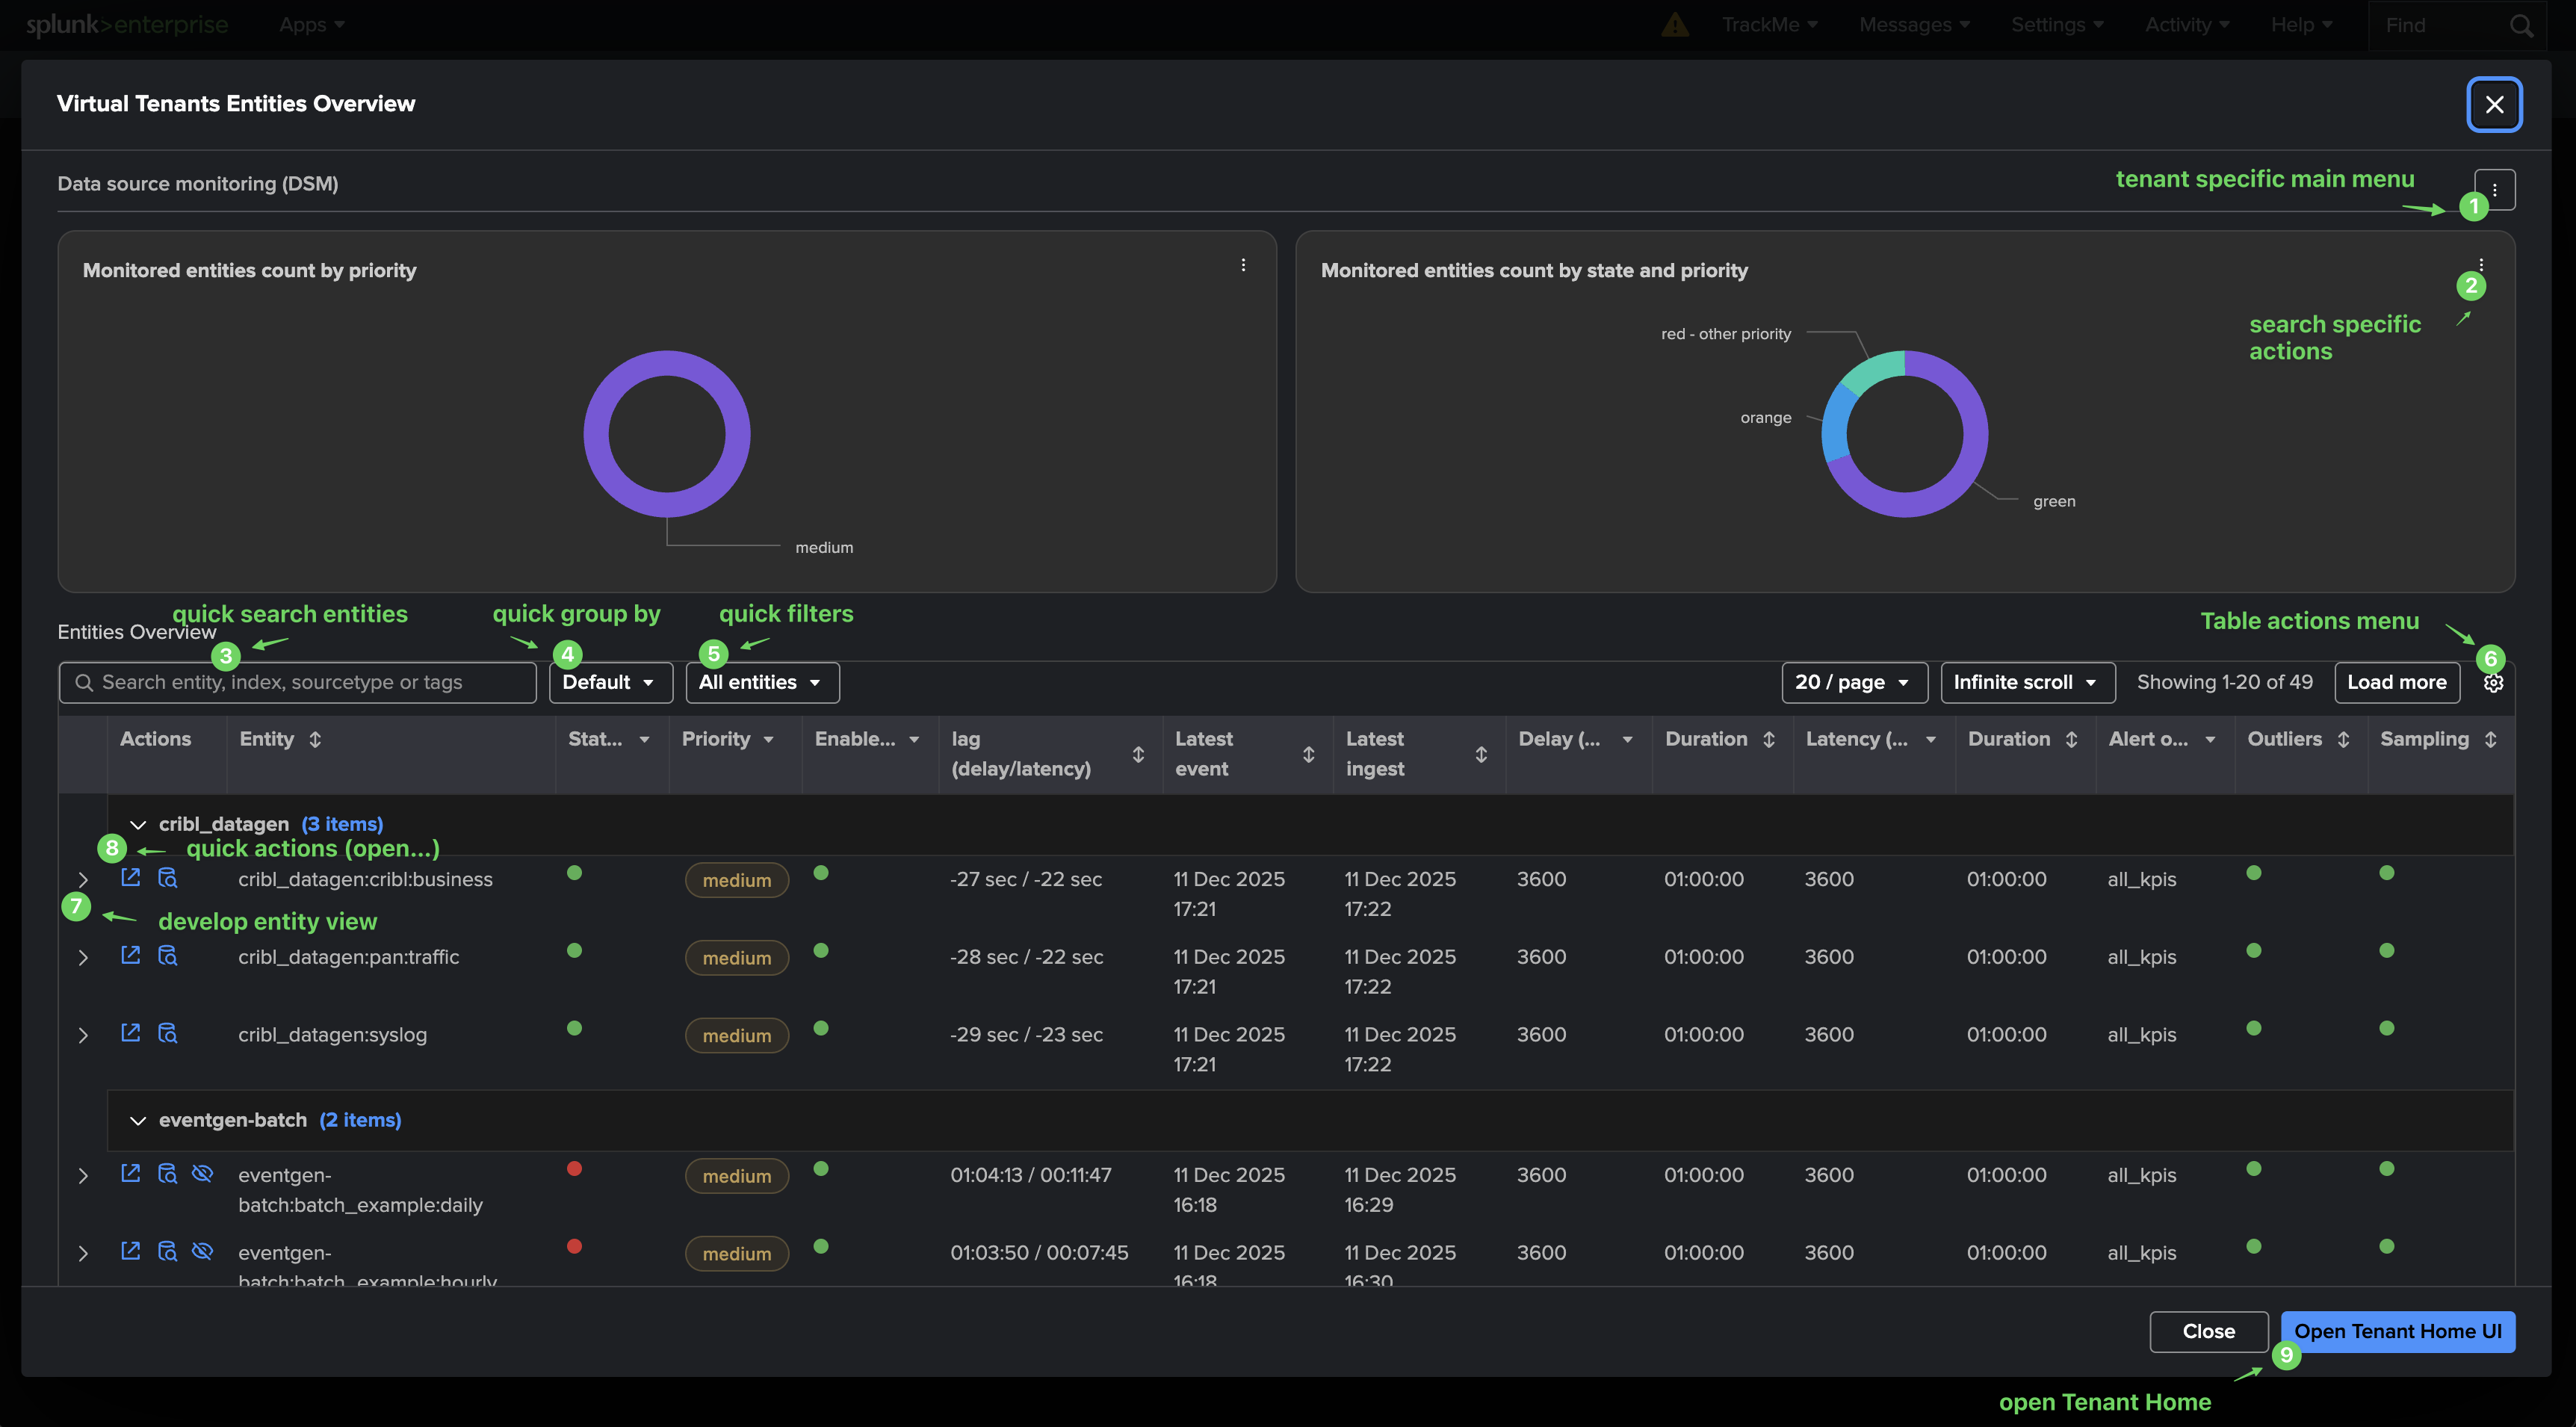
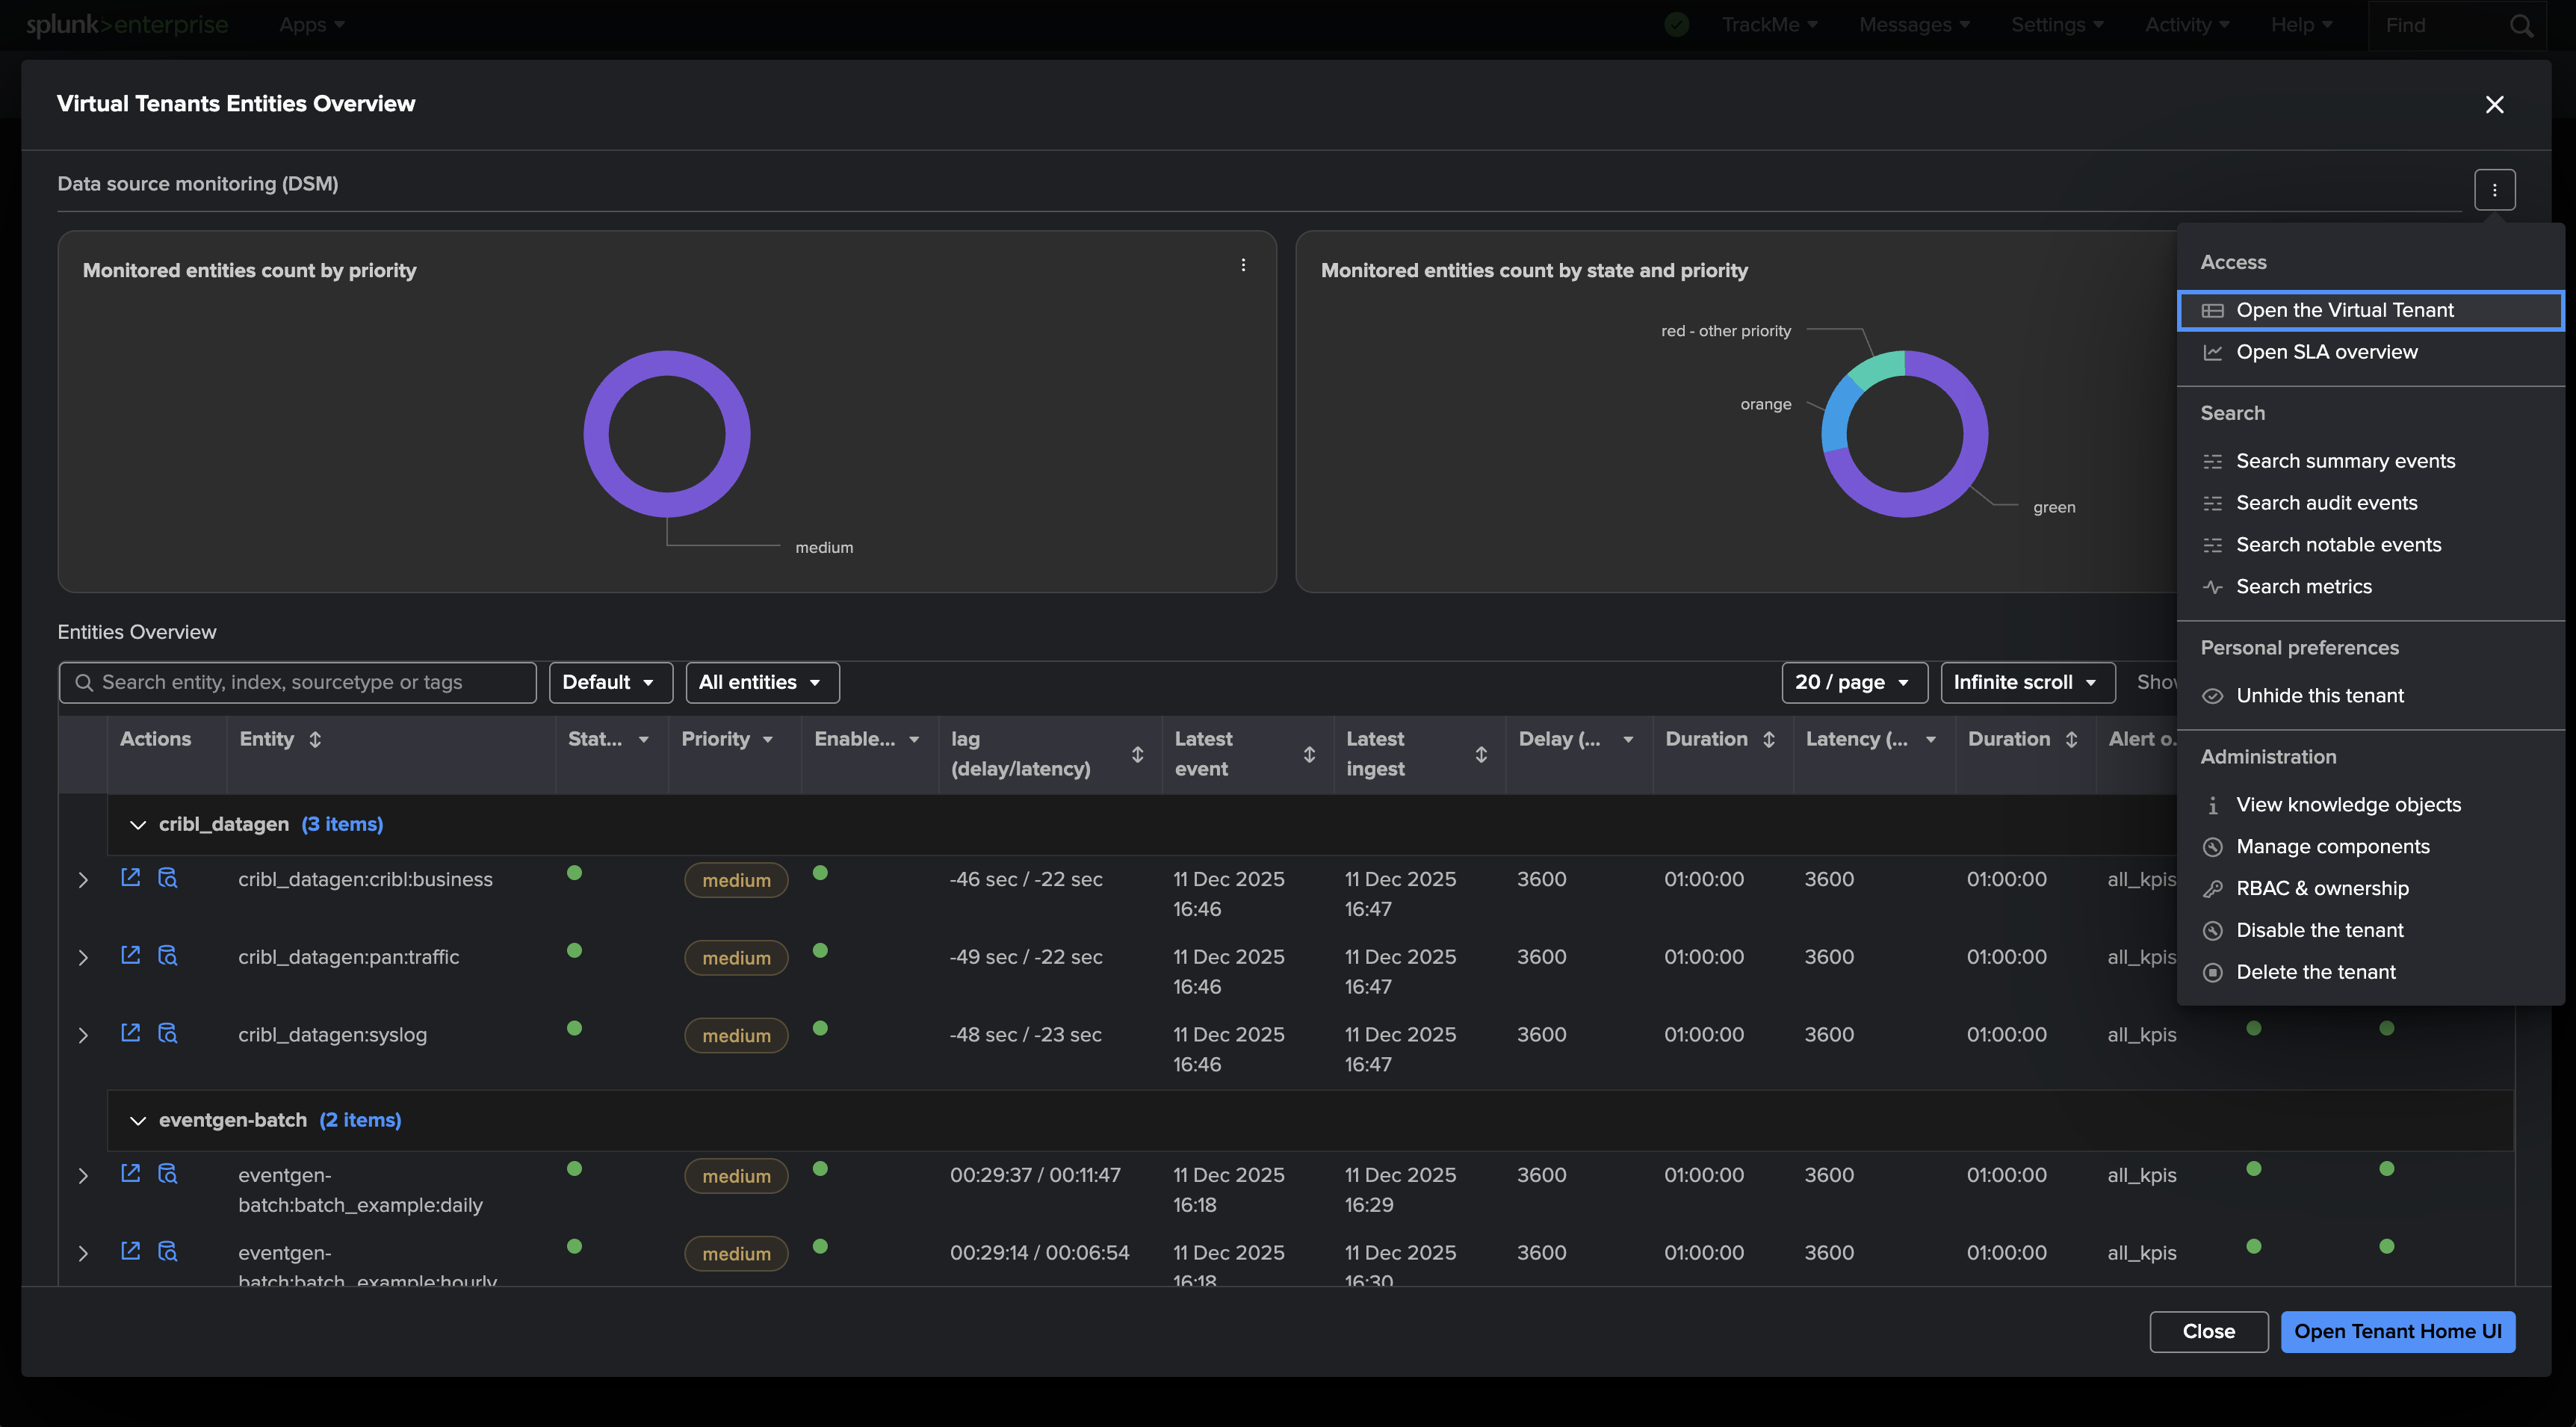
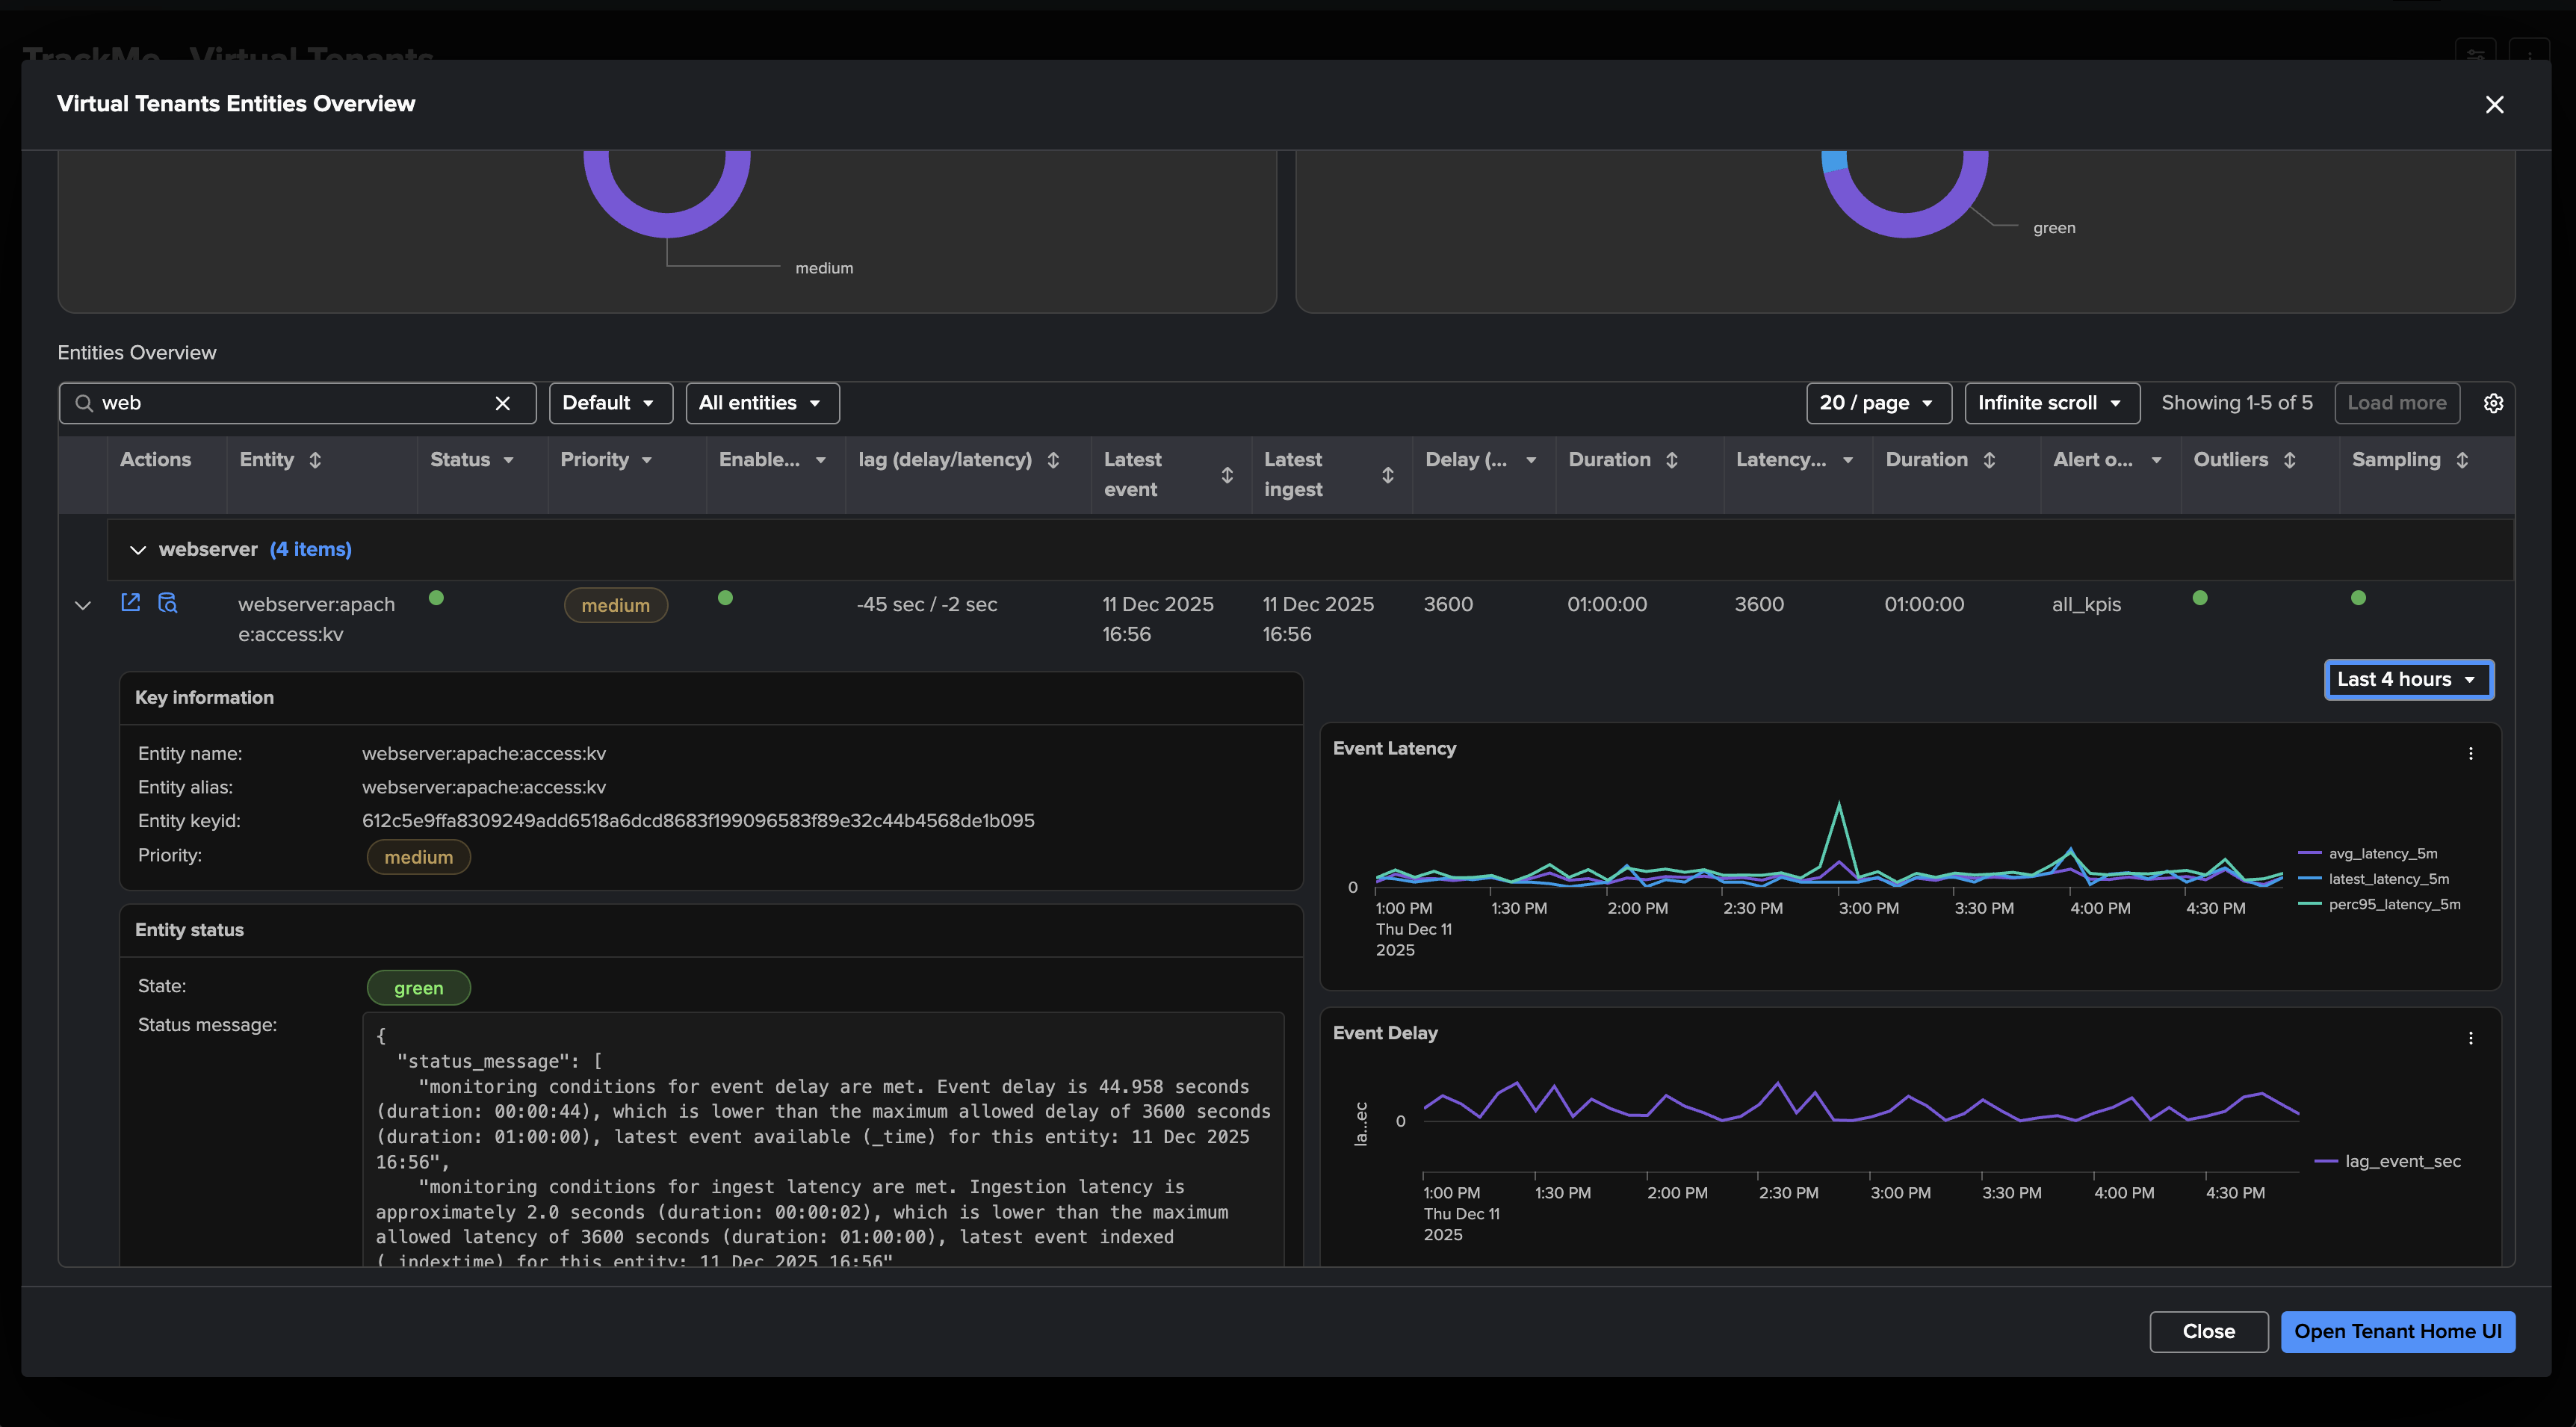
Entities overview
From the Virtual Tenant overview, you can access in a read only mode the entities parts of the Virtual Tenant.
Various many actions are available, you can for instance develop the entity and review detailed information and mini-charts.
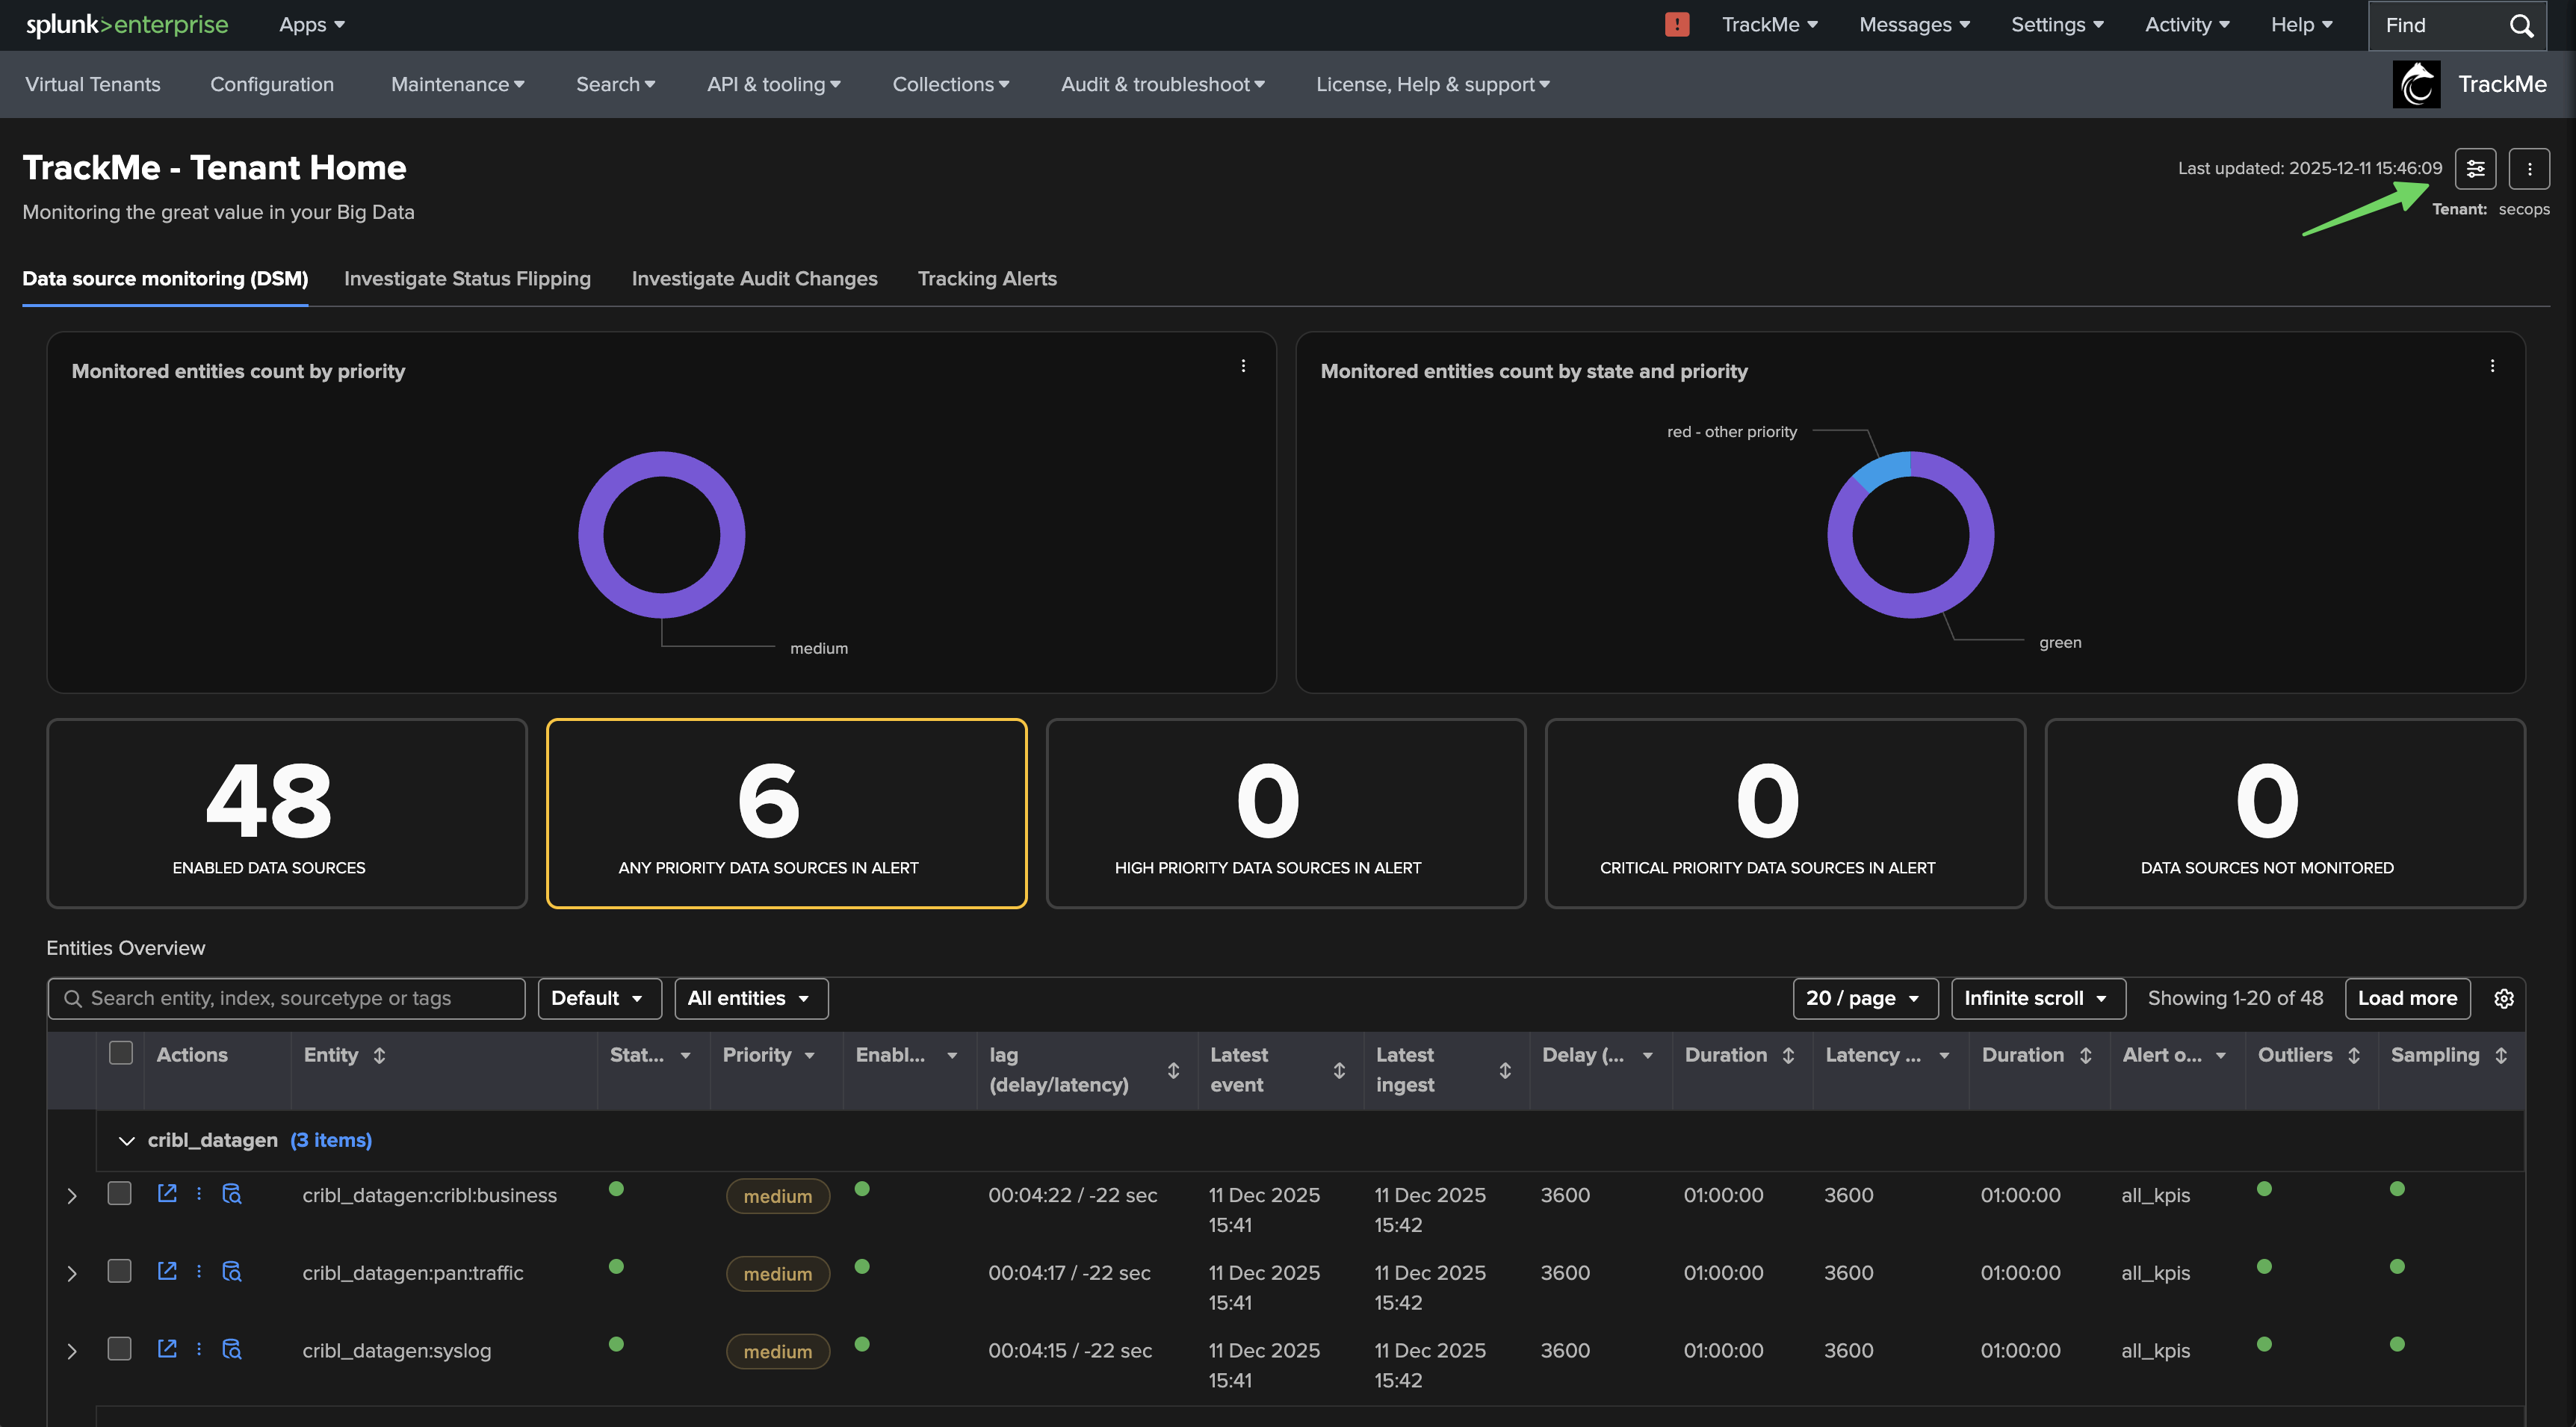
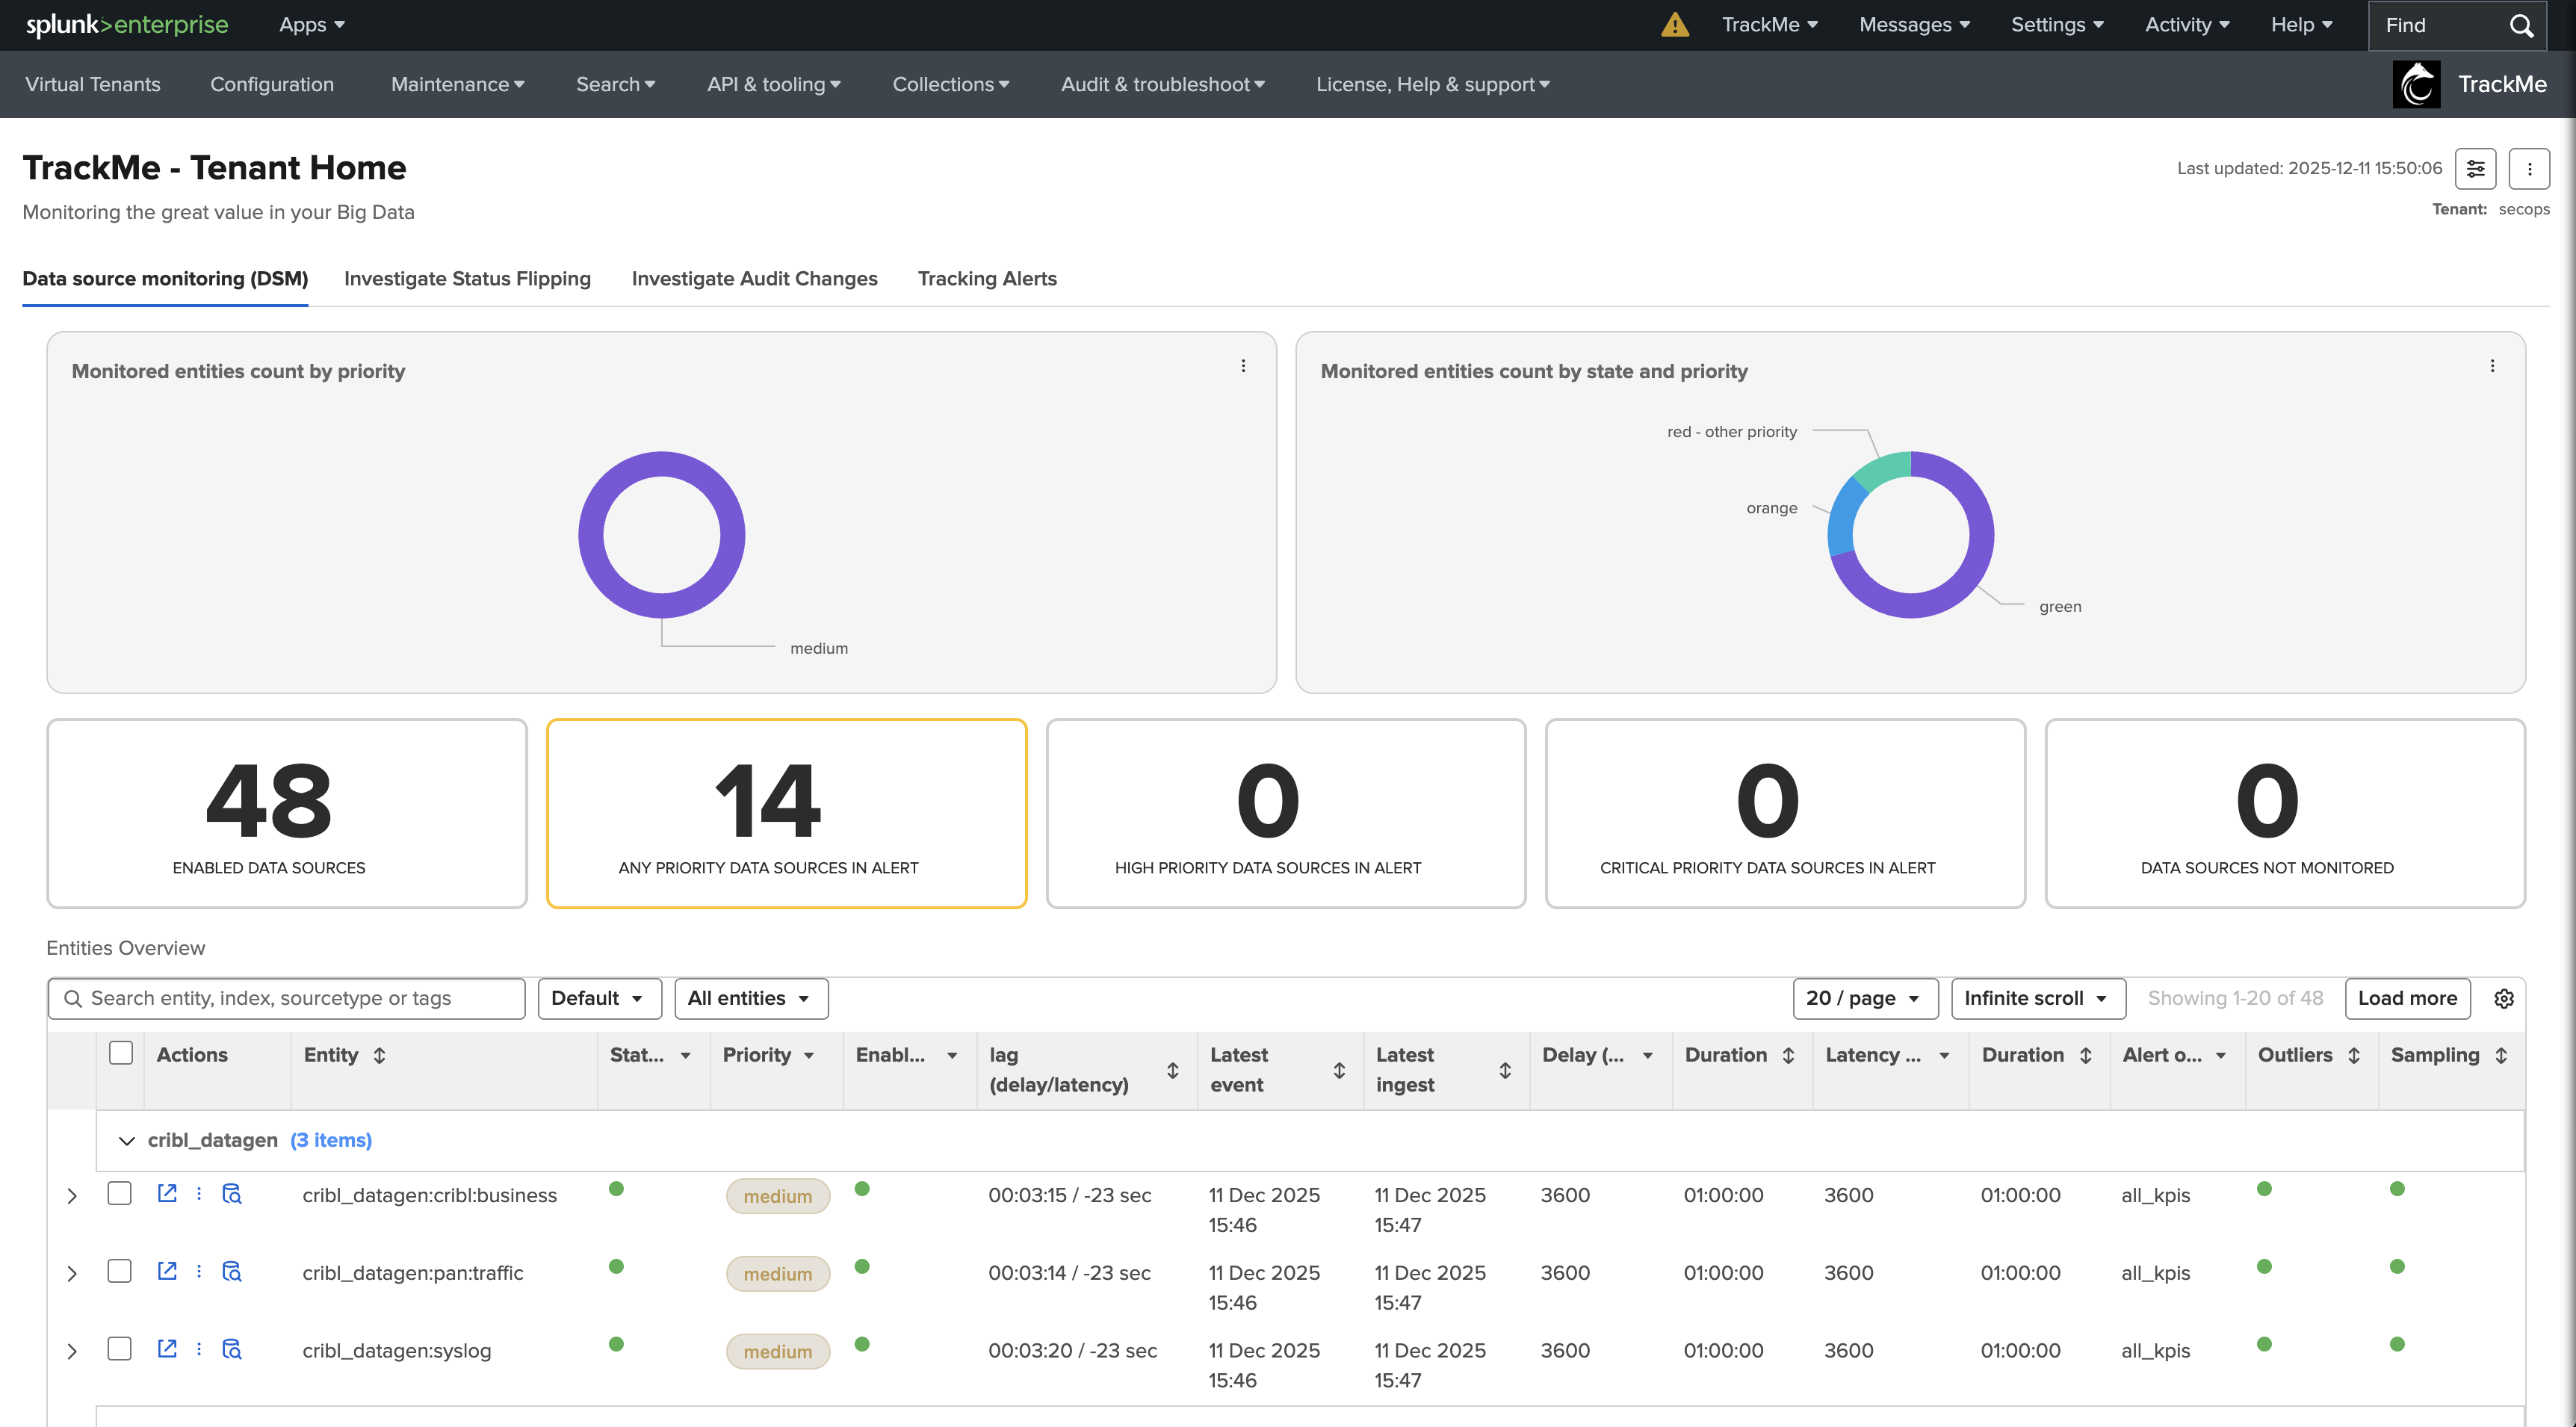
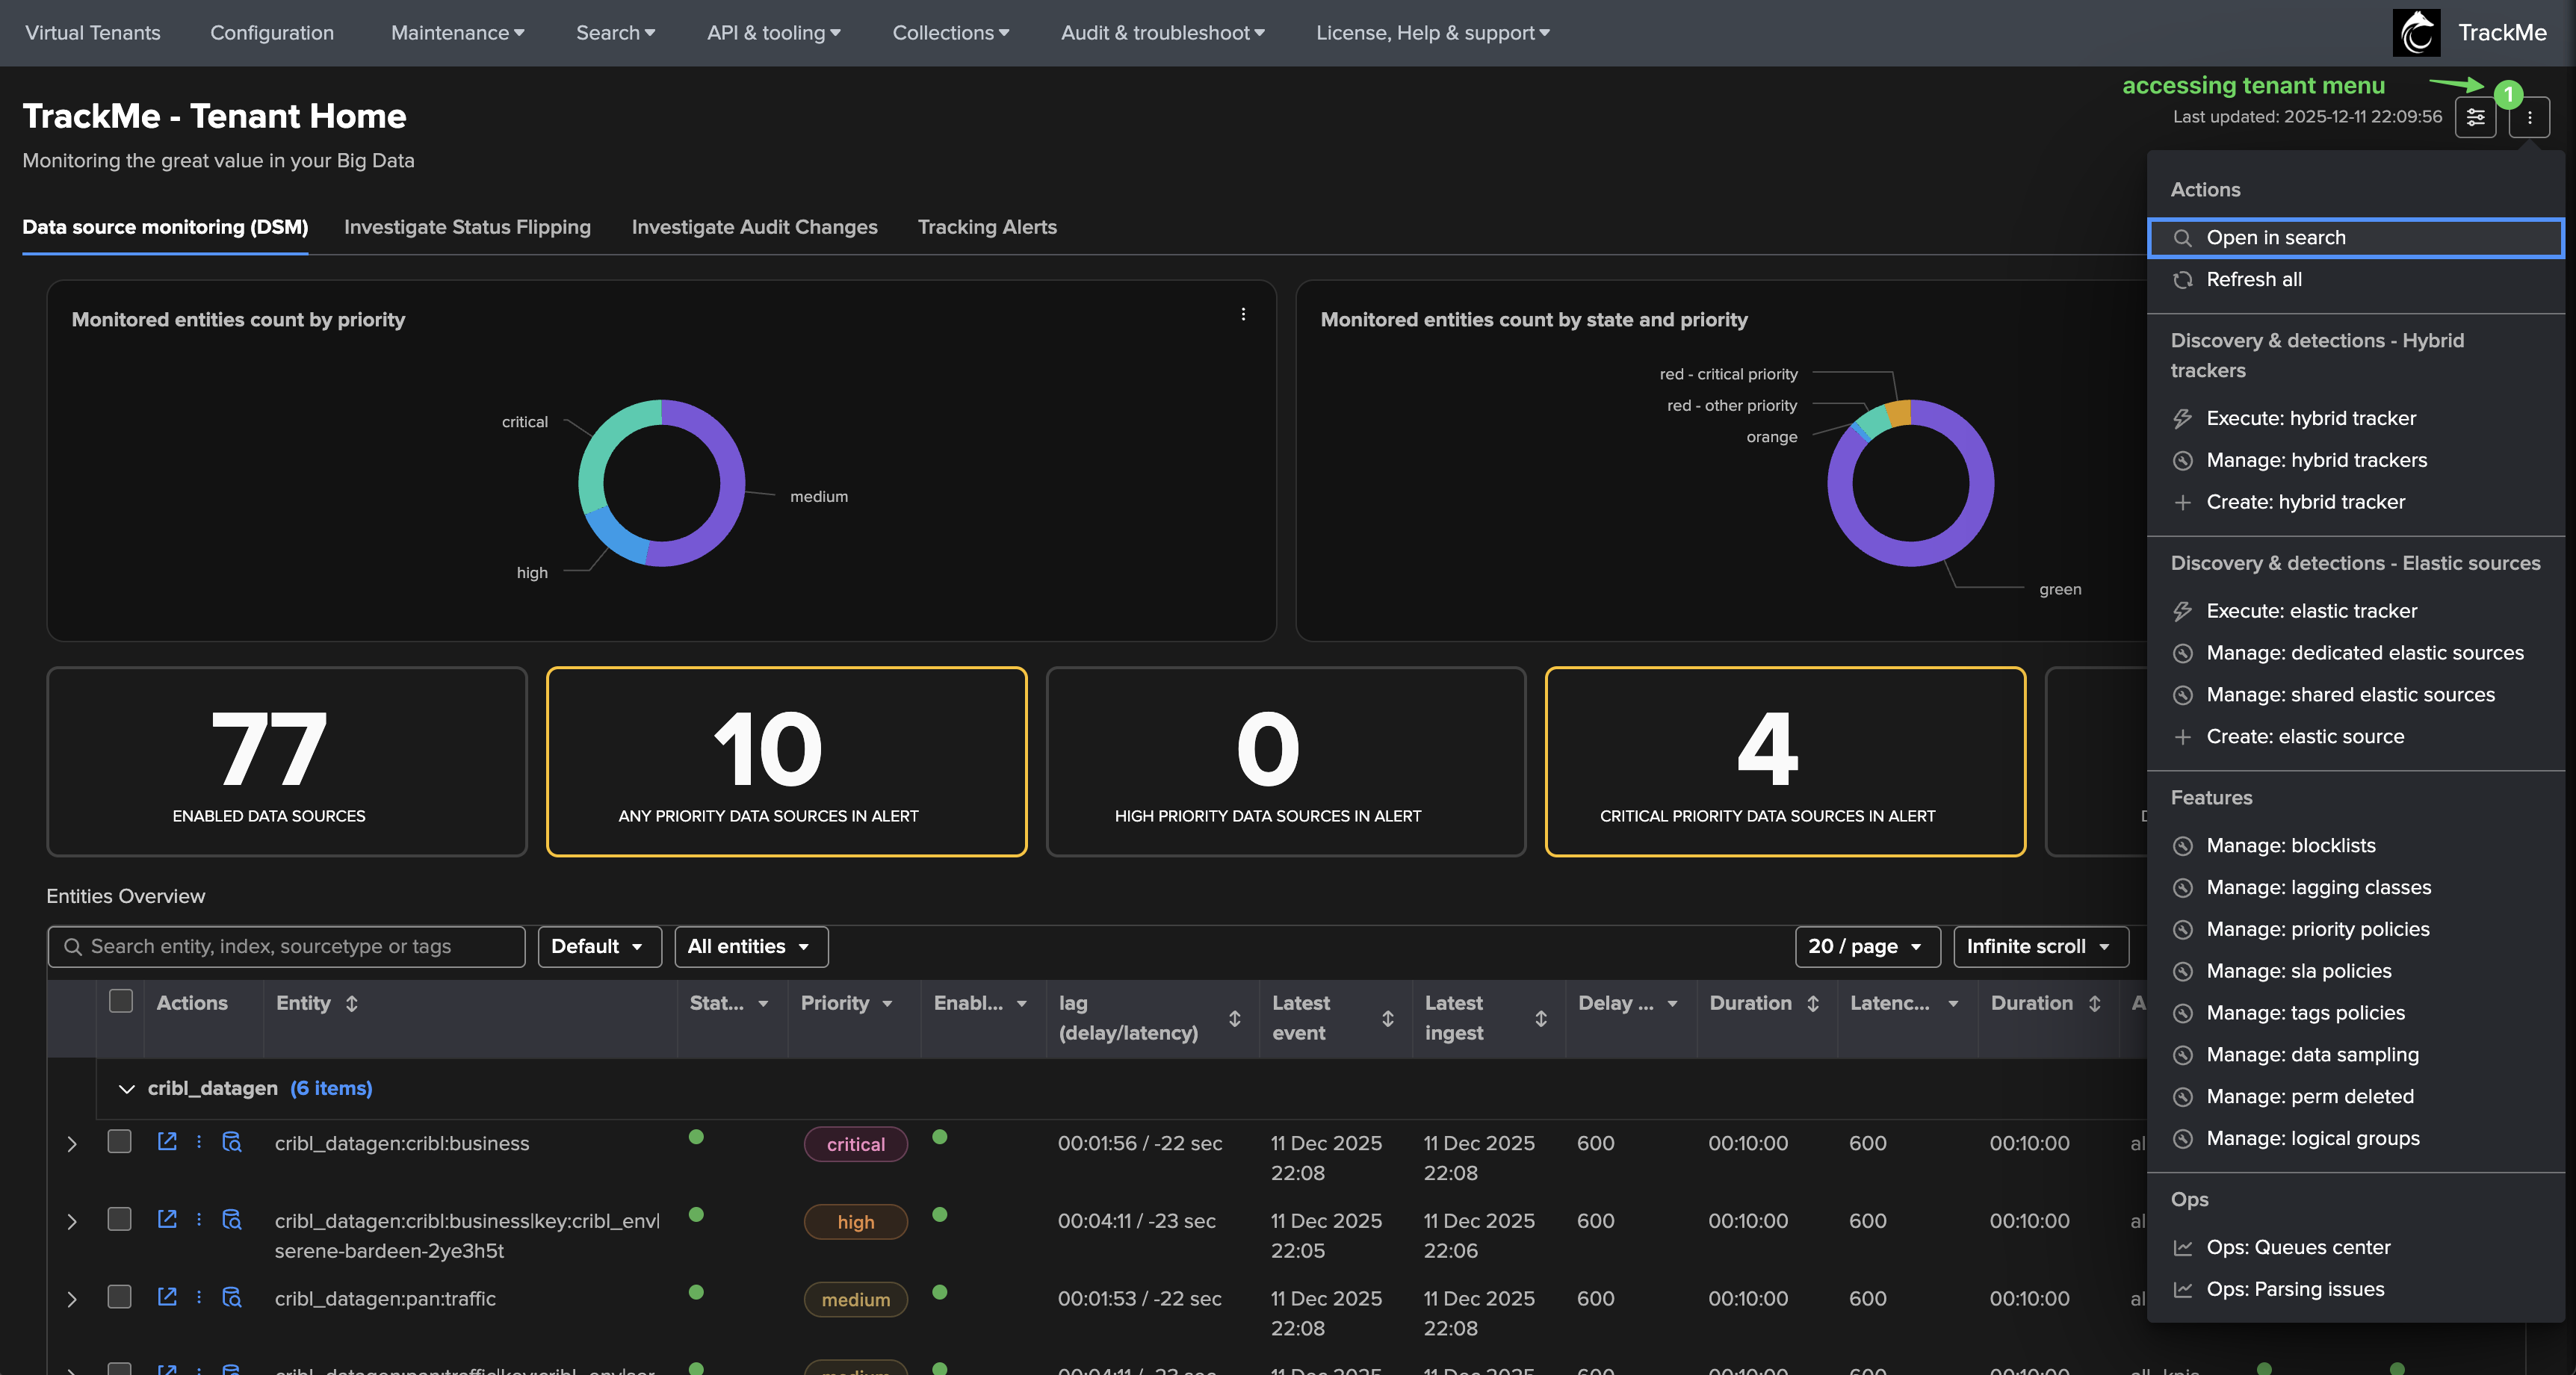
Tenant Home interface
The Tenant Home interface is the main interface to manage your TrackMe entities.
This is a rich user interface which provides all sorts of interactions depending on the component type.
You can access the Tenant Home interface by different ways from the Virtual Tenant interface:
Tenant Home interface key interactions
The following shows the key interactions in the Tenant Home interface:
Note: view will very depending on the component type.
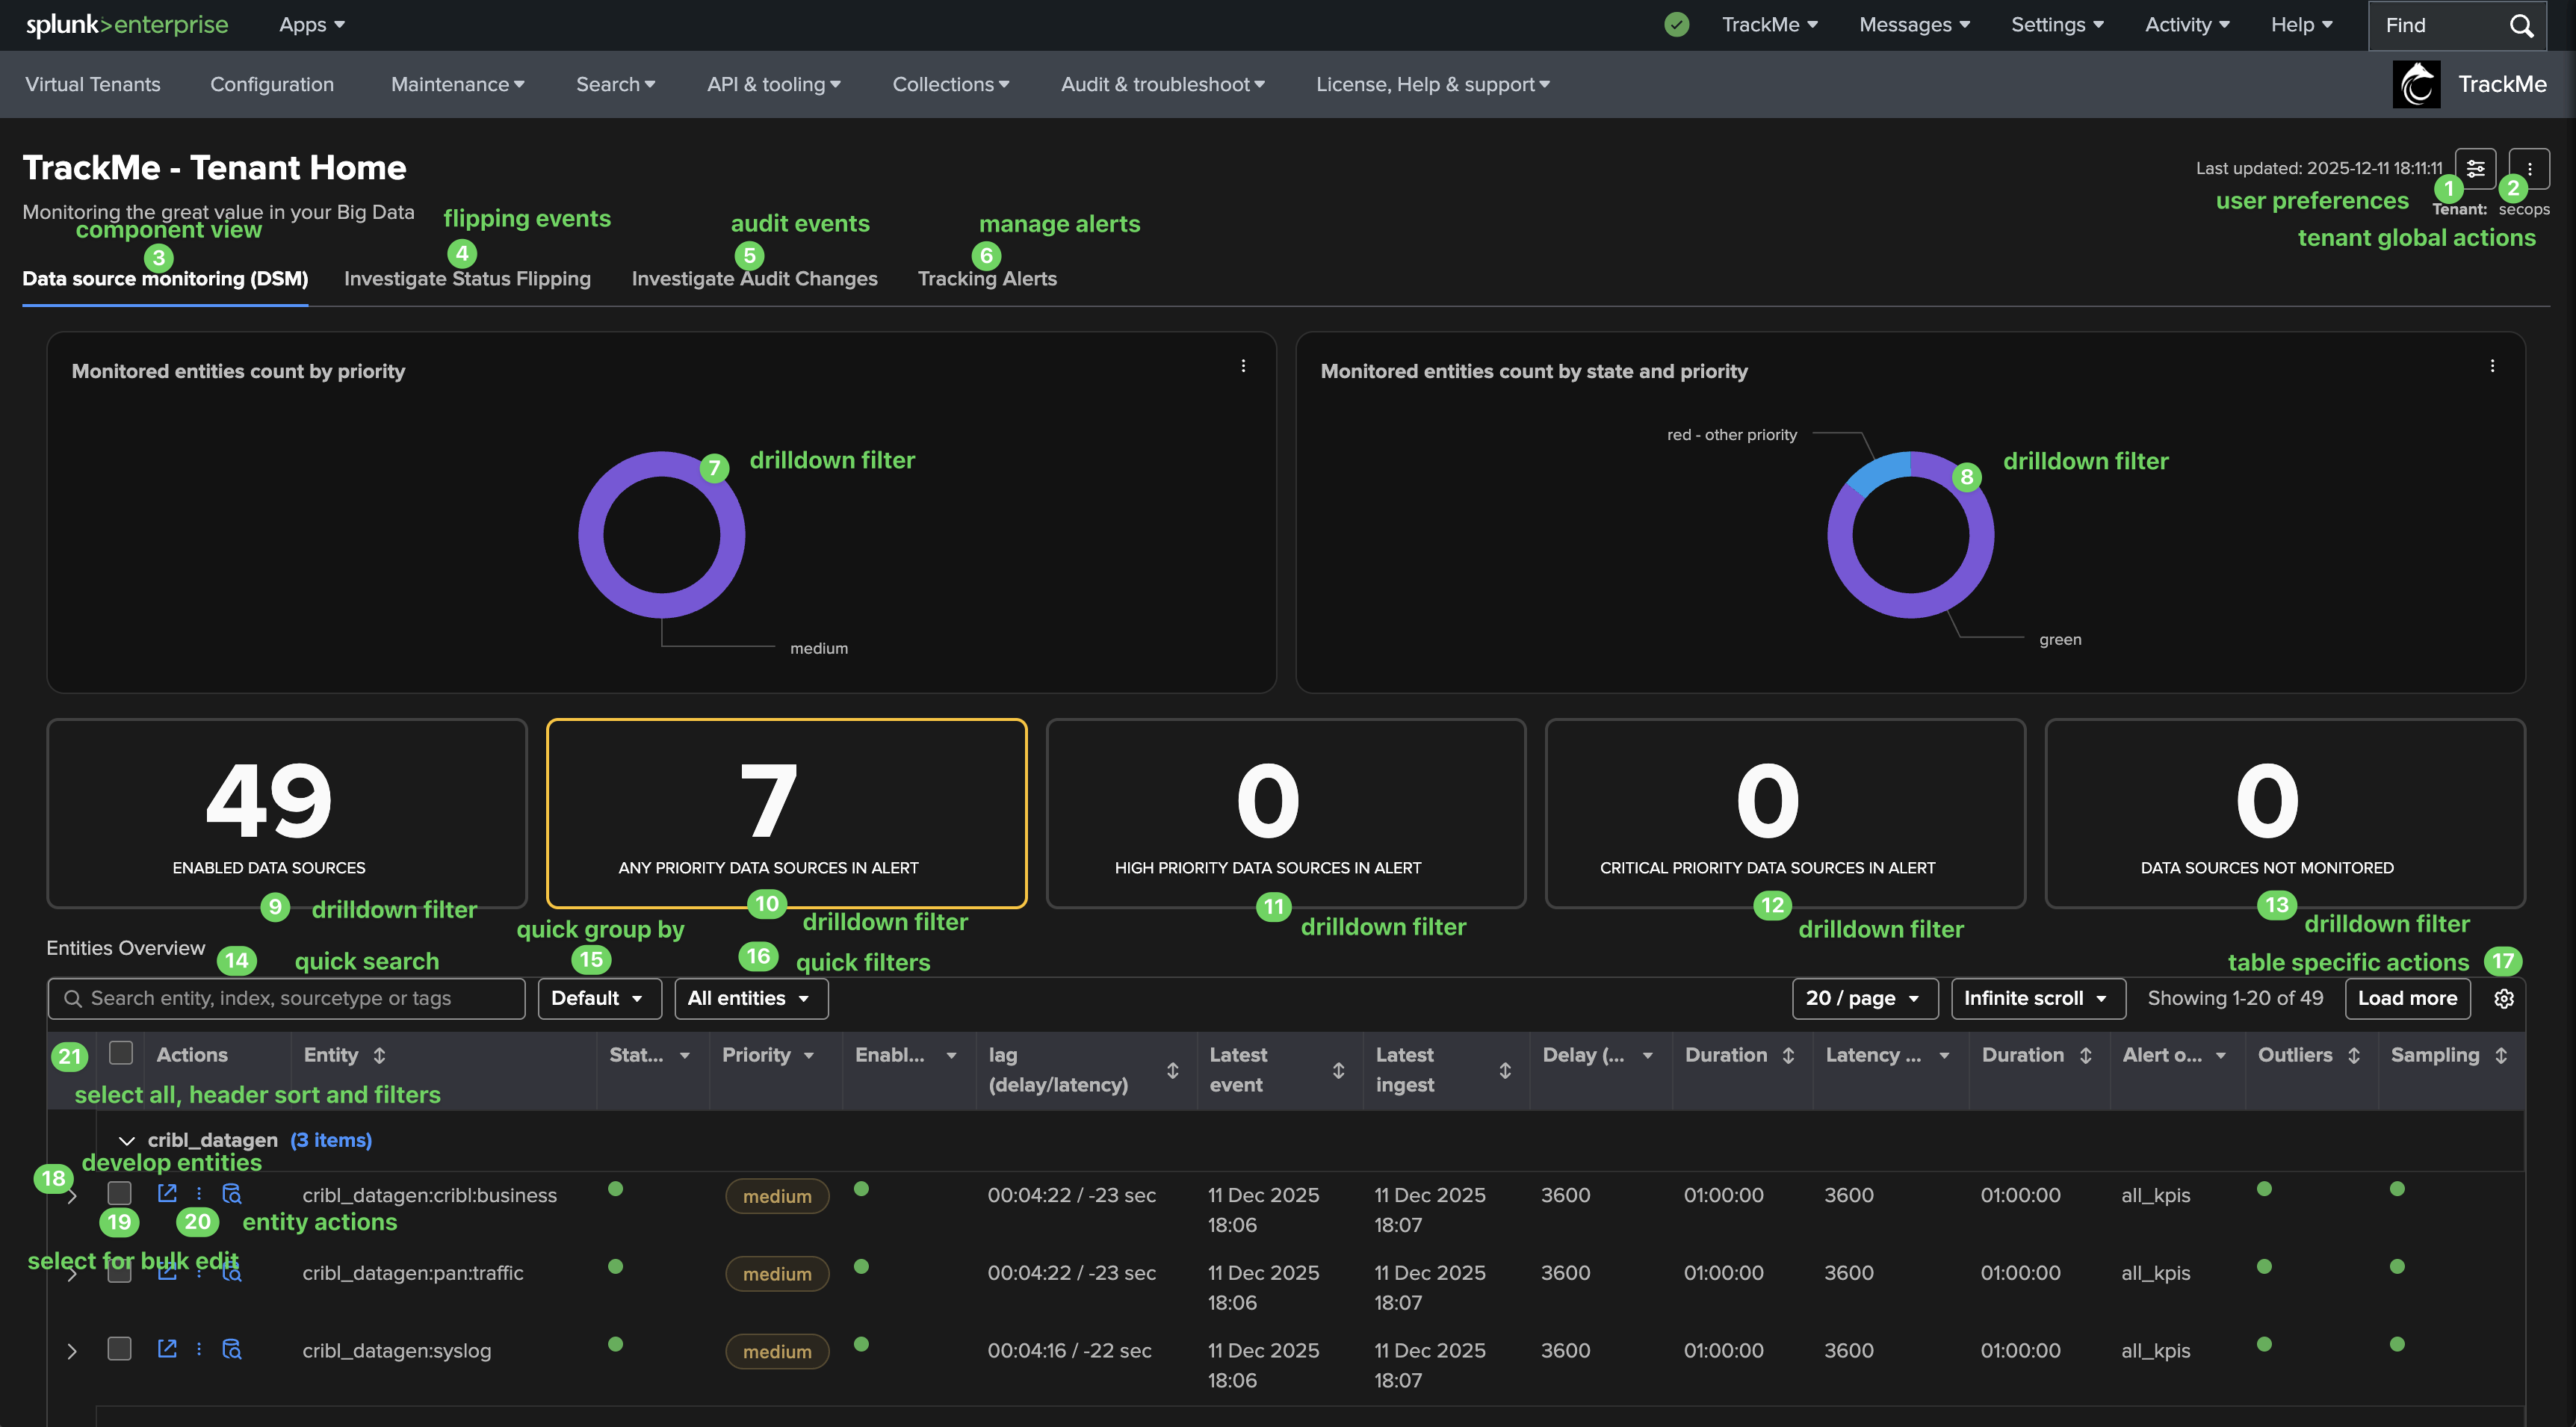
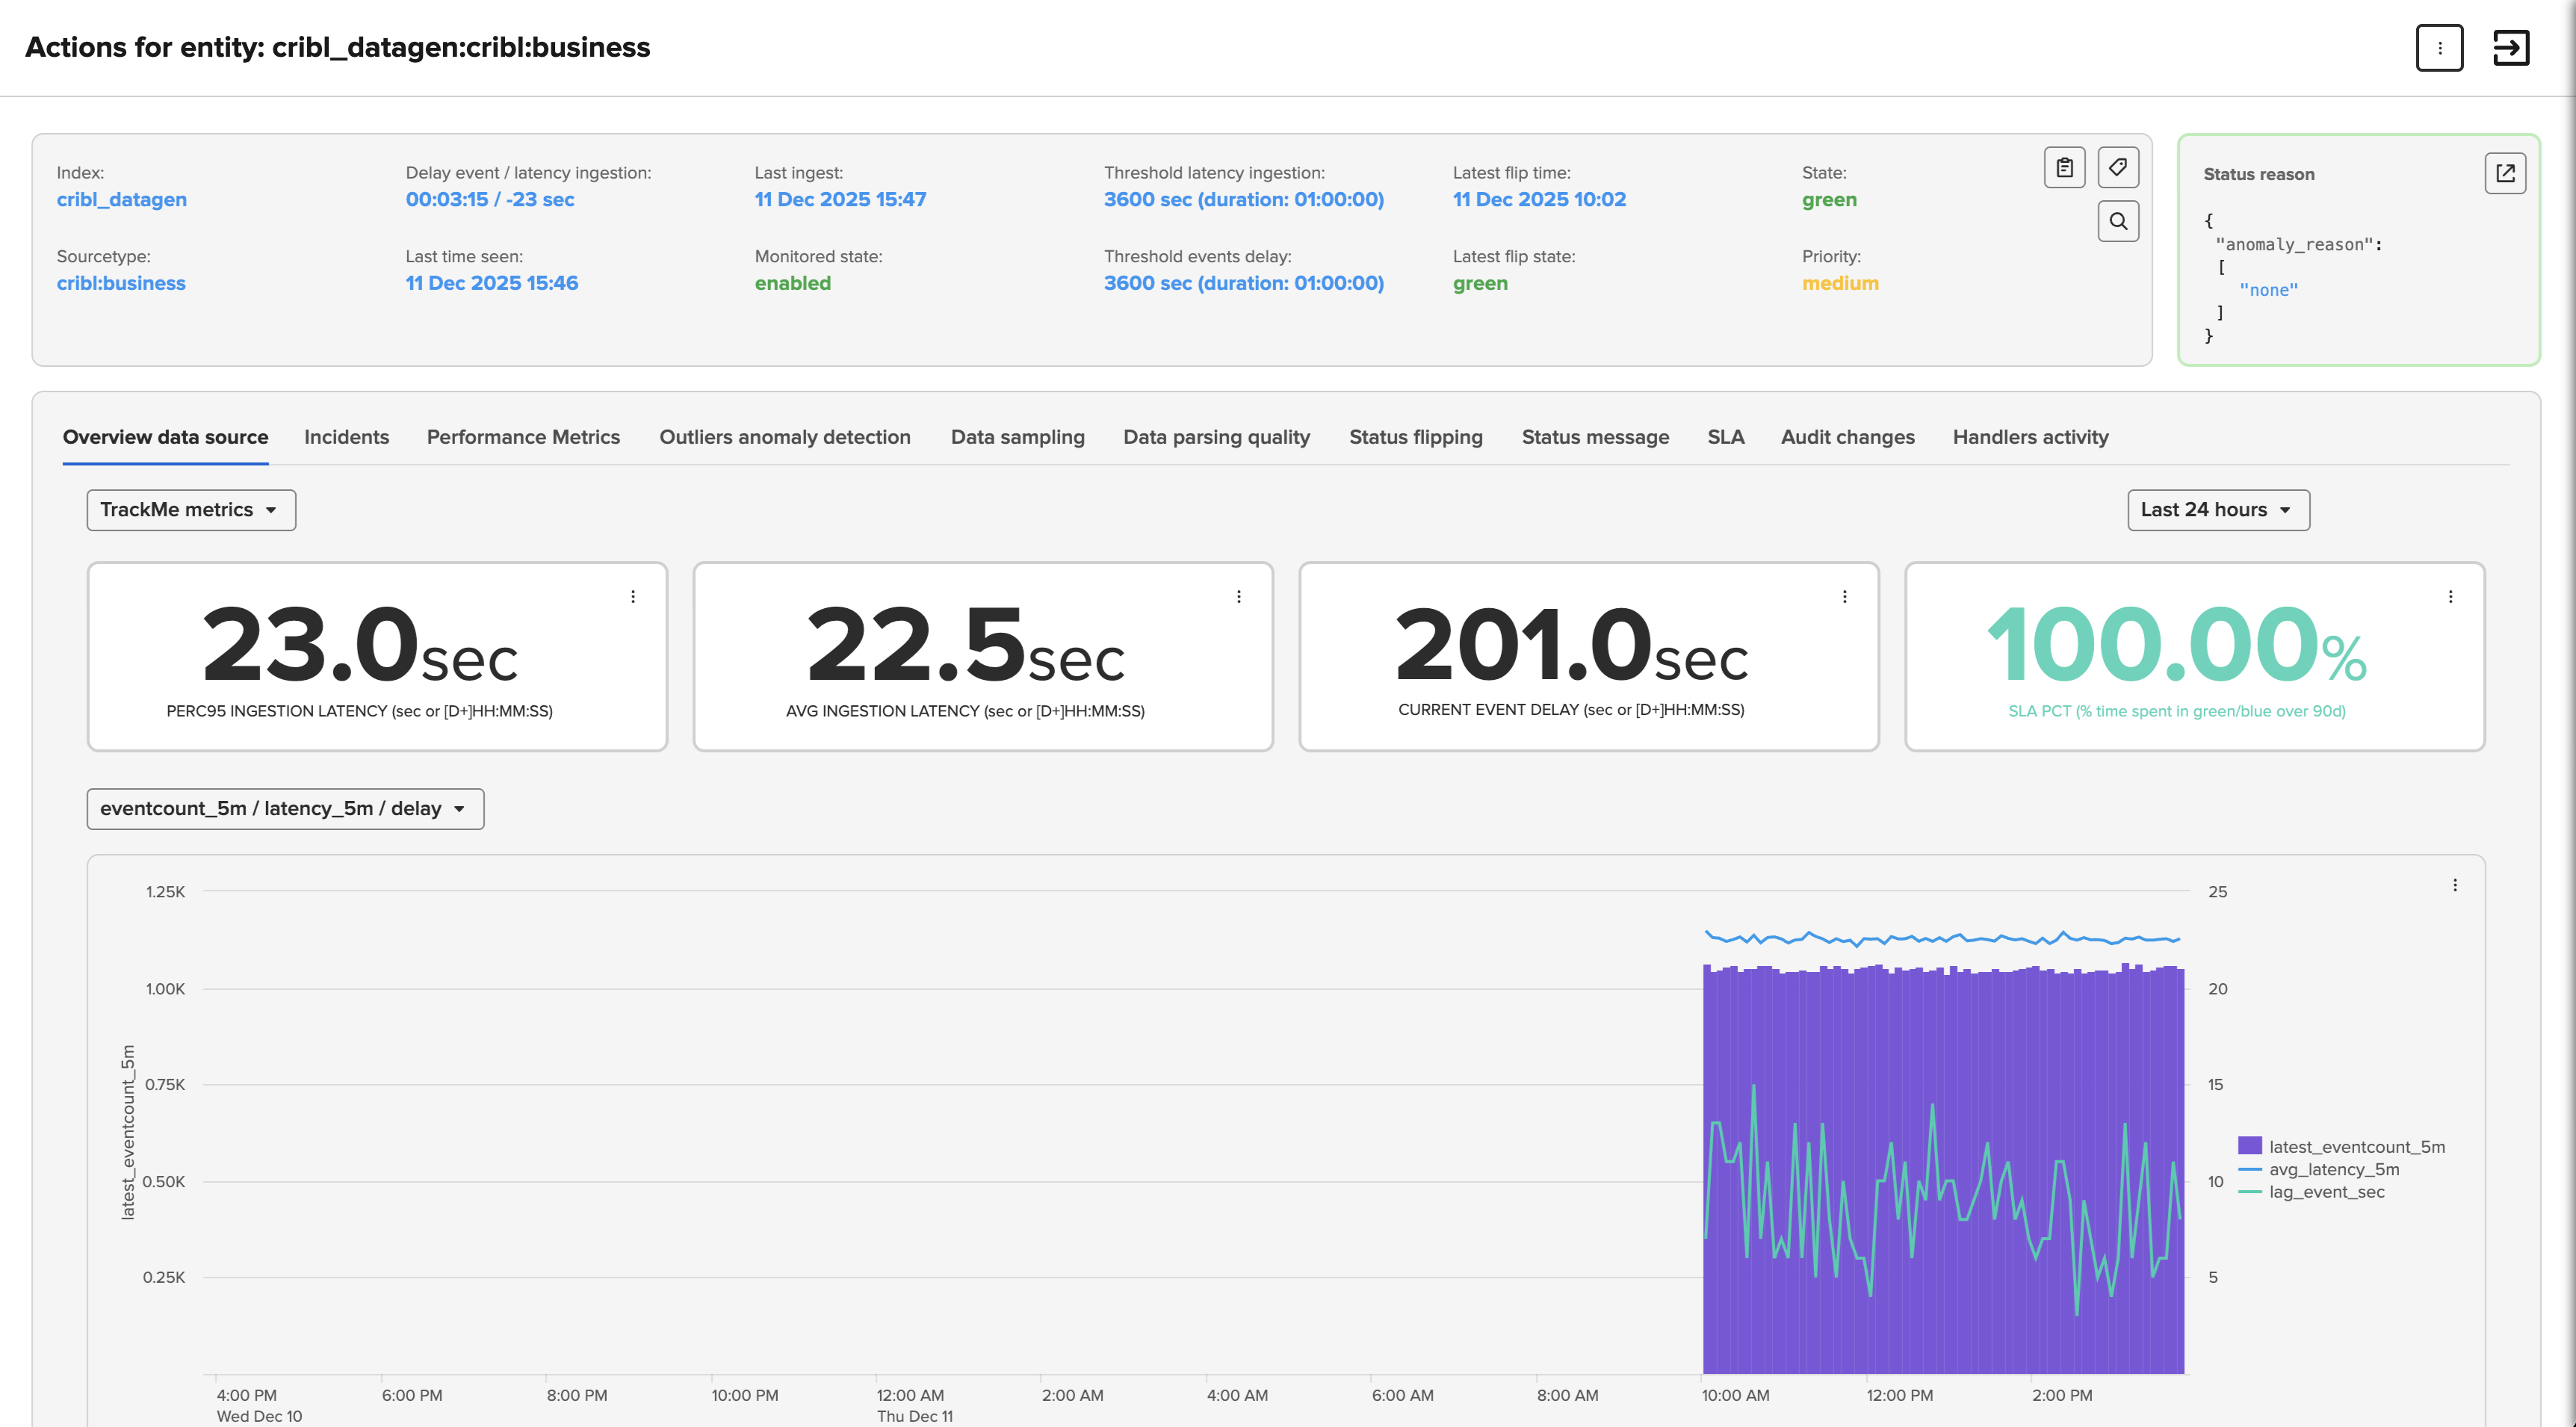
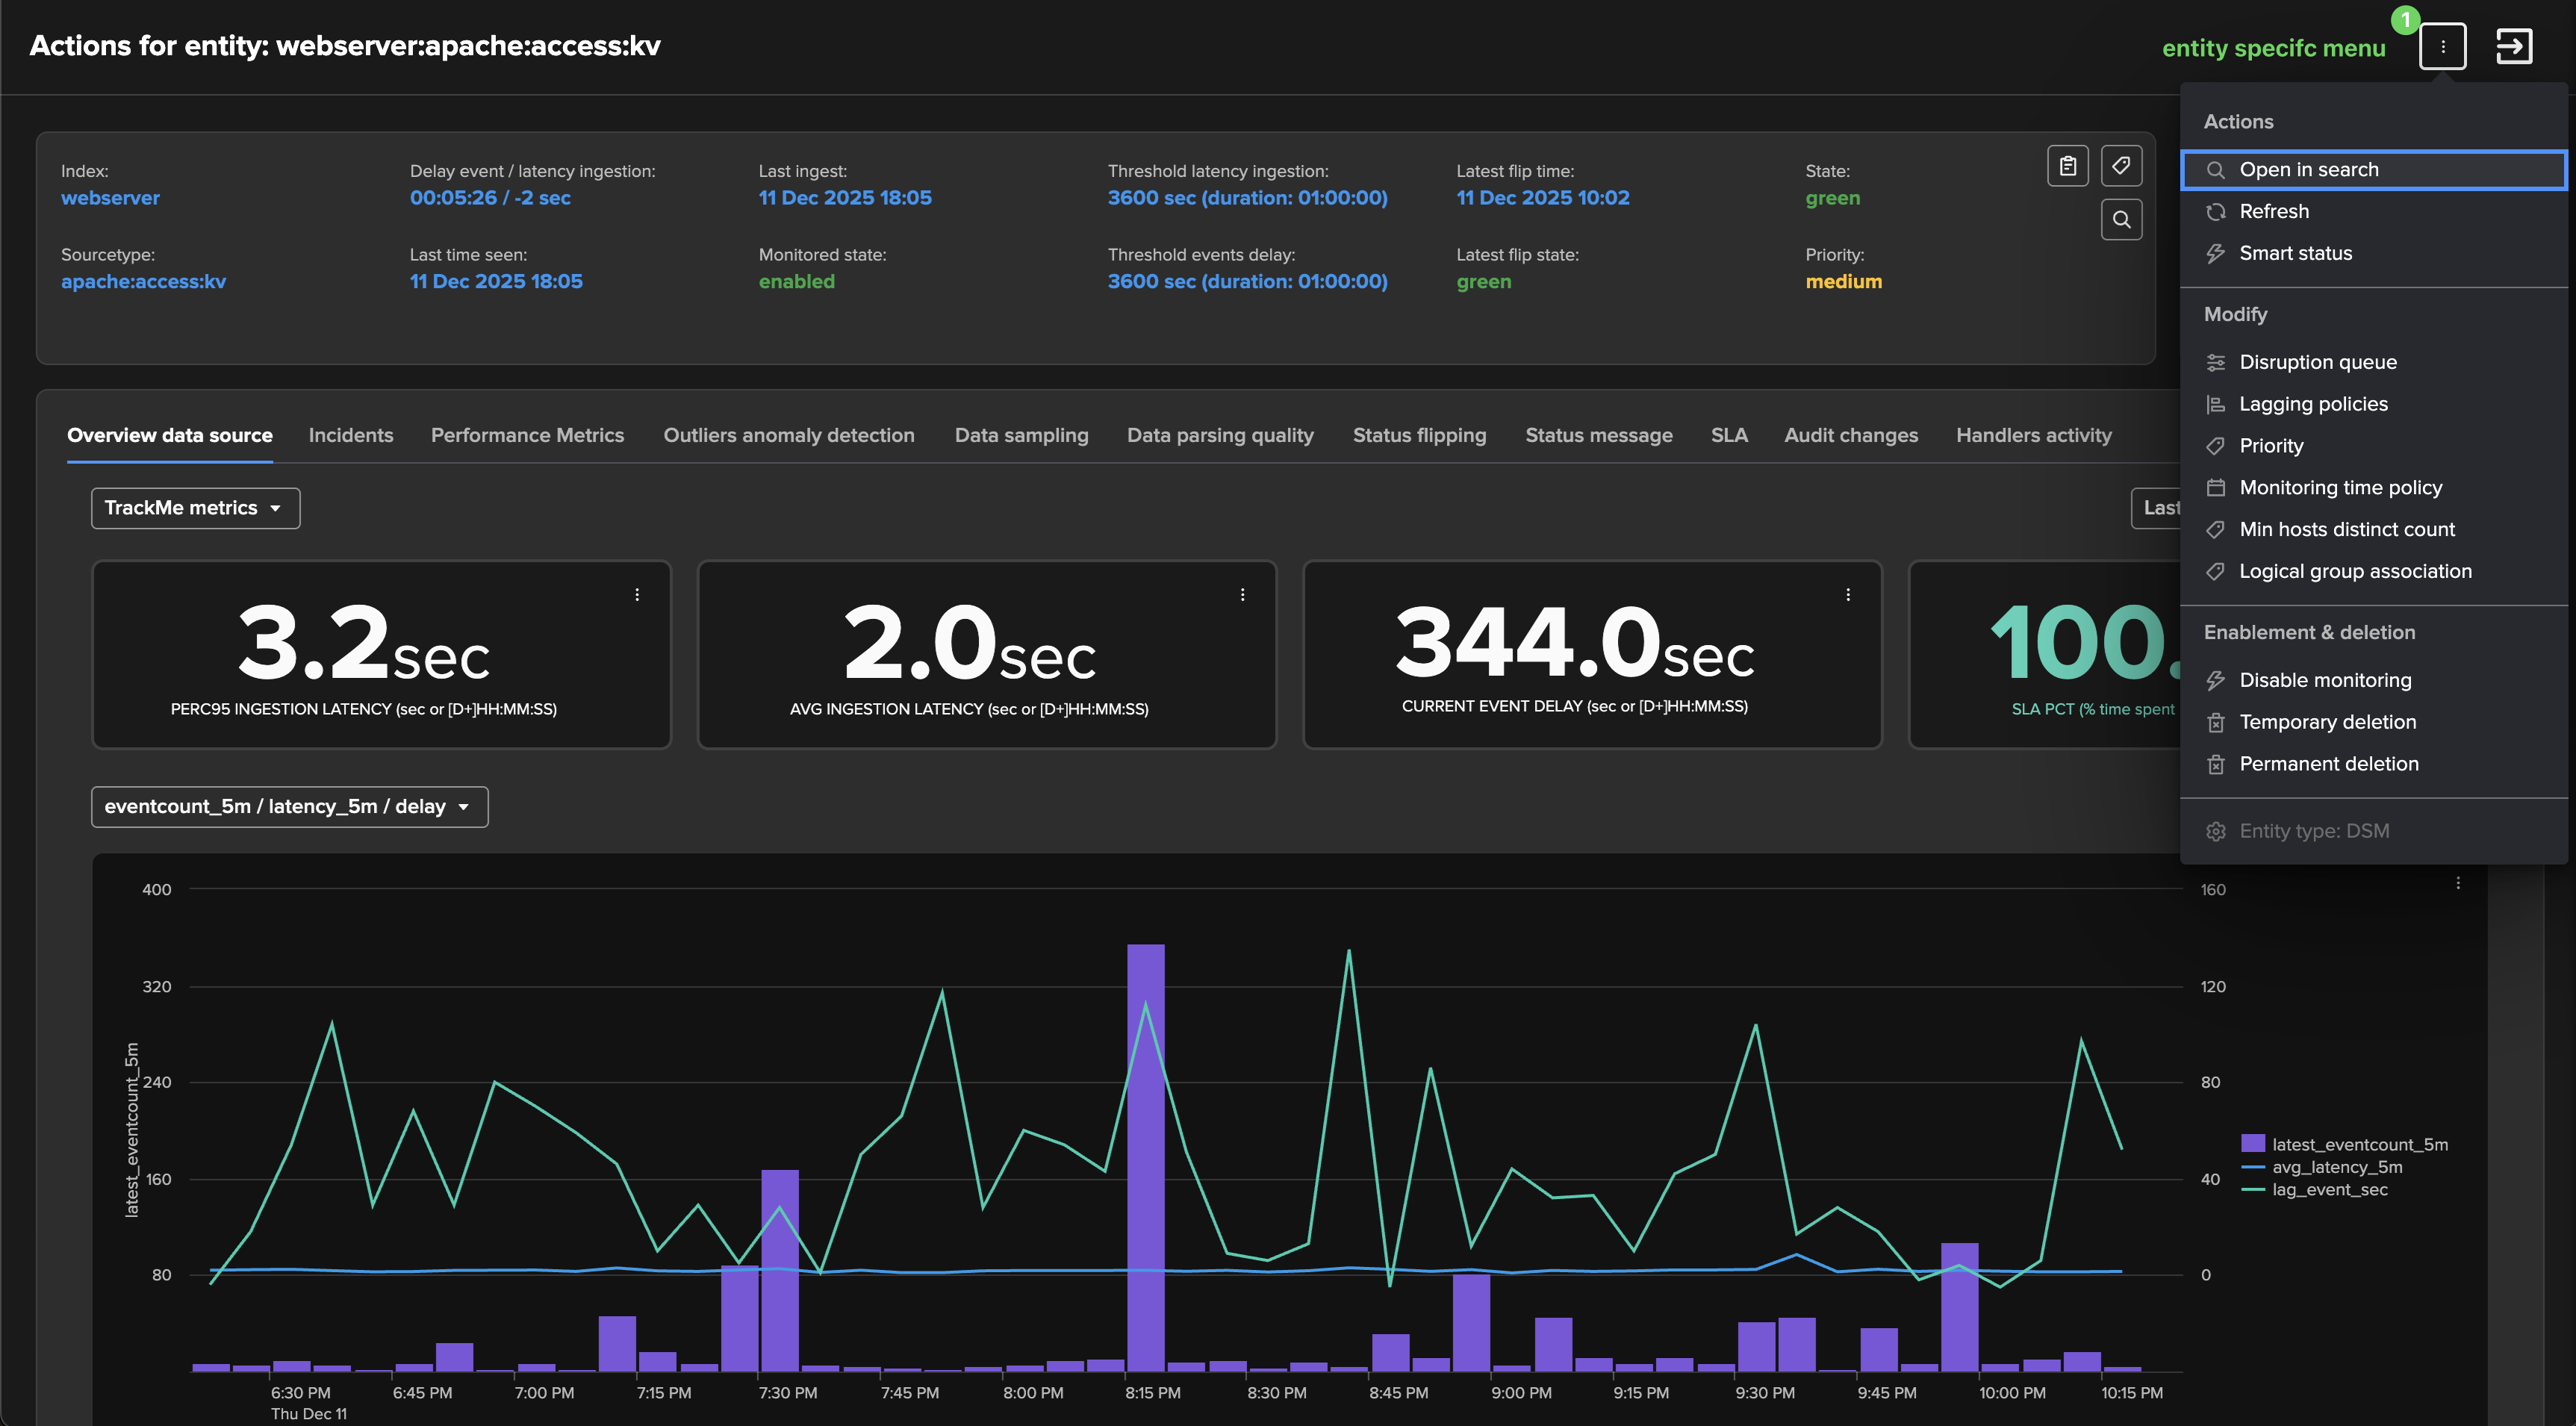
Key interactions from the entity view:
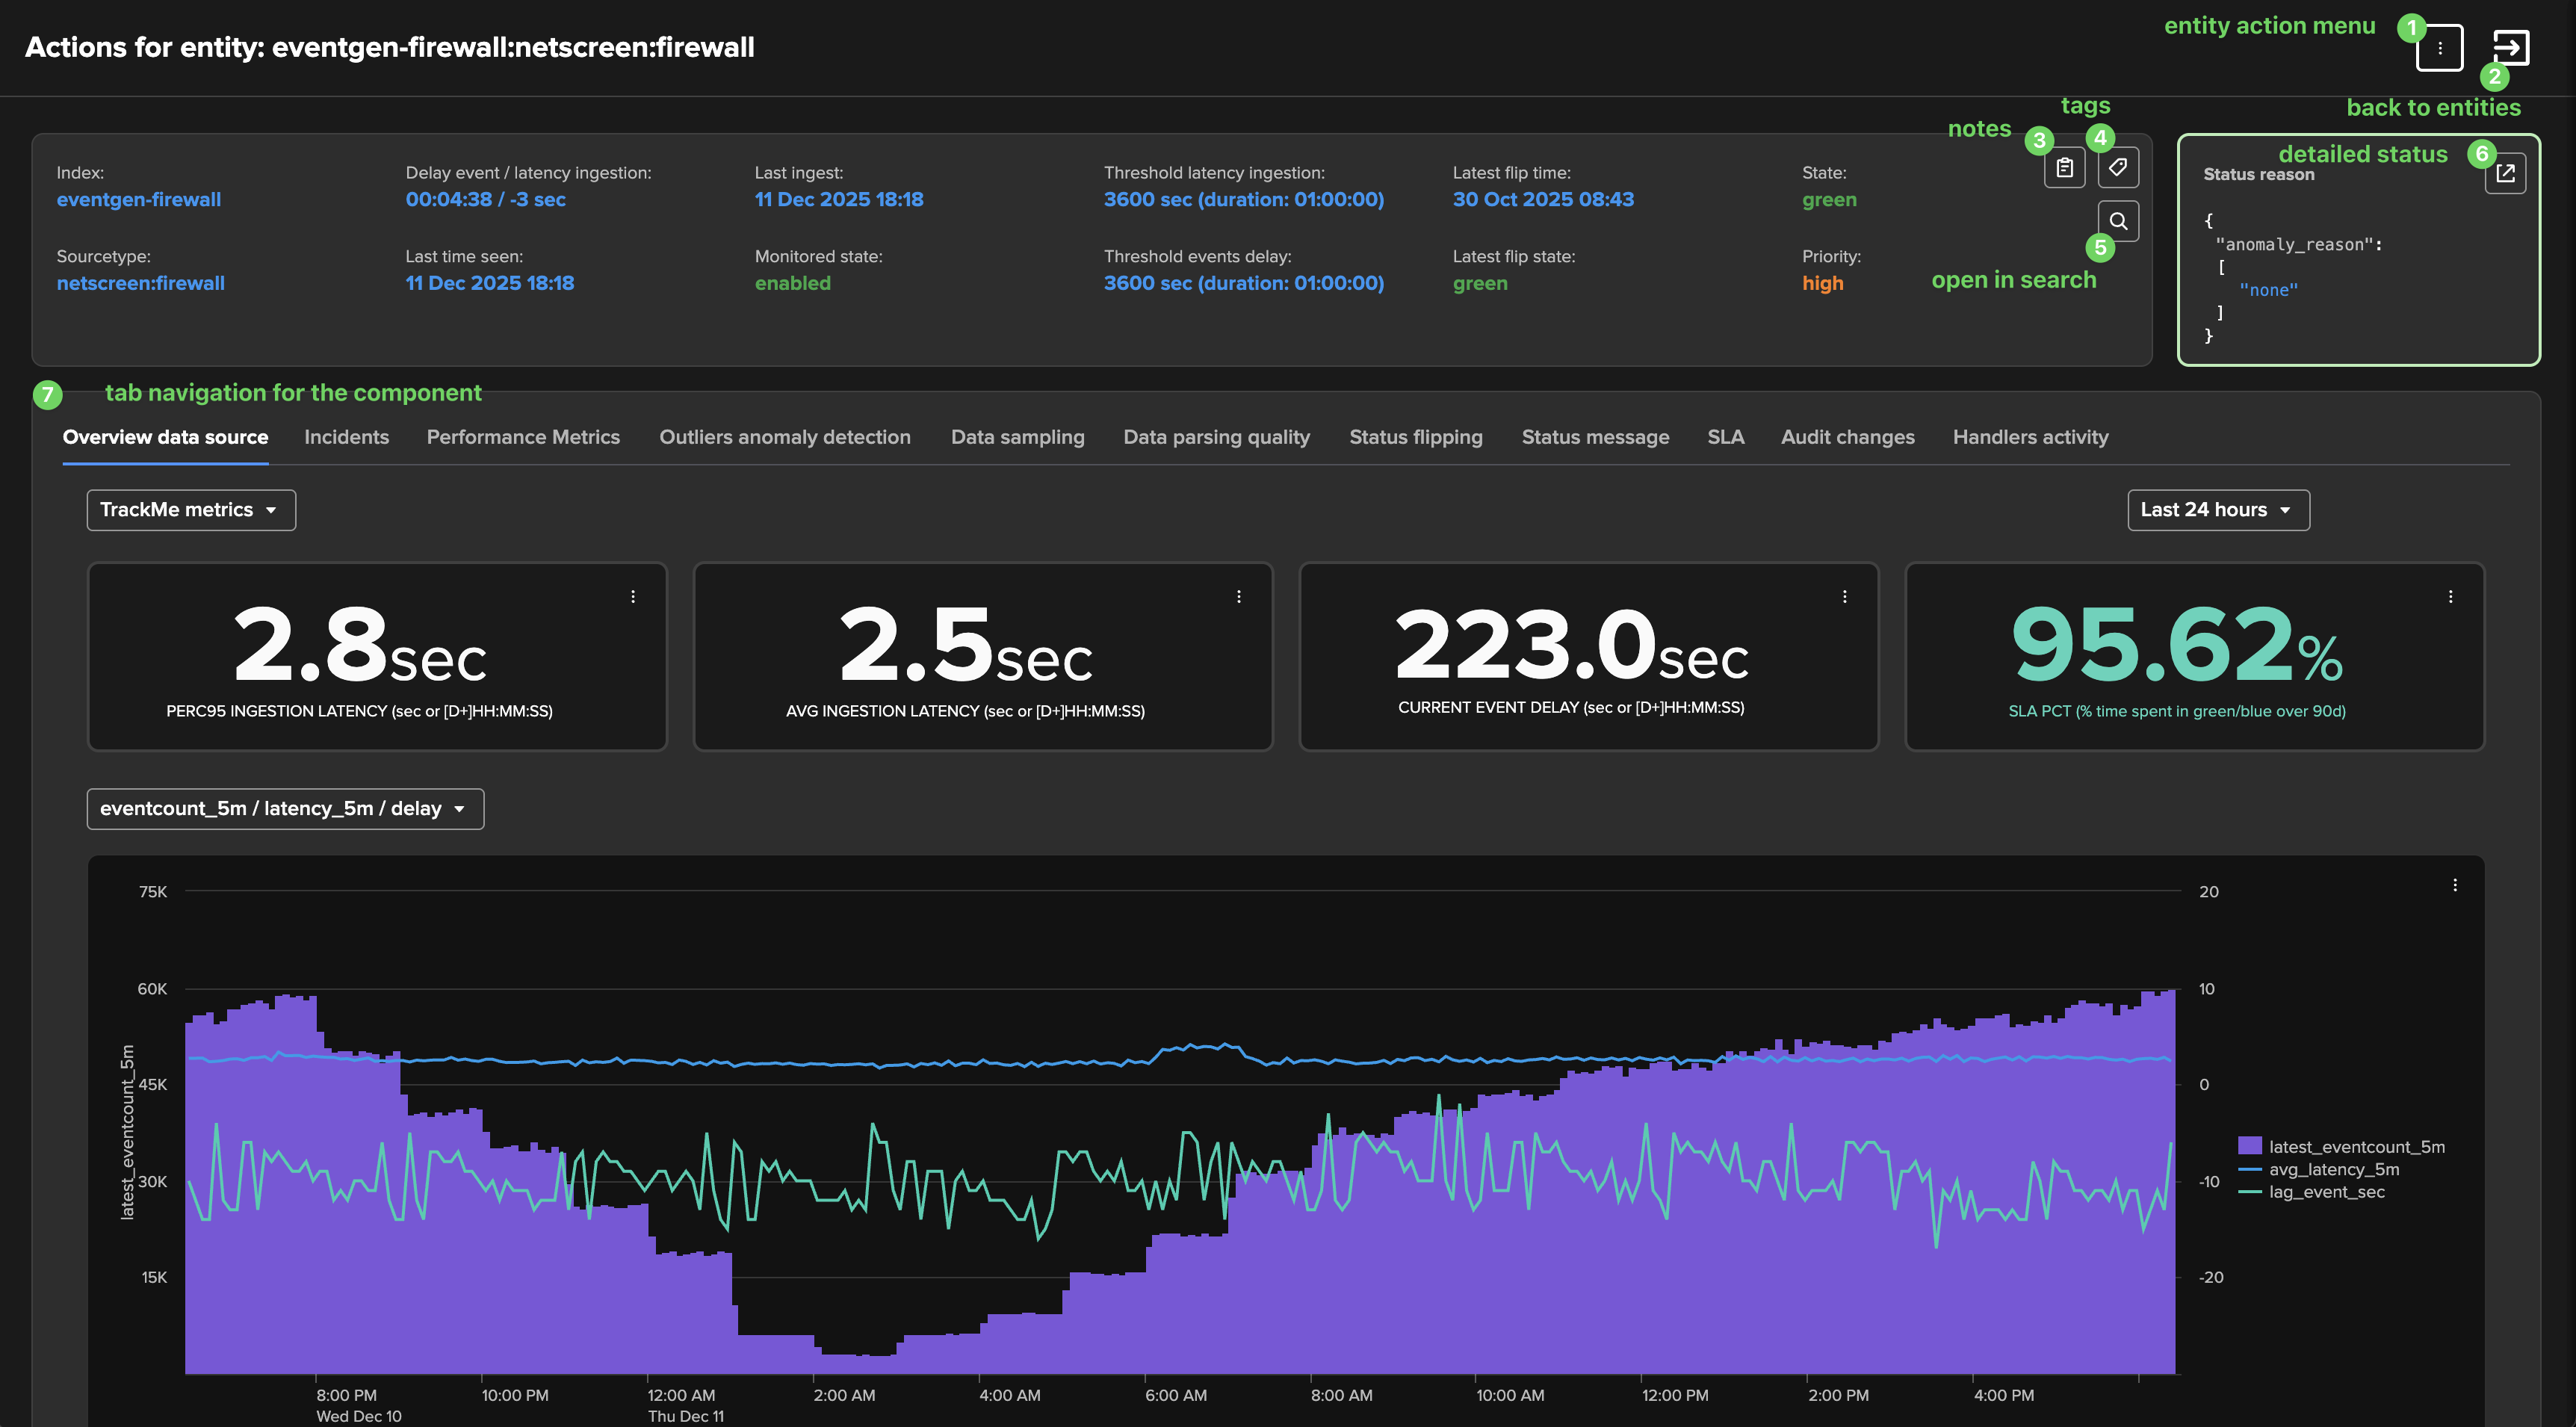
accessing tenant menu: (depends on the component type)
accessing entity menu from the top selector: (depends on the component type)
accessing entity menu from the entity table: (depends on the component type)

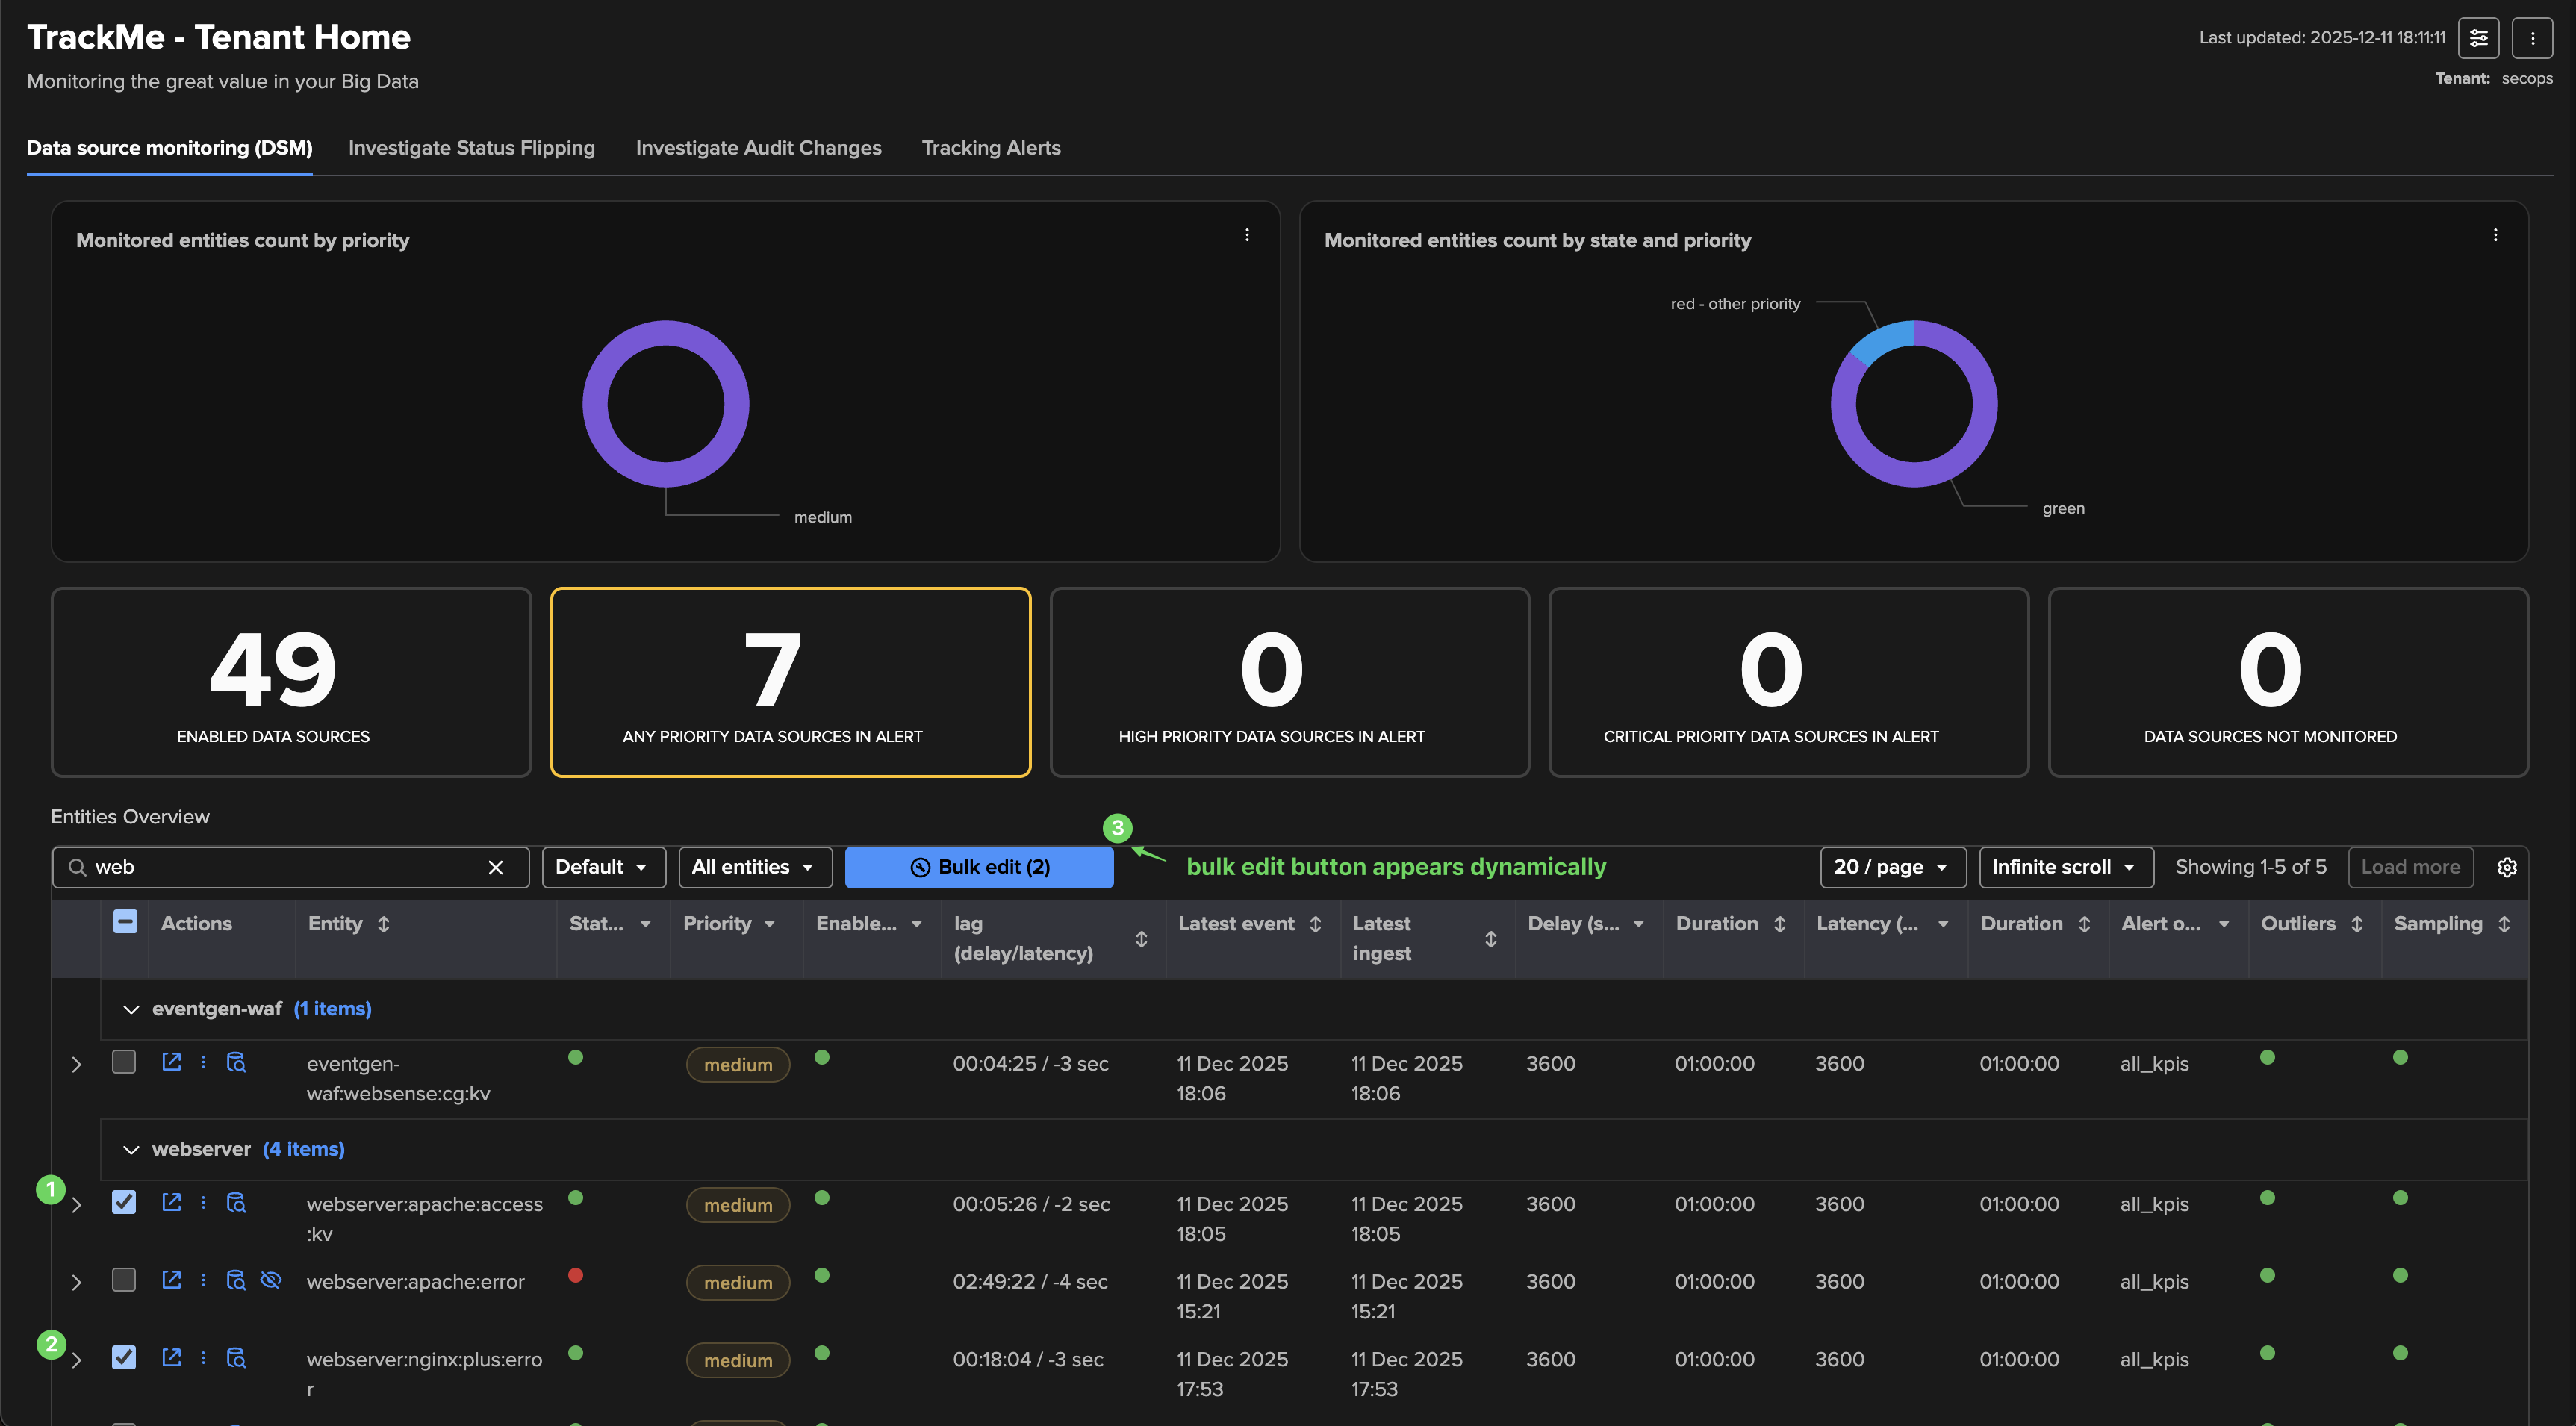
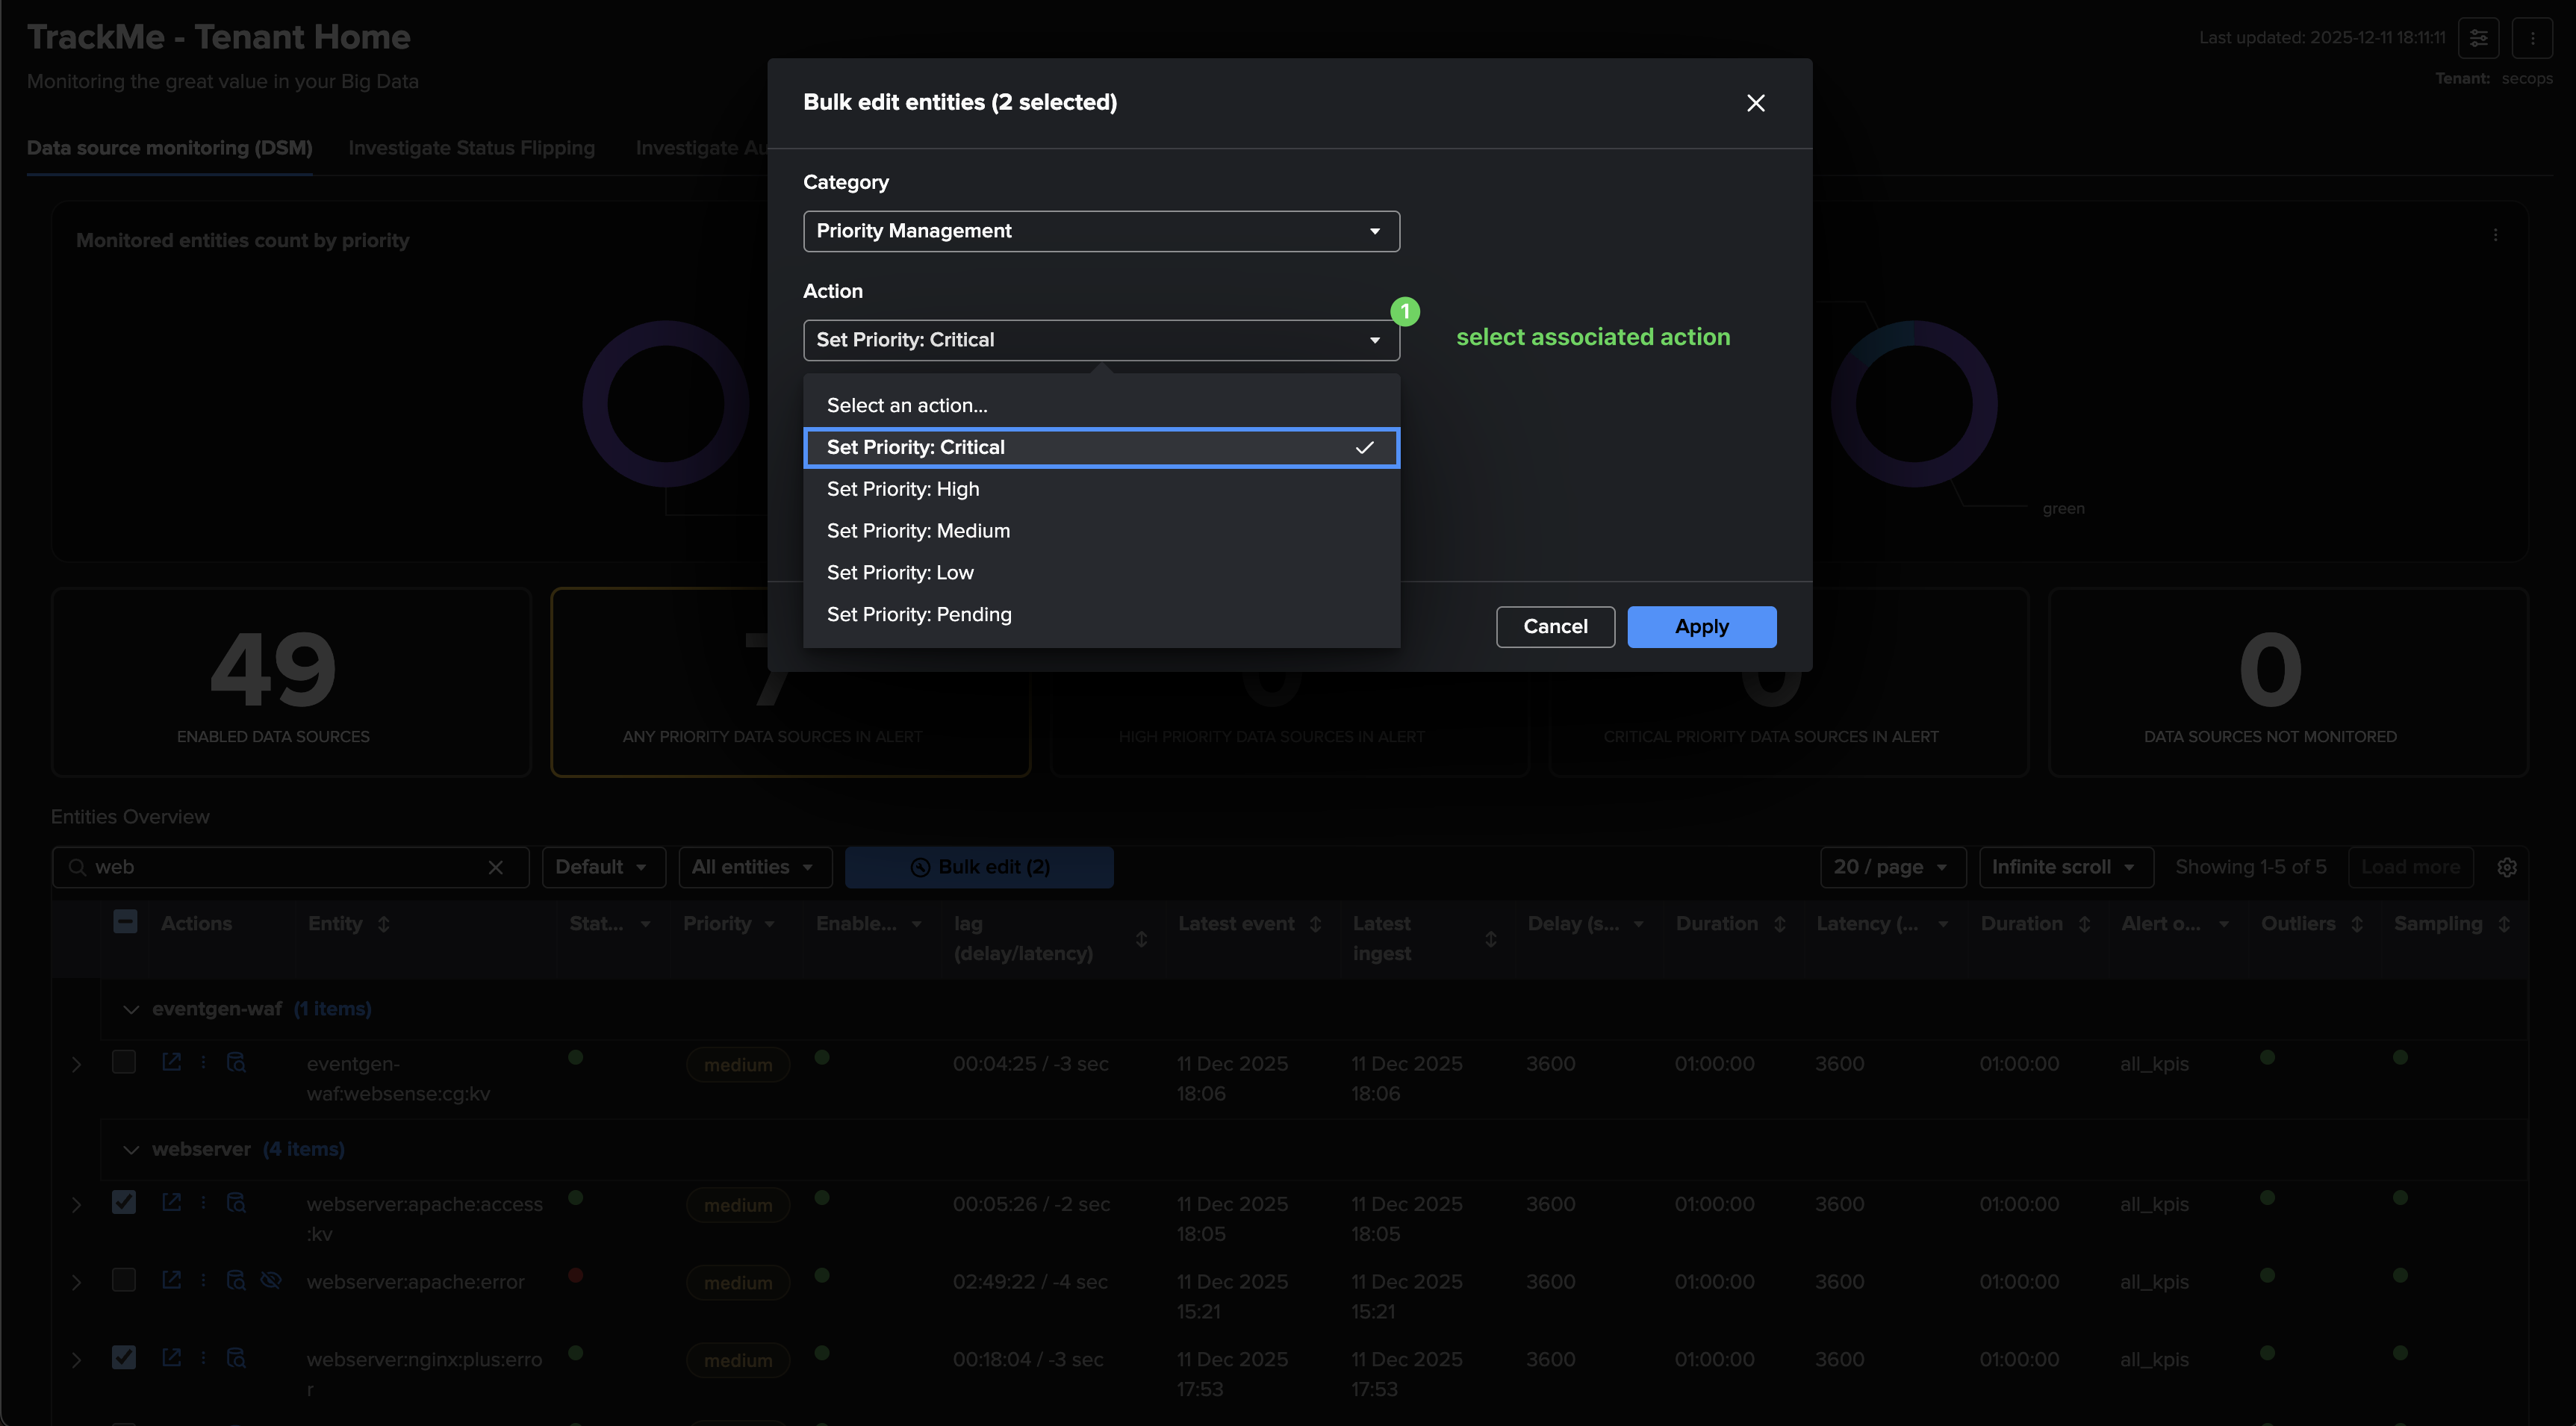
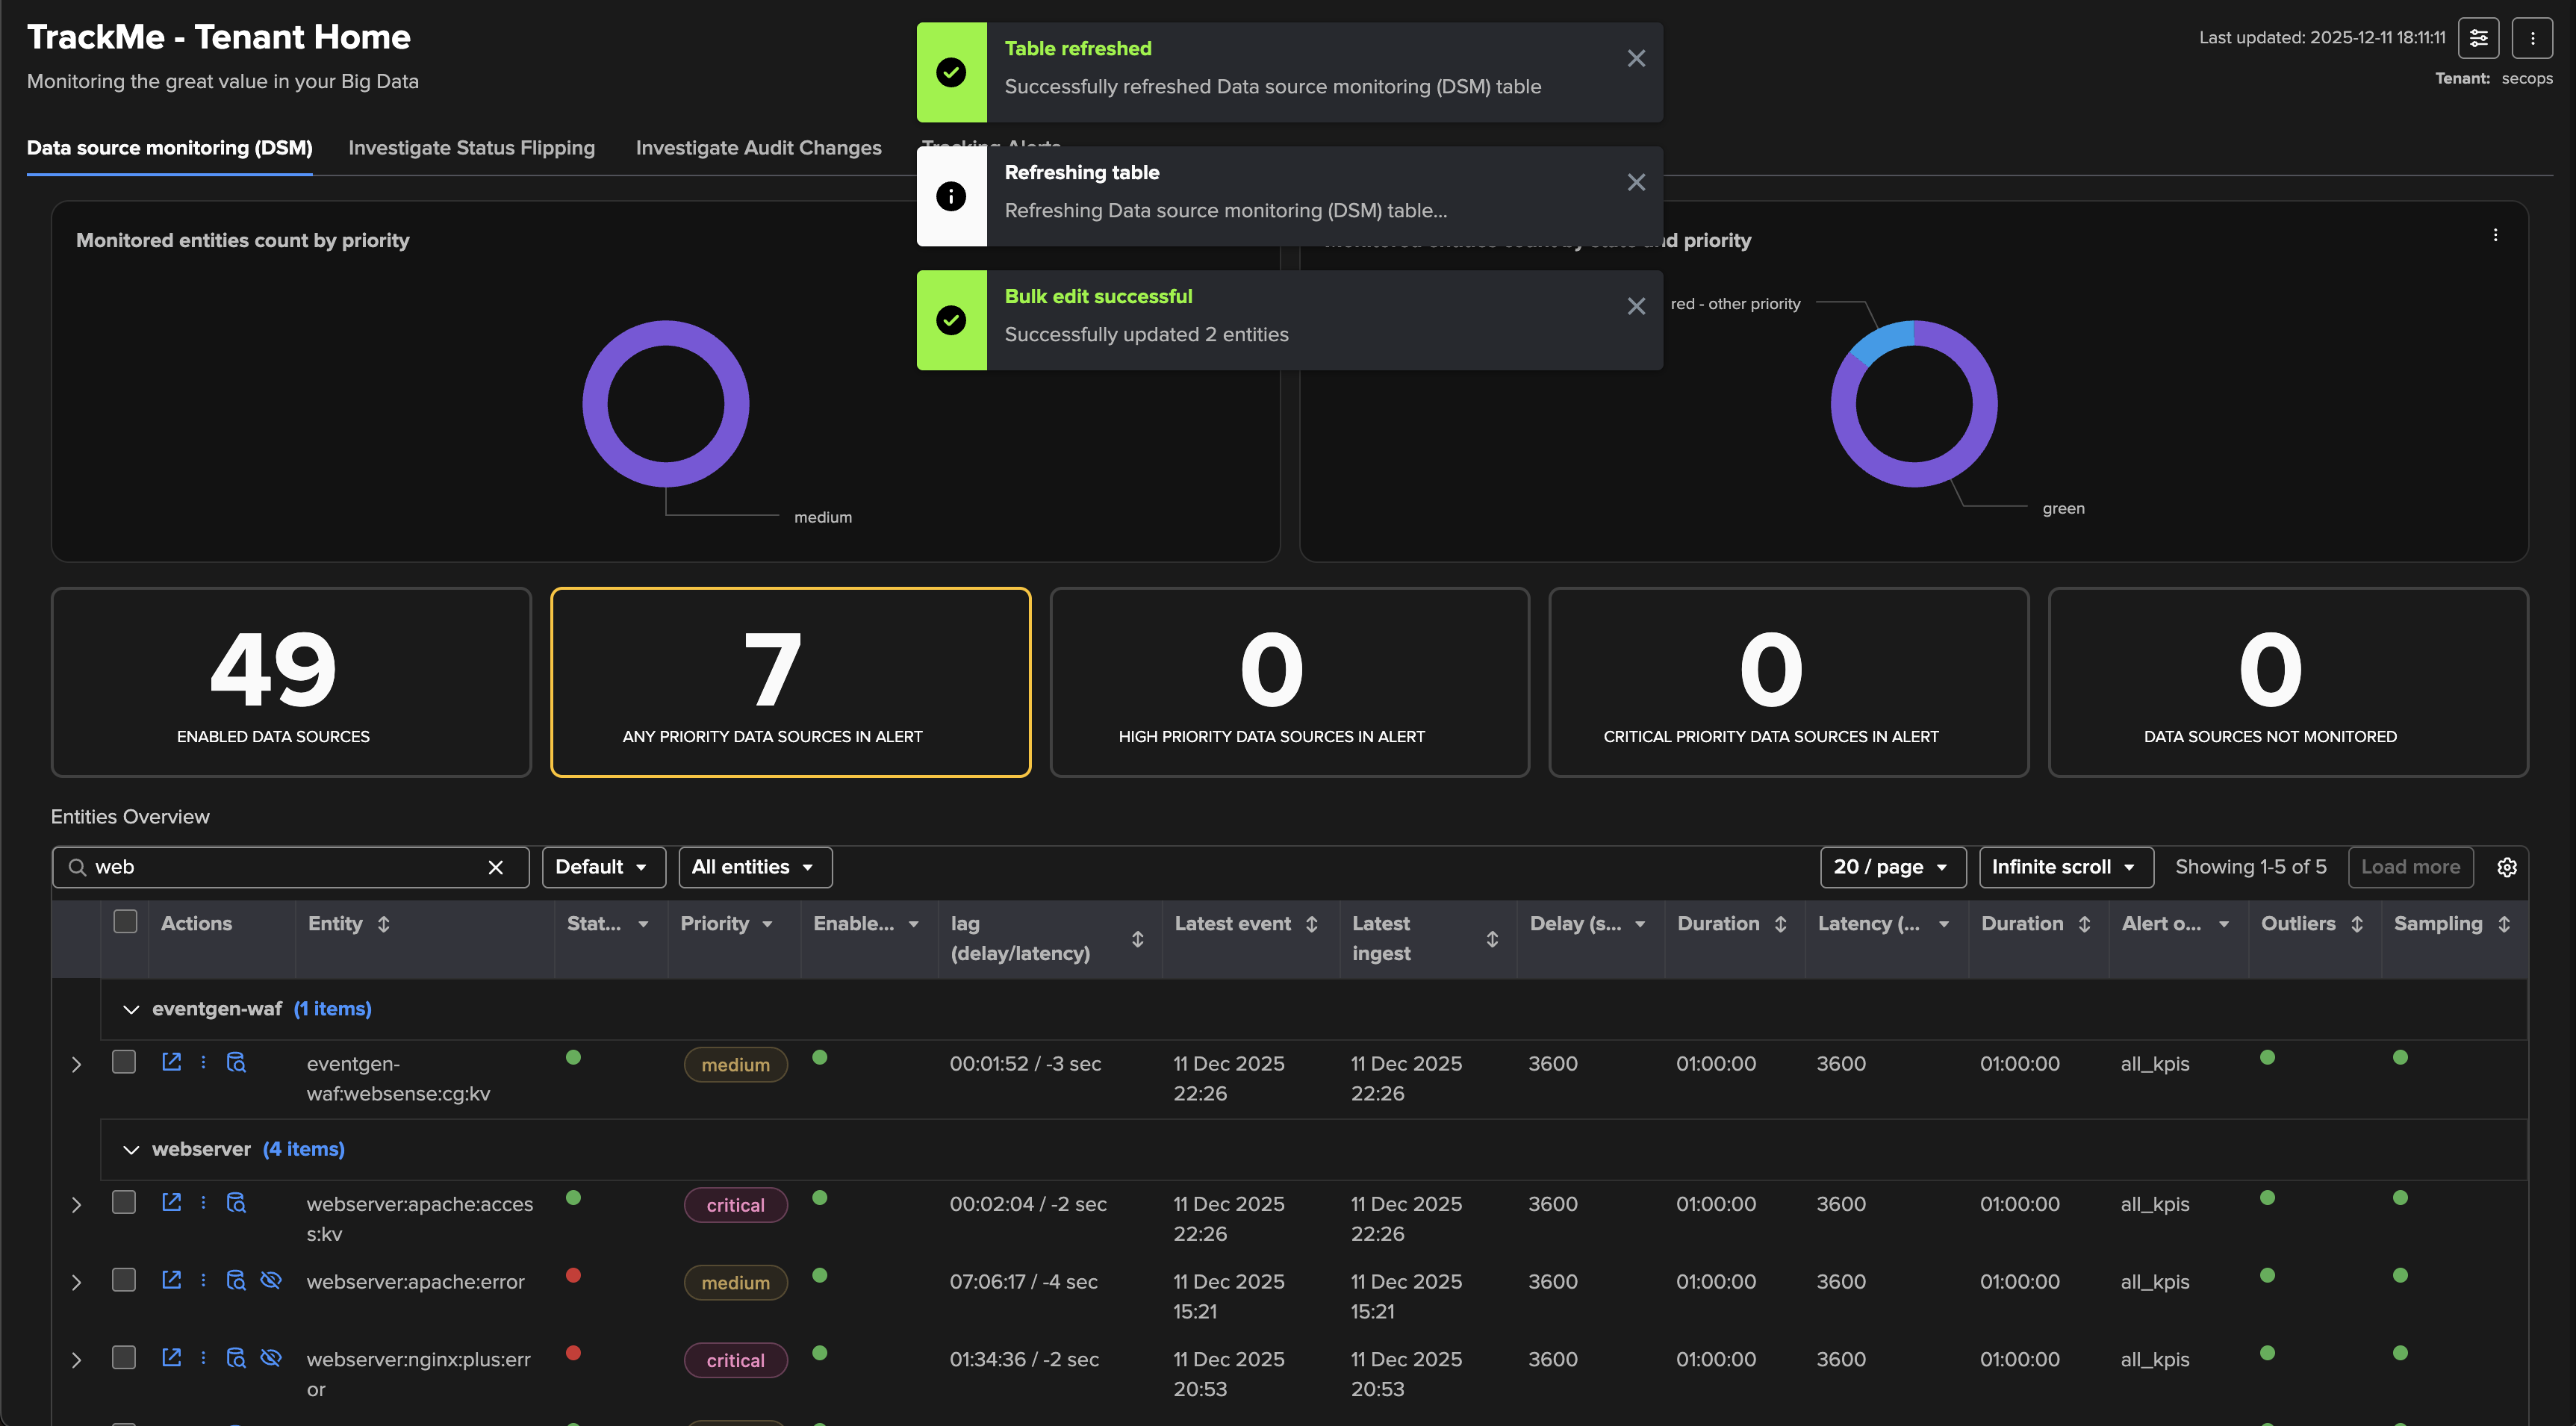
Tenant Home bulk editing actions
The Tenant Home interface supports dynamic bulk editing actions, to perform a bulk edit, select one or more entities and click on the bulk action button which appears automatically: