QUICK START - Starting with TrackMe: (feed tracking quickstart)
Starting with TrackMe!
This tutorial is a starting point for TrackMe new joiners!
The objective is to help you get started with TrackMe, understand the basic concepts and focus on feeds Tracking for Splunk.
In this tutorial, we will assume that you are starting entirely from scratch, and we will cover the essential steps to set up feed tracking in TrackMe, with main best practices.
- This tutorial works in 3 main steps and can be used by all users, including Free community users:
Step 1: Create a Virtual Tenant for data sources tracking
Step 2: Create a Virtual Tenant for data hosts tracking
Step 3: Alerting and notifications
This quickstart tutorial was last updated on the 25th of May 2025, to reflect the latest TrackMe releases and especially the new Stateful Alerting features.
TrackMe is installed, what now?
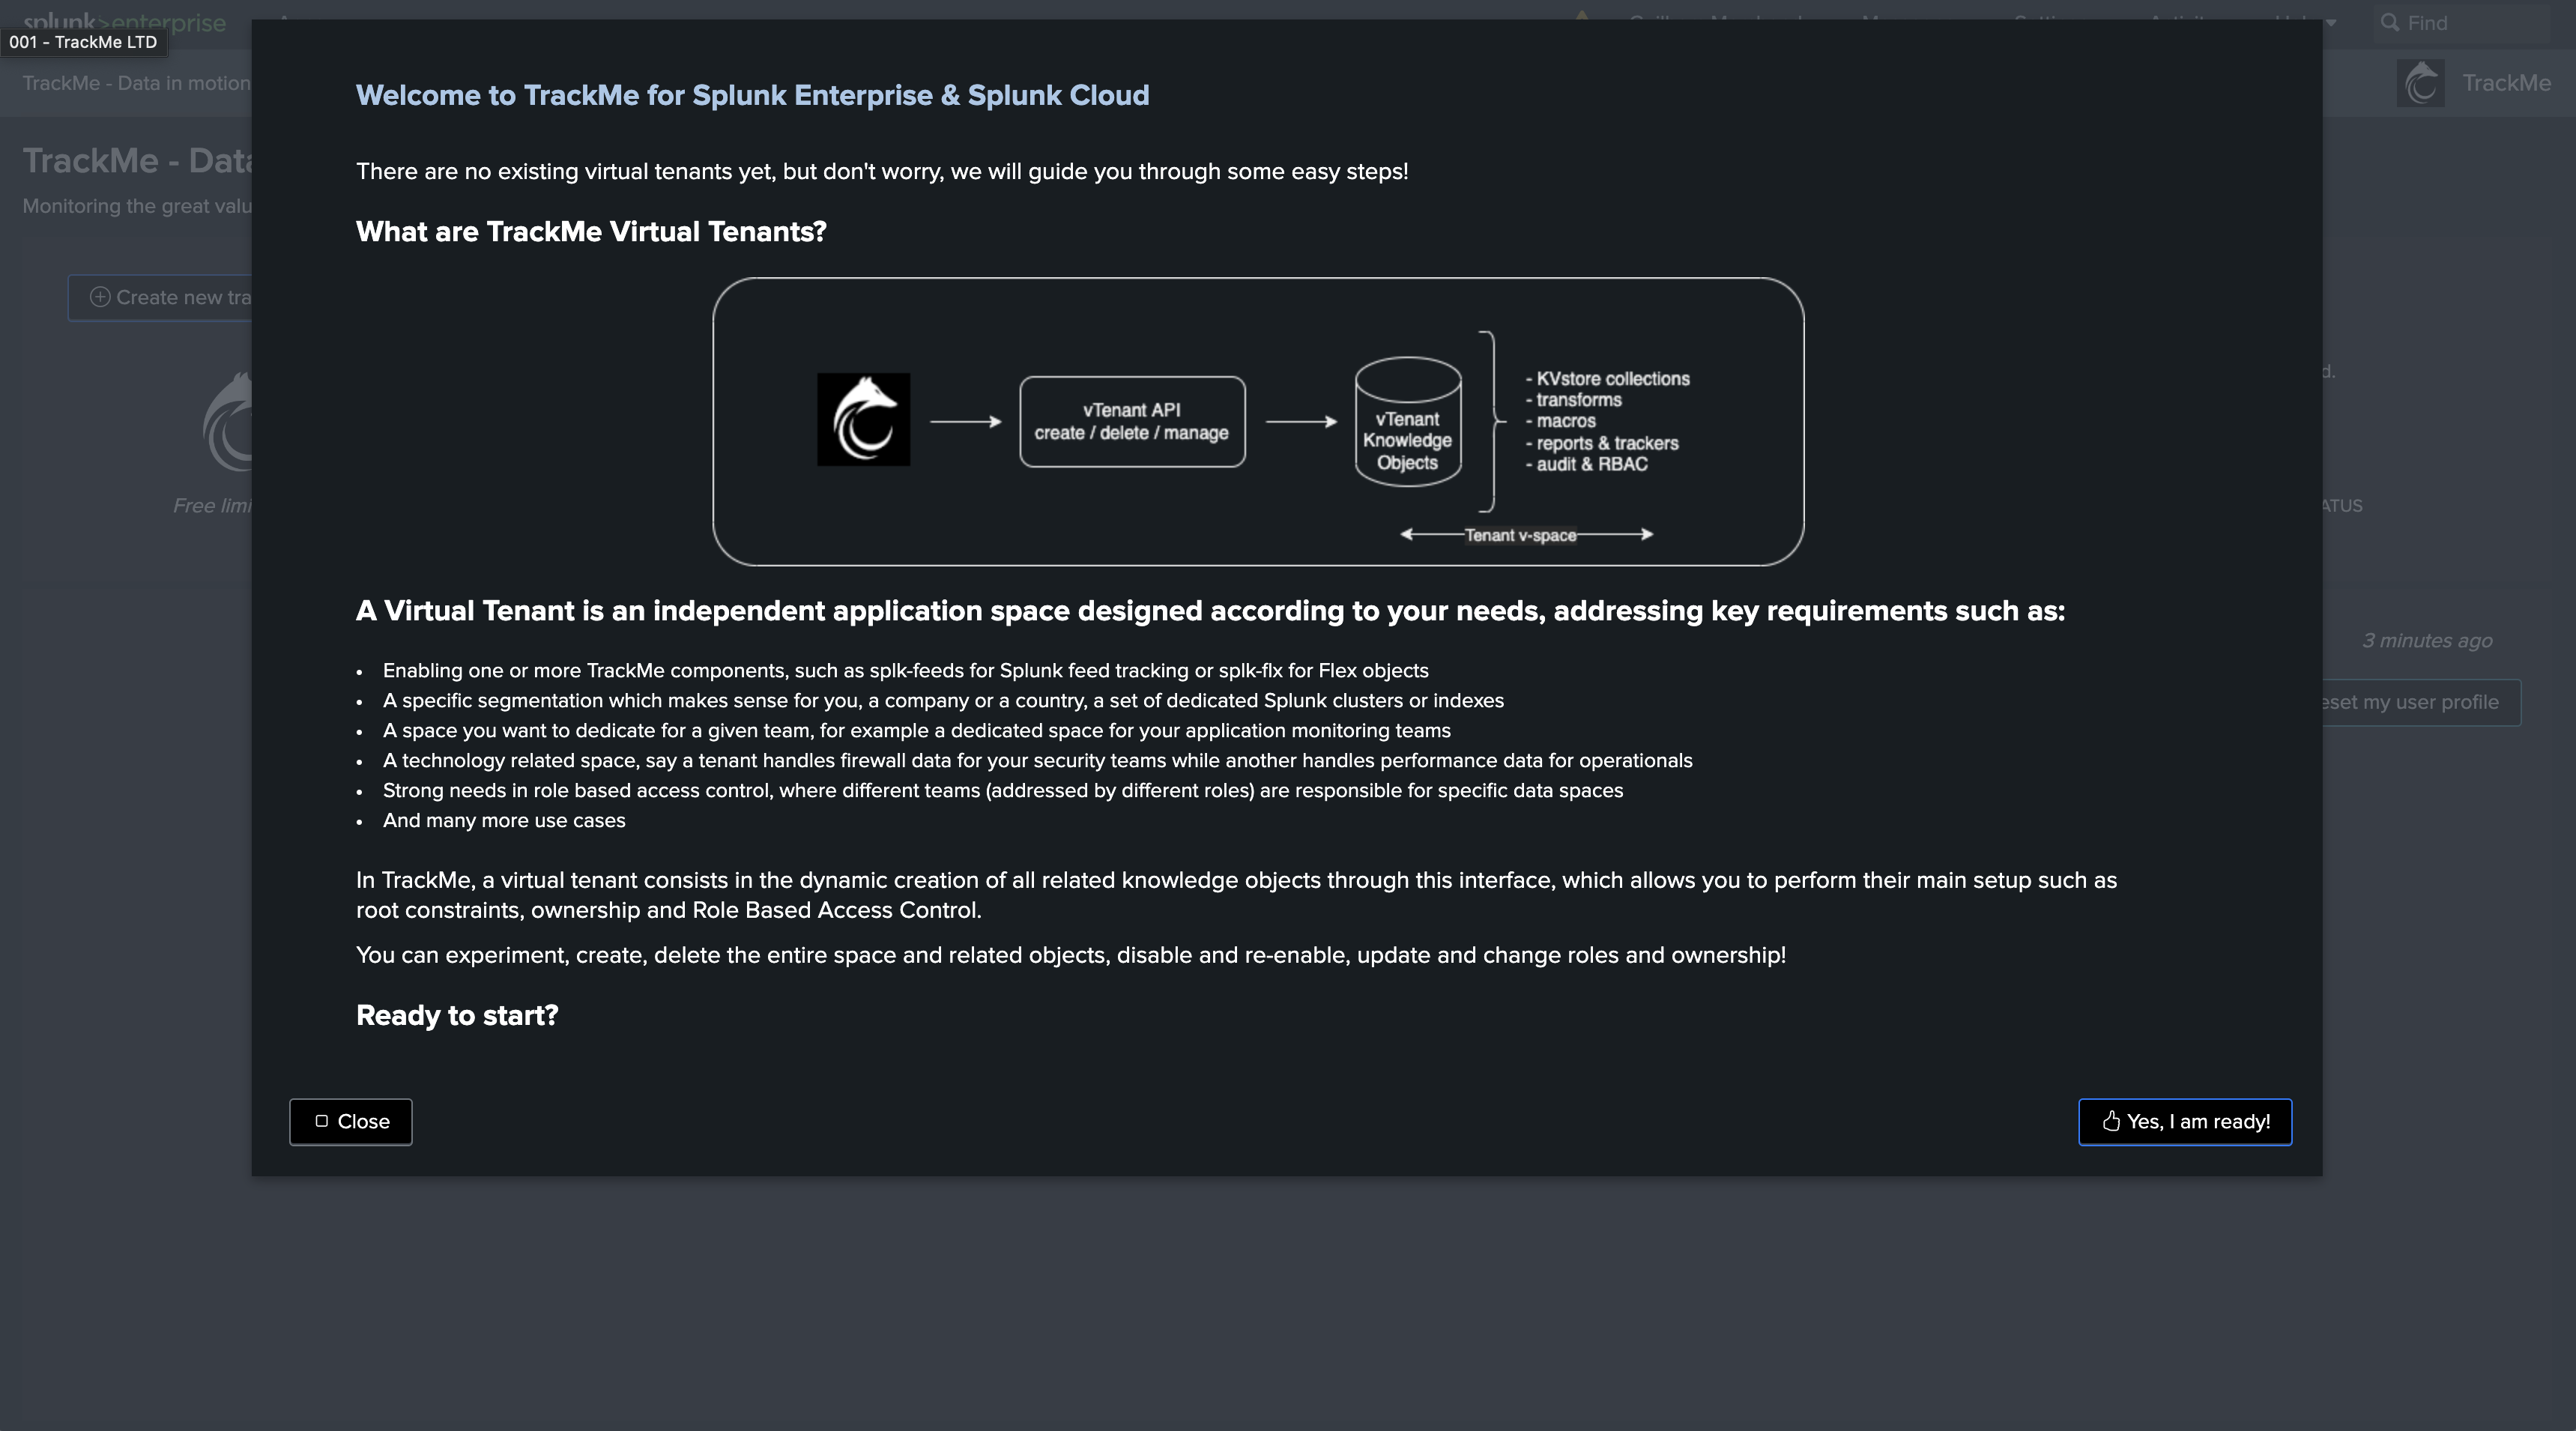
Once TrackMe is installed, the following wizard will guide you through the initial setup of a new Virtual Tenant:
About Virtual Tenants:
Virtual Tenants are an essential core feature in TrackMe, this allows TrackMe to orchestrate and manage TrackMe-related knowledge objects and configuration, and address many powerful concepts such as multi-tenancy, data isolation, and more.
You can also understand this concept as virtual instances of TrackMe within TrackMe, which you can create, destroy, and restart as needed.
Virtual Tenants enable TrackMe components, which are designed to address use cases, such as splk-dsm which is the essential component for feed tracking.
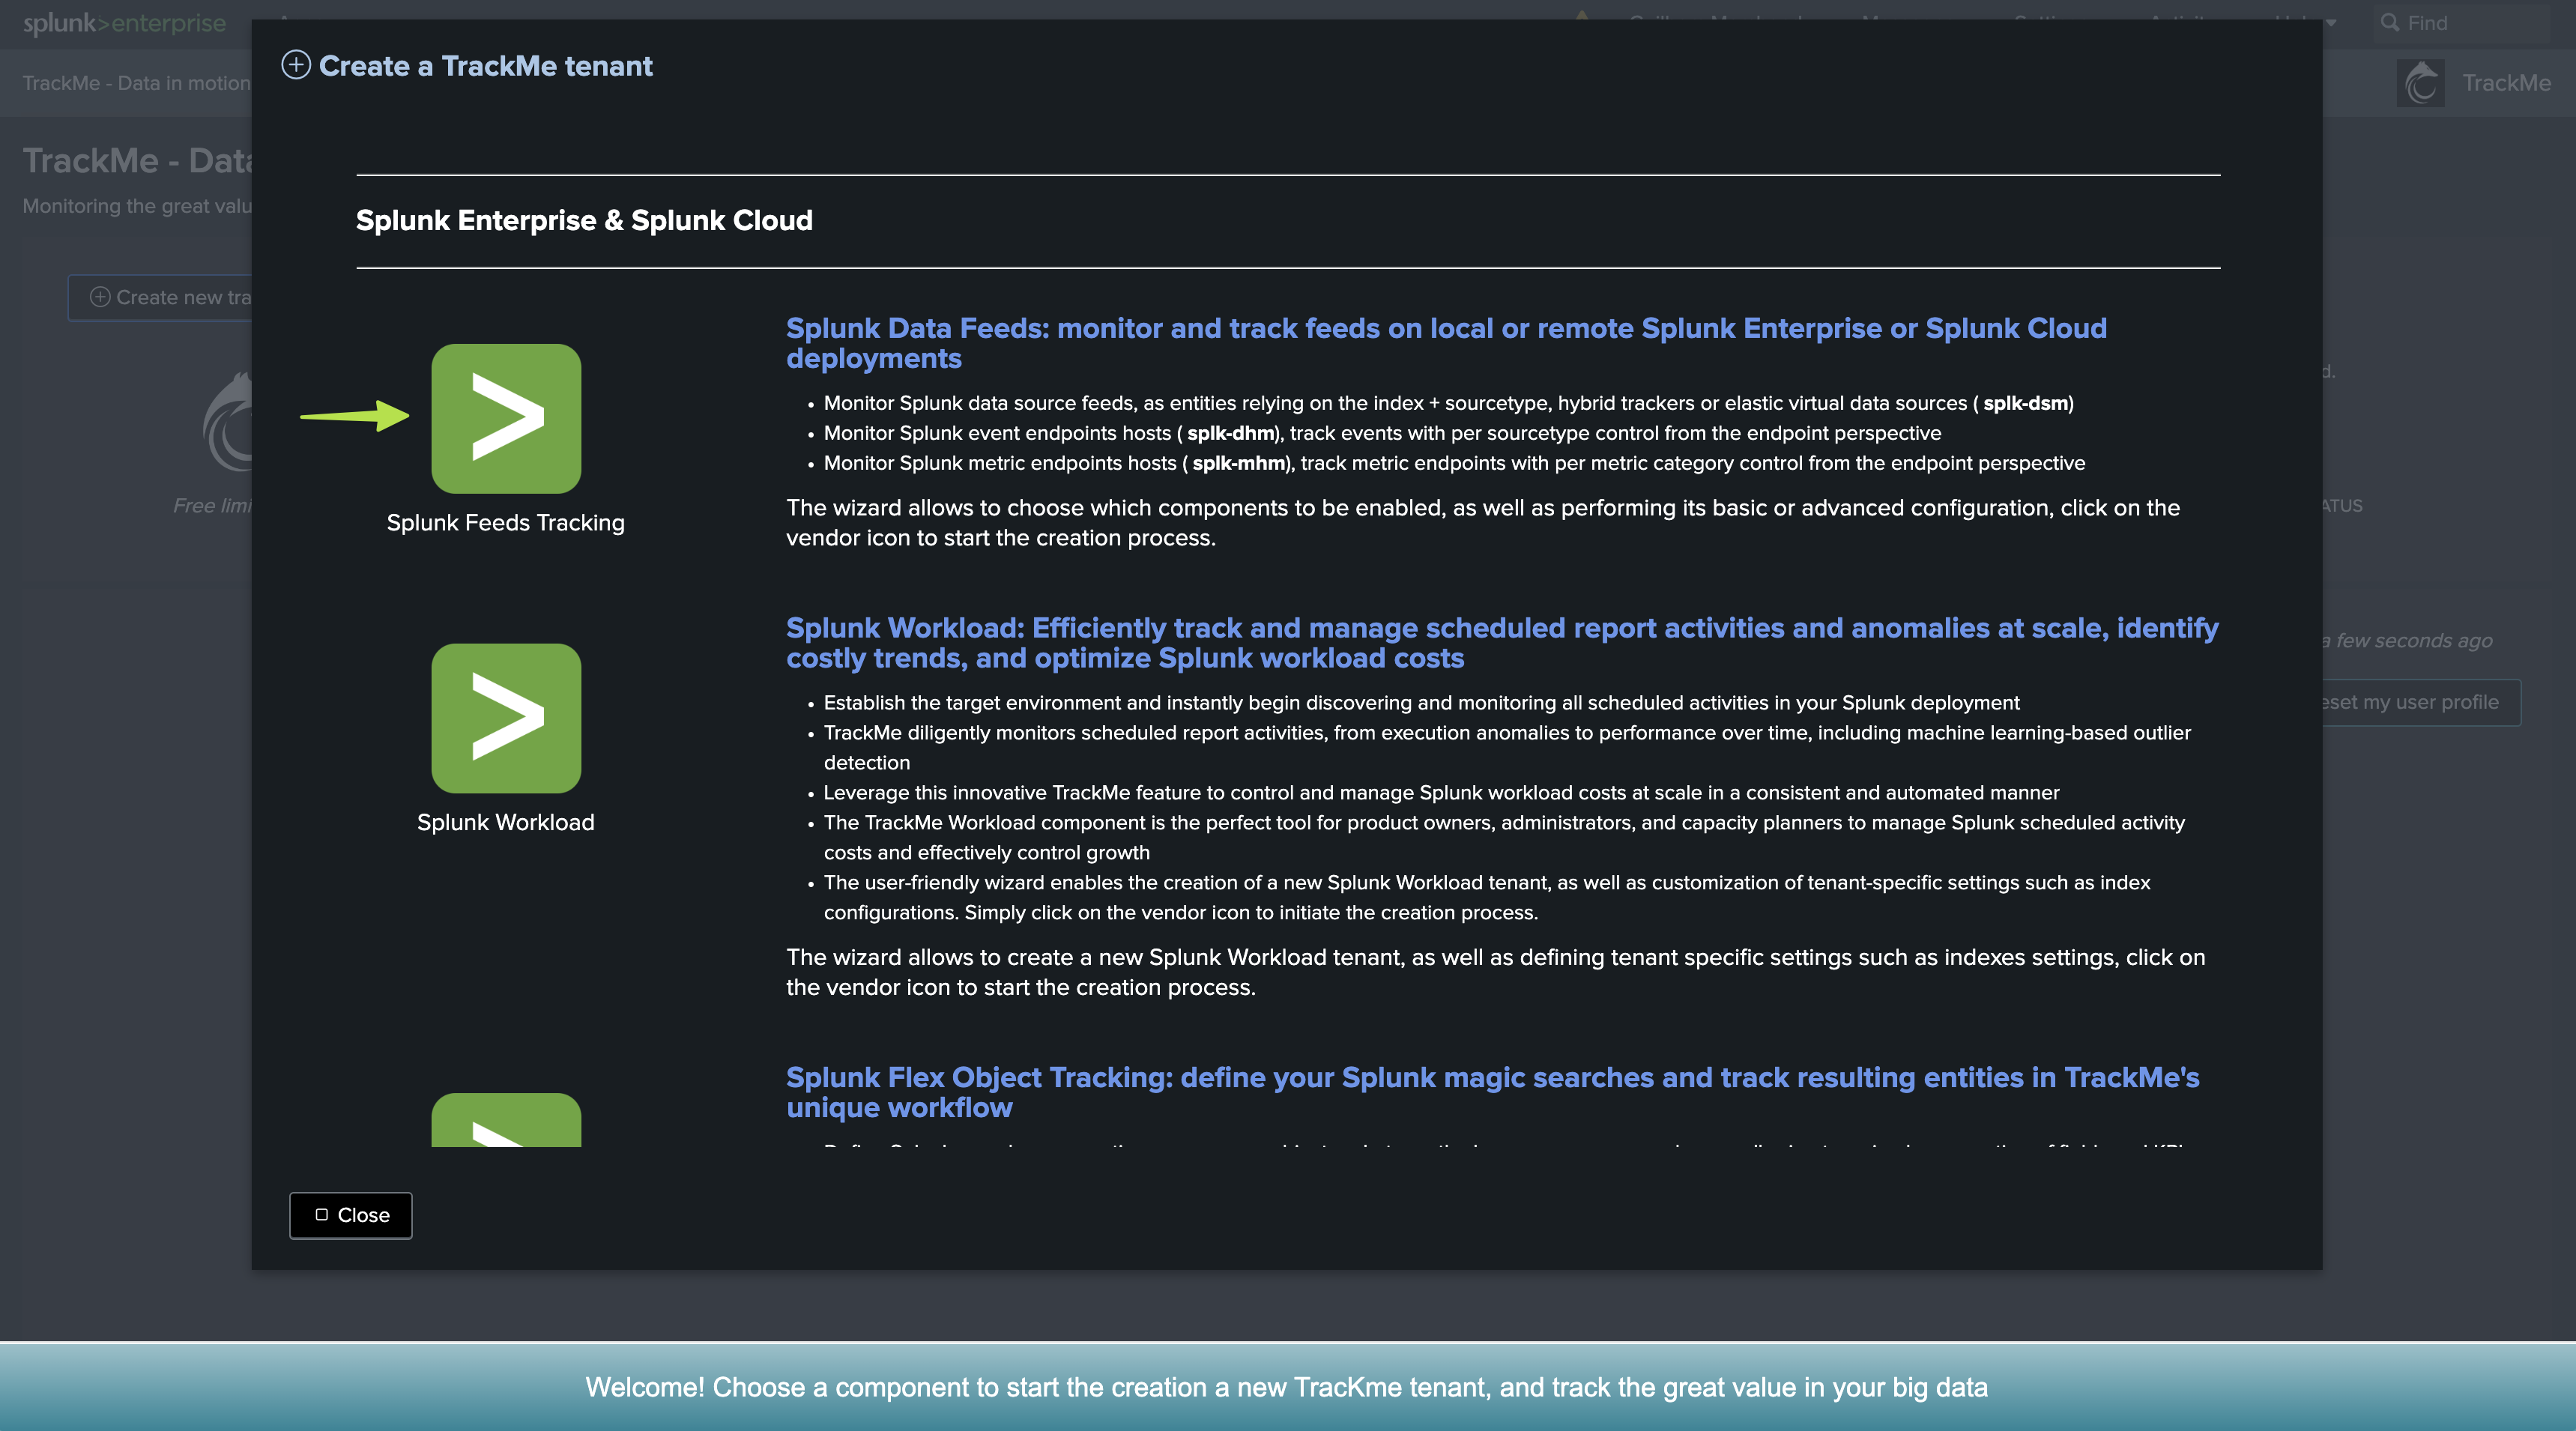
Step 1: Let’s create a Virtual Tenant for data sources tracking
We will now create a Virtual Tenant to start tracking data sources:
component:
Splunk Feeds Tracking
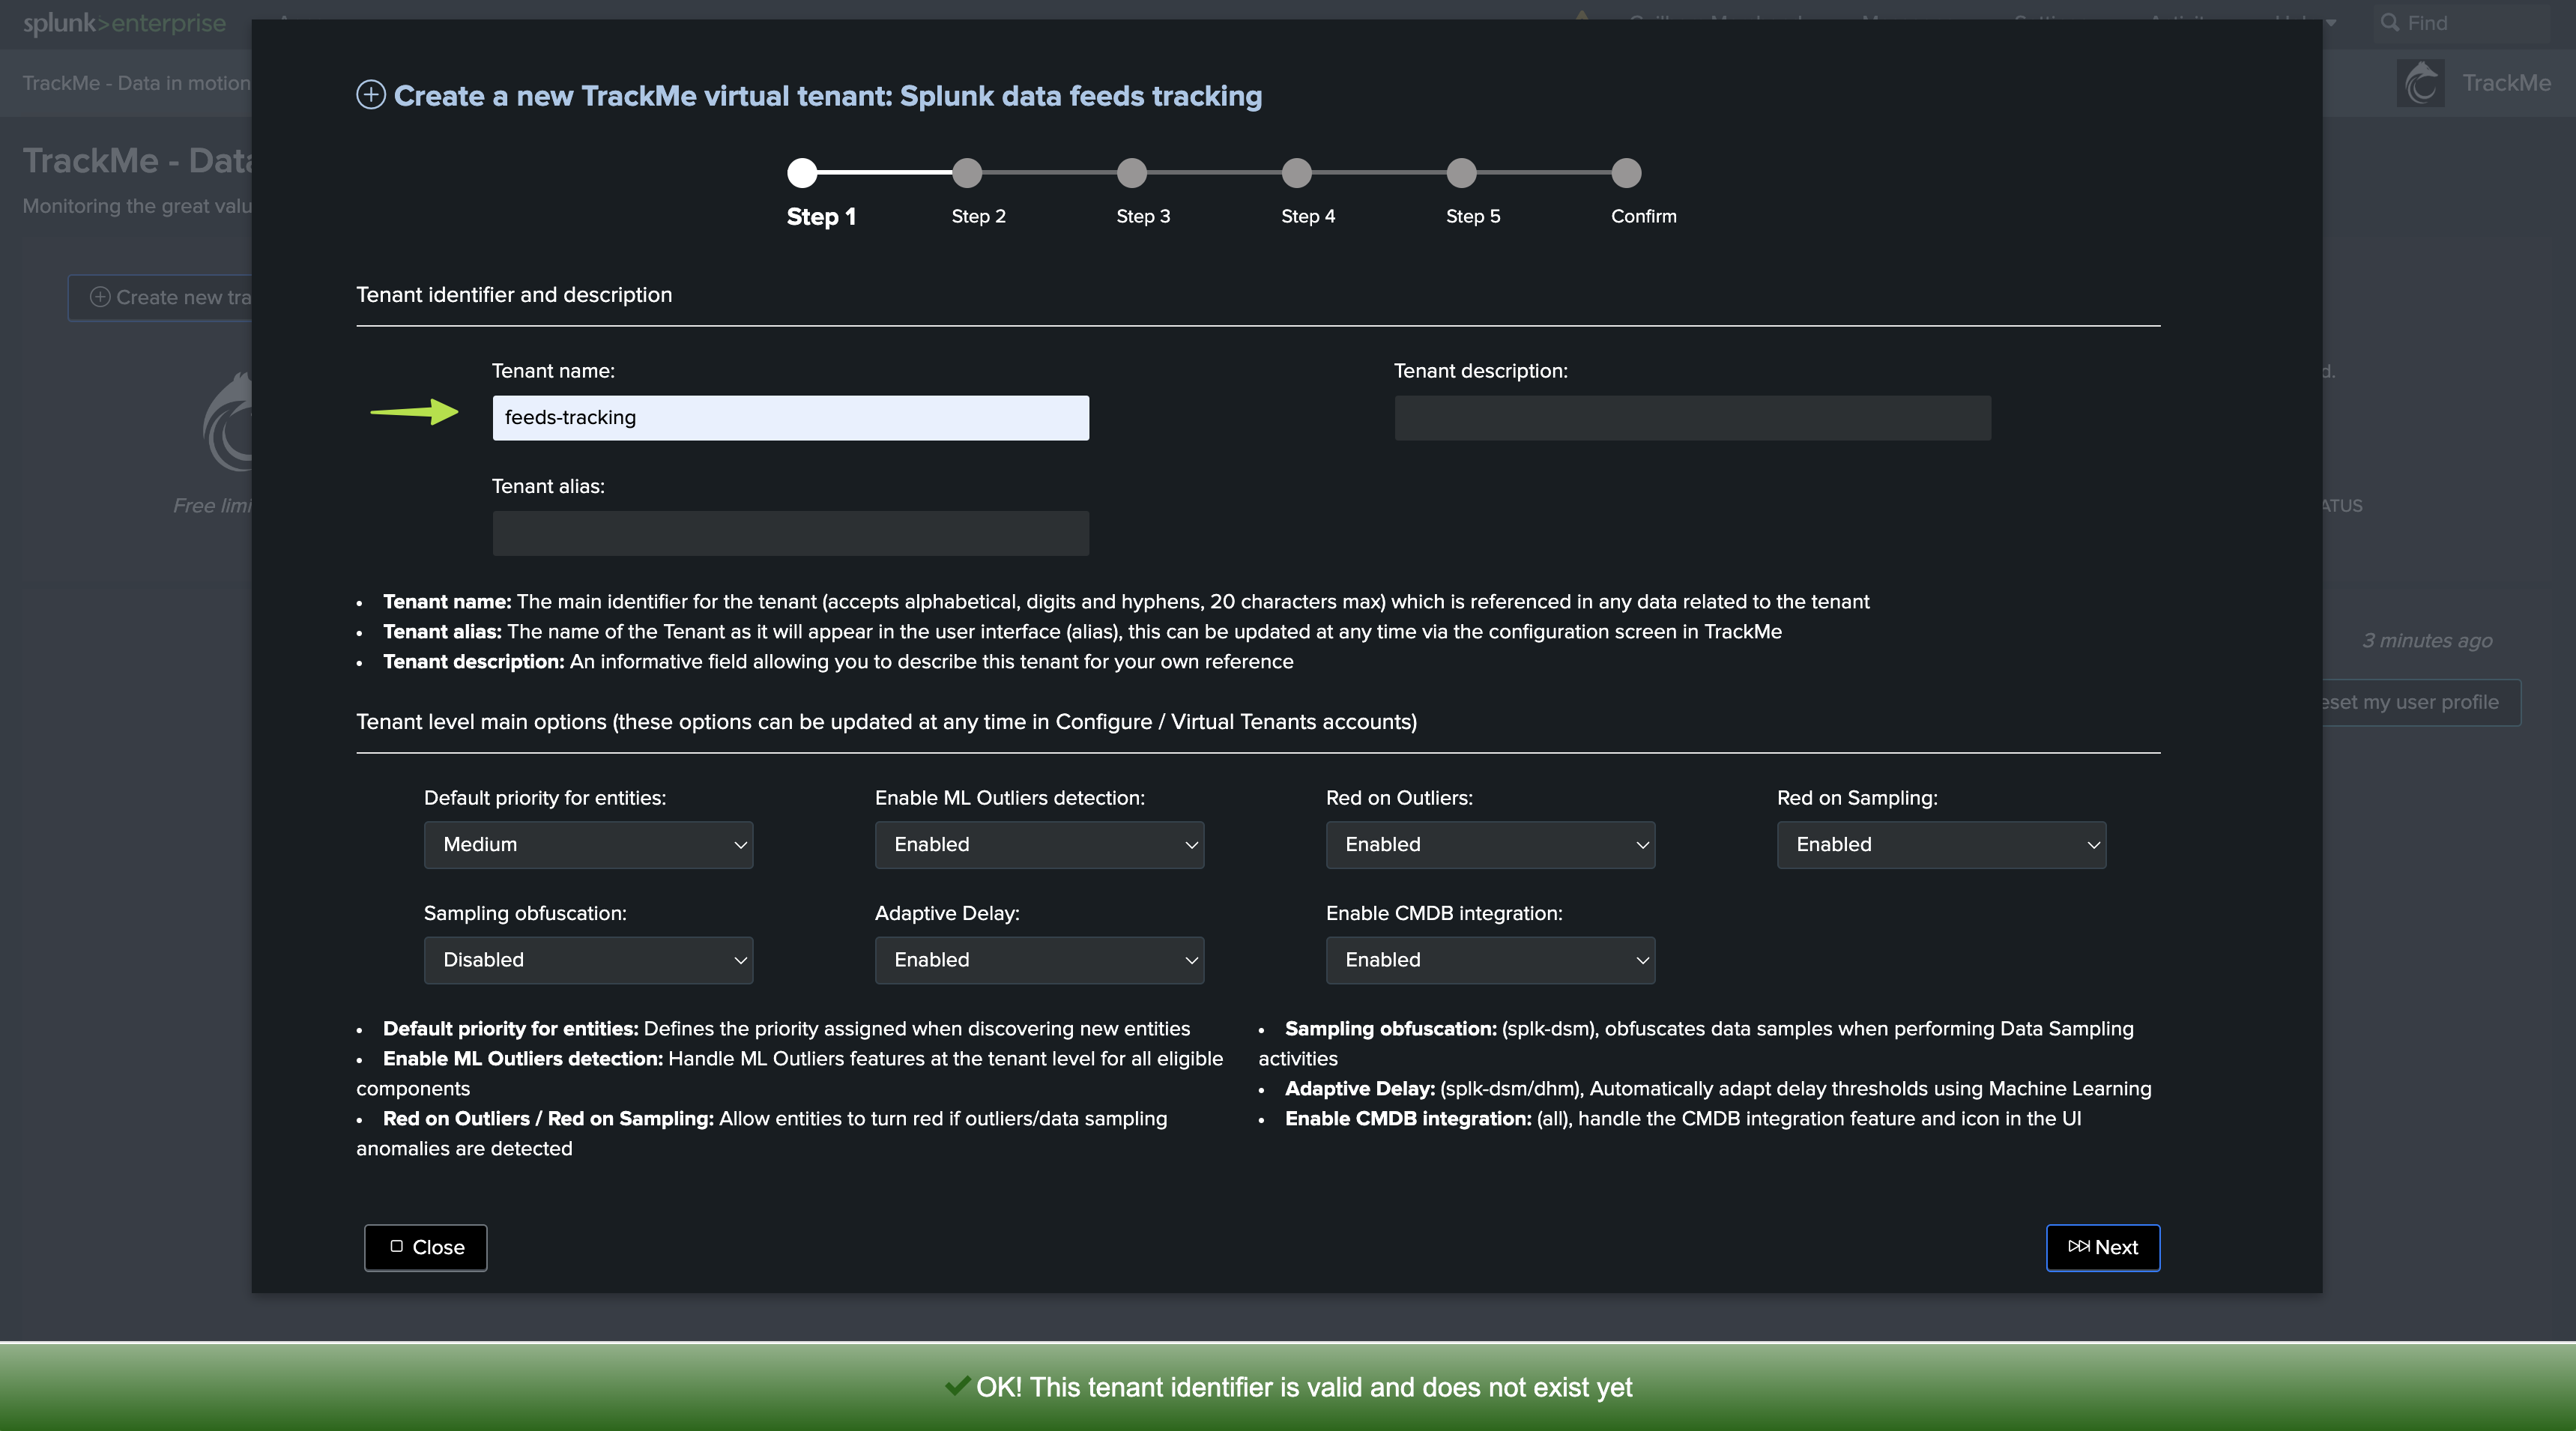
tenant name:
secopstenant alias: This is optional and can be updated at any time. If set, the alias replaces the tenant identifier in the Virtual Tenants UI.
tenant description: This is optional and can be updated at any time. If set, the description is displayed in the Virtual Tenants UI.
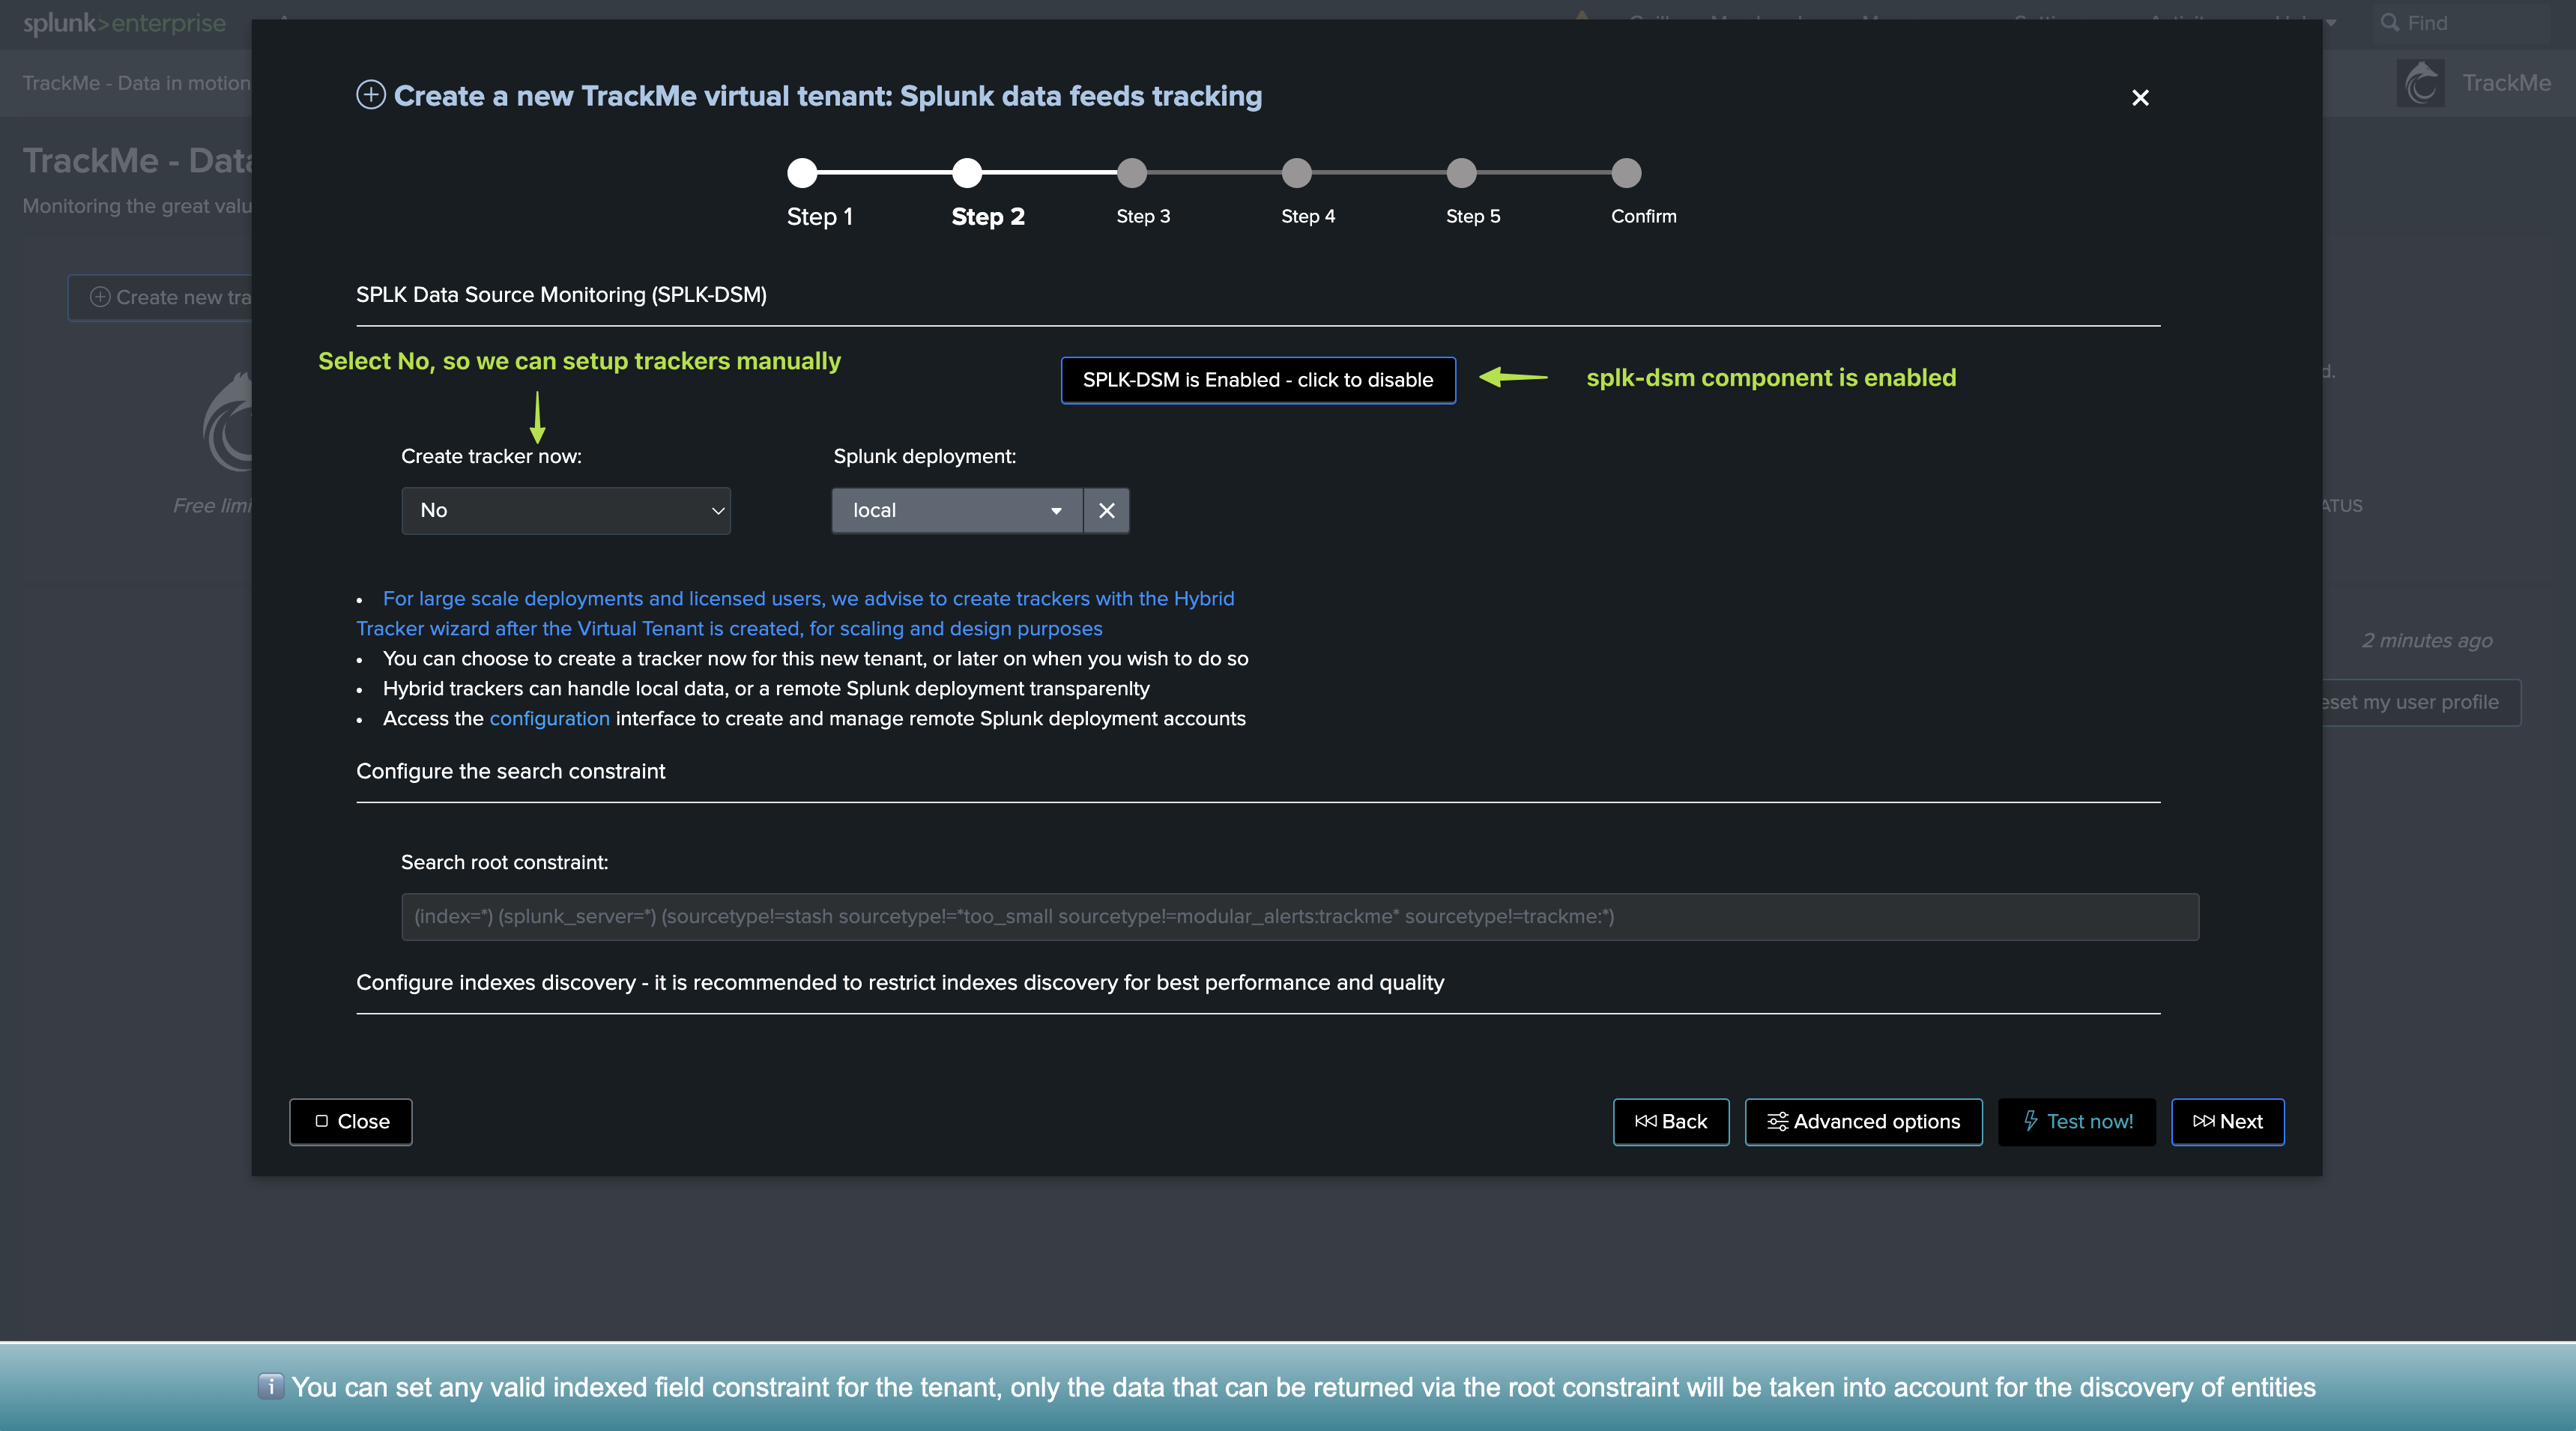
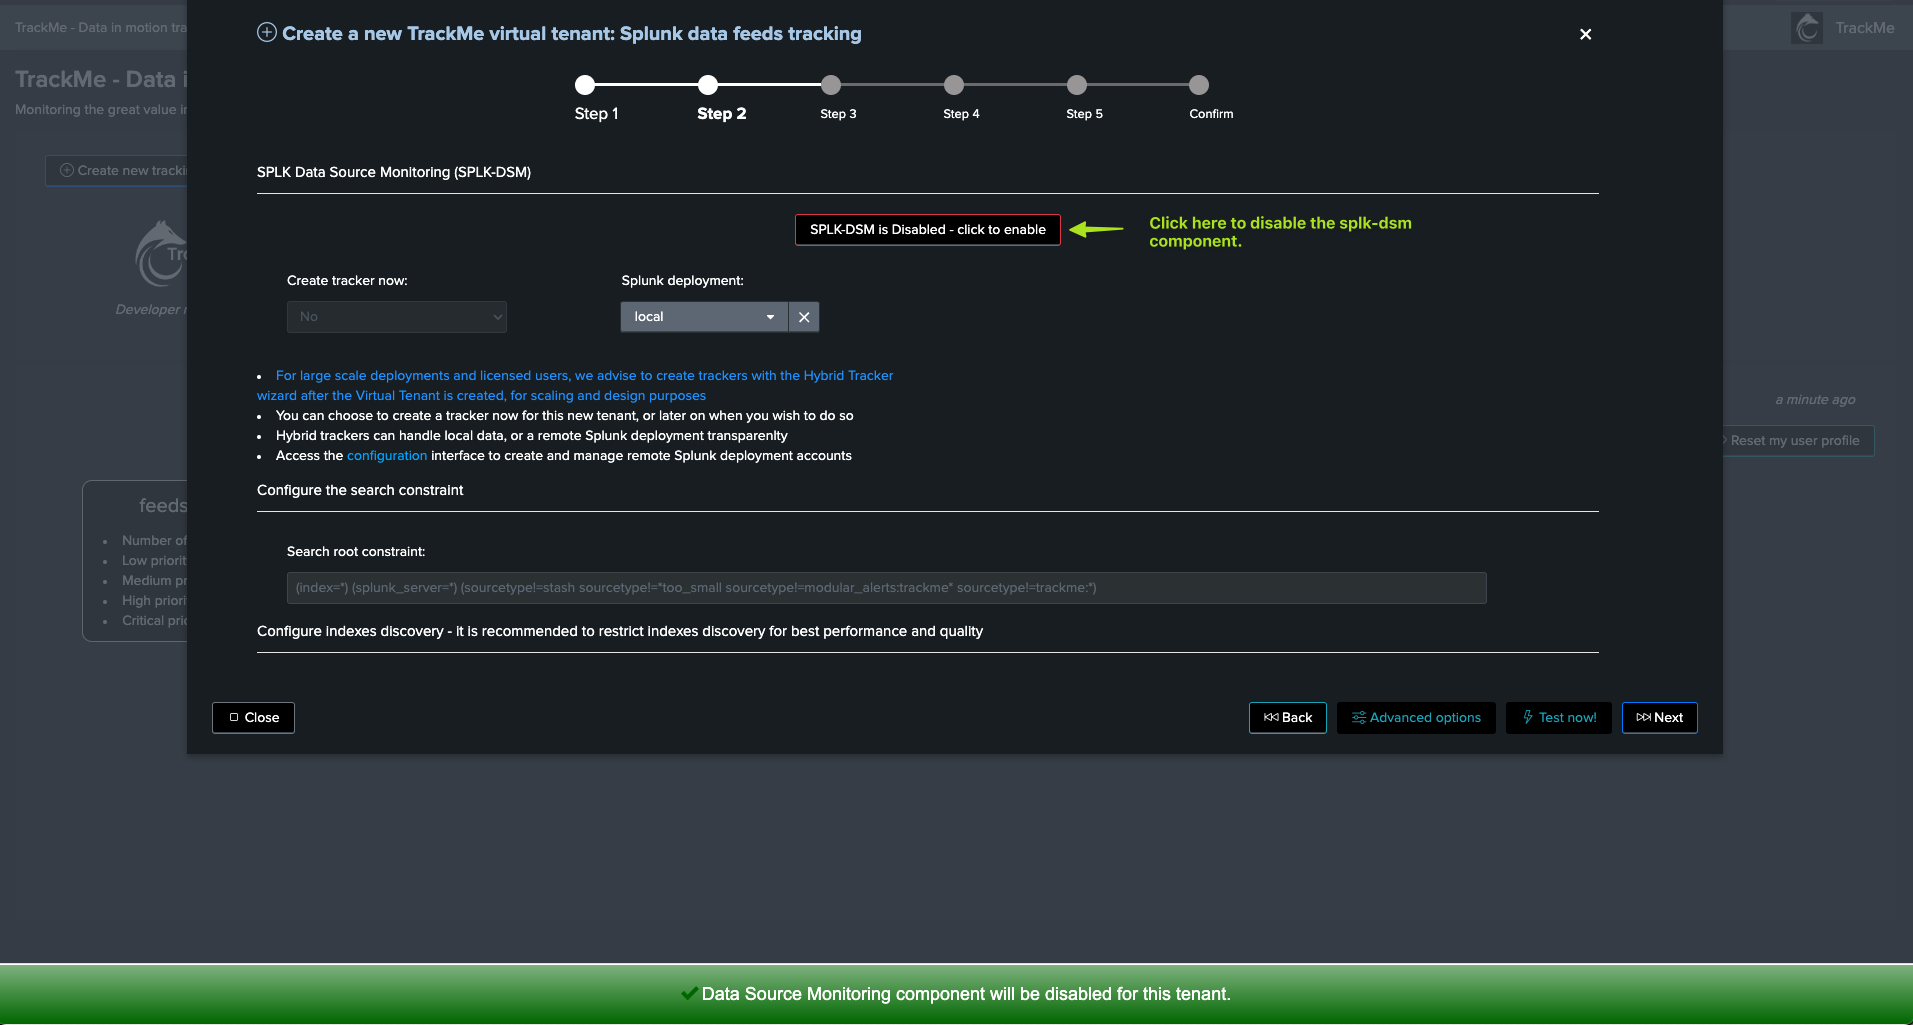
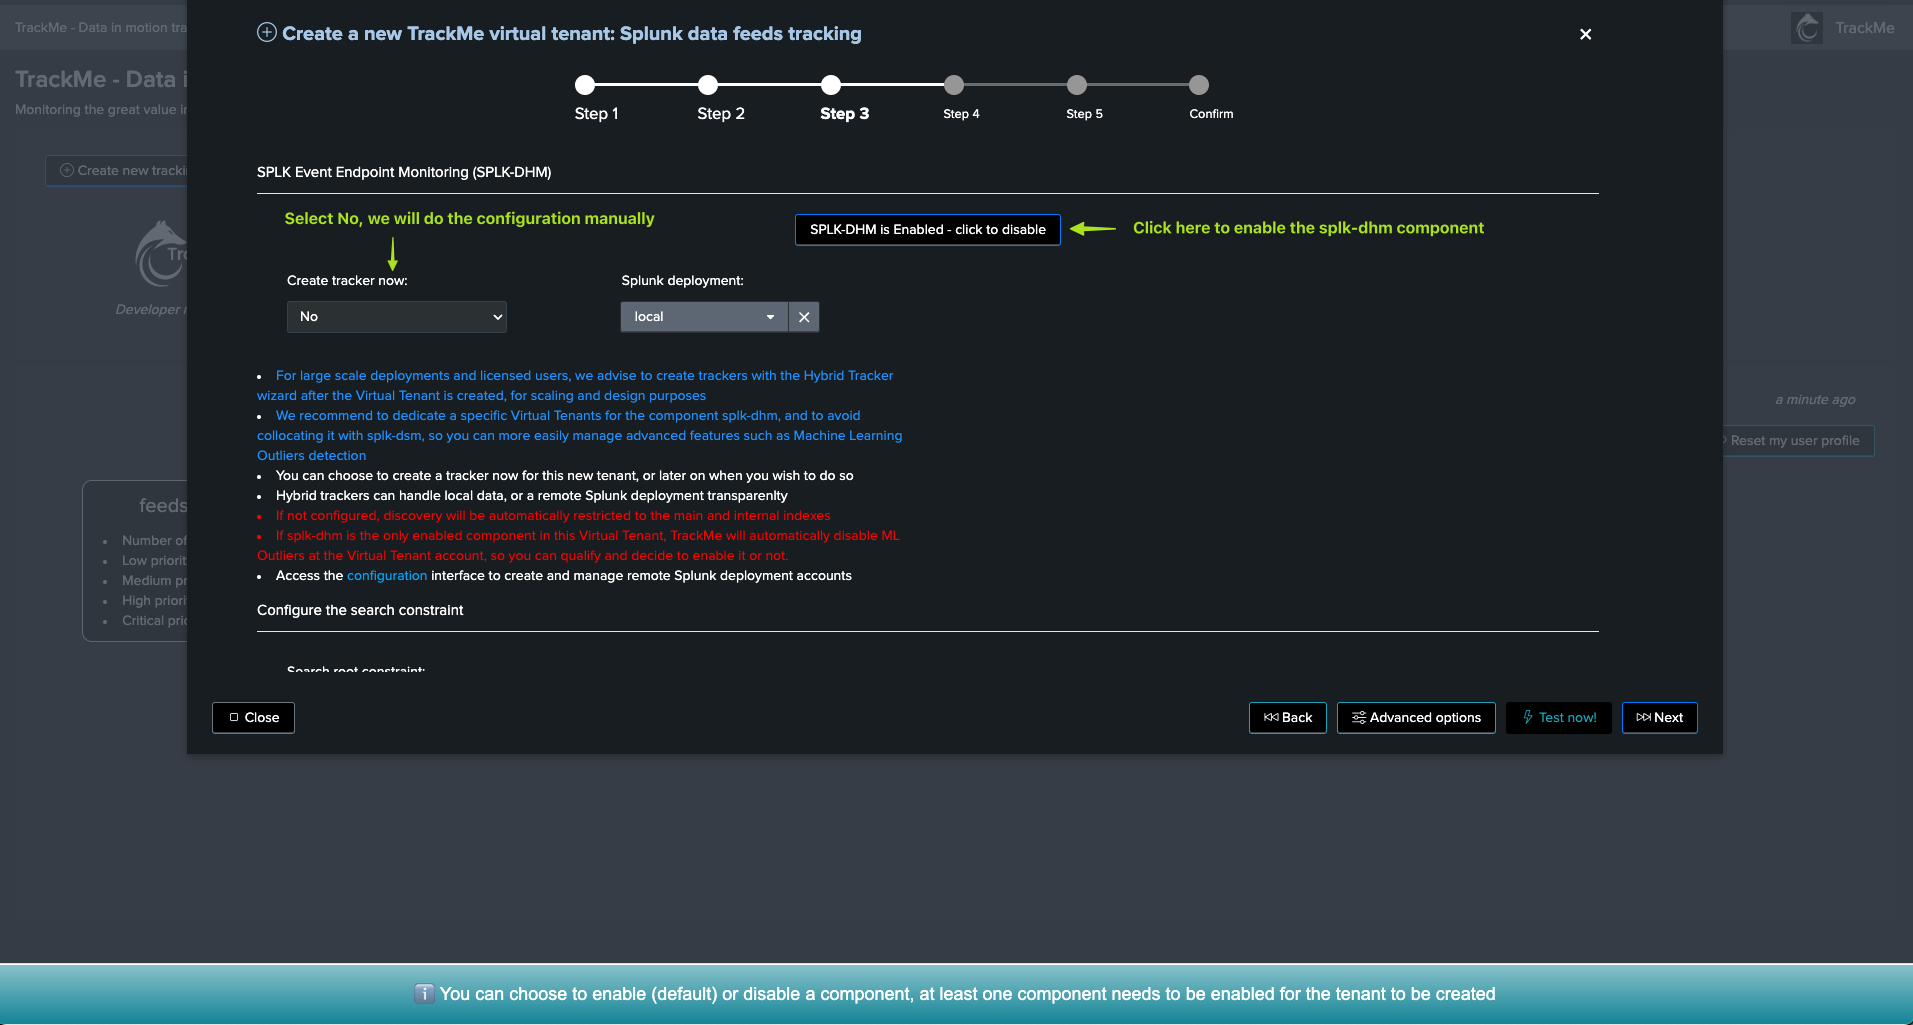
Creating tracker during the Virtual Tenant creation, or later on via the Hybrid Tracker management UI
If your environment is small enough (less than 2/3 TB per day of ingestion), you can leave the default configuration and create the tracker during this stage (so leave “Yes” for Create Hybrid tracker).
For larger environments, and up to any super large environments, we recommend disabling the creation of the Virtual Tenant and creating the tracker later on manually via the Hybrid Tracker management UI.
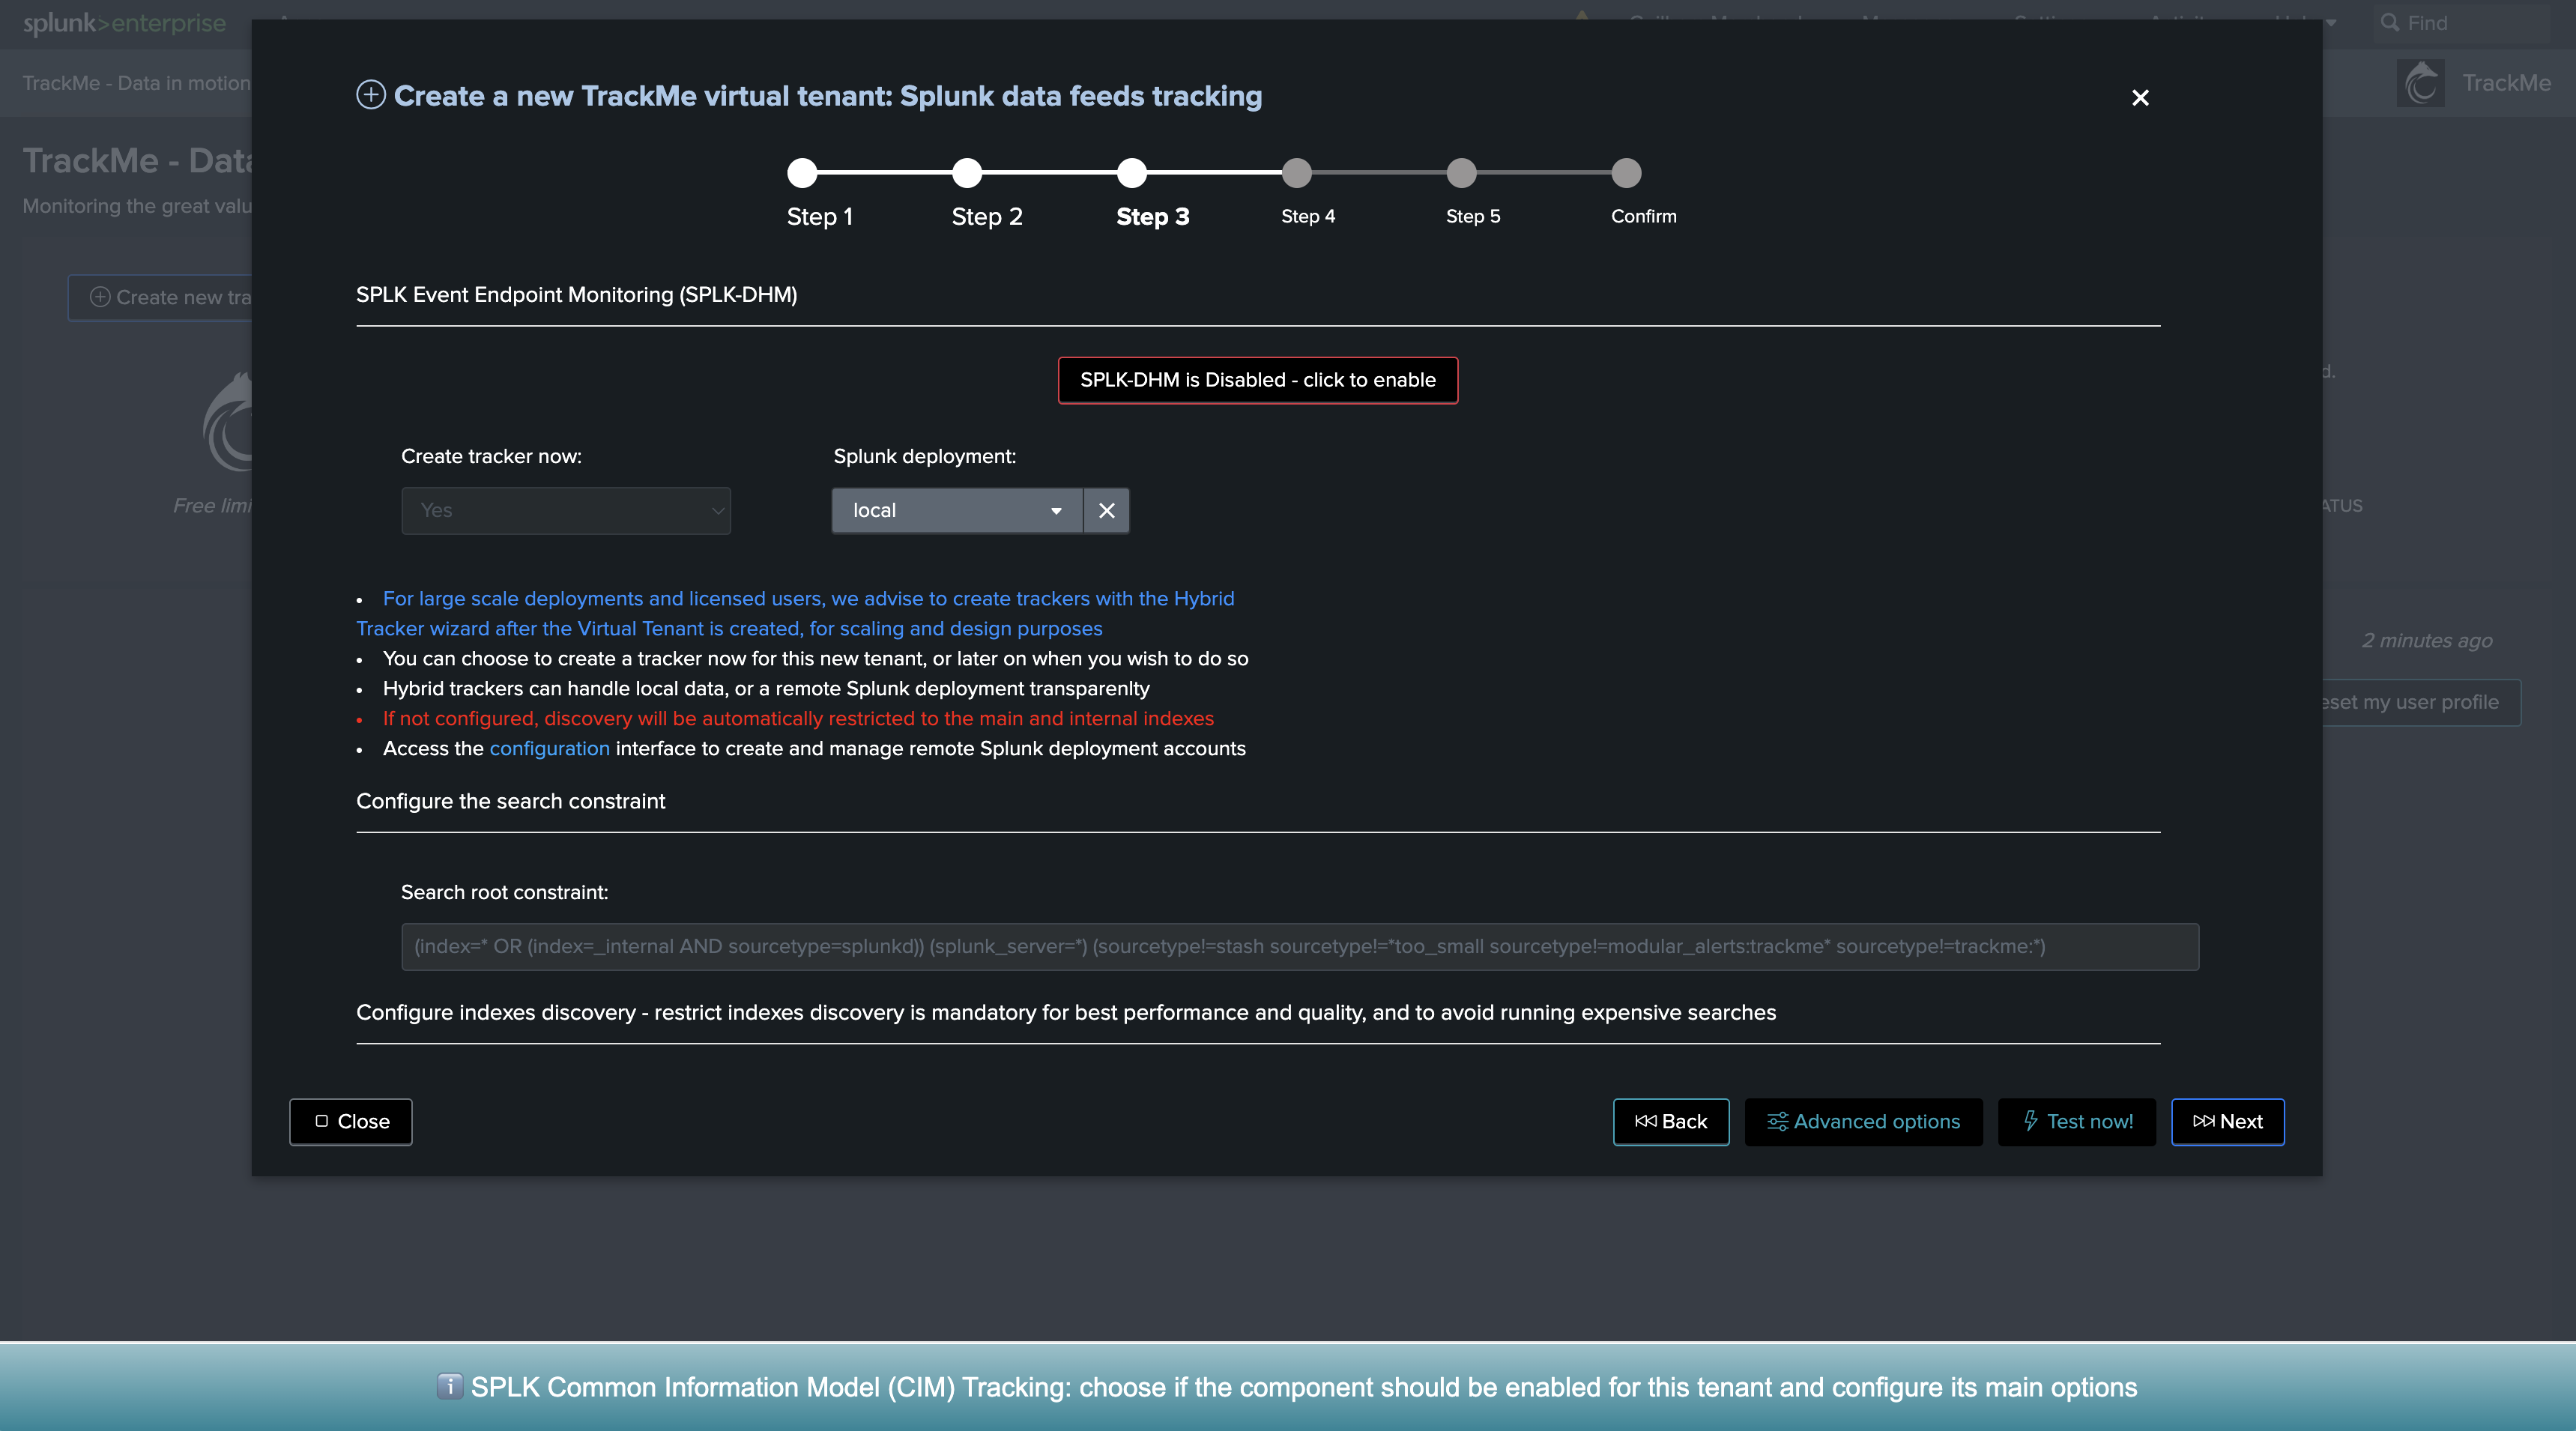
The final configuration screen and its top section allows defining TrackMe indexes, in most cases, the default indexes are fine, and we can leave the default configuration.
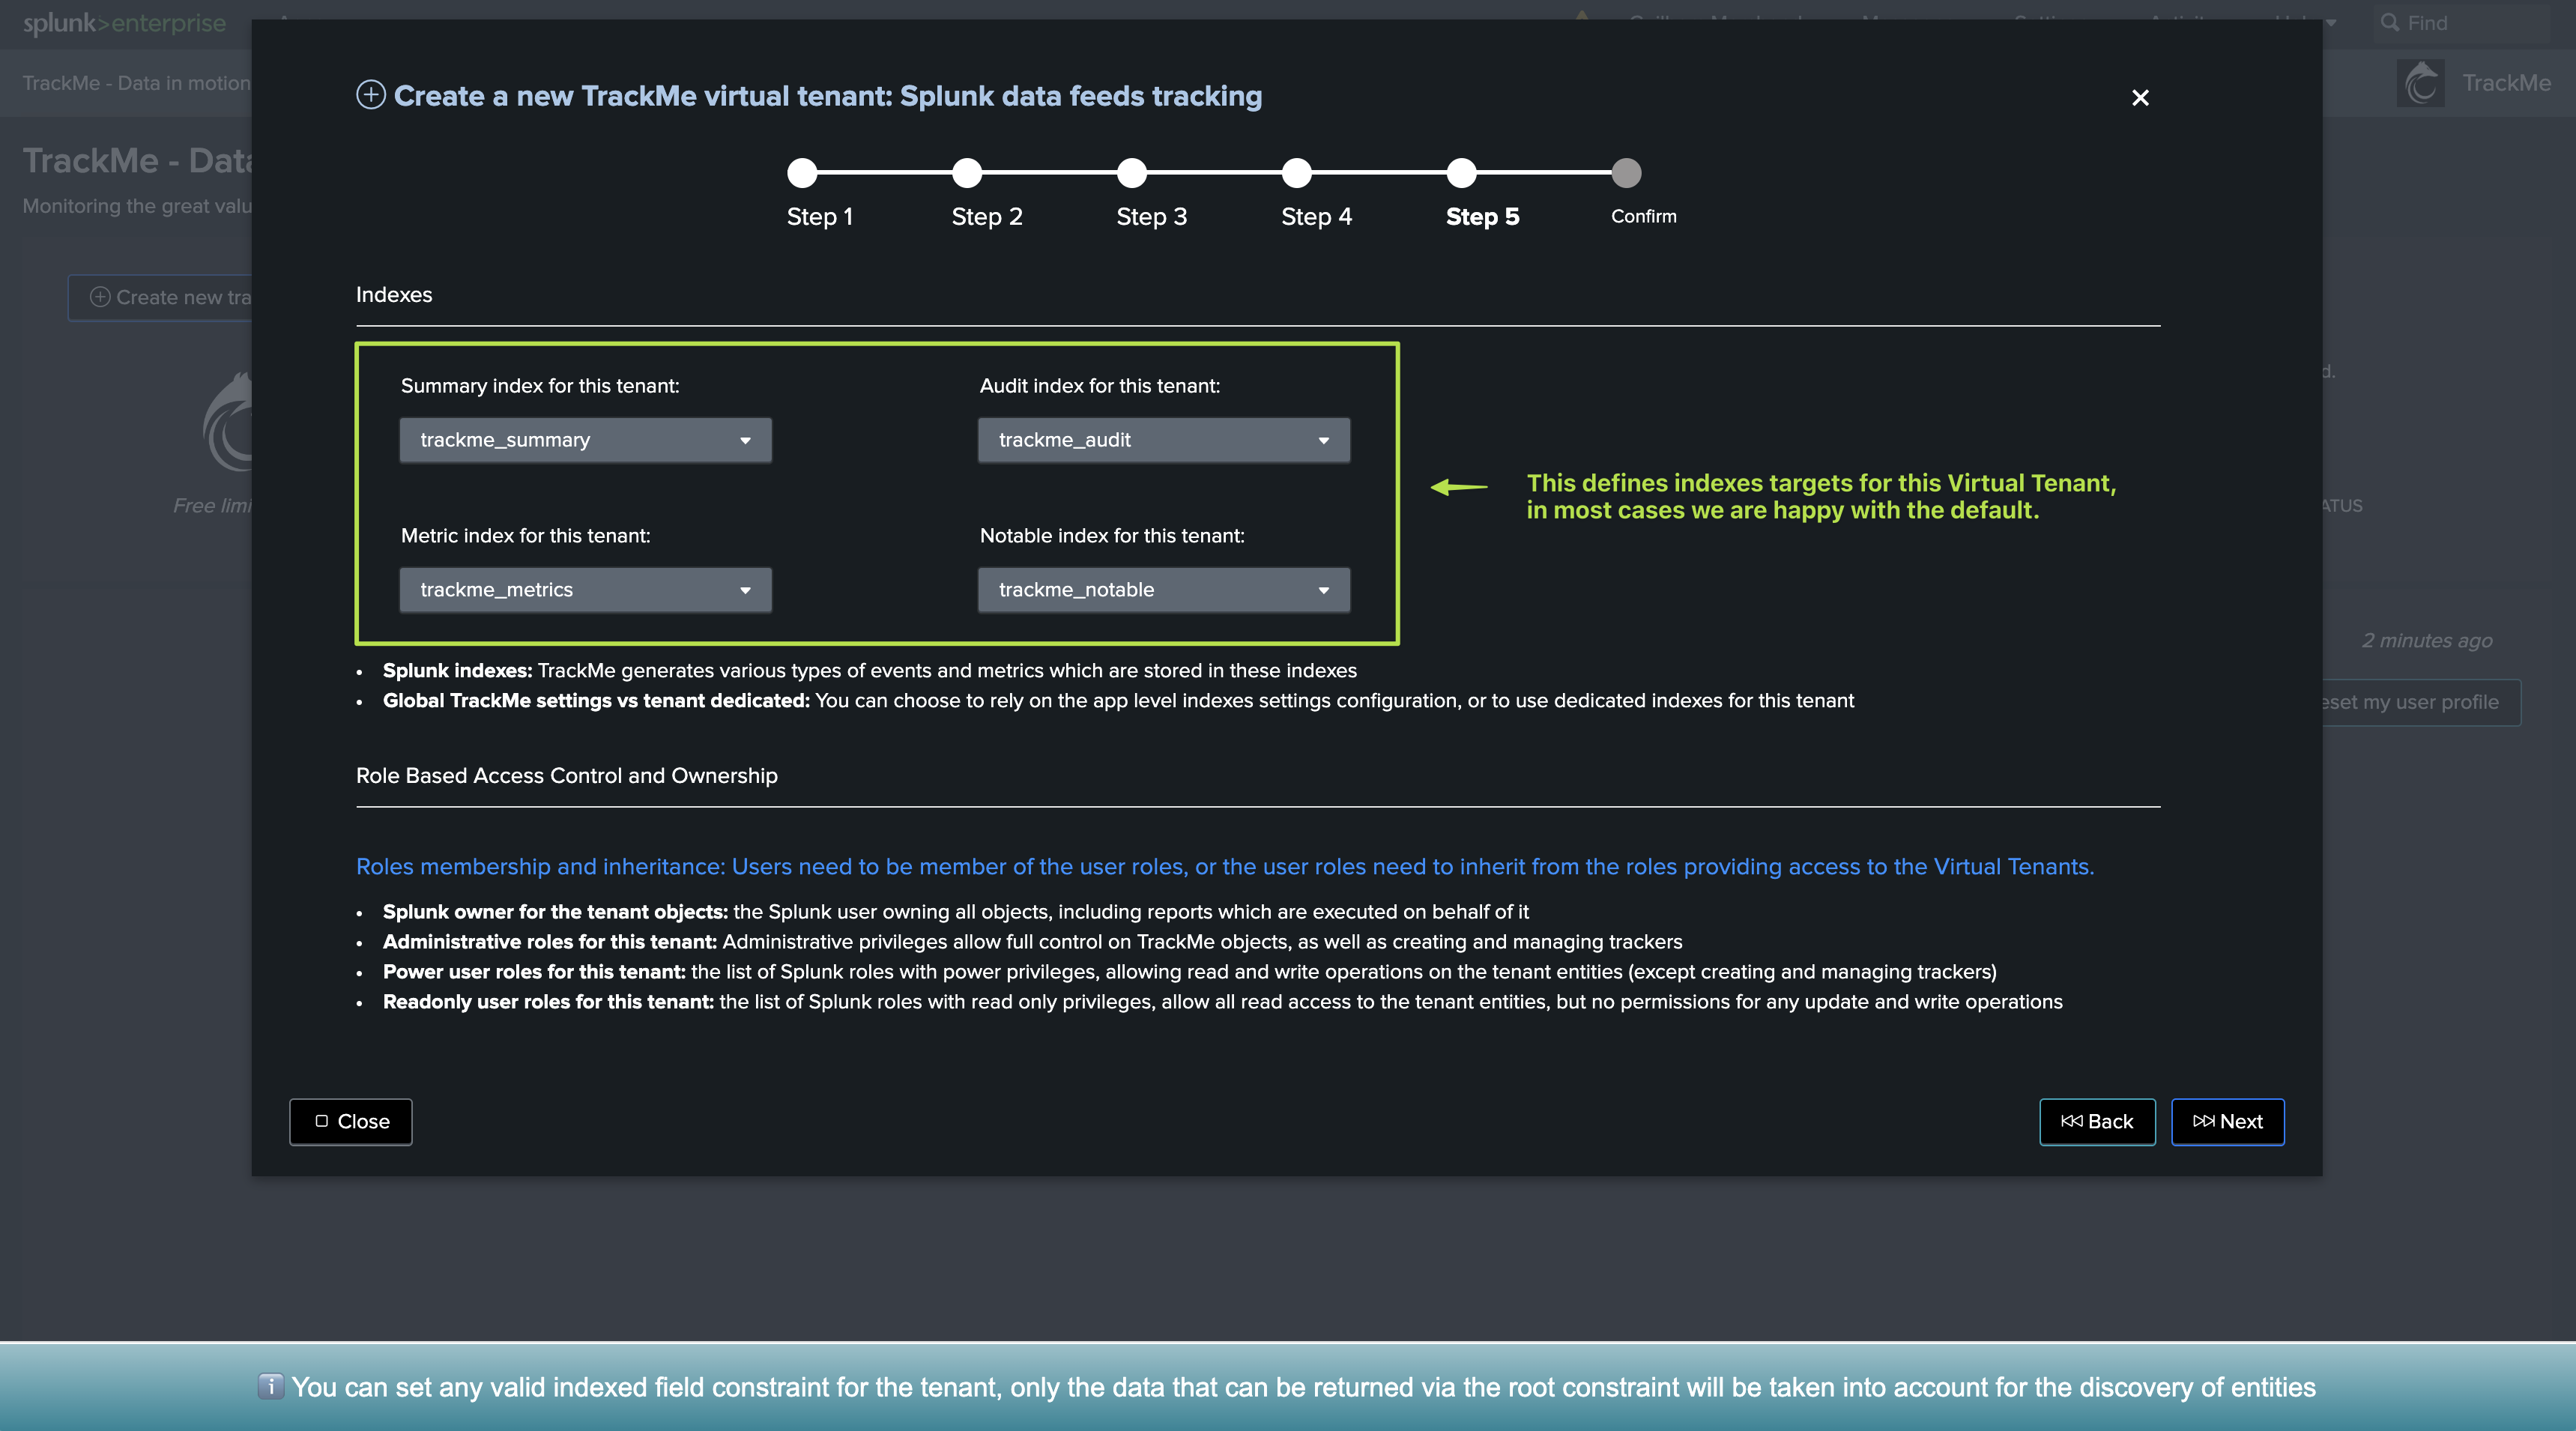
The second part of that same screen allows defining ownership and permissions, all of these can be easily modified via TrackMe at any point in time, in short:
Owner:
Default owner is nobody, which refers to the splunk-system-user, this means that TrackMe will automatically reassign the ownership of the knowledge objects to the splunk-system-user.
This is fine for most cases and is a common practice in Splunk.
On large or strict environments, creating a service account can be considered as good practice and notably allows tracking TrackMe’s related activity easily, leveraging Splunk Workload Management, see: :ref: trackme_admin_config for more information.
Permissions:
The default permissions leverage a 3-dimensional model, from admin to power and finally read-only users.
As a start, you generally can leave everything as default
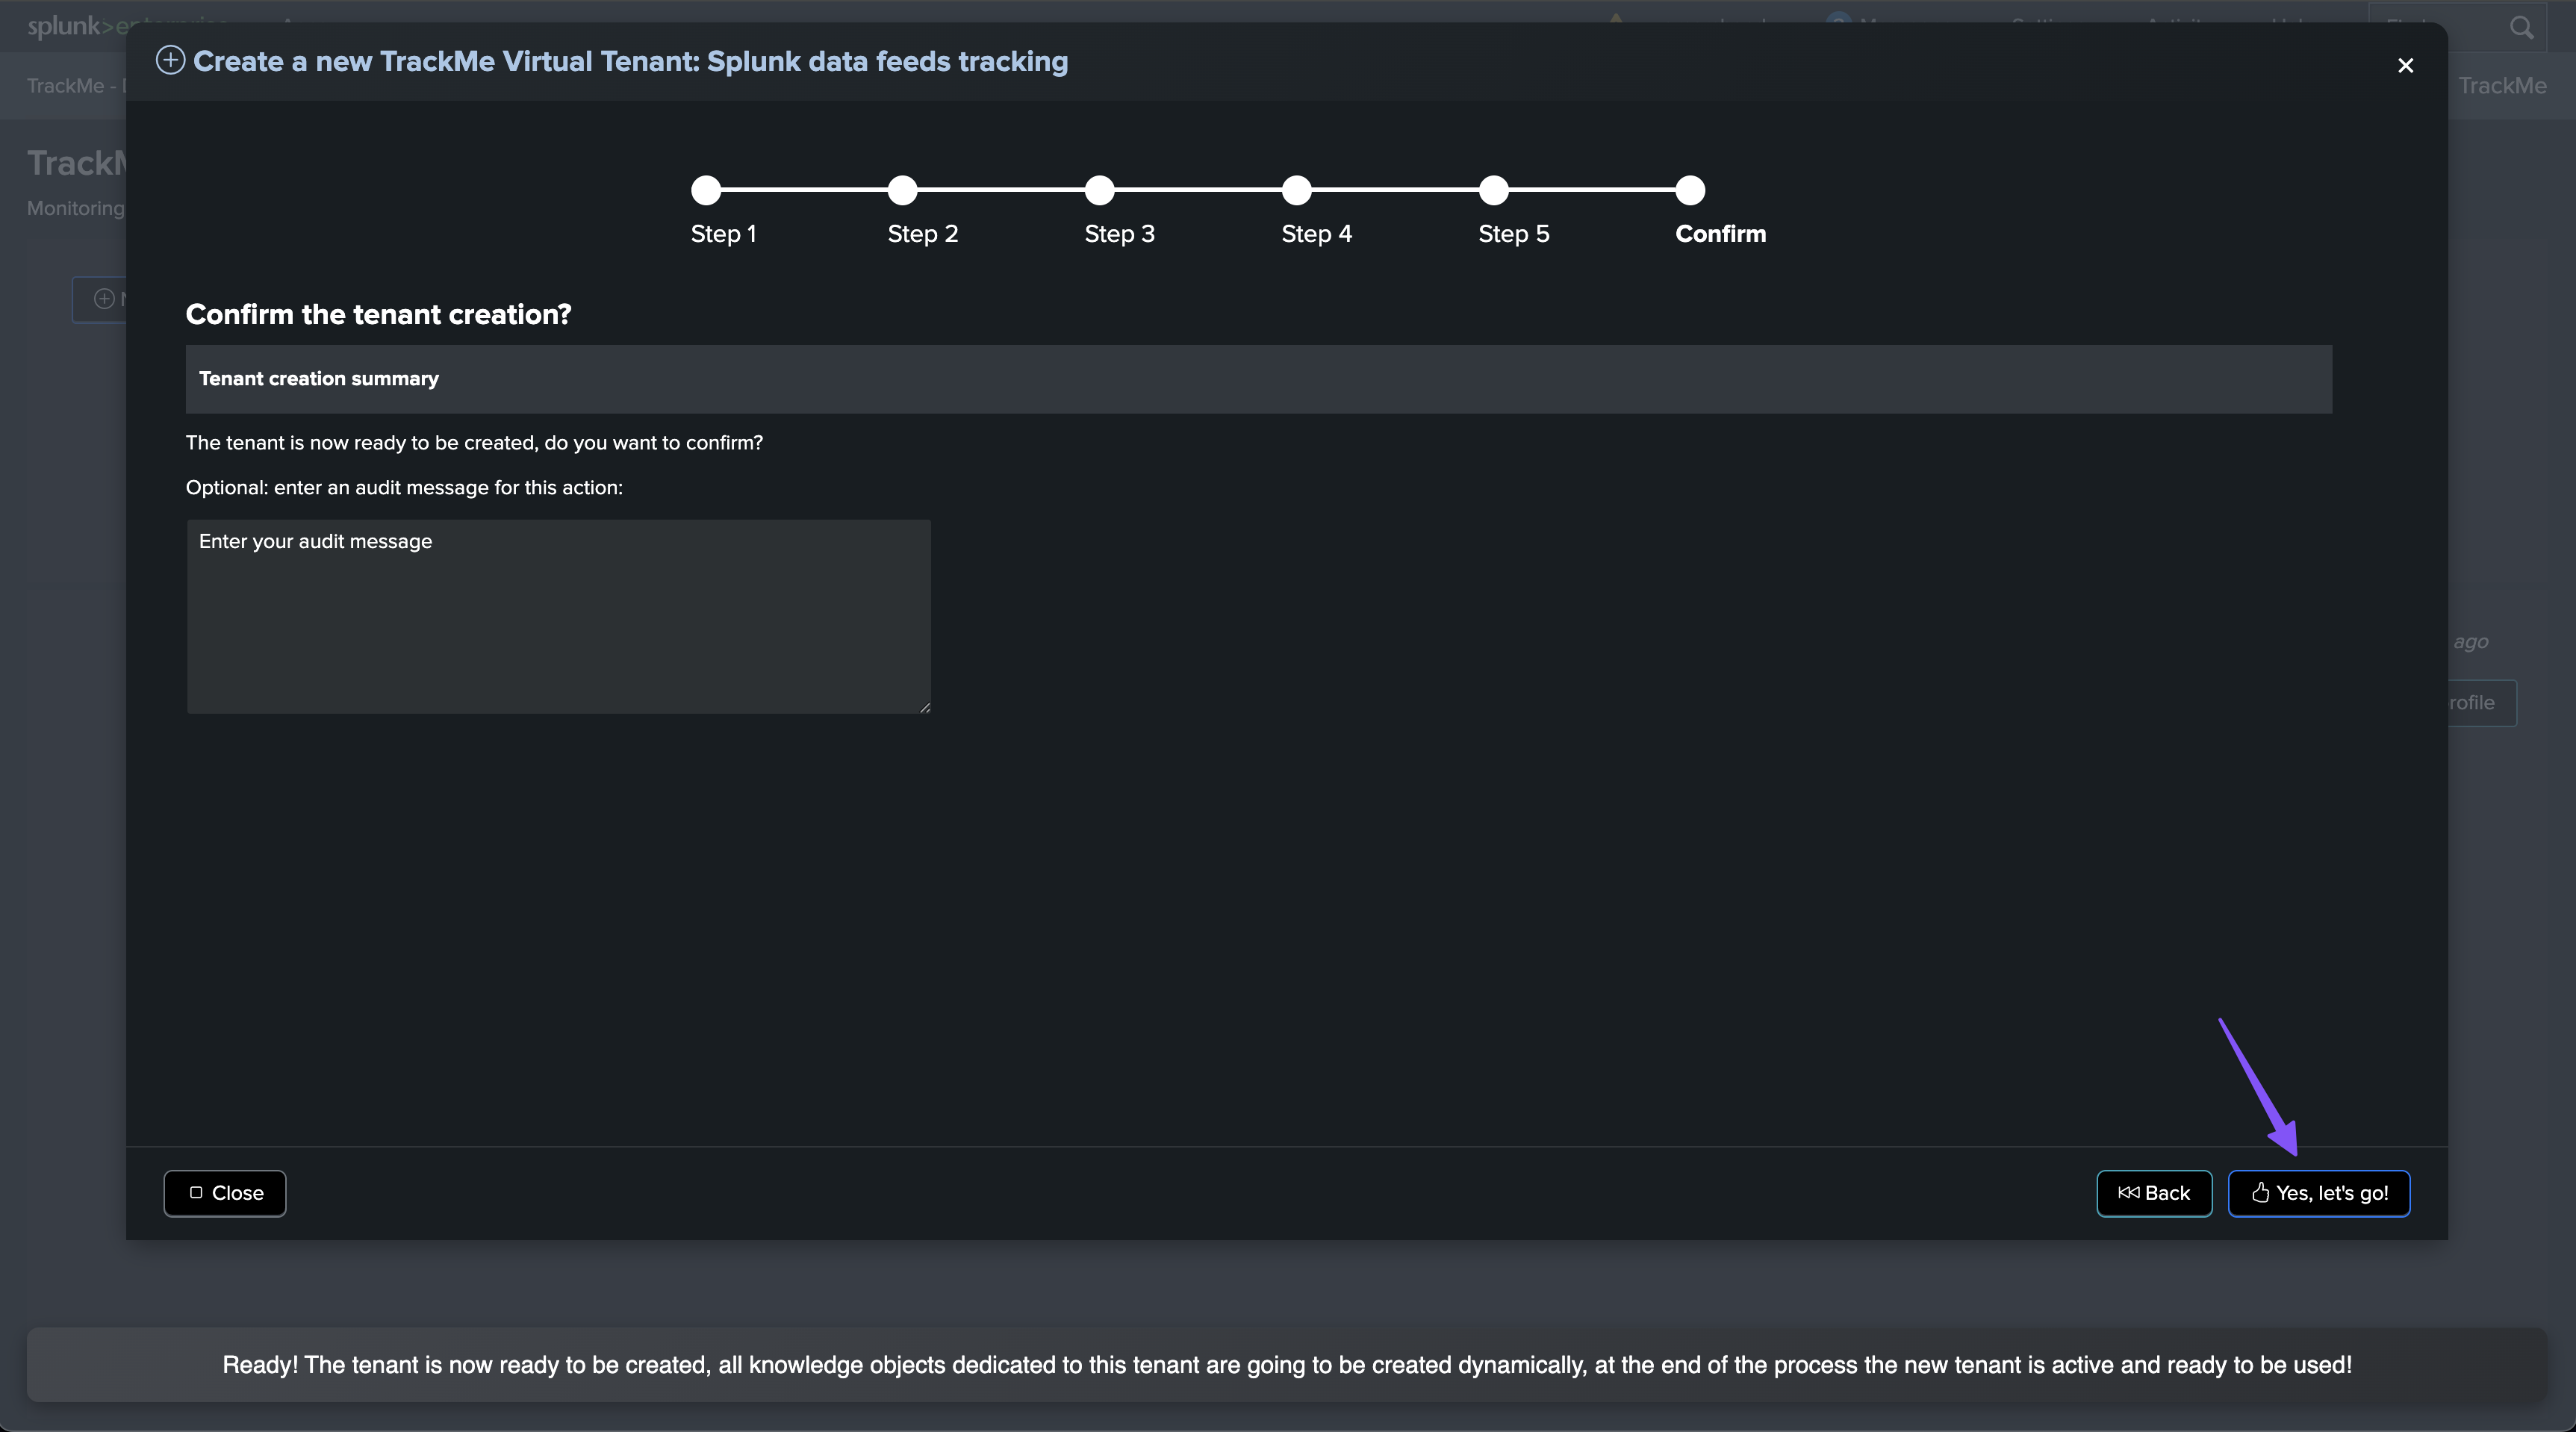
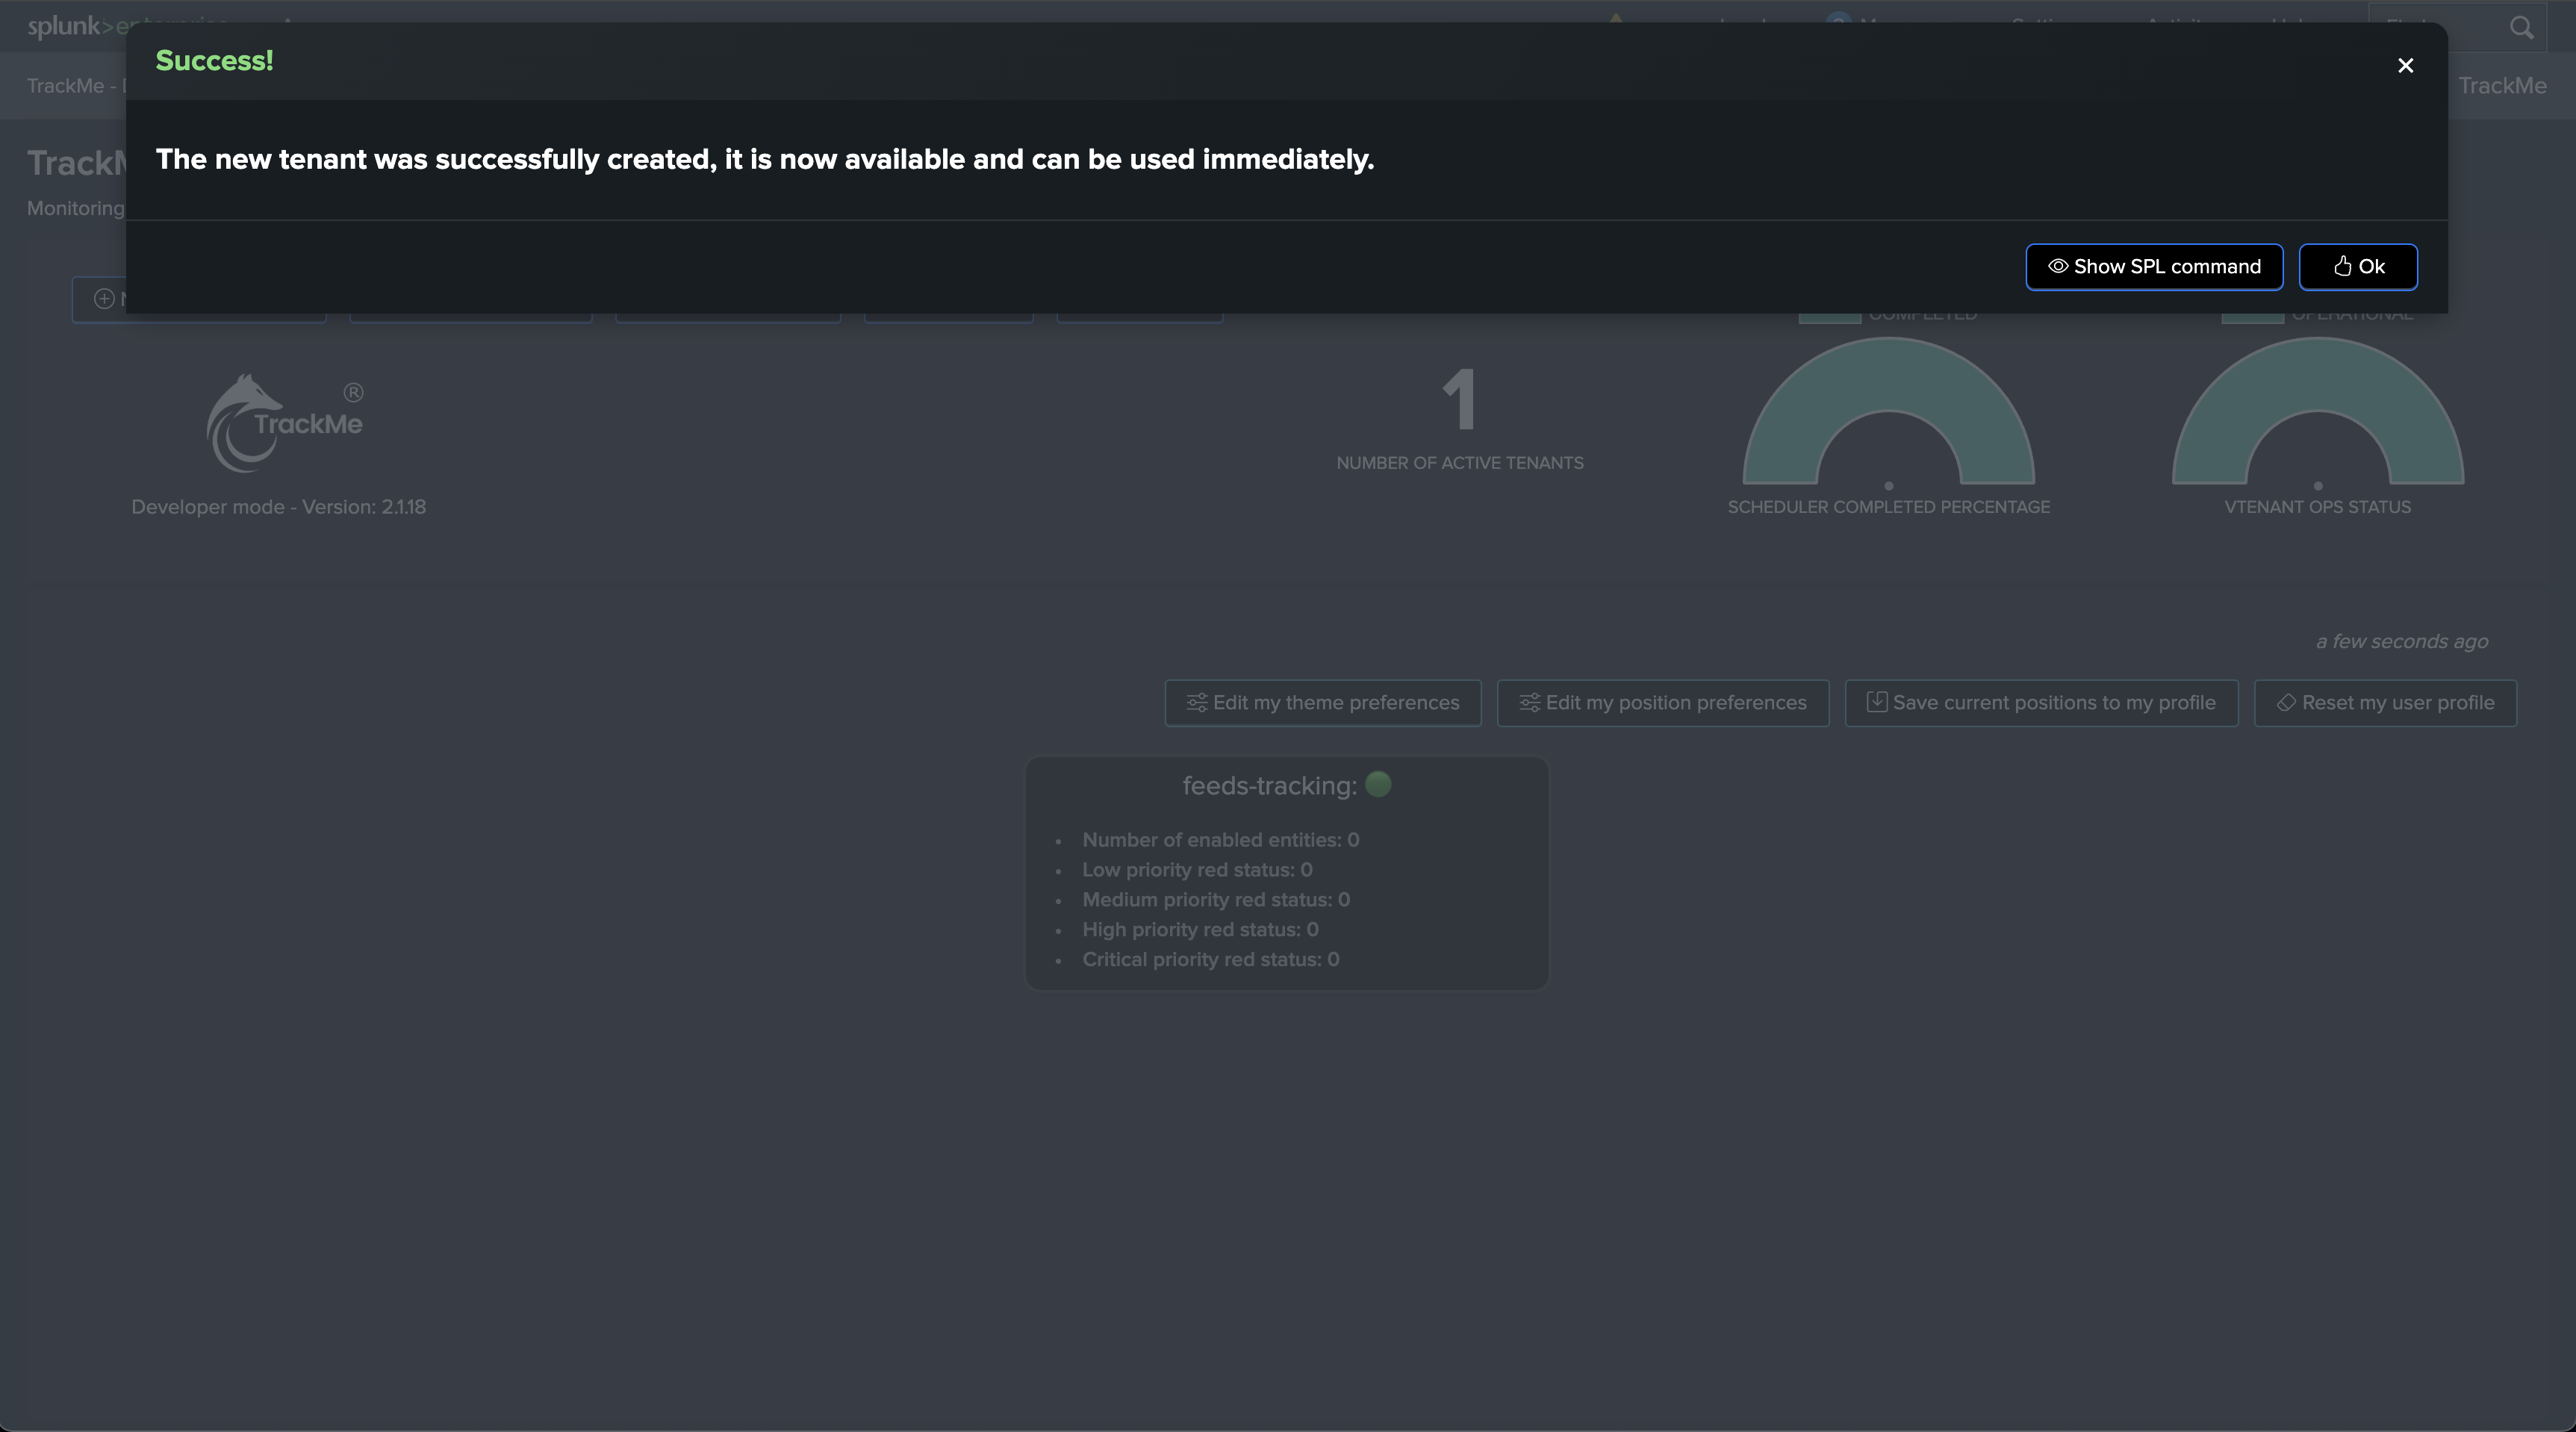
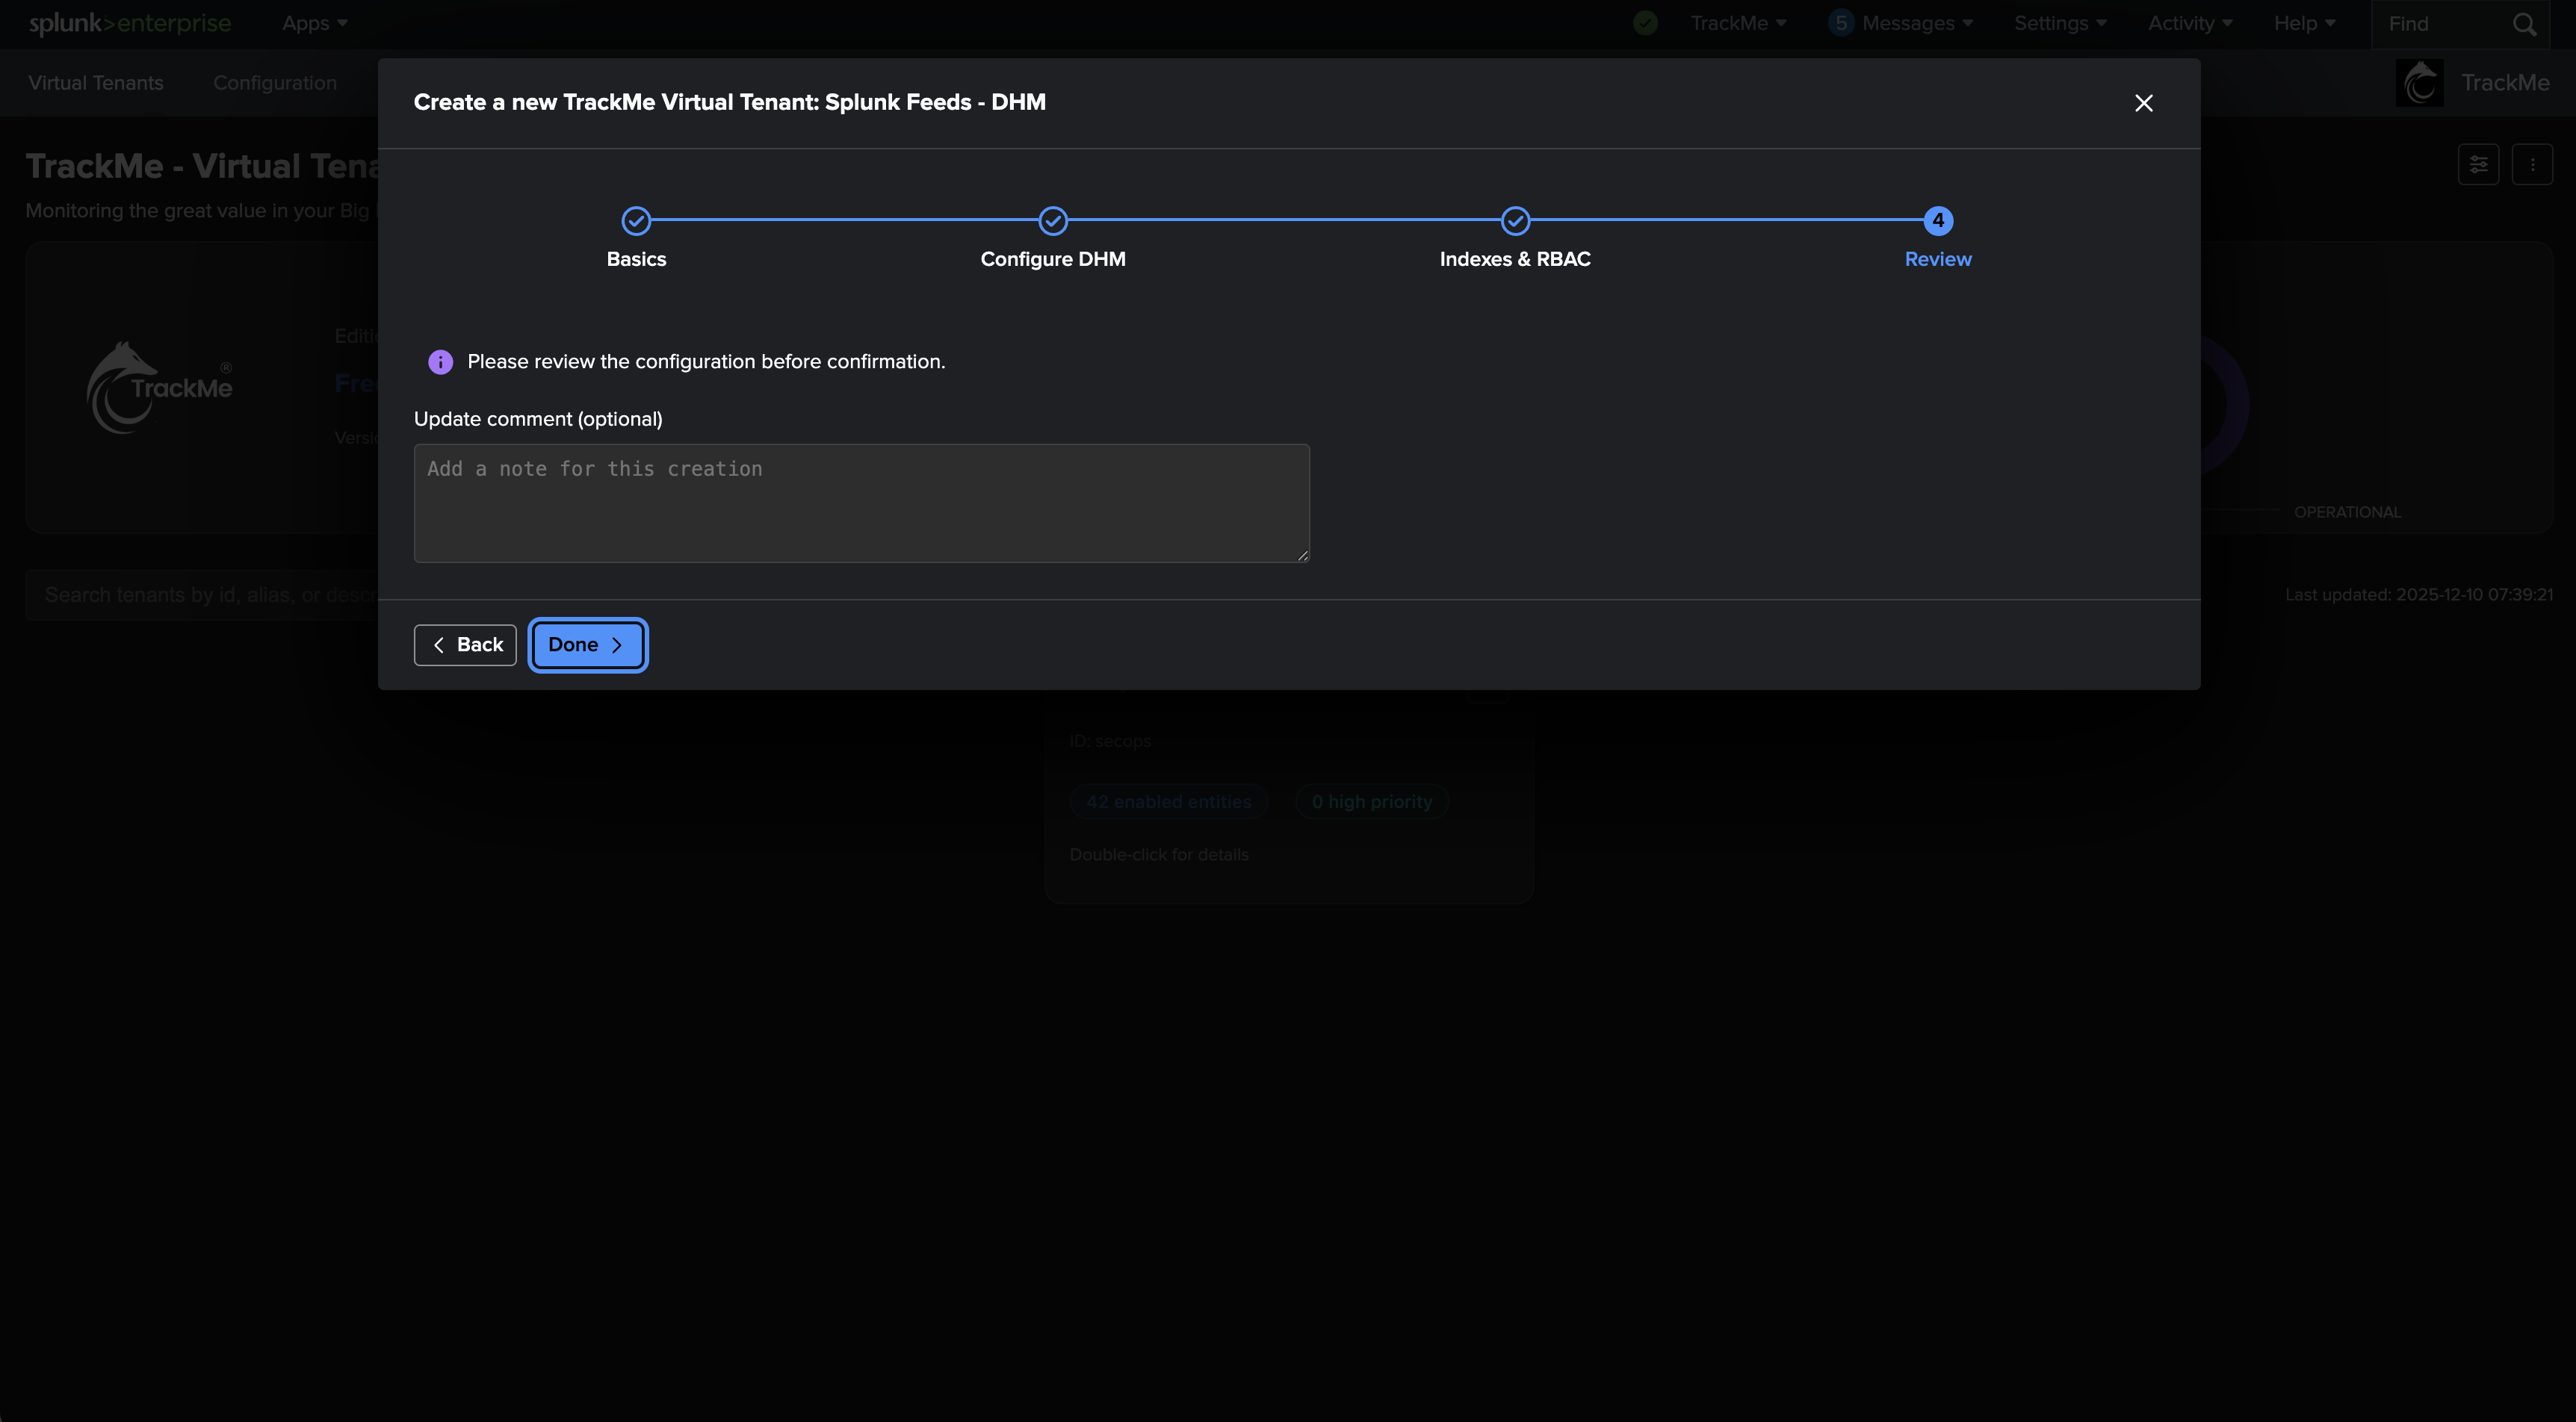
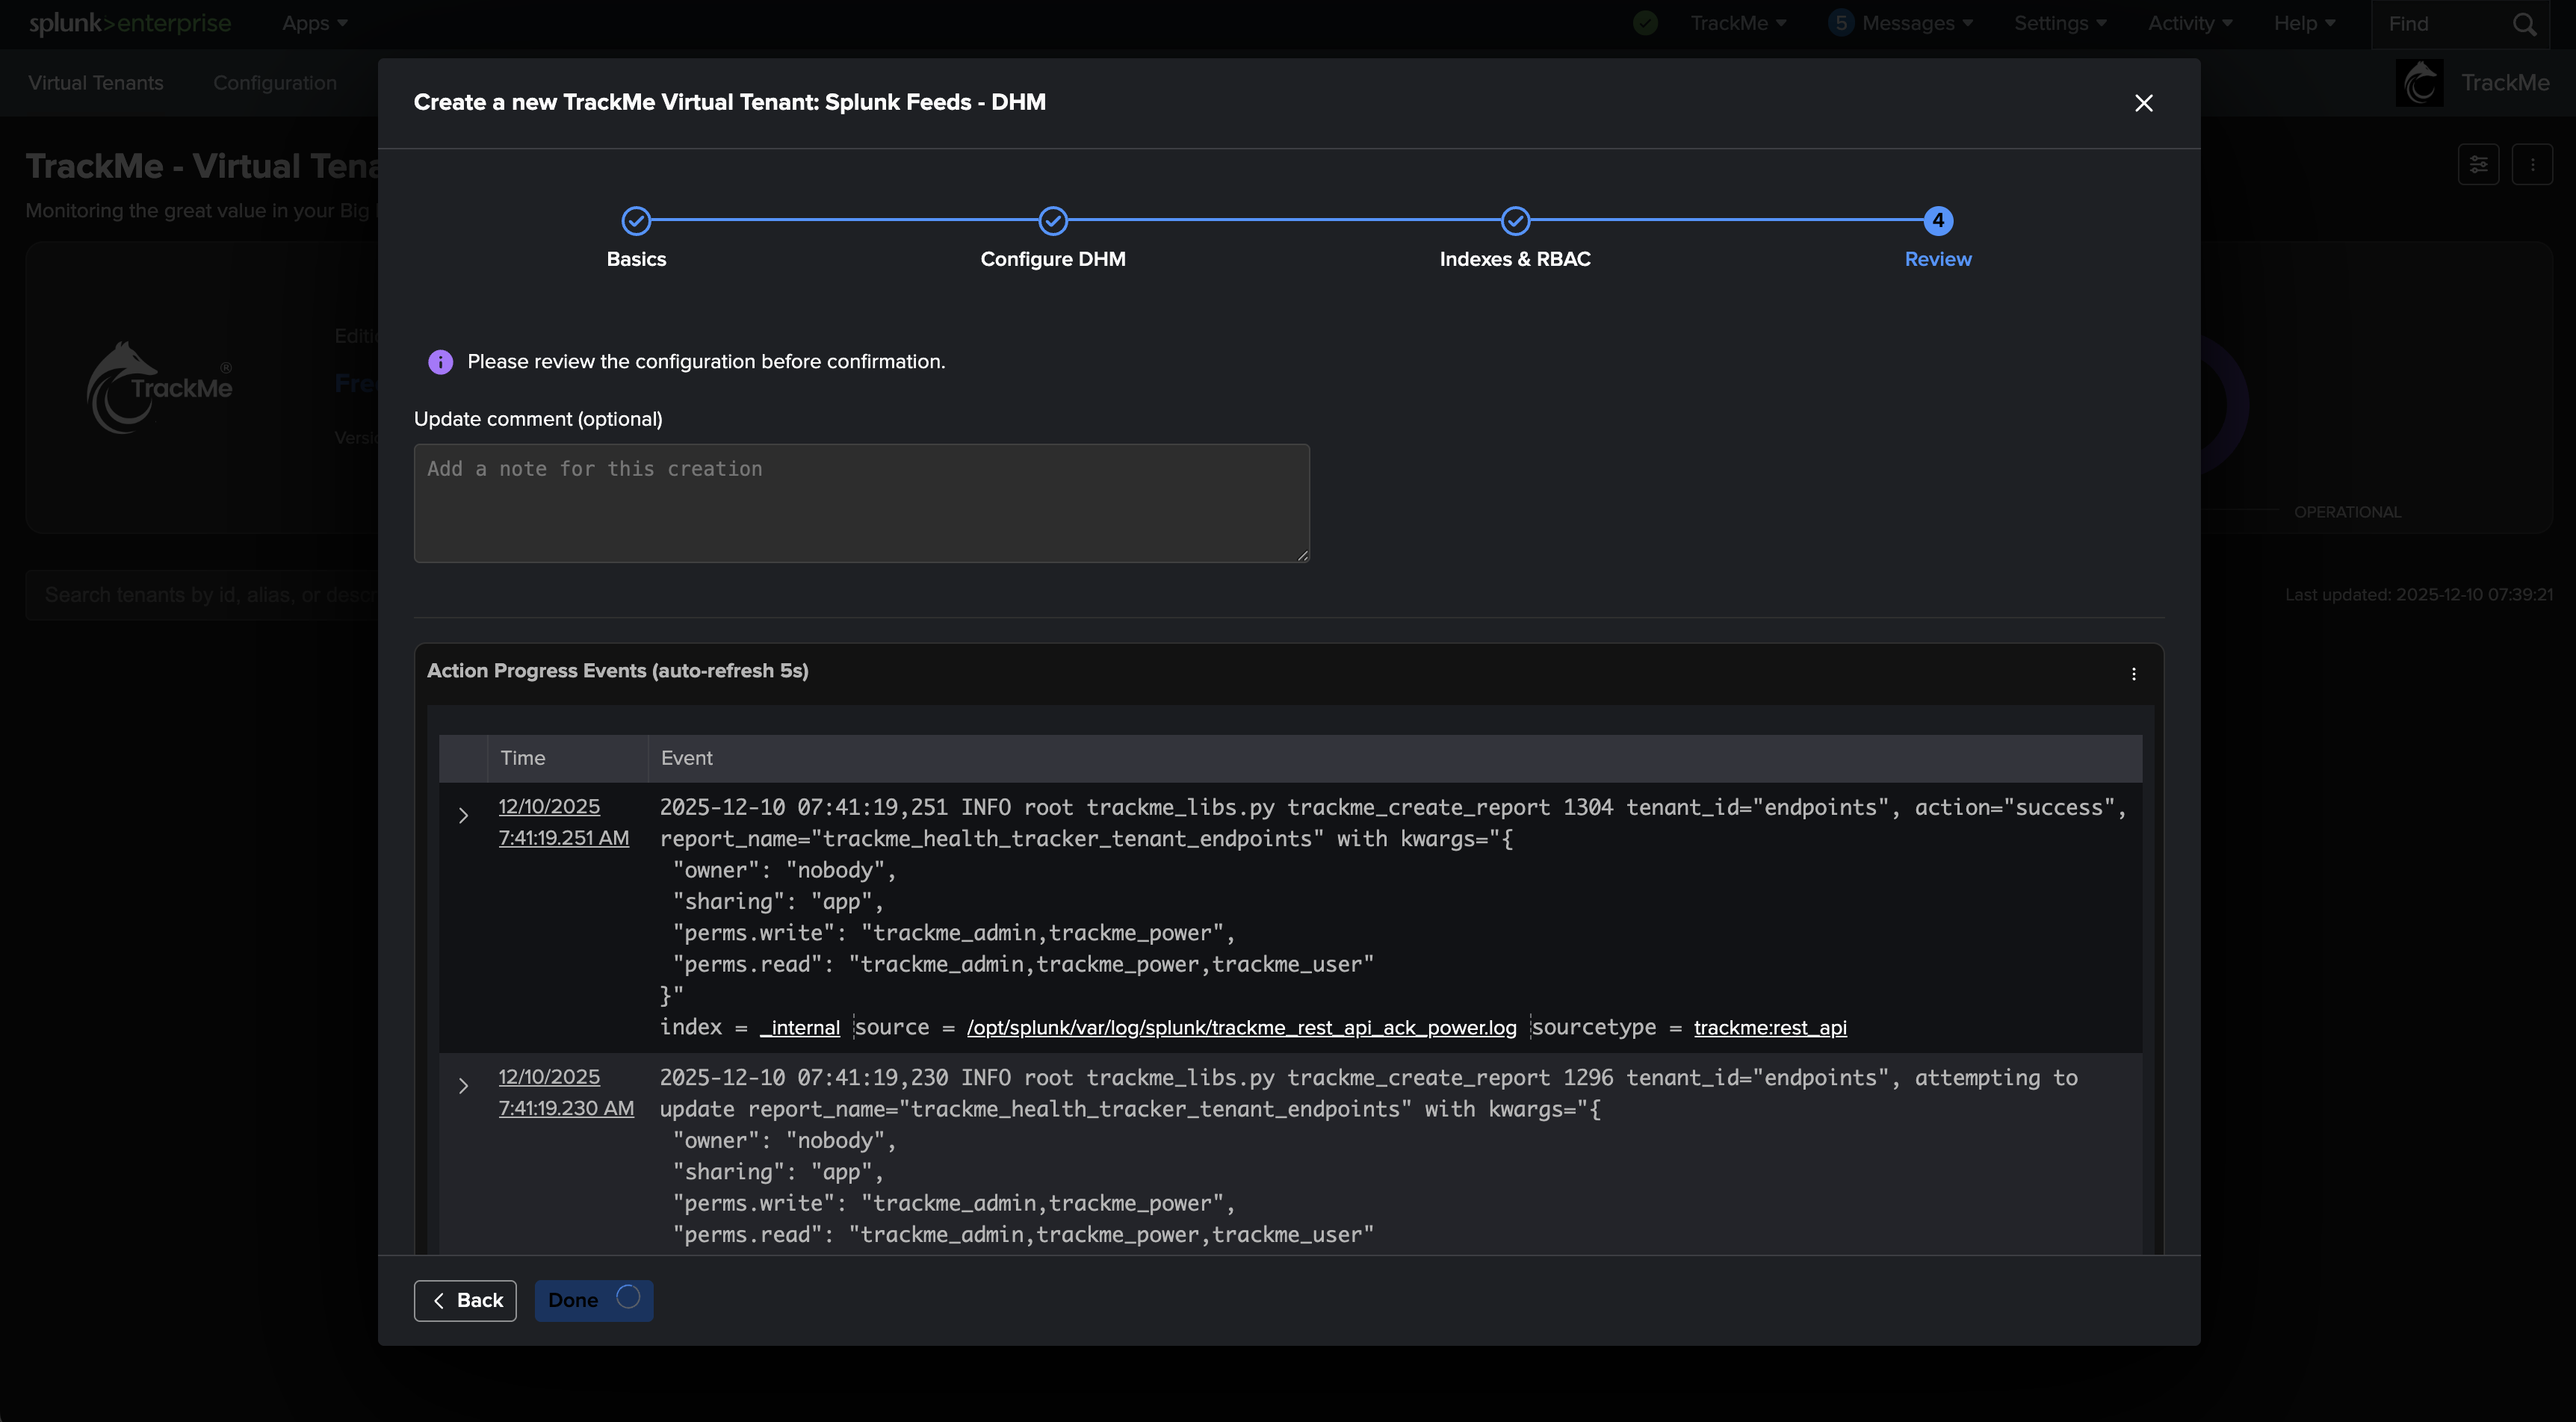
Validate the creation of the Virtual Tenant:
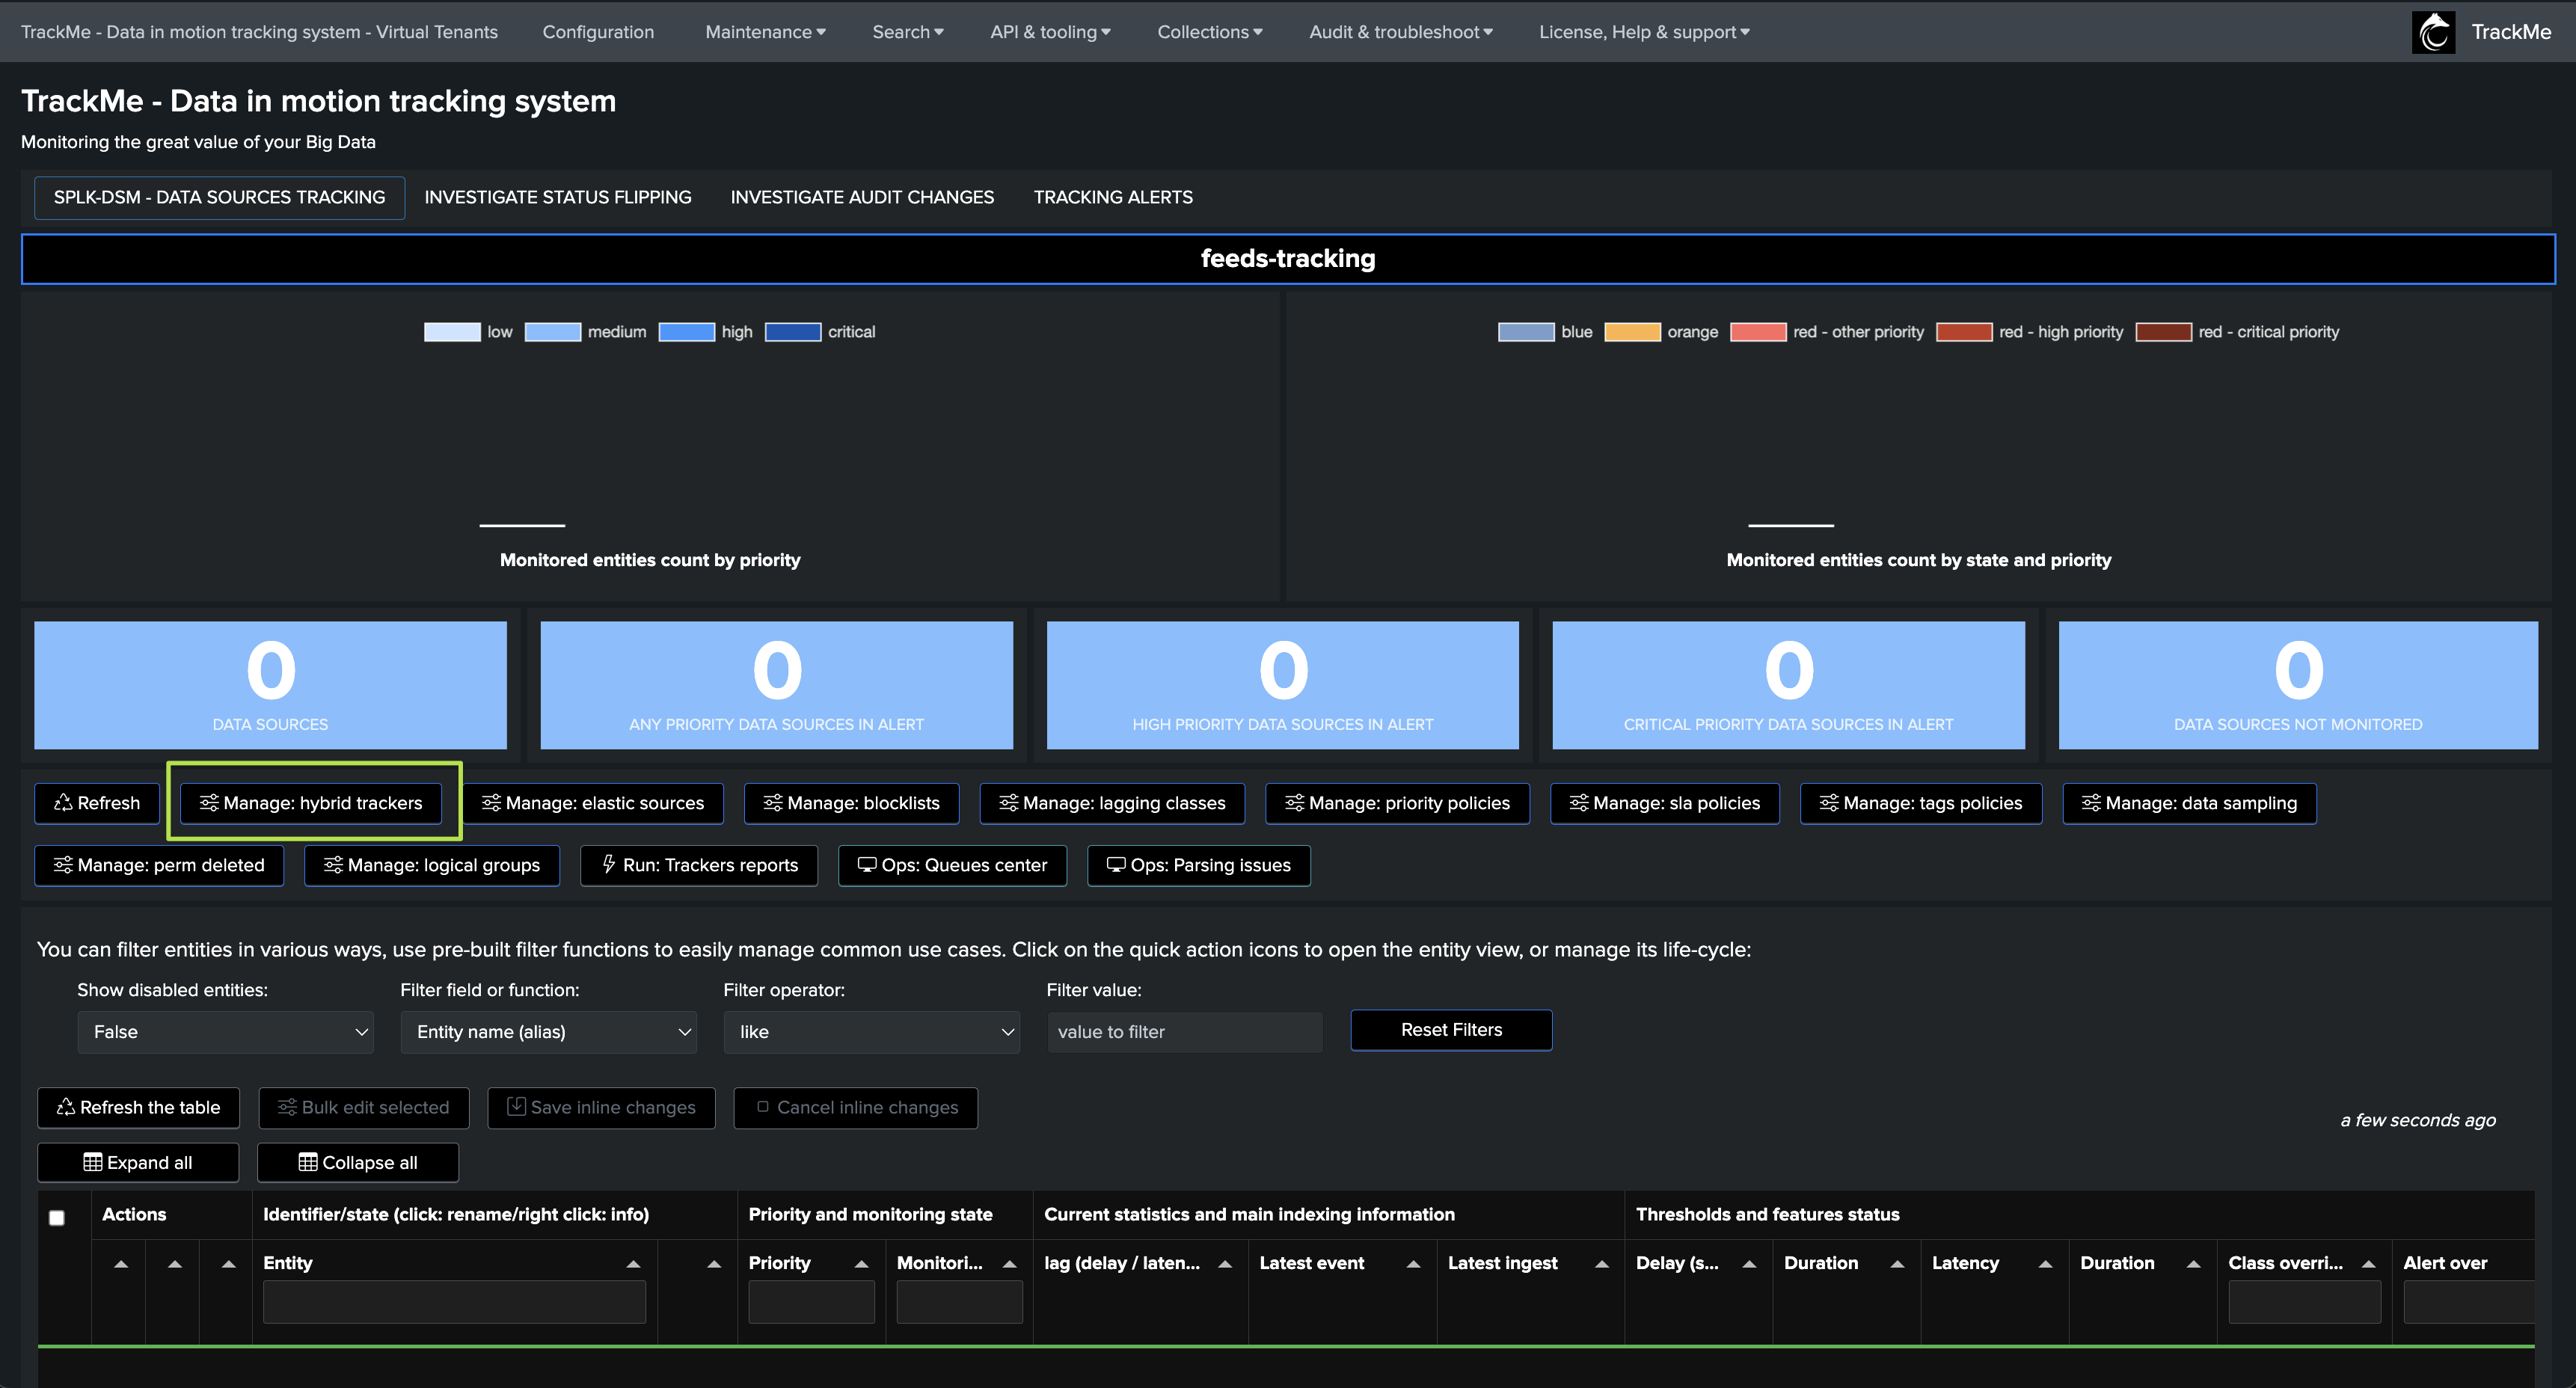
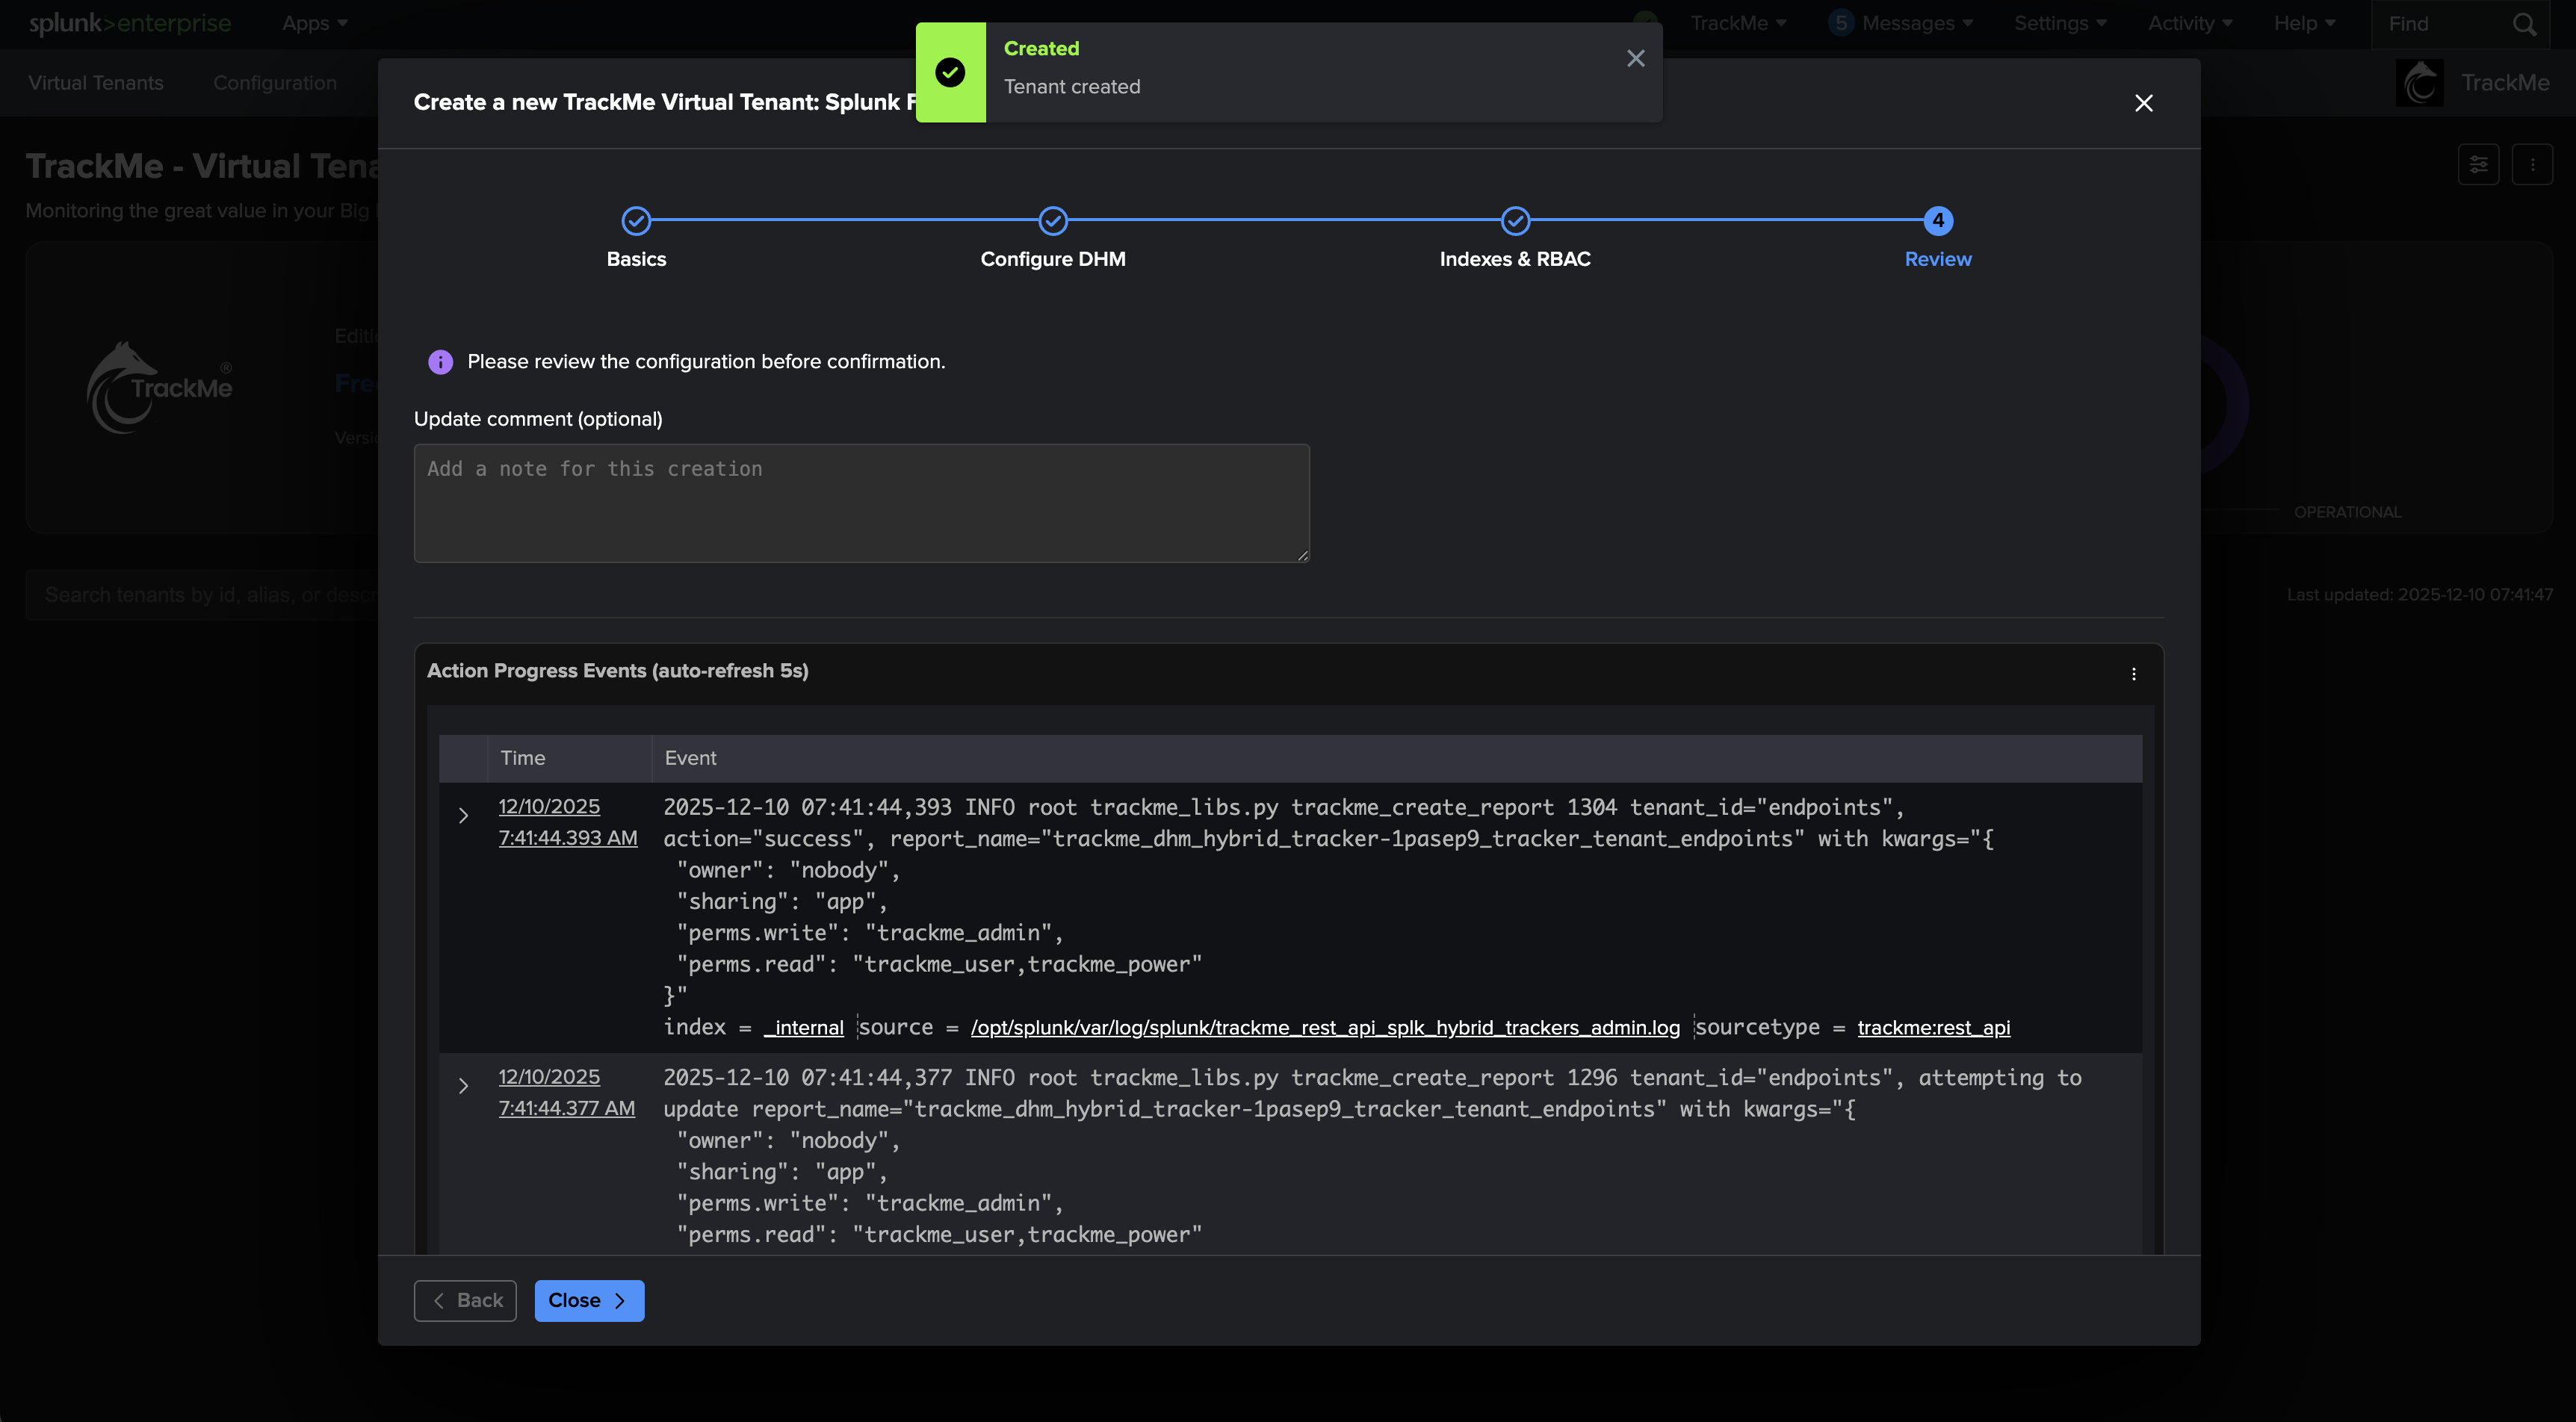
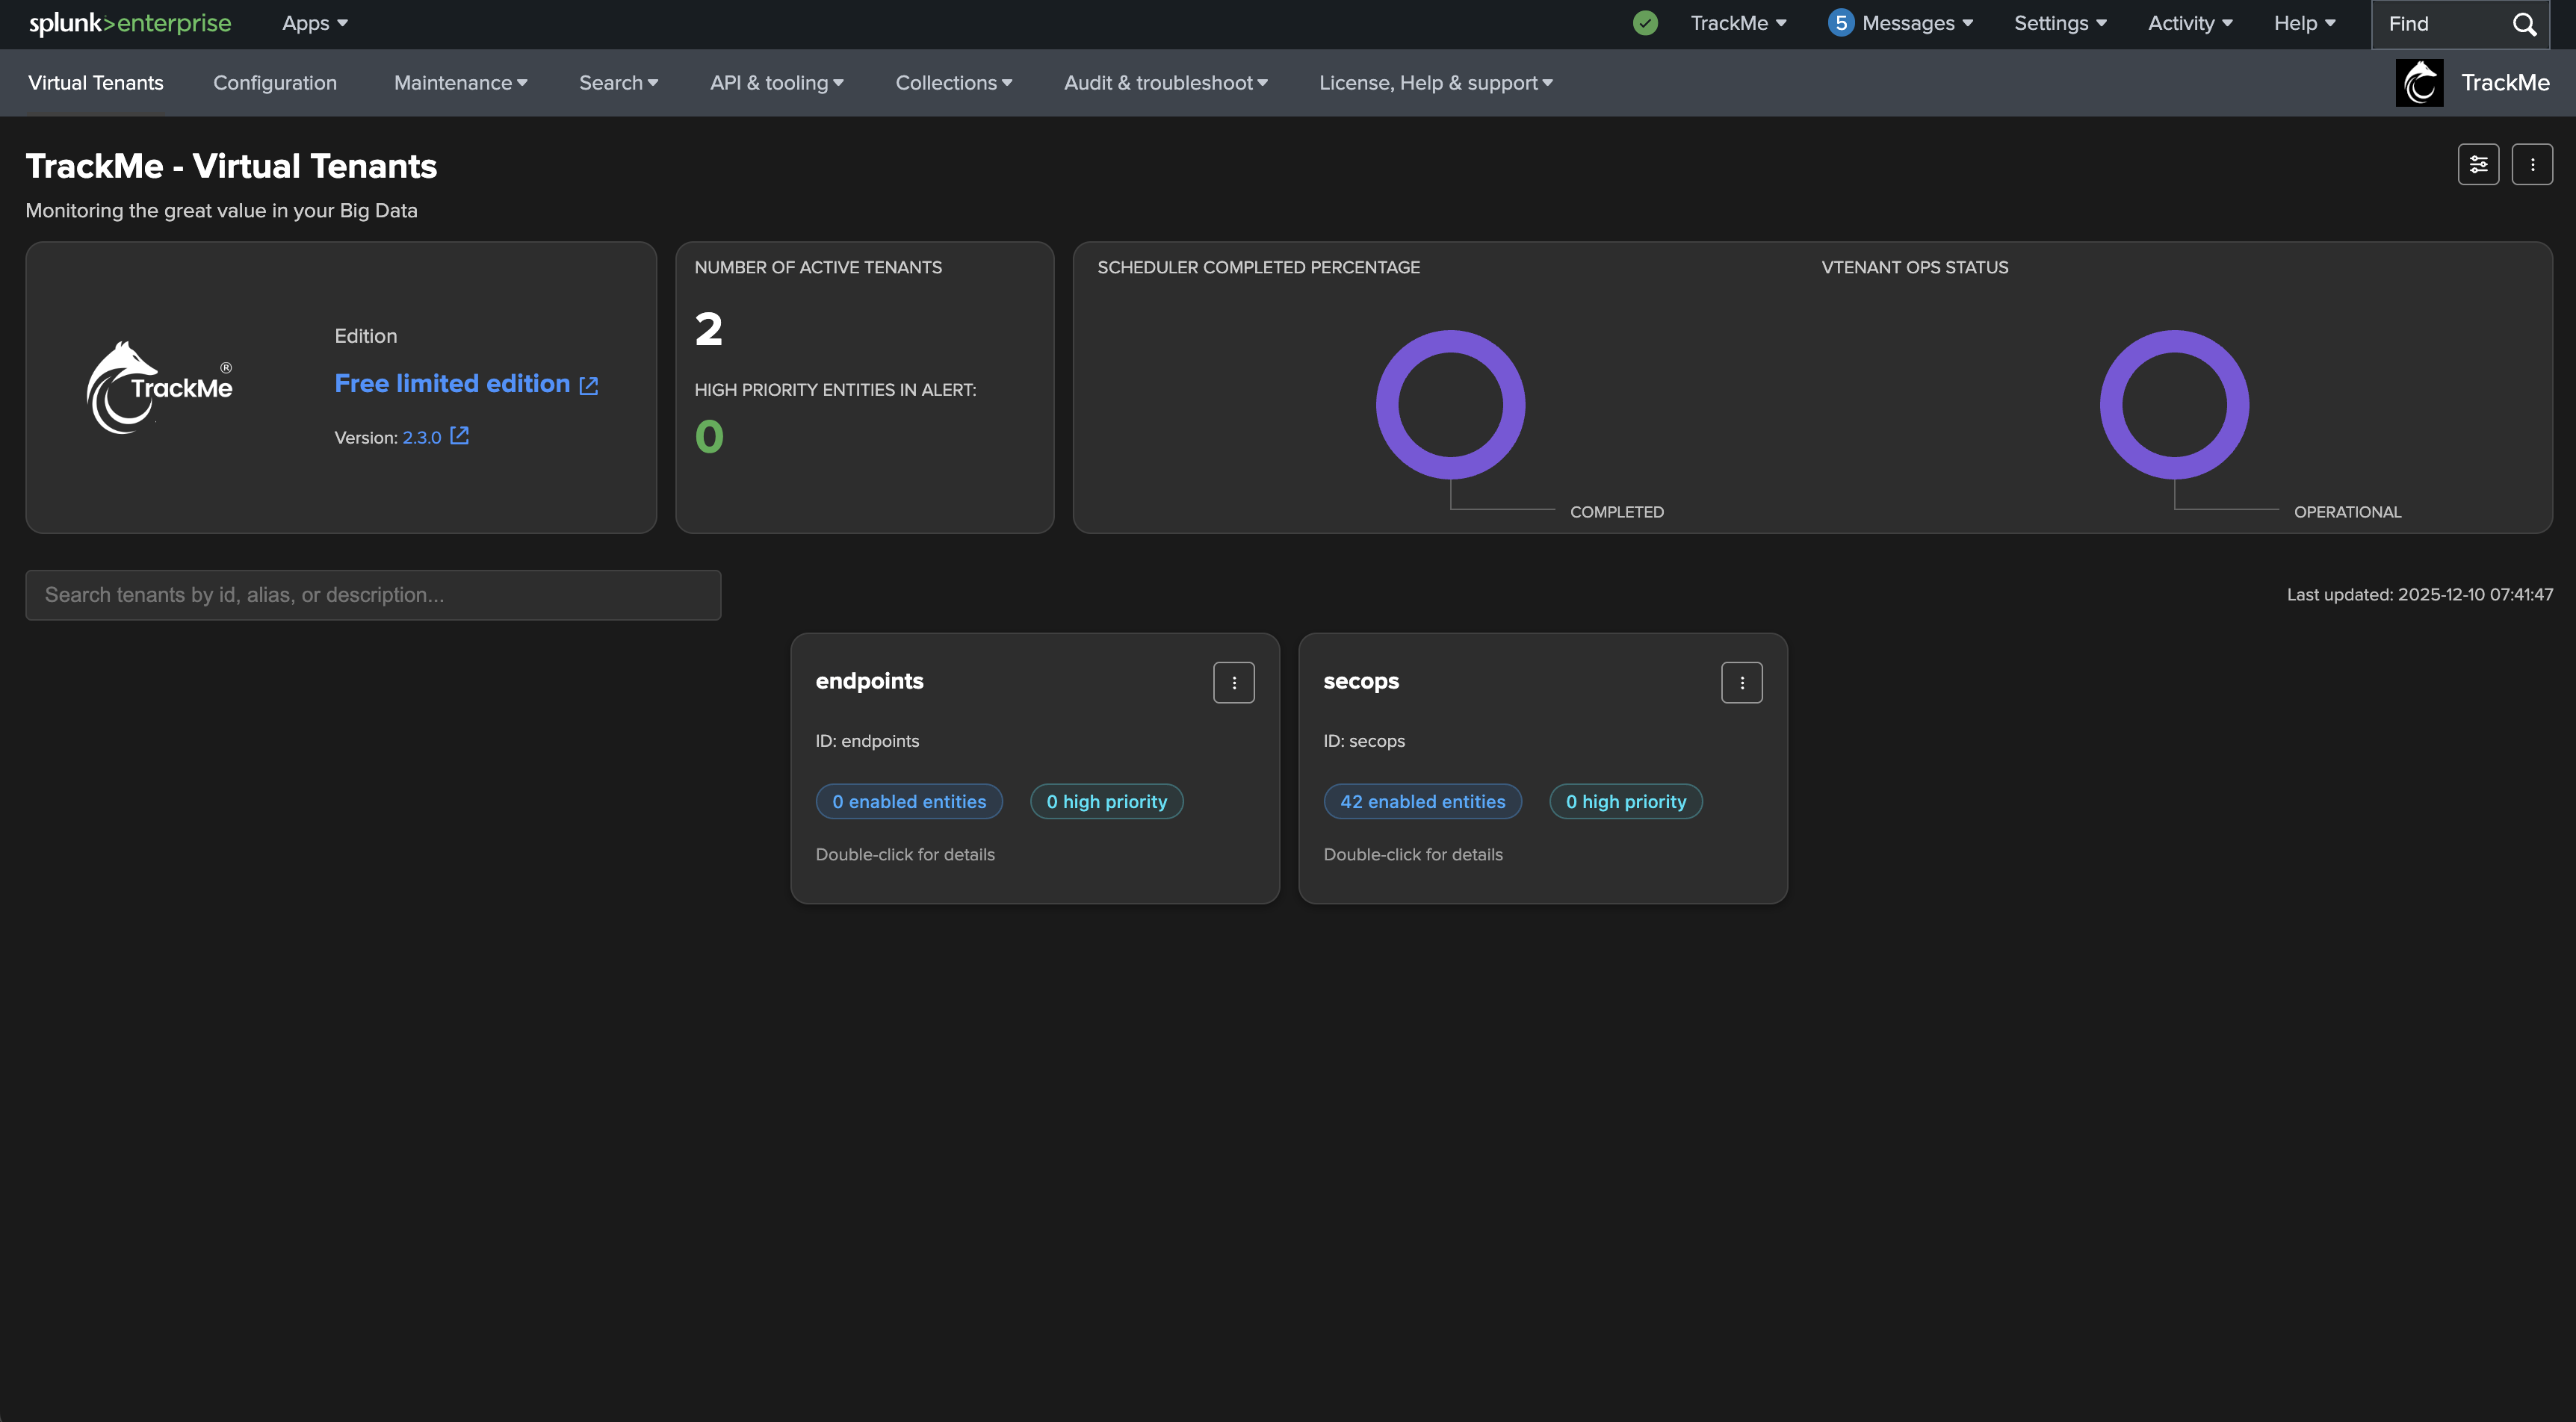
We can now validate the creation of the Virtual Tenant, after a short moment, the Virtual Tenant UI will be refreshed and a Virtual Tenant will now be available:
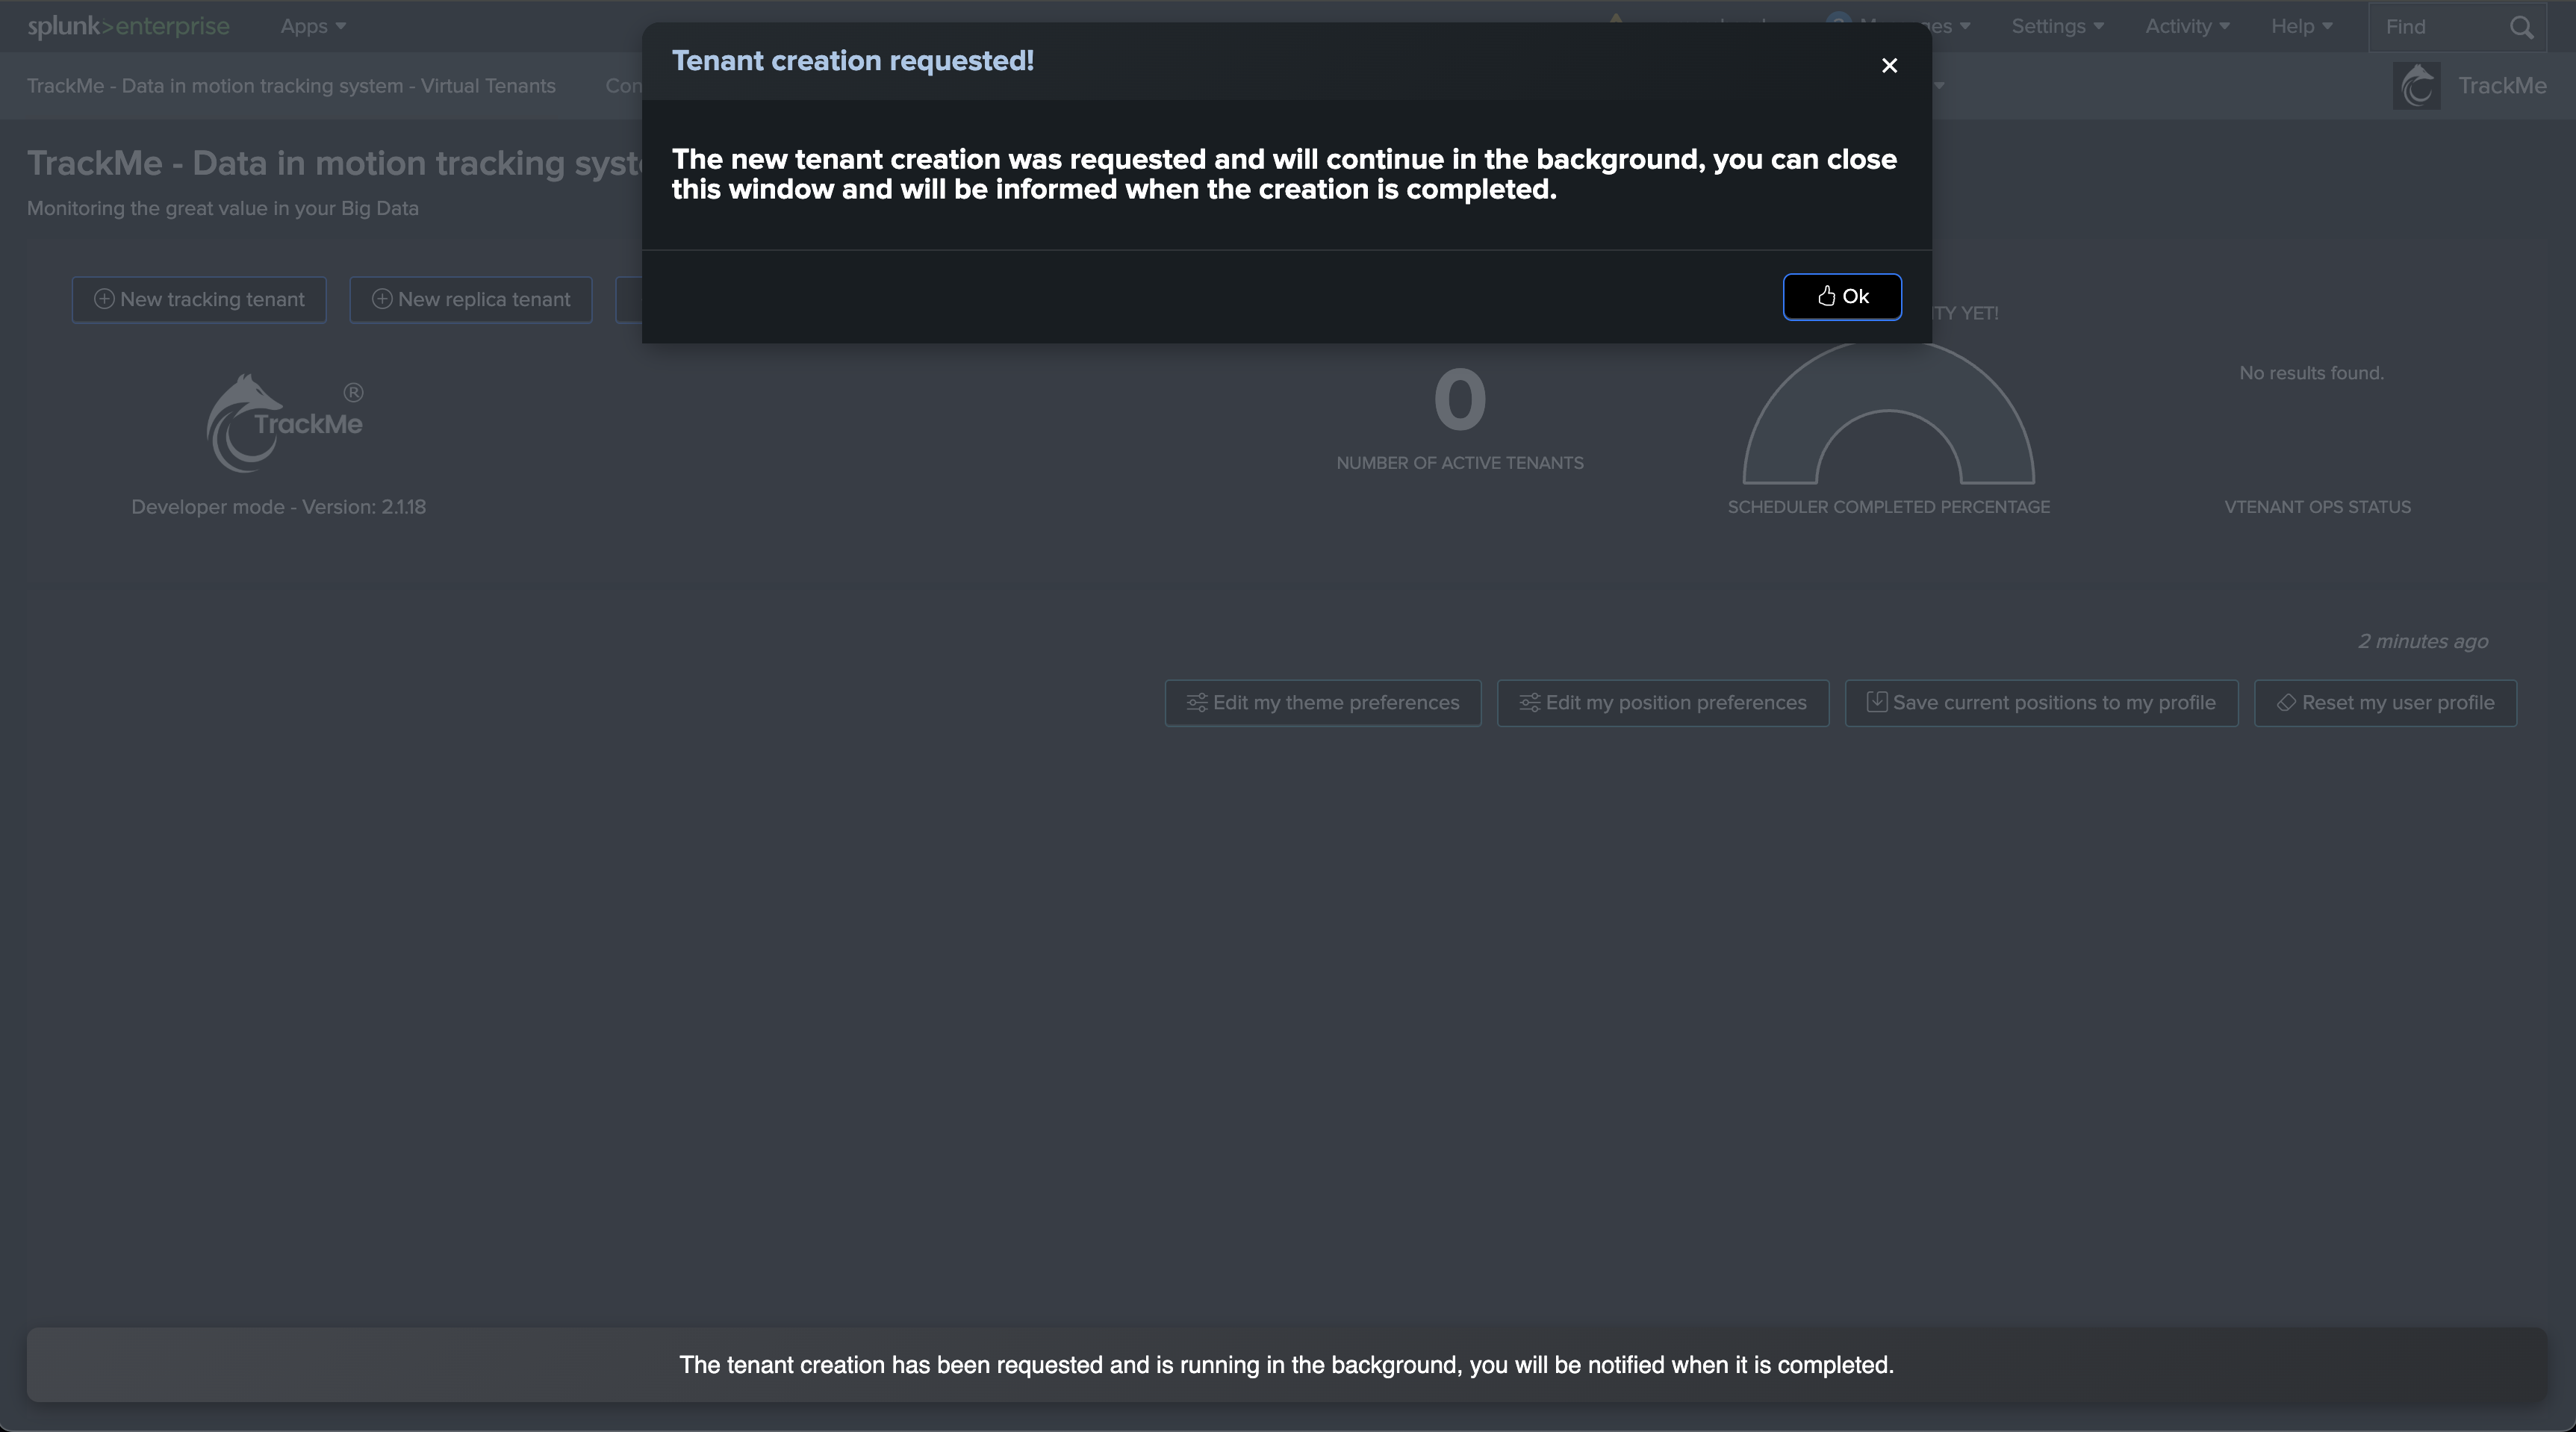
After a few minutes, the Virtual Tenant user interface will show activity of the tenant and eventually entities that were discovered:
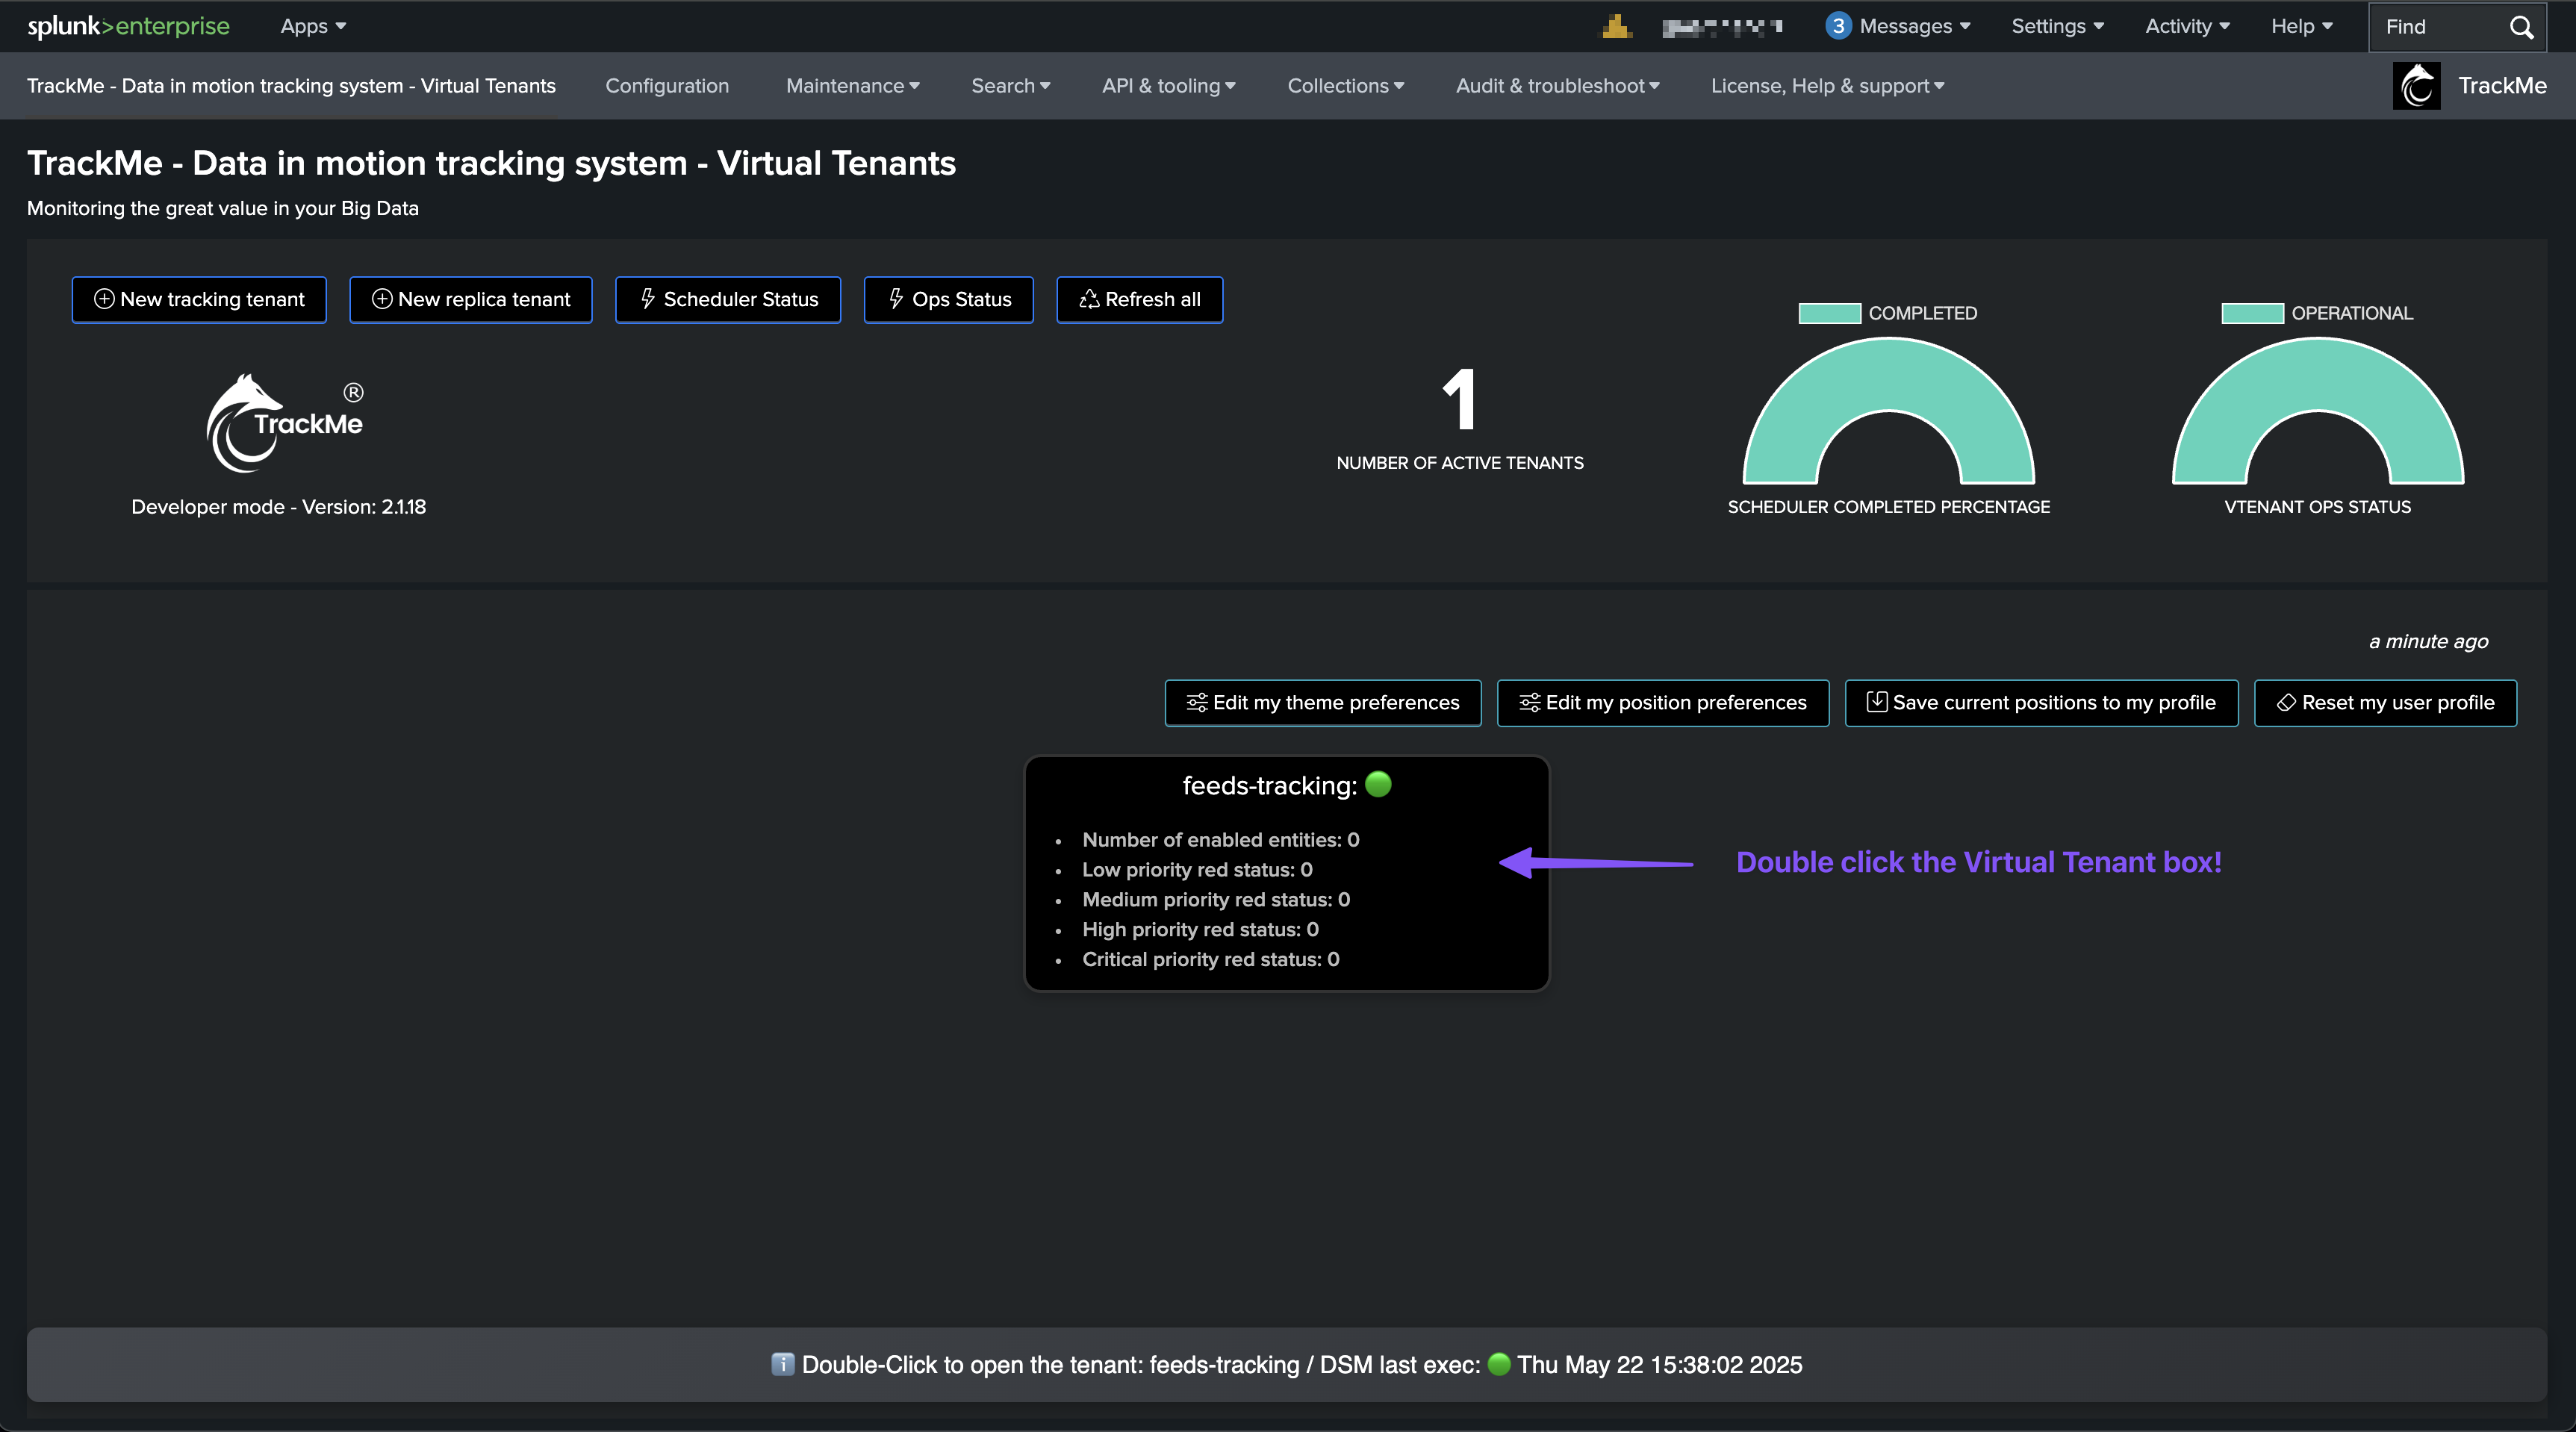
Double click on the Virtual Tenant box to open the following screen:
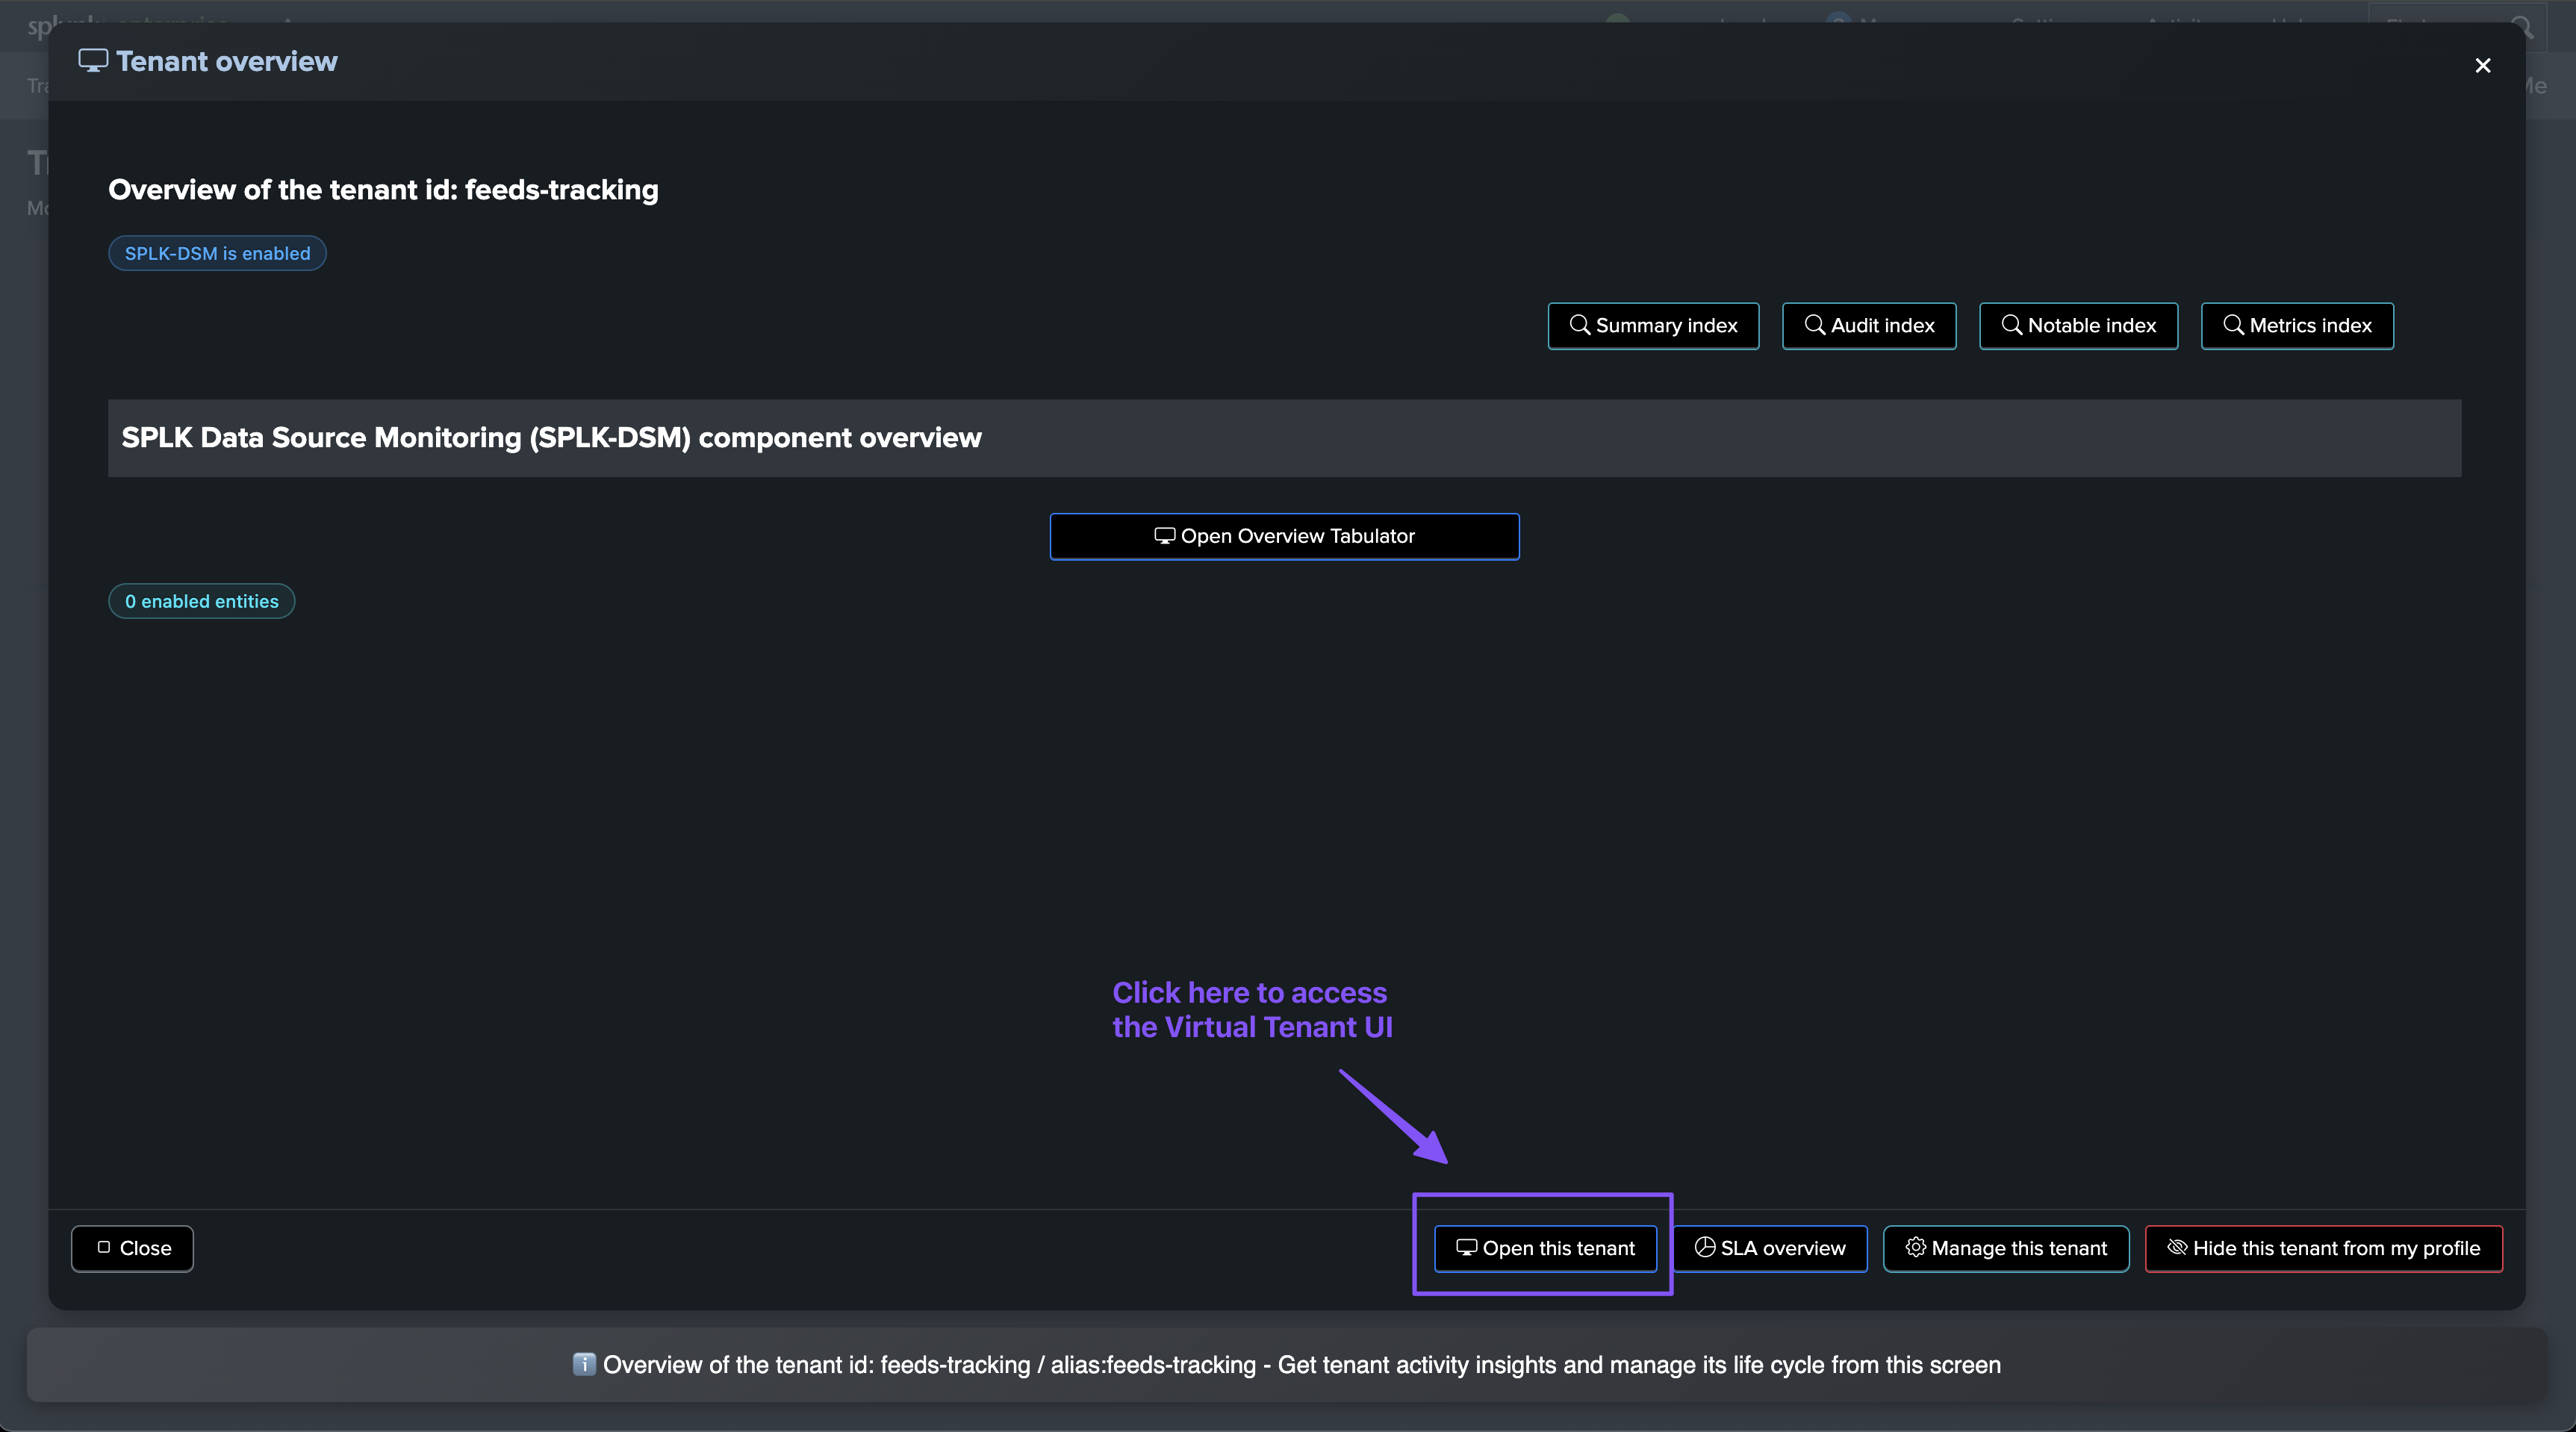
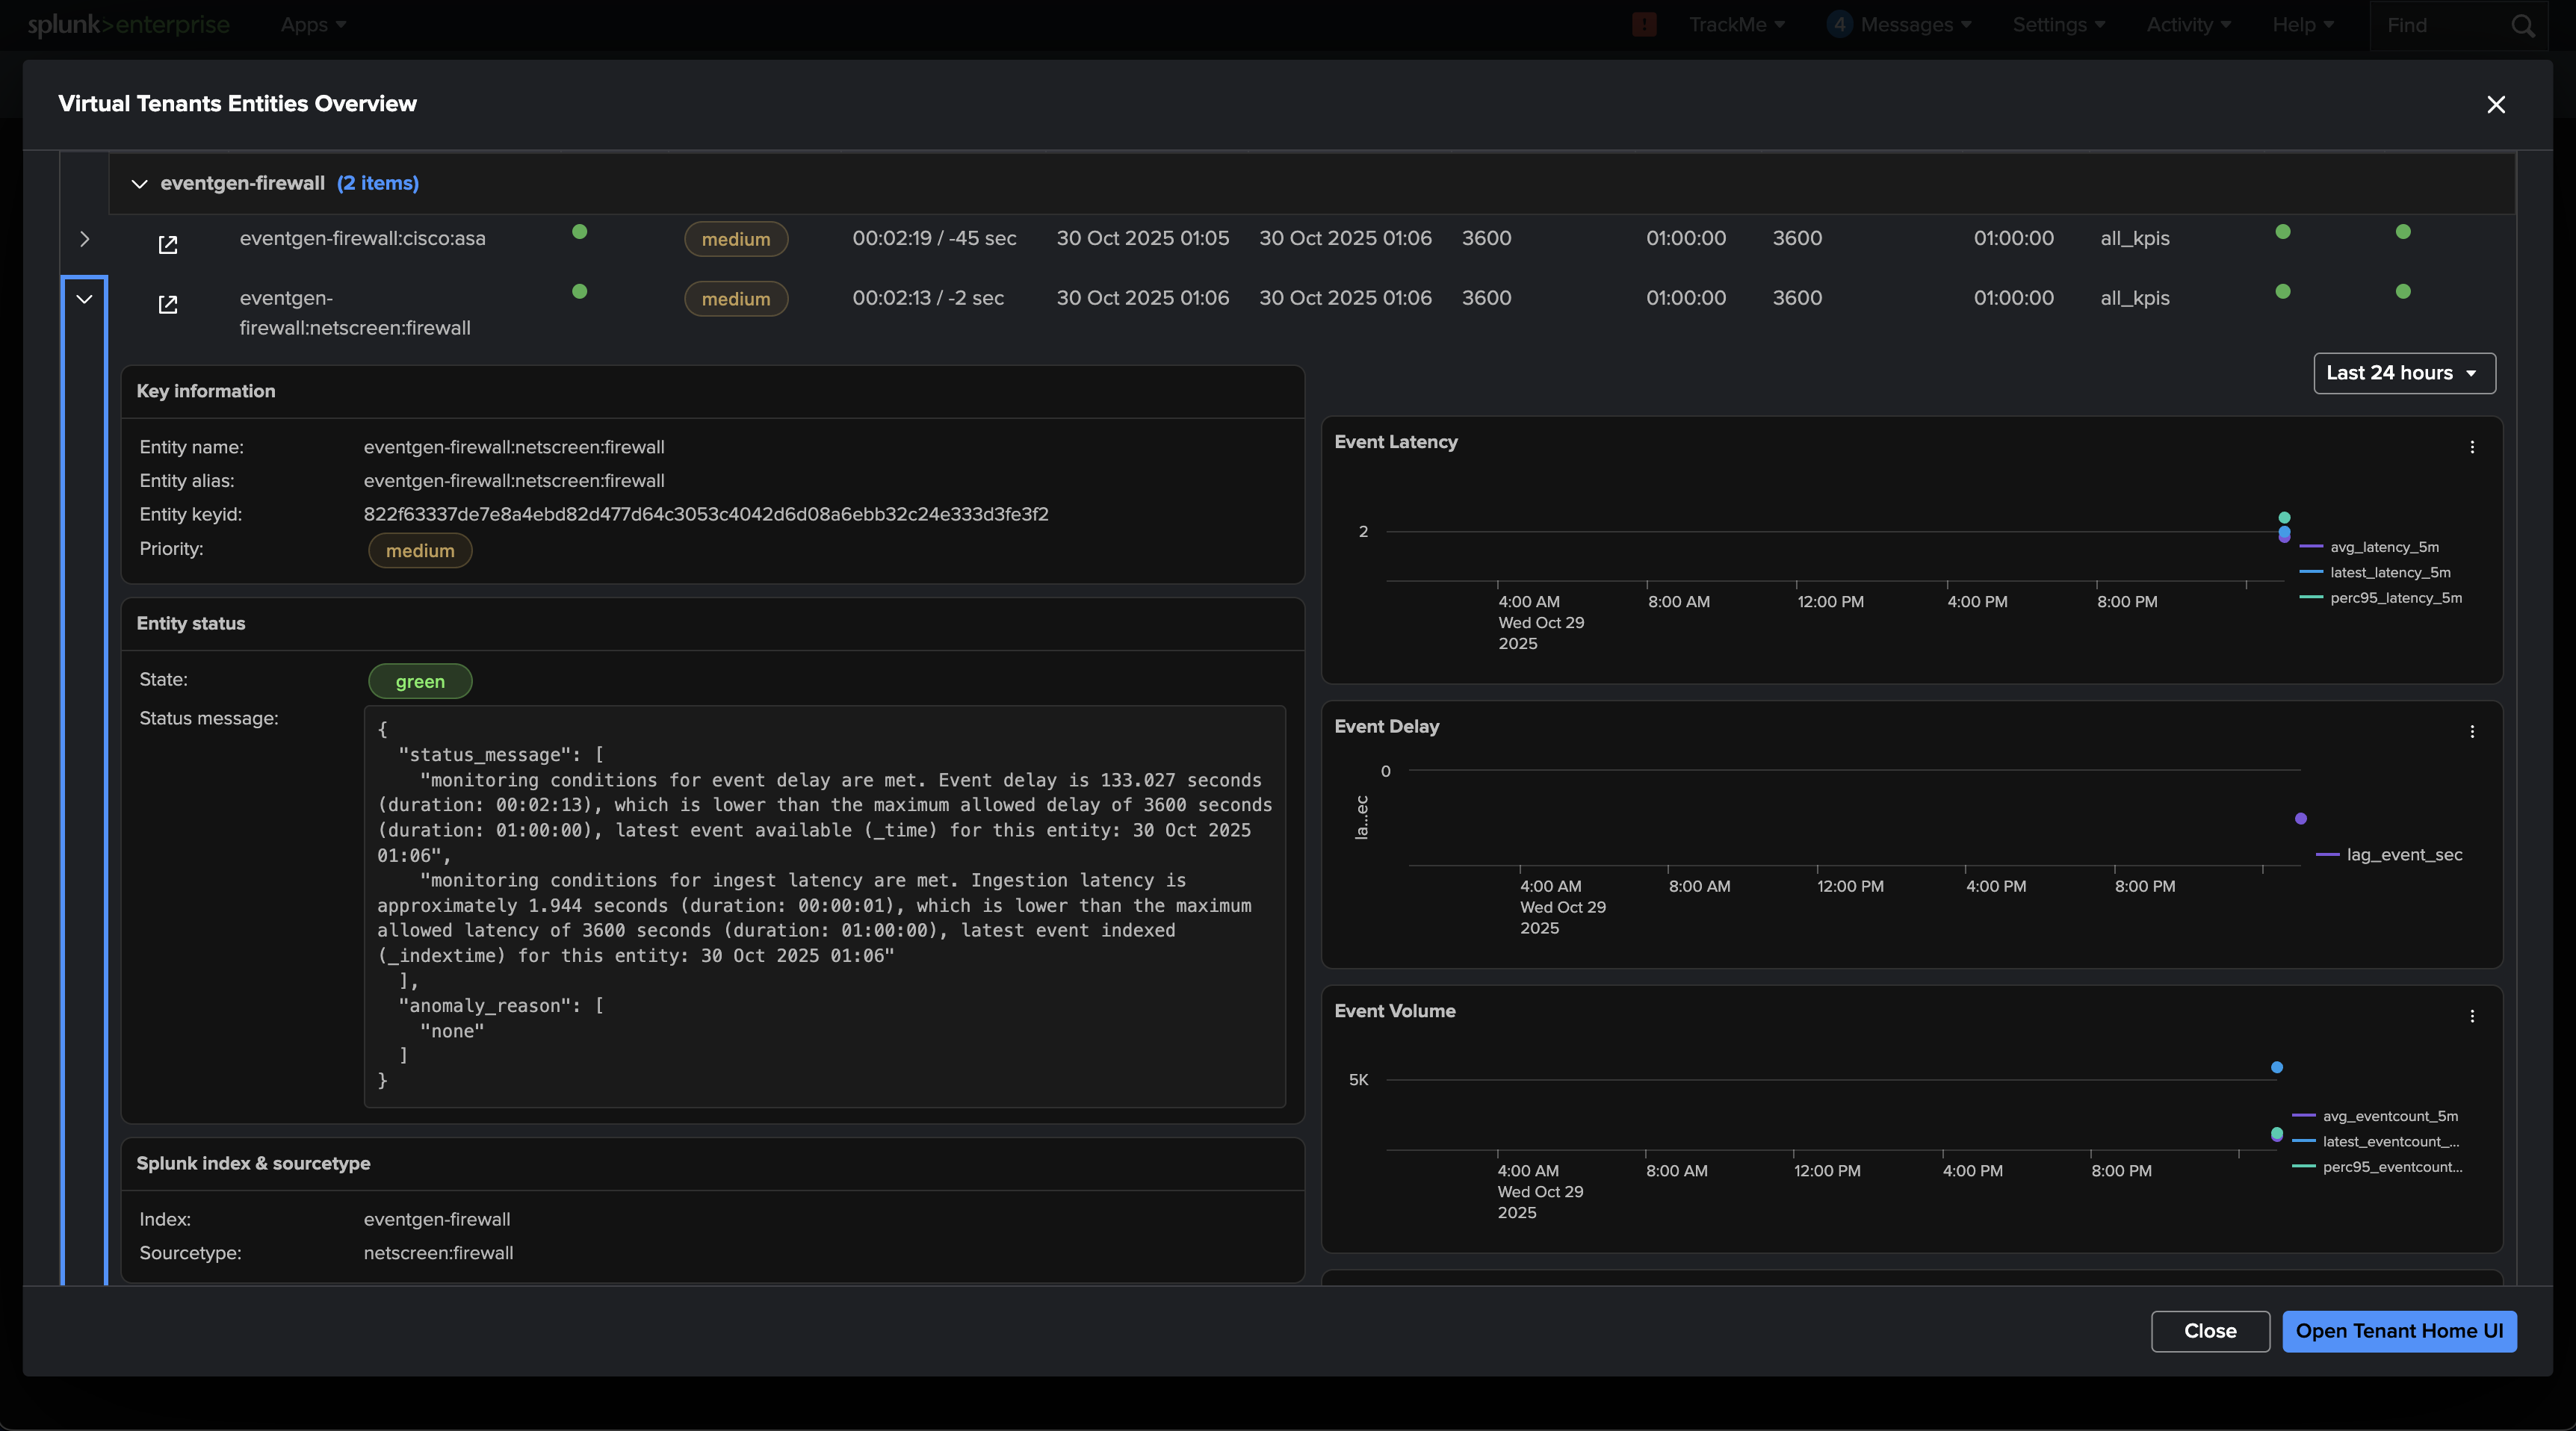
You can preview various information about the entities, and access the Home user interface for the tenant:
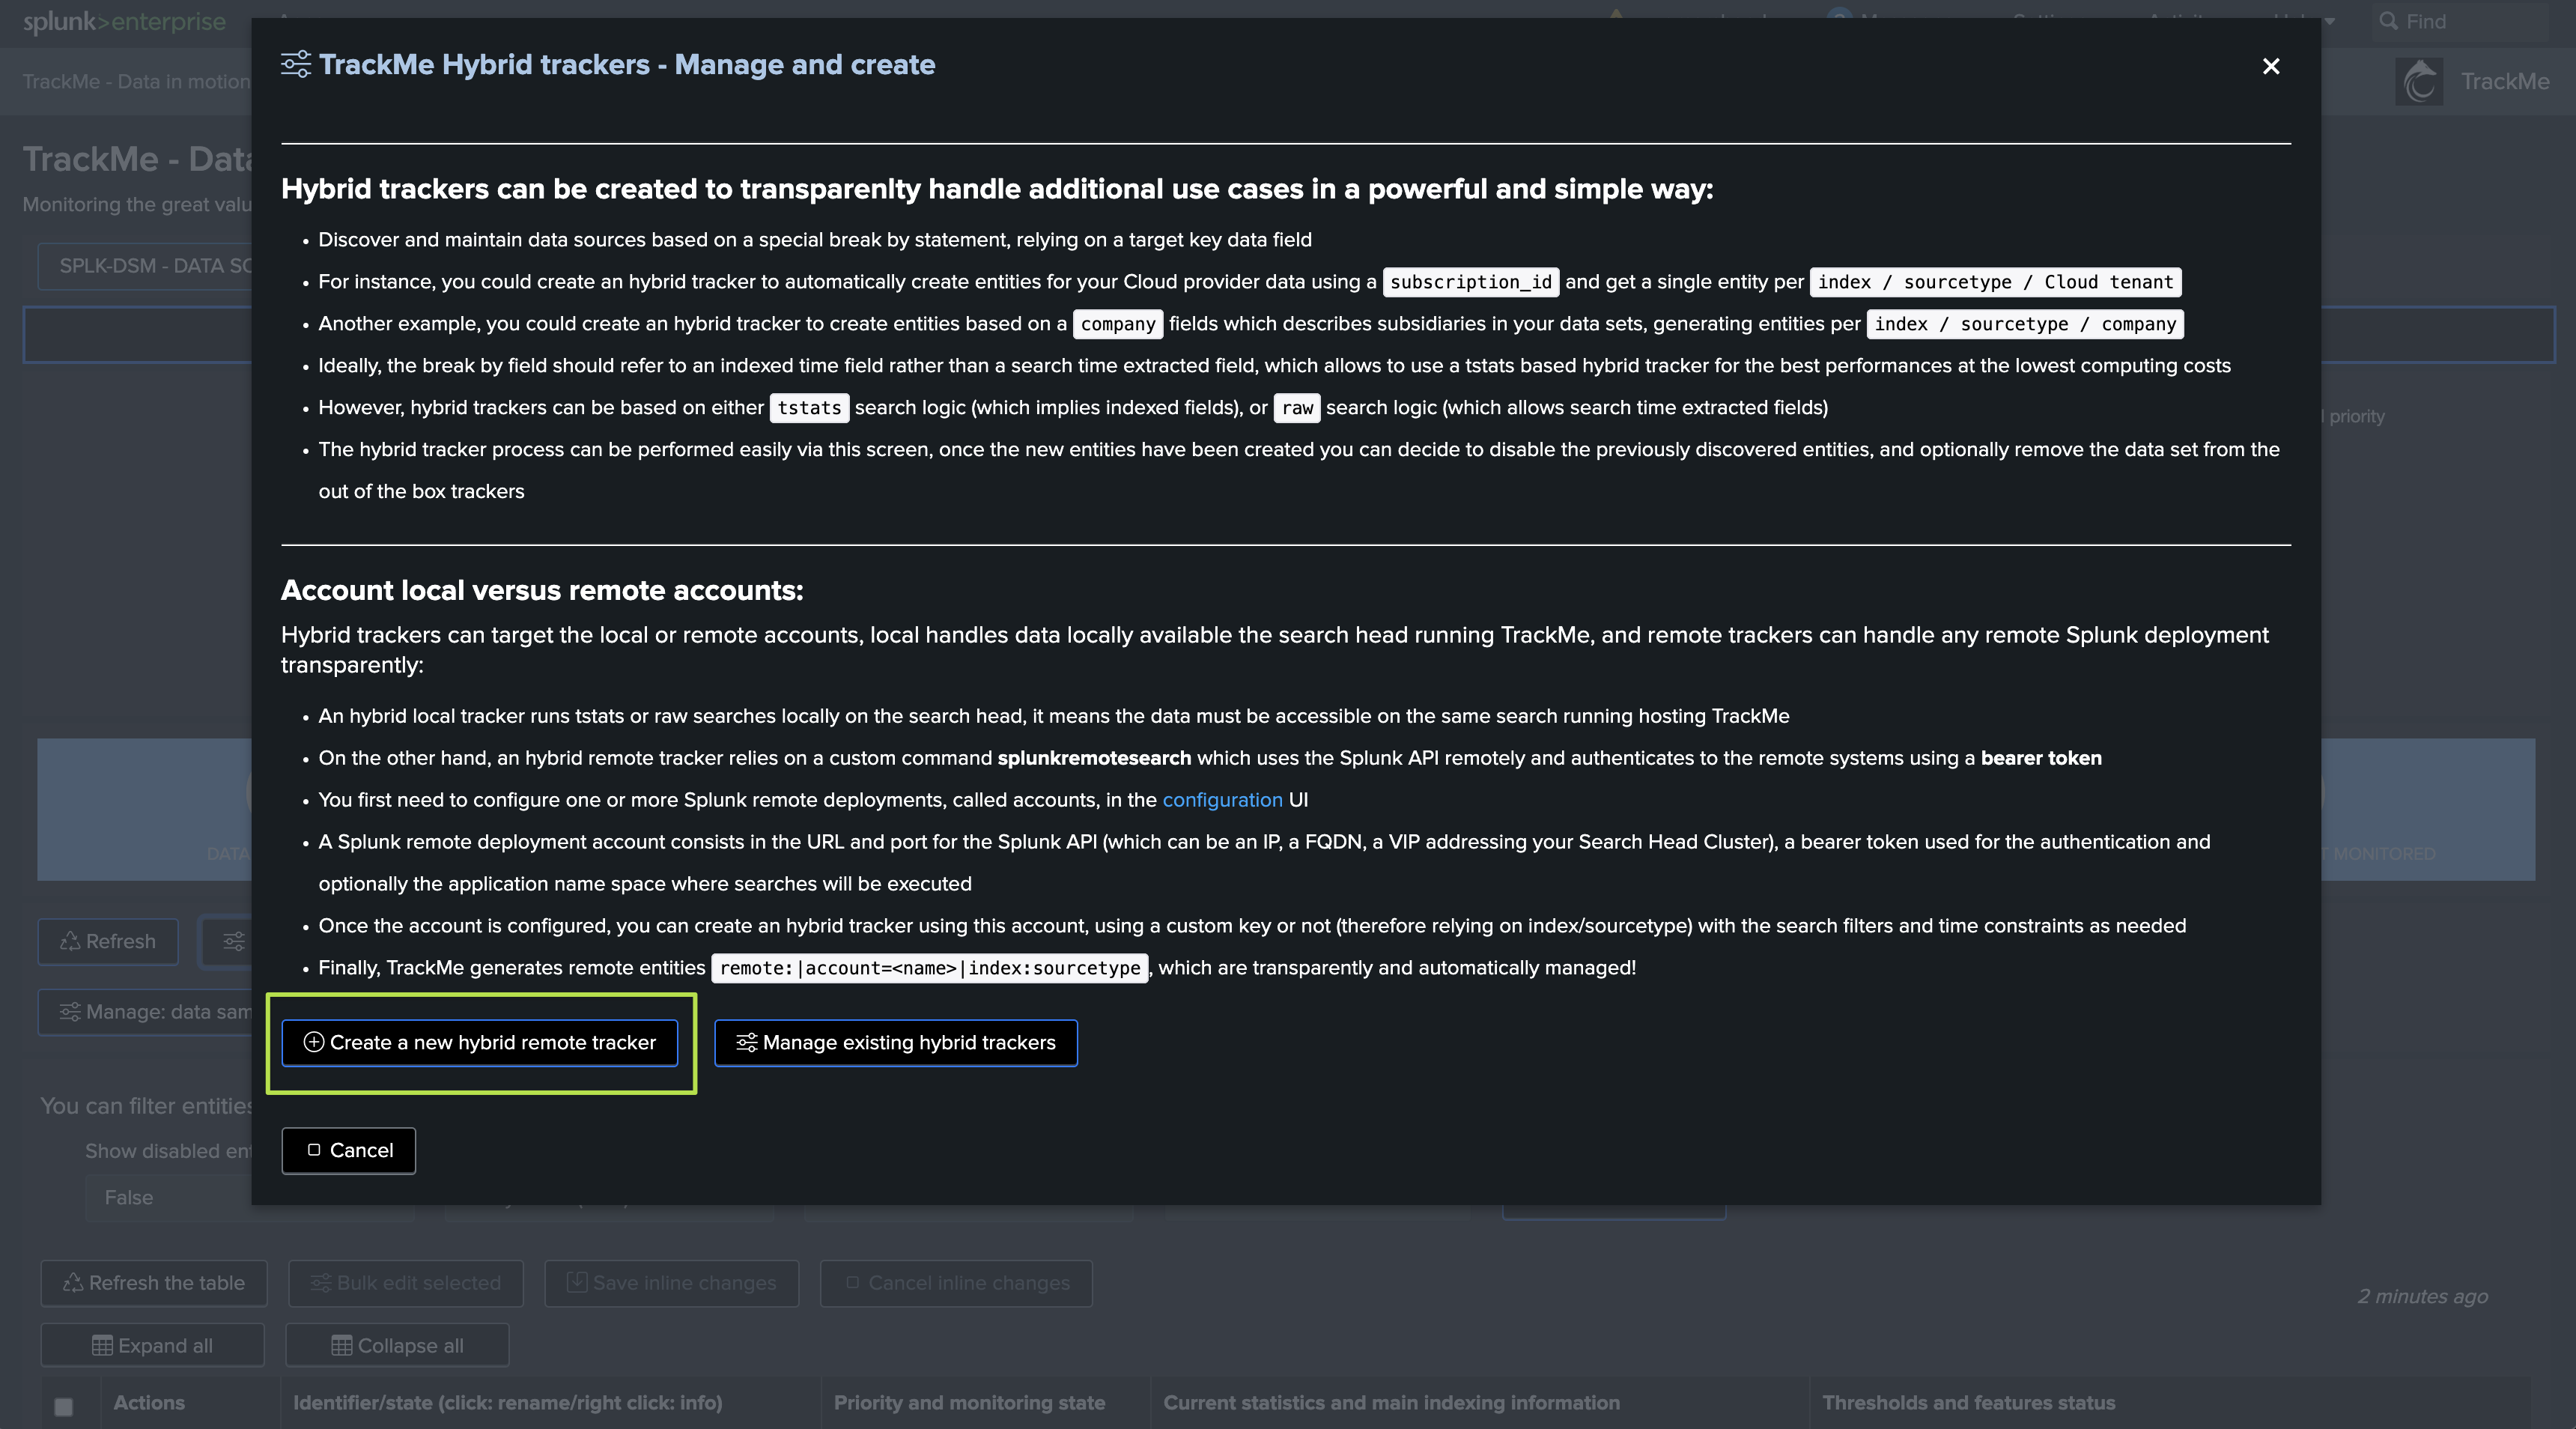
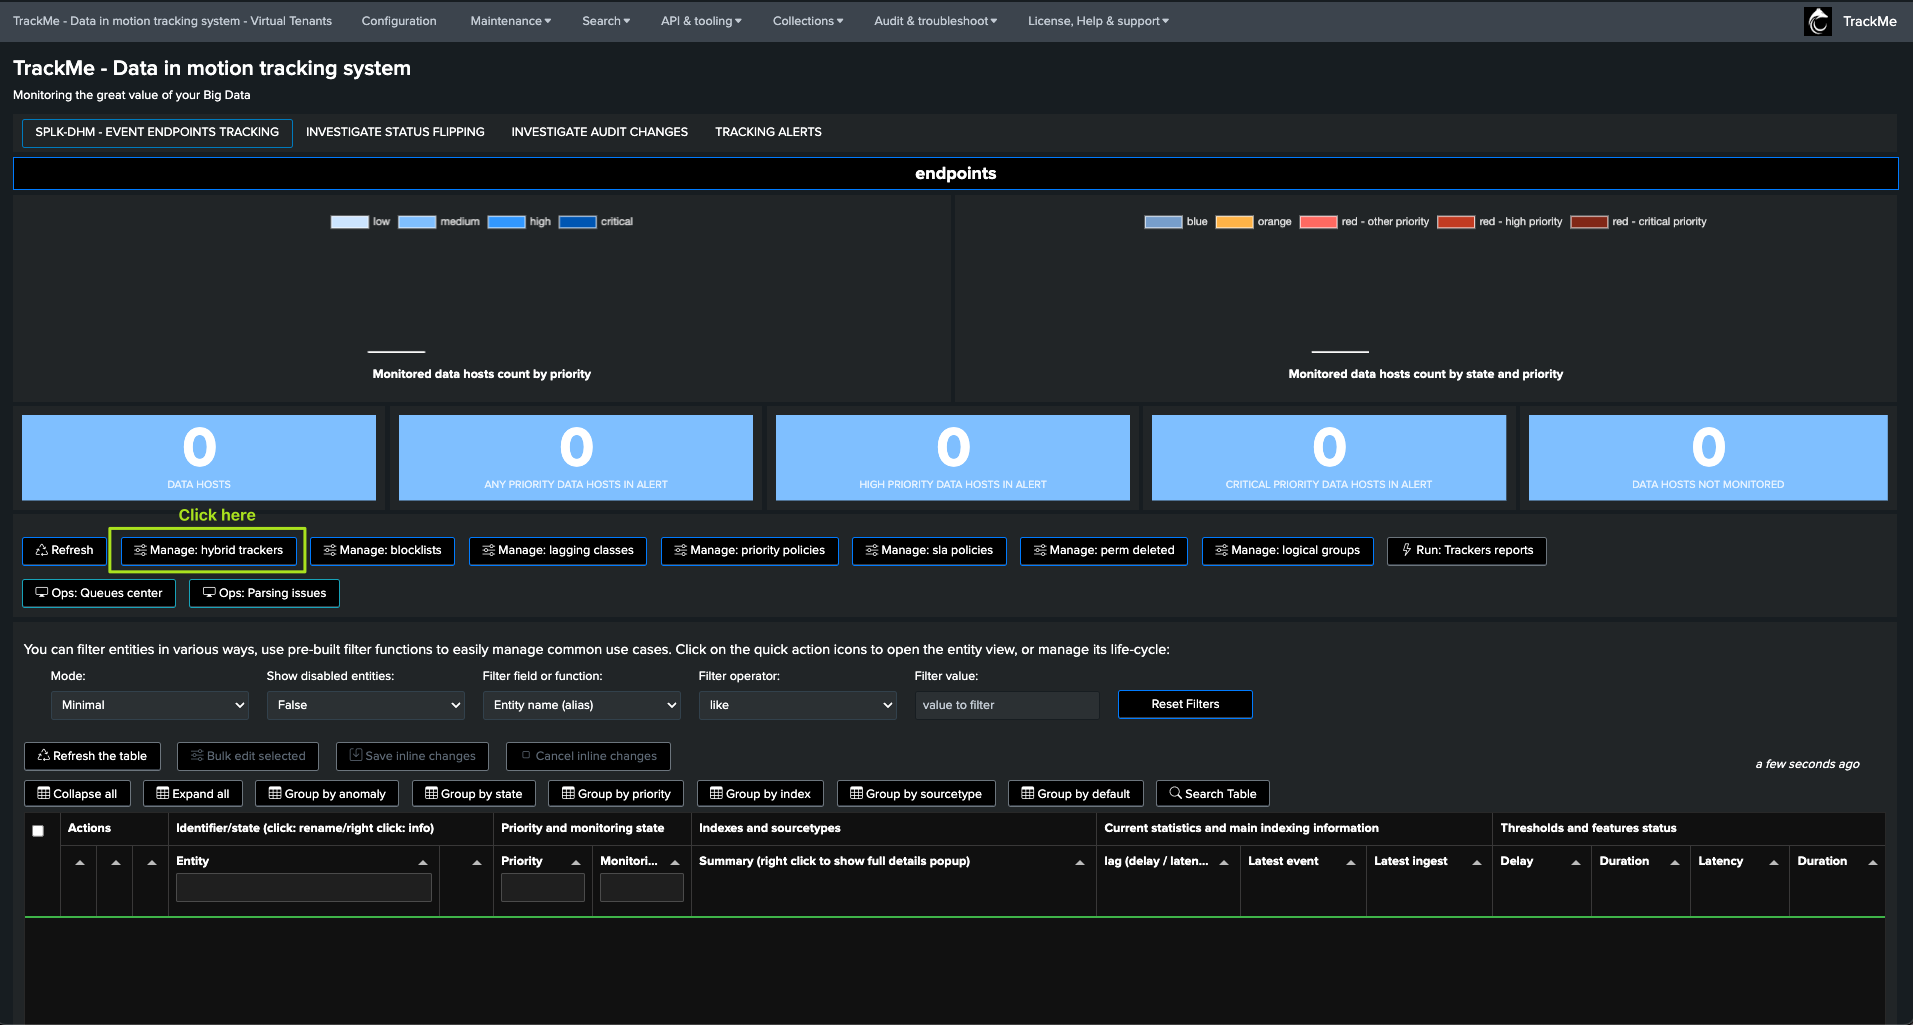
Optional: Create a hybrid tracker for splk-dsm after the creation of the Virtual Tenant
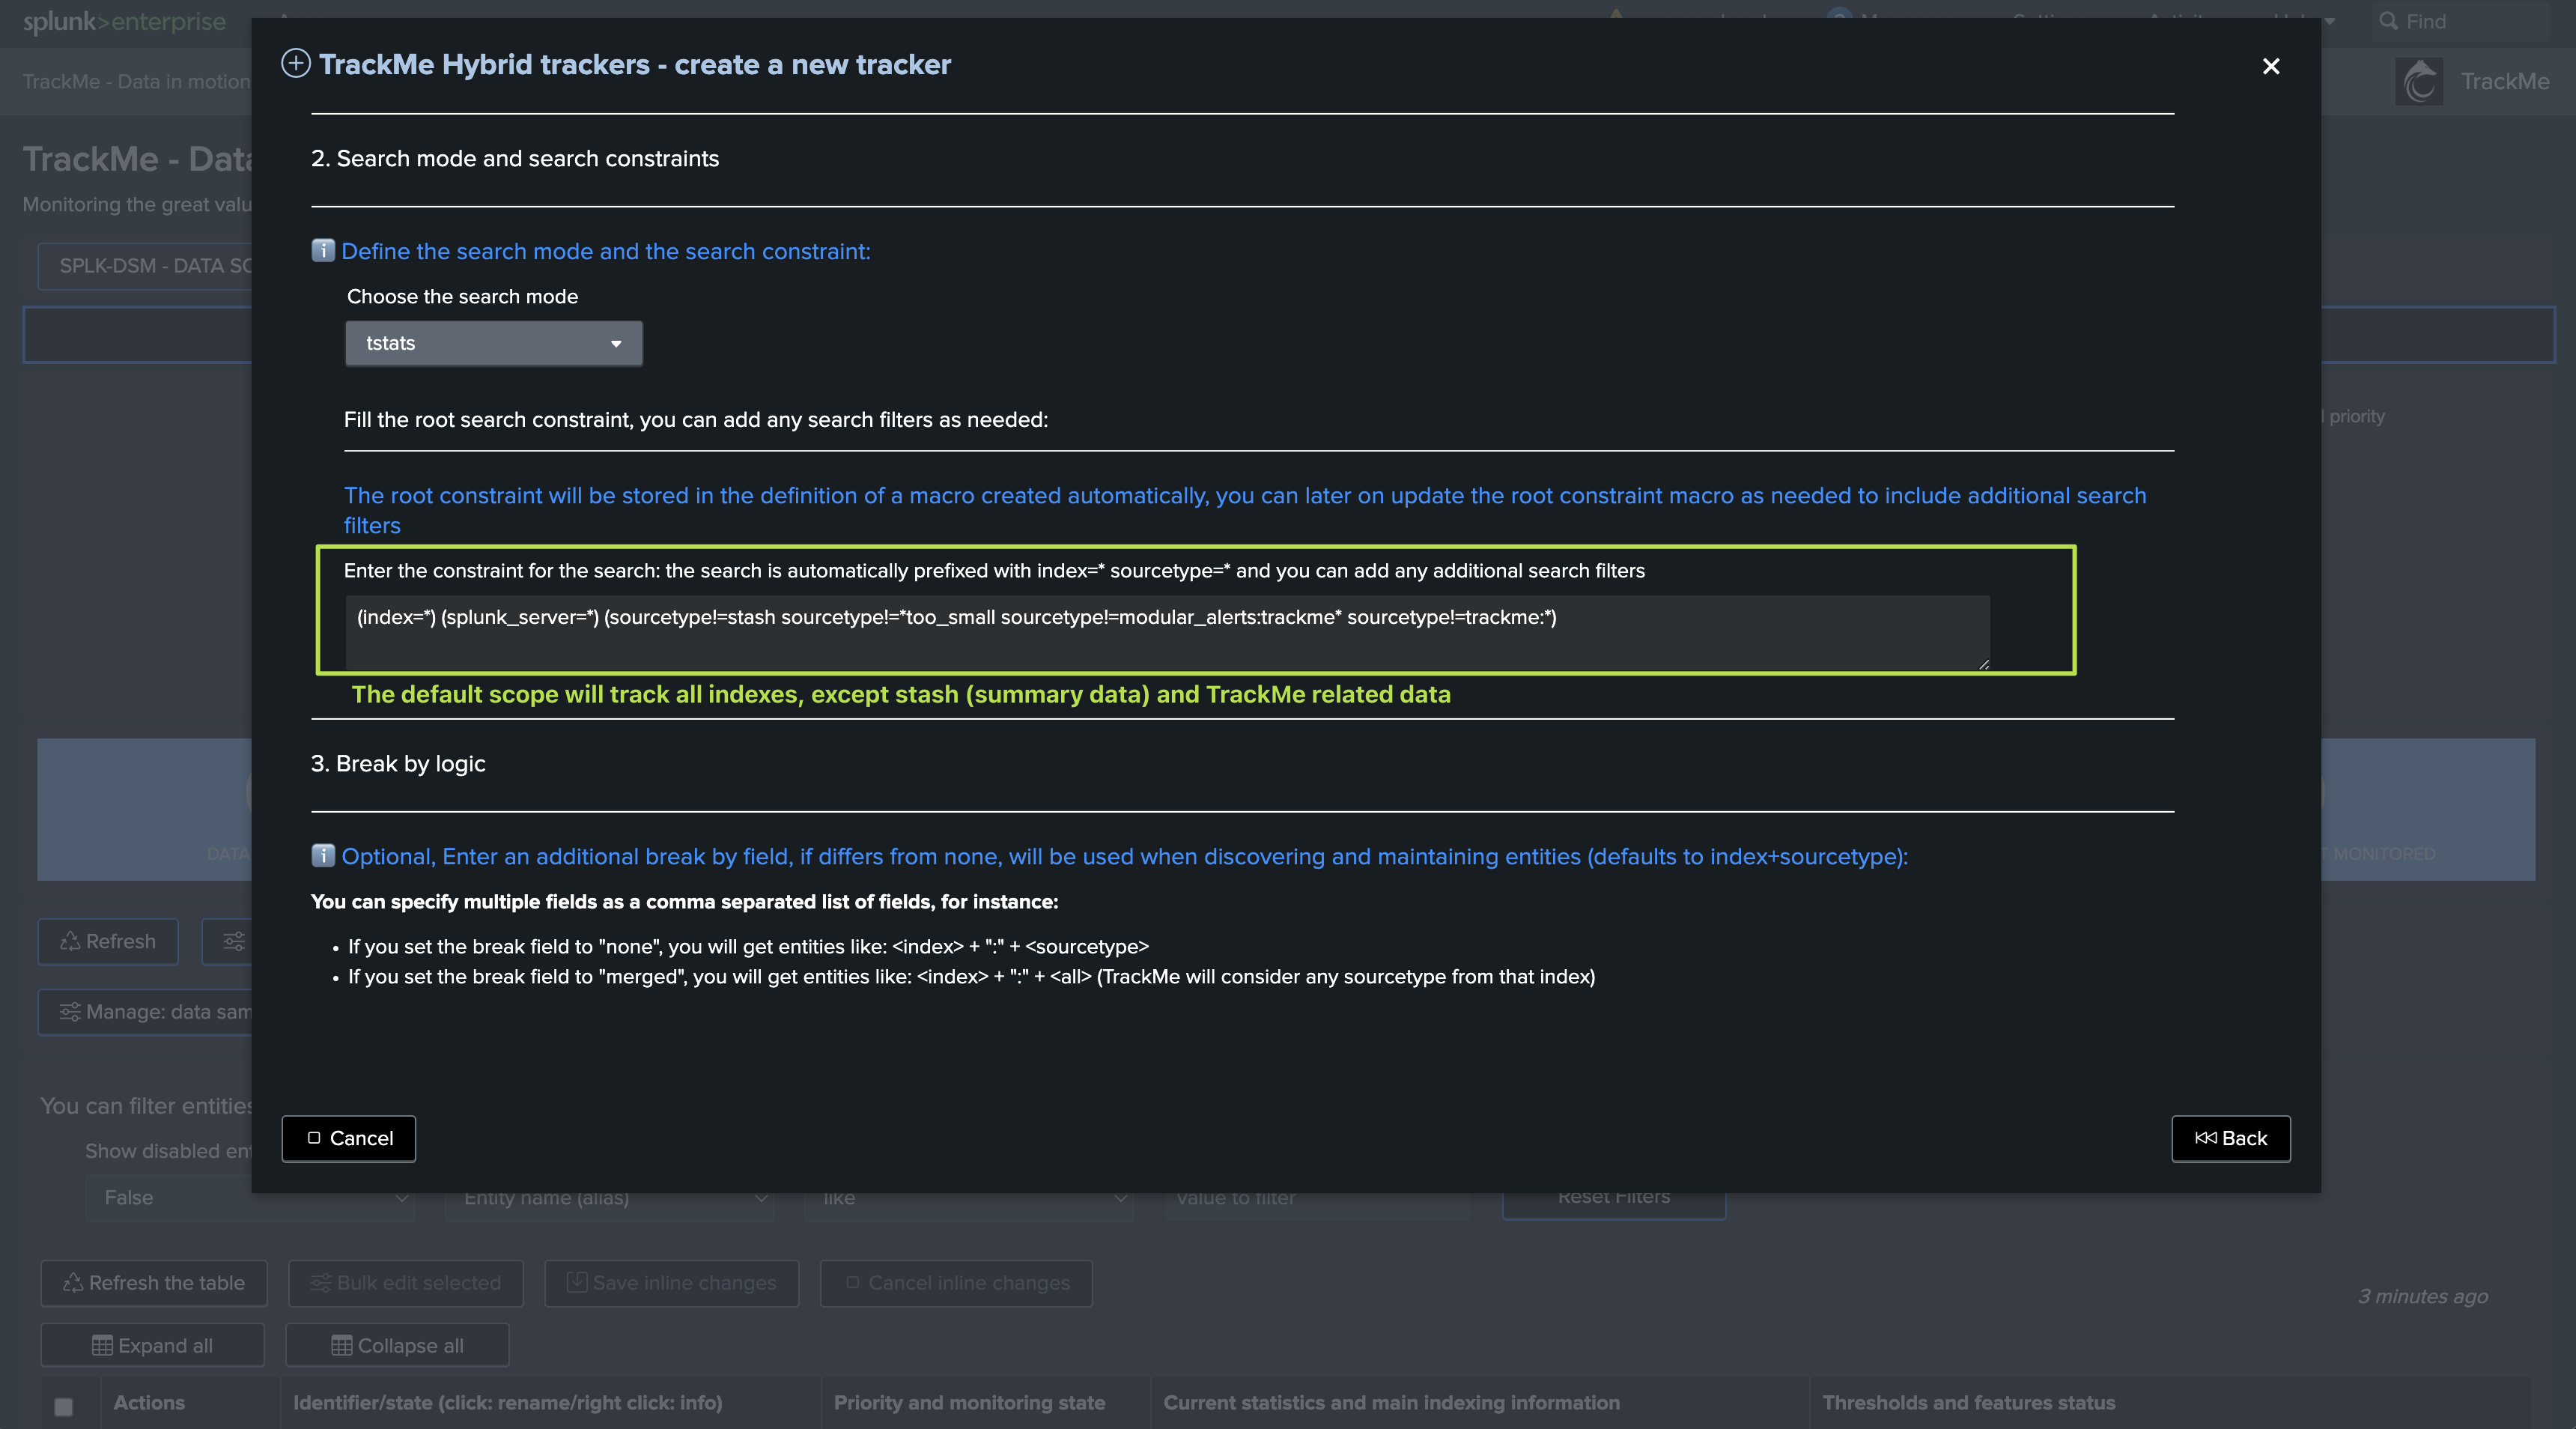
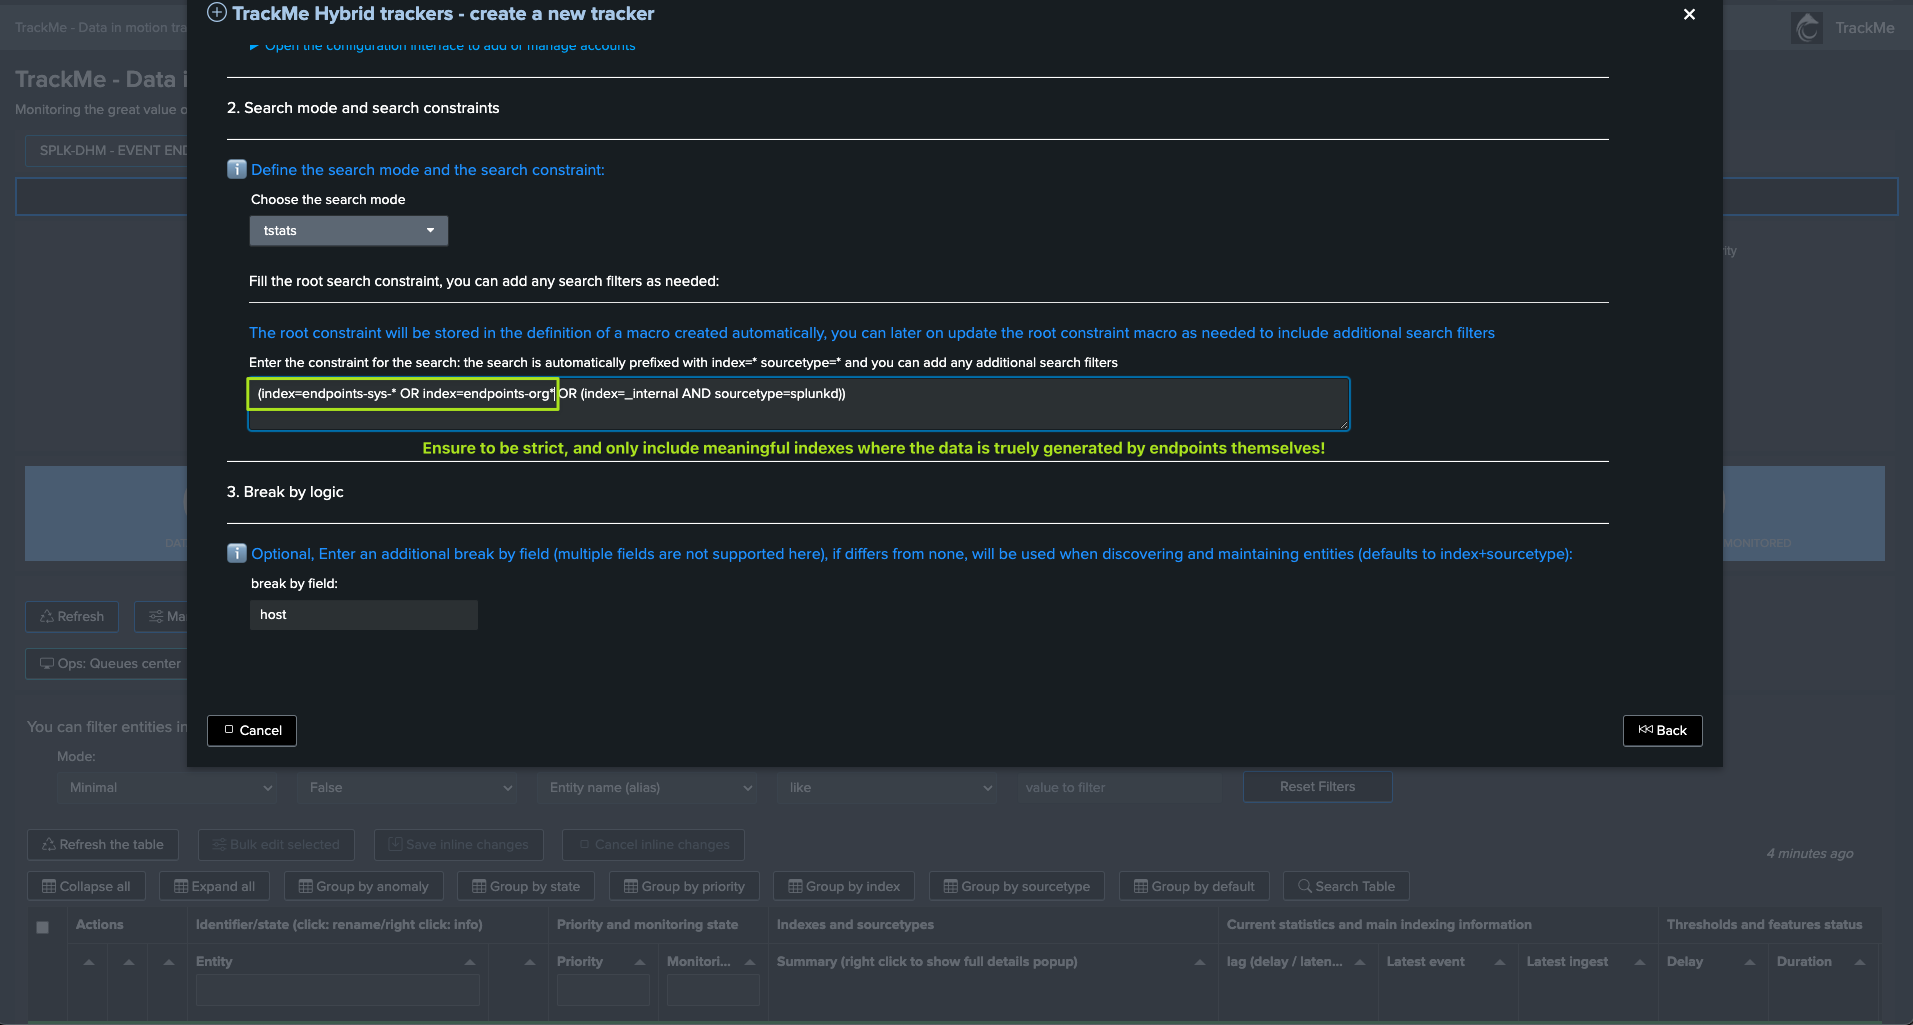
Go to Step 2: (Search mode and constraints)
The default root constraint tracks all indexers, and excludes summary data (stash) and TrackMe-related data.
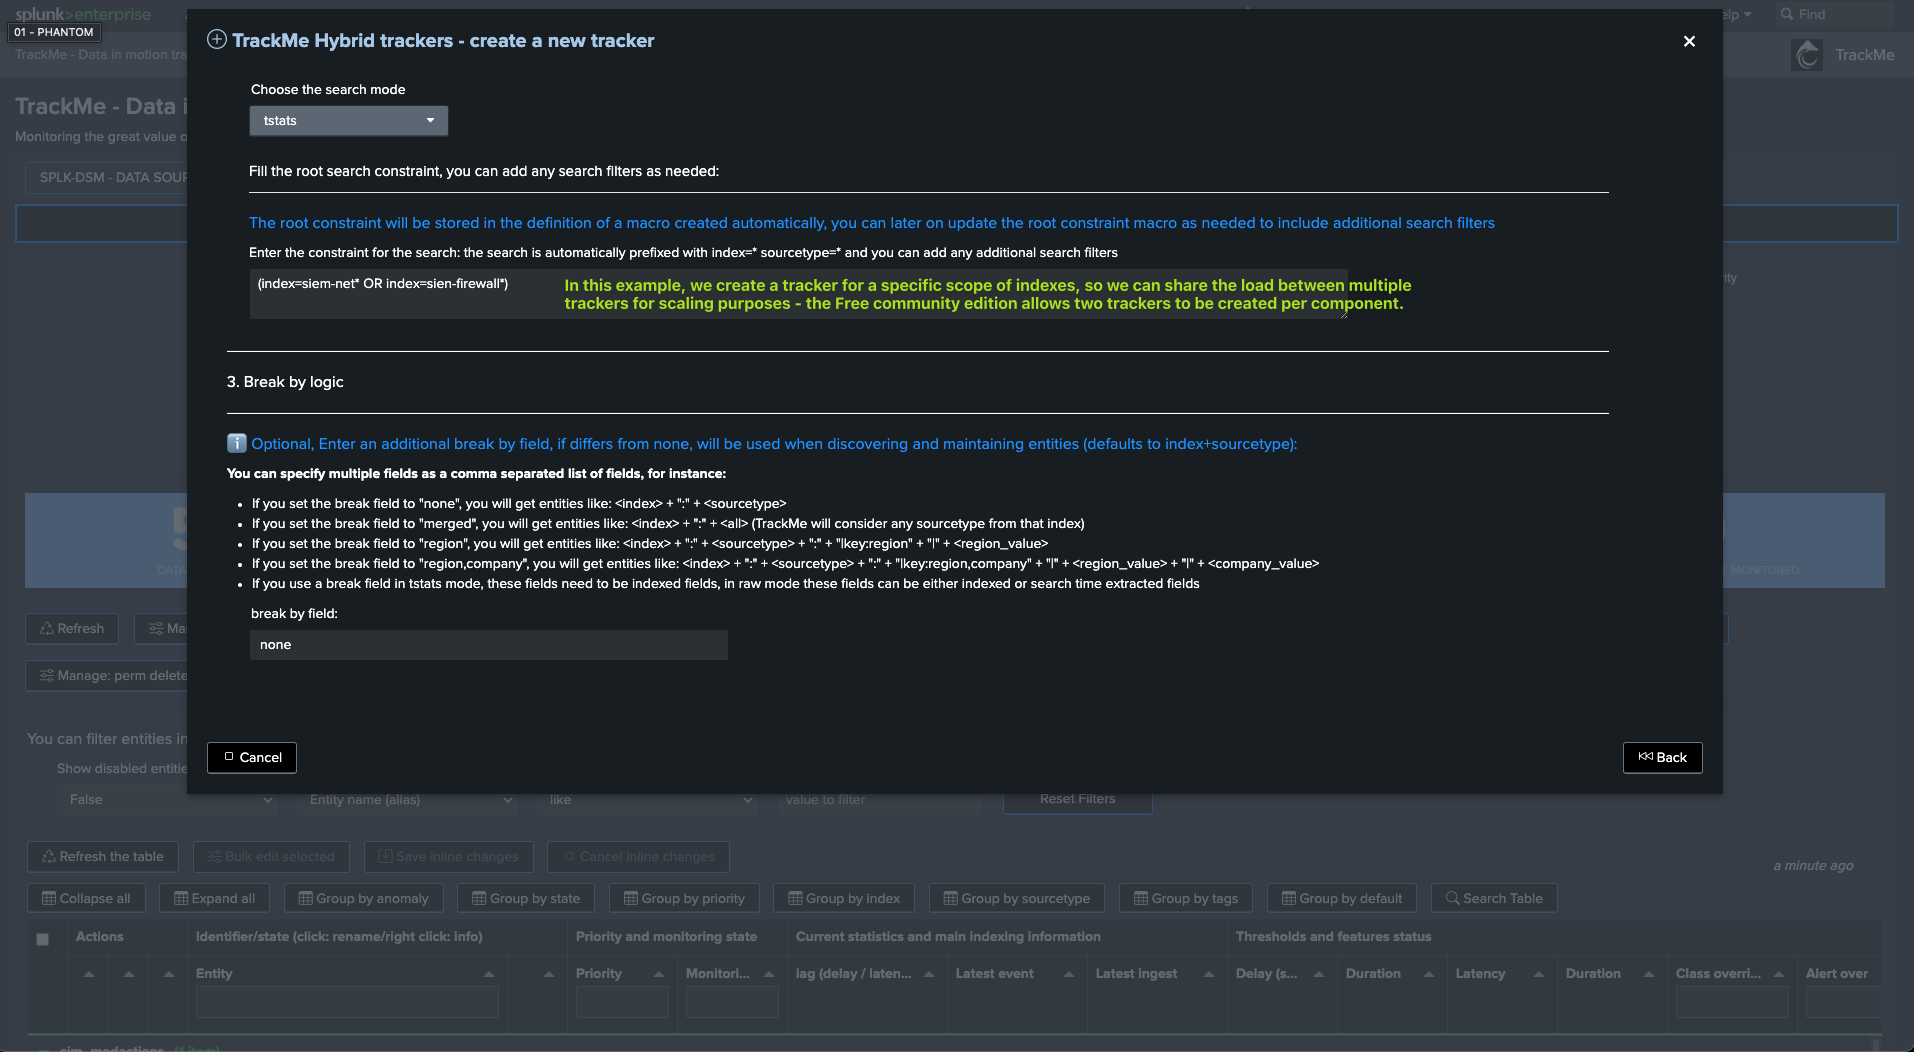
On large environments, the scaling concept for TrackMe is to dedicate Hybrid Trackers to specific indexes scope, so trackers can share the load and be executed concurrently, allowing TrackMe to scale at any level.
On relatively small environments, the default configuration for a single tracker is in most cases able to cope with the load with no issues.
Finally, if you are a free community edition user, you can create up to two Hybrid Trackers per component.
For more information about scaling TrackMe for high-scale environments, please refer to the TrackMe documentation, notably: Large Scale Environment and Best Practices Configuration Guide
About Trackers scope:
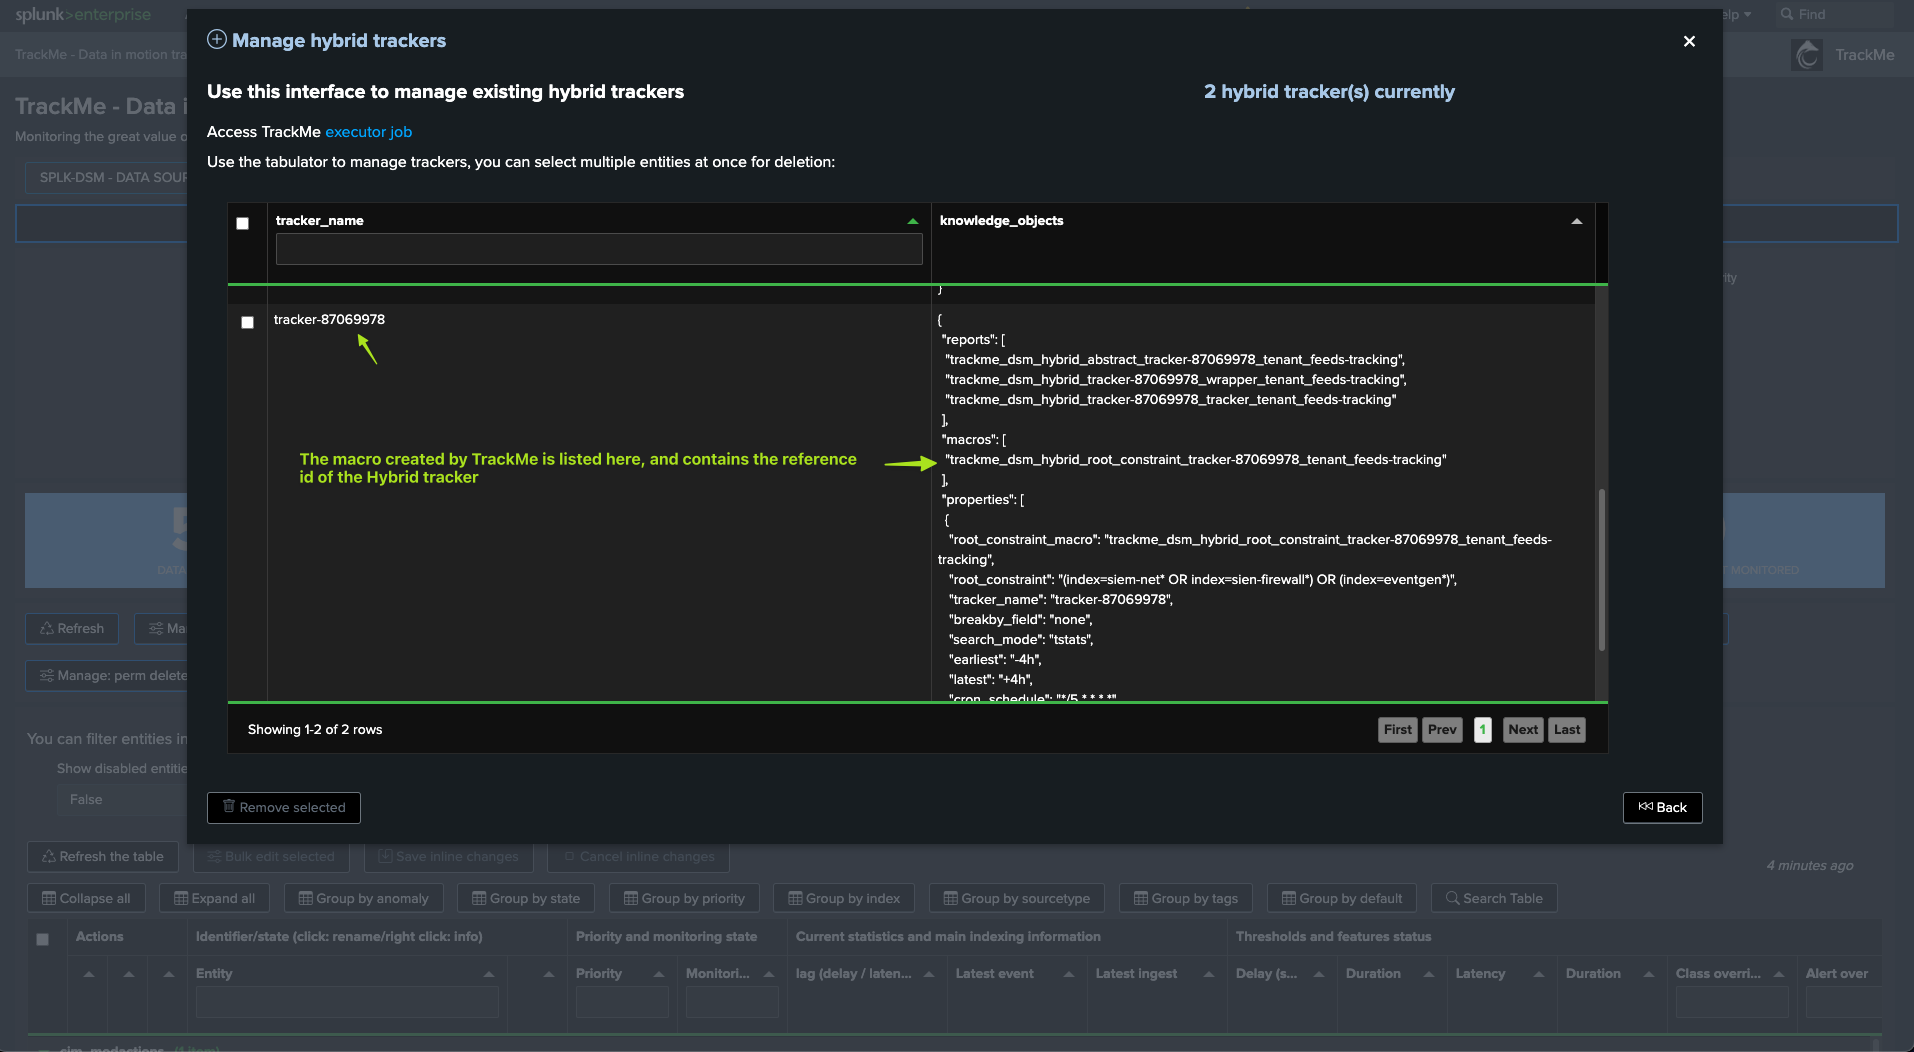
When creating a Hybrid Tracker, TrackMe creates a dedicated Splunk macro which contains the scope of the tracker.
You can therefore easily start with a restricted scope such as a list of index patterns, then modify this macro at any point in time to include additional contexts.
To retrieve the macro name after the tracker is created, click on Manage Hybrid tracker from the home UI.
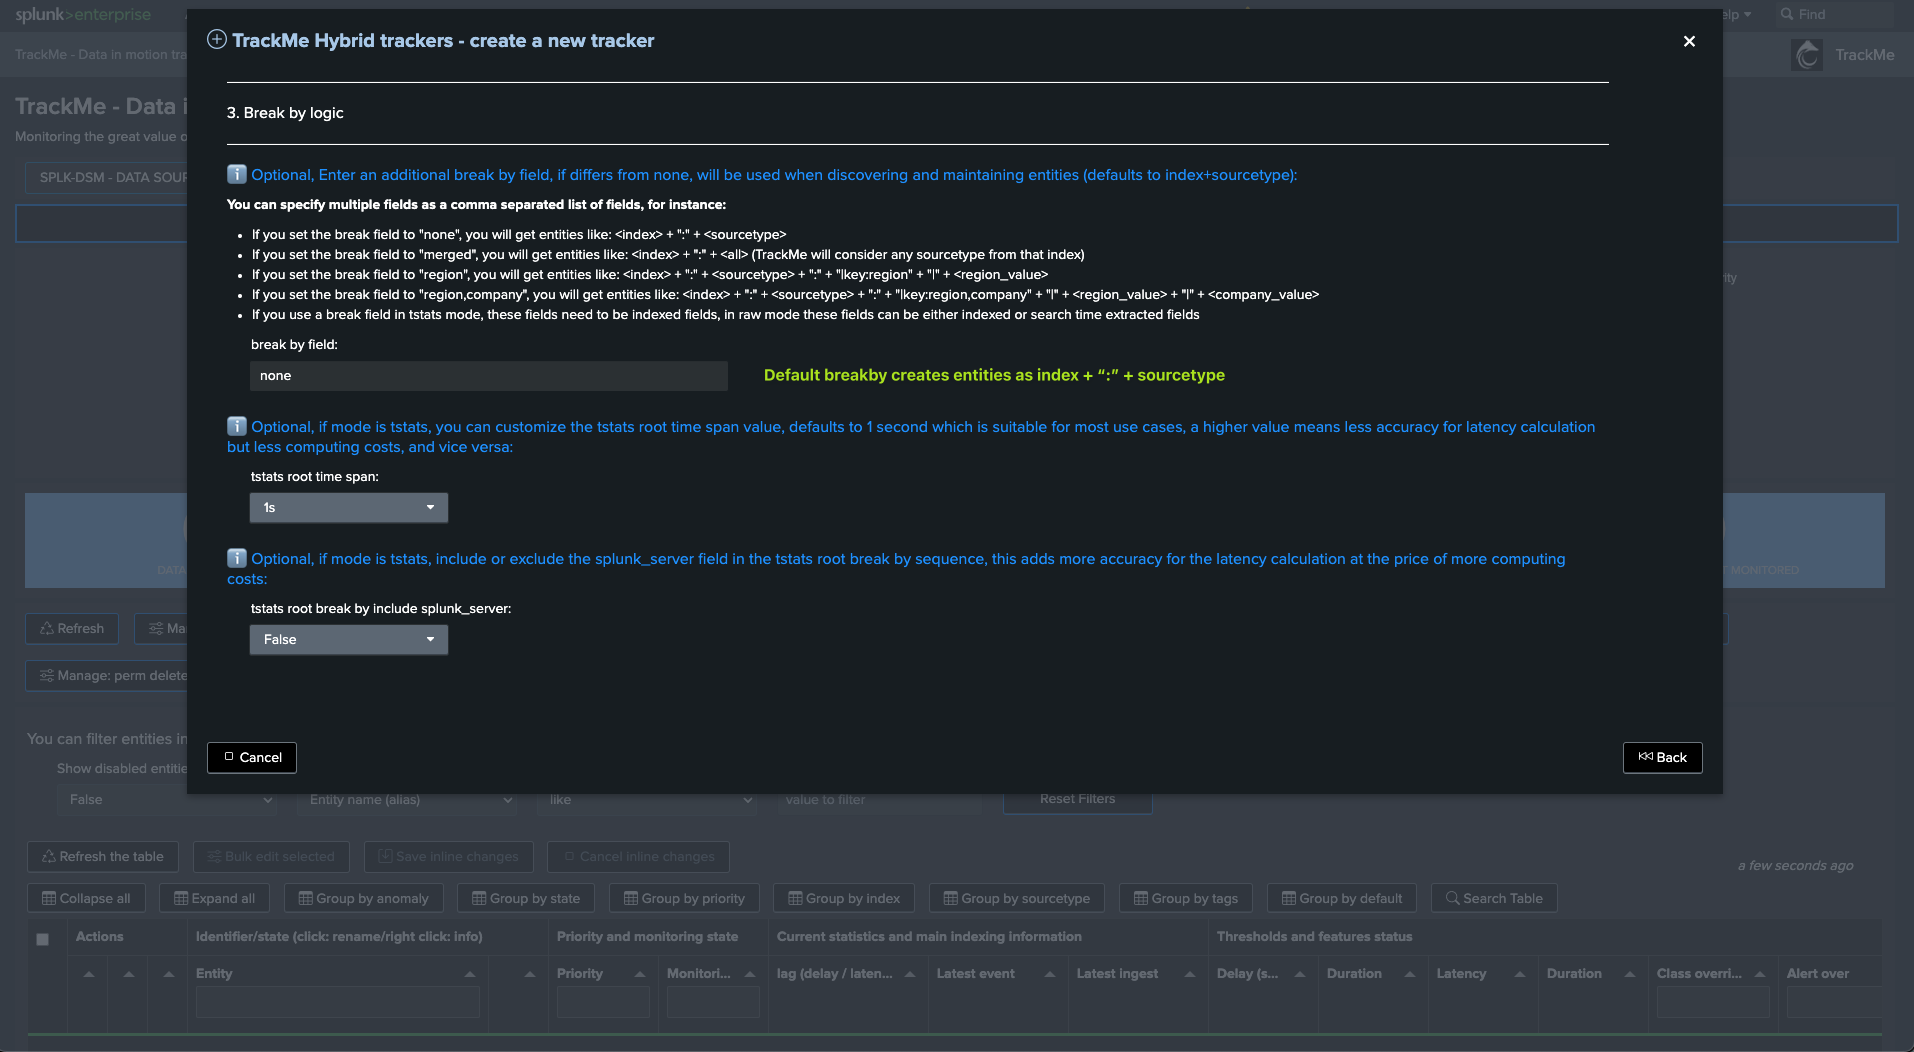
Go to Step 3: (Break by logic)
By default, the behavior is to create TrackMe entities as the combination of indexes and sourcetypes, therefore:
<index>:<sourcetype>, in most cases, this is what you want.An alternative, and depending on your requirements, is to use the
mergemode, in this case TrackMe will create one entity per index:<index>.Finally, you can also specify a custom list (comma-separated format) of fields as part of a custom break by, this is more sophisticated and is generally used for specific use cases such as leveraging custom indexed fields in large-scale environments.
Go to Step 4: (Time ranges)
By default, TrackMe uses a -4h/+4h time range for the search logic, this is generally fine for most cases.
In some contexts such as very high-scale contexts, or limited capacity contexts, you can eventually reduce the earliest to reduce the associated costs and run time (most likely for splk-dhm than splk-dsm).
Go to Step 5: (Test & Review)
This steps allows simulating the search logic and its parameters, to preview the results and notably the number of entities that would be created.
Go to Step 6: (Performance benchmark)
TrackMe allows benchmarking the most expensive part of the search logic, this provides an accurate enough idea of how long the tracker will take to execute.
The target is to execute the search every 5 minutes (while this is under your control, in most cases we want to get as close as possible to this frequency, especially for feeds tracking).
This means that the search needs to be executed in less than 300 seconds to avoid generating skipping searches and missing executions.
The scaling idea underneath is to create multiple trackers with a reduced scope, so they can be executed concurrently, and therefore reduce the execution time.
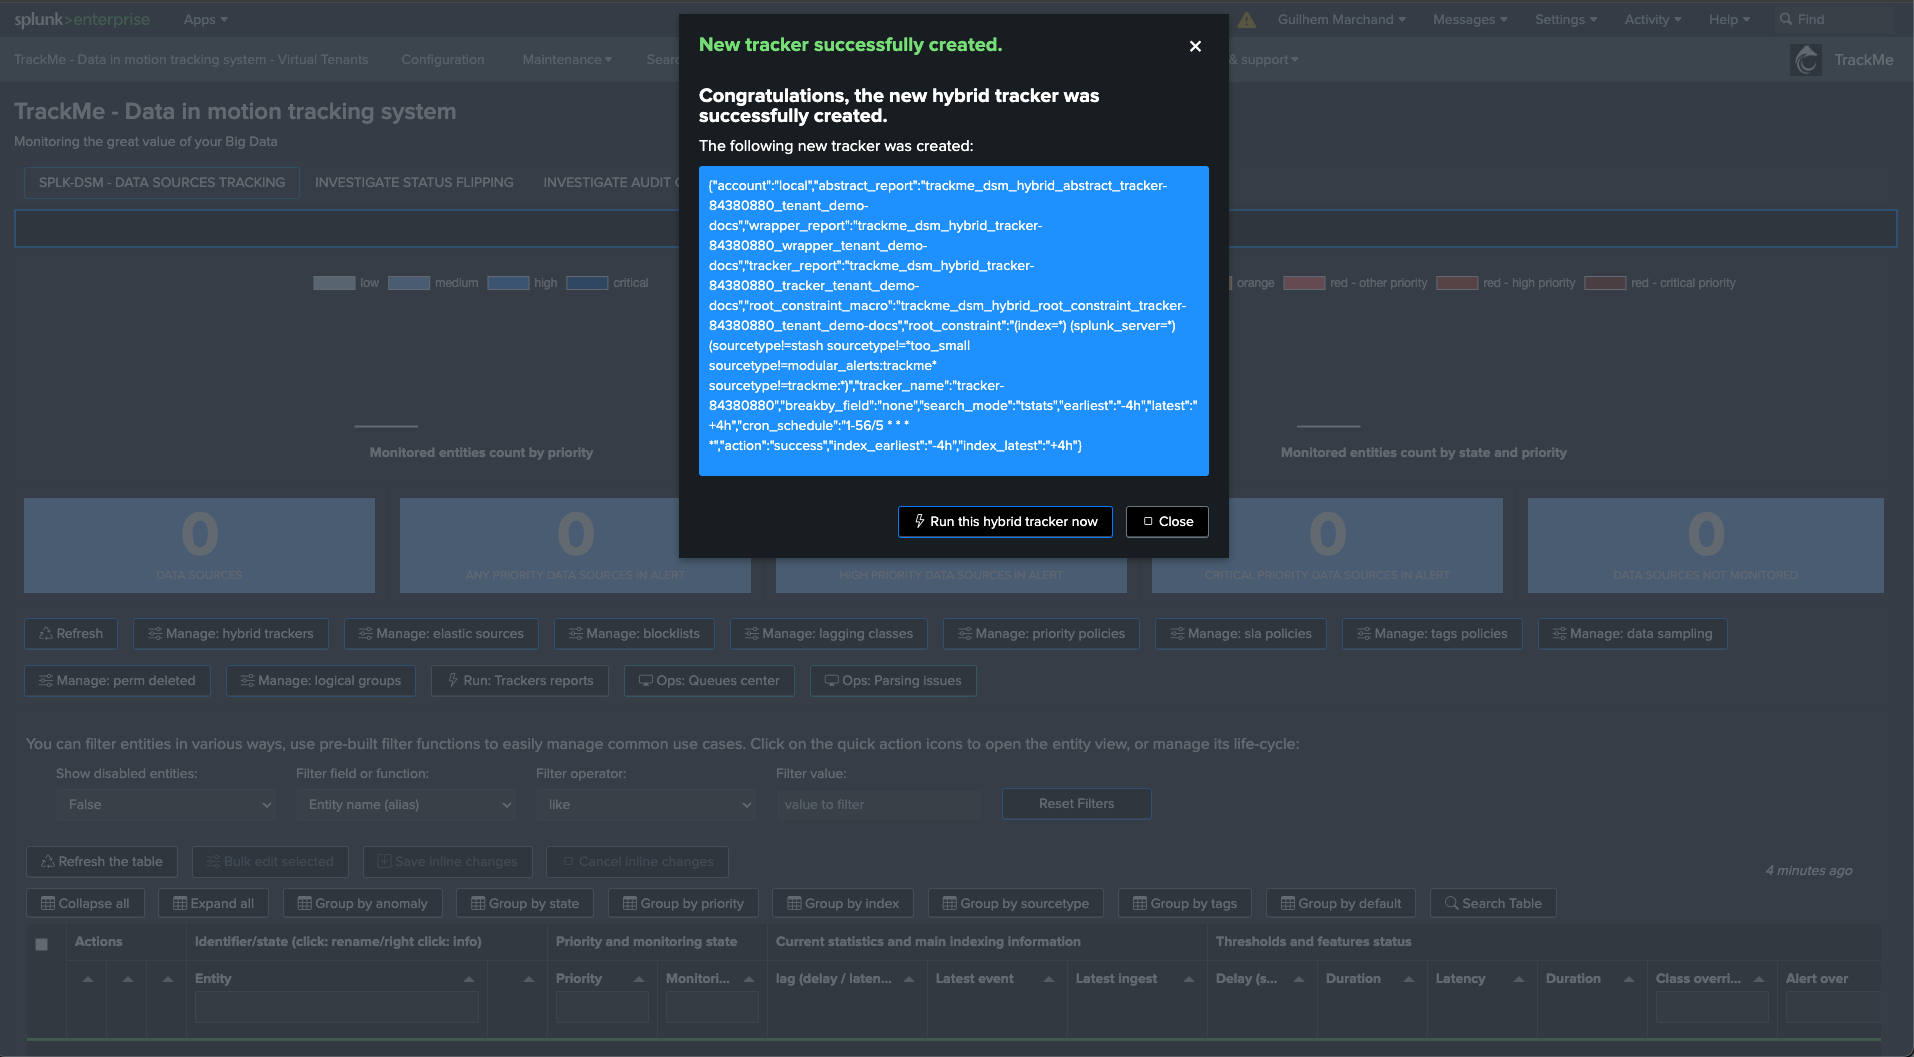
Finally, go step “Validate creation” to create the tracker

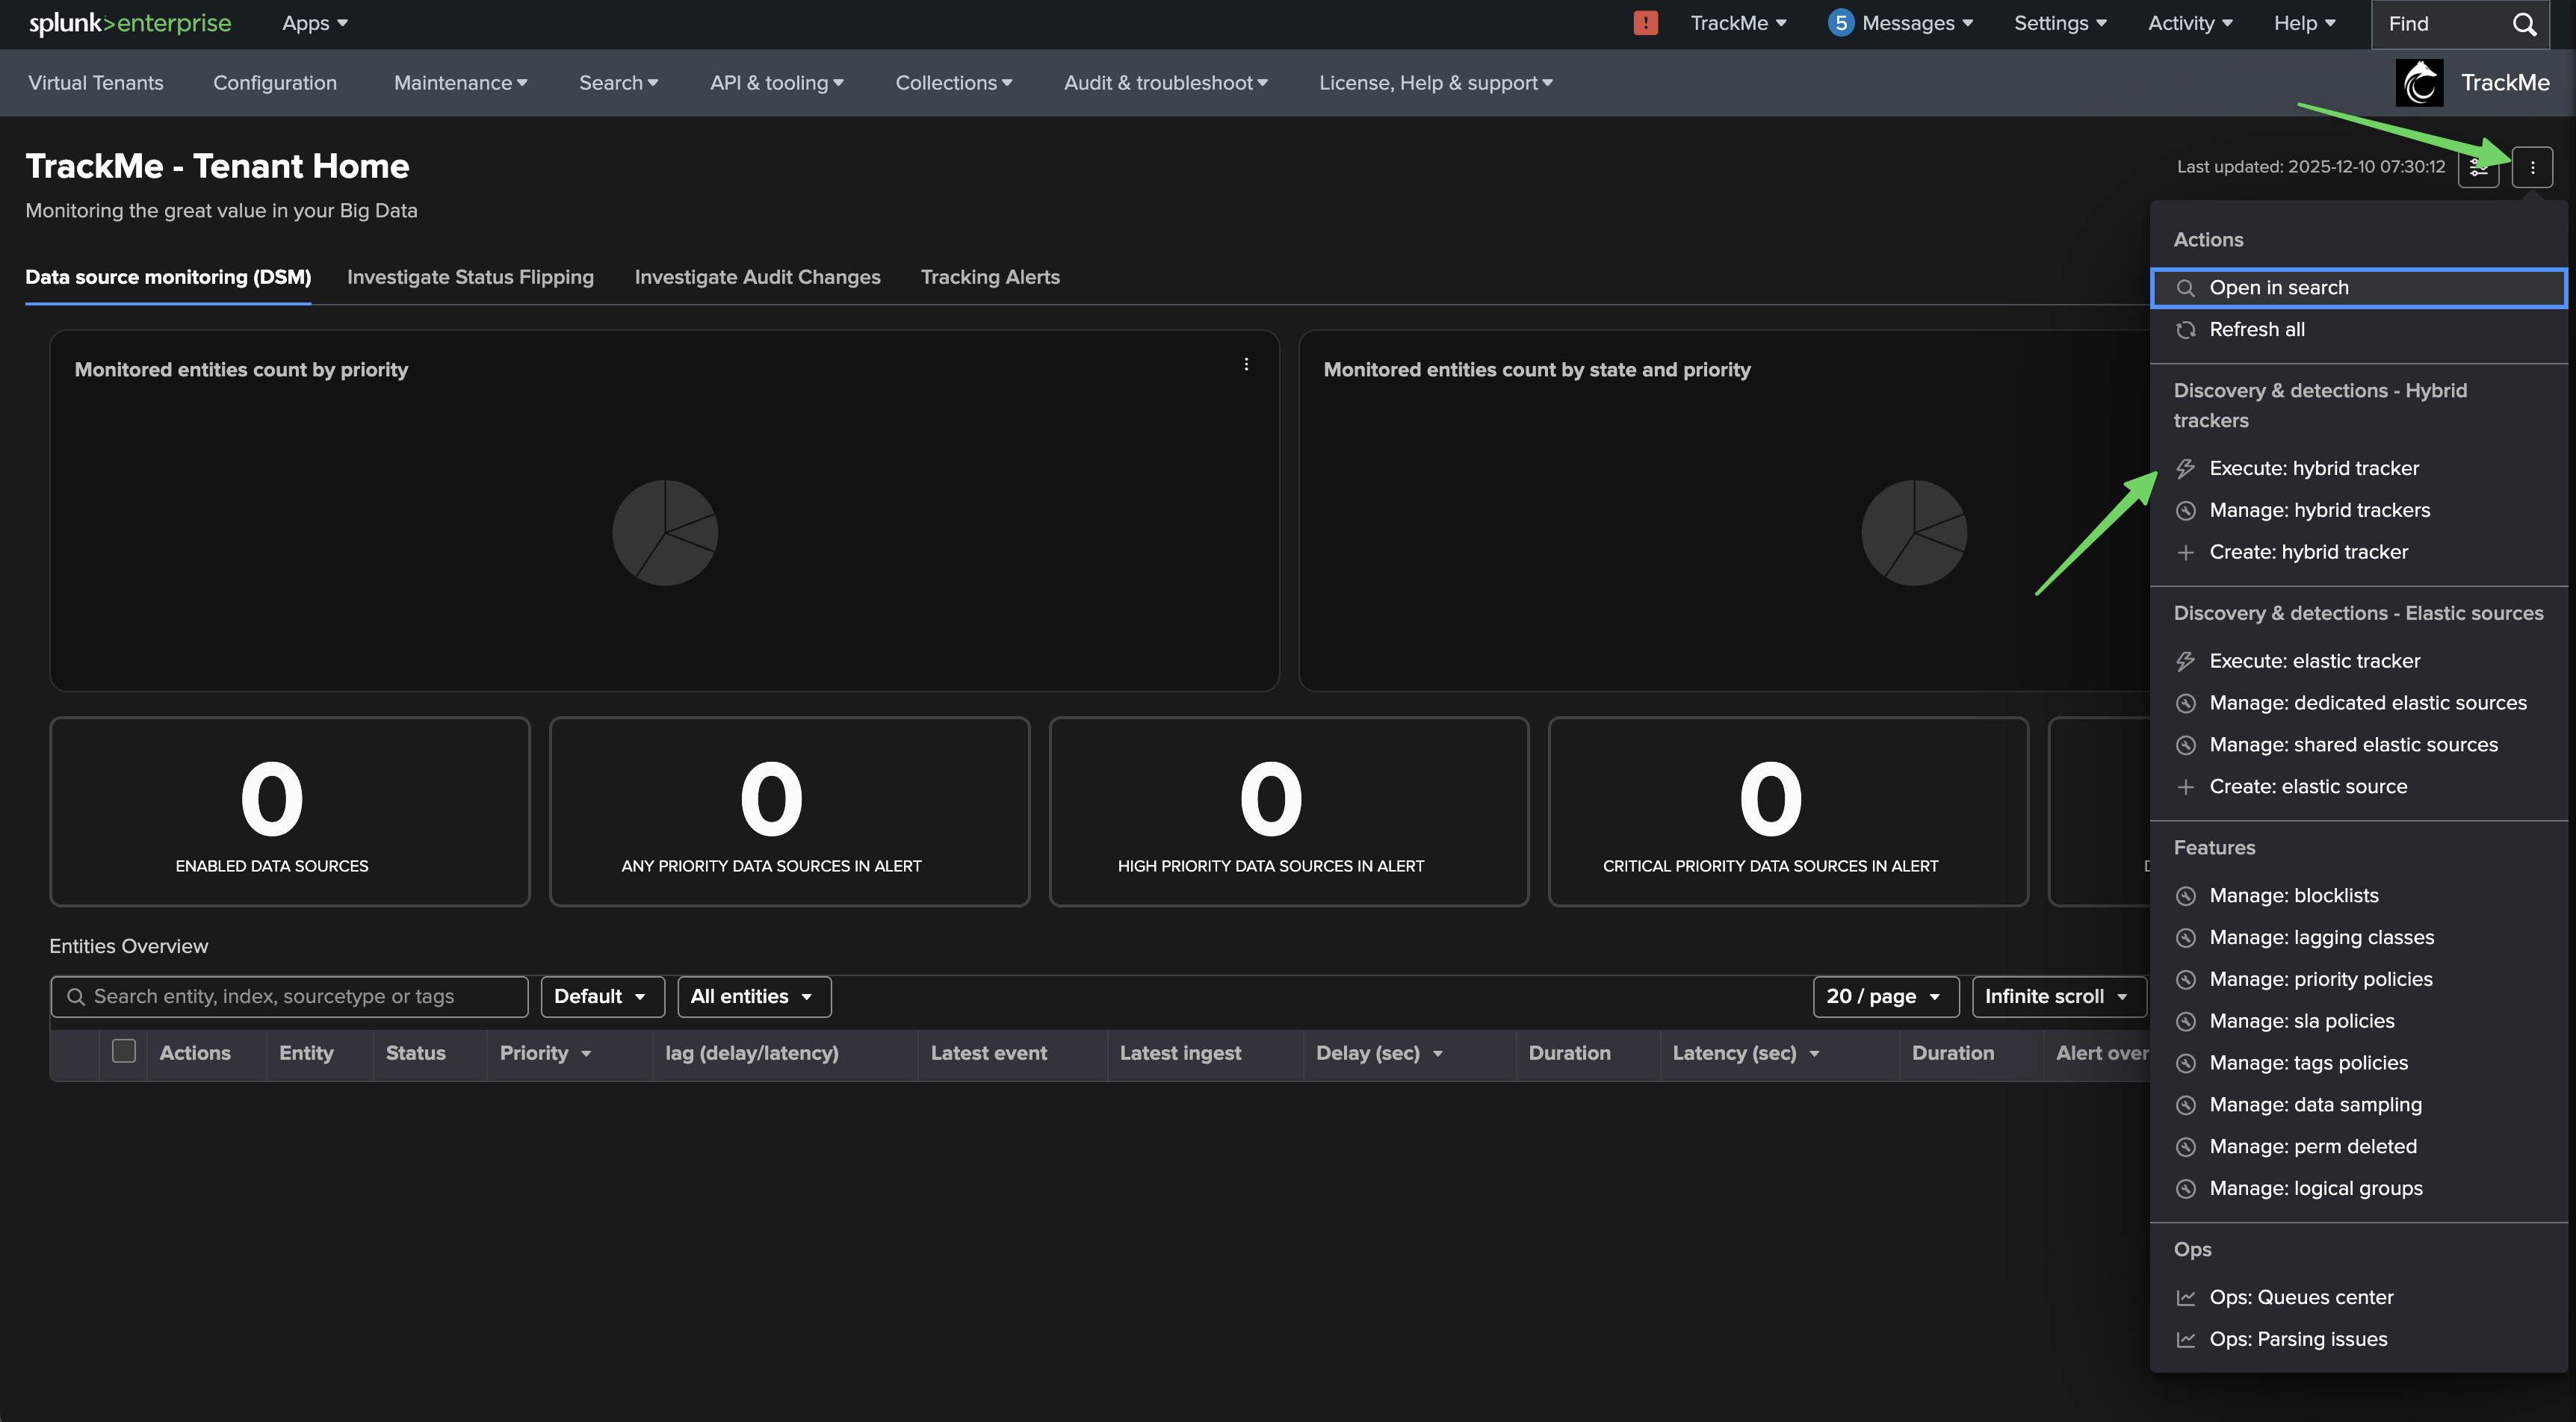
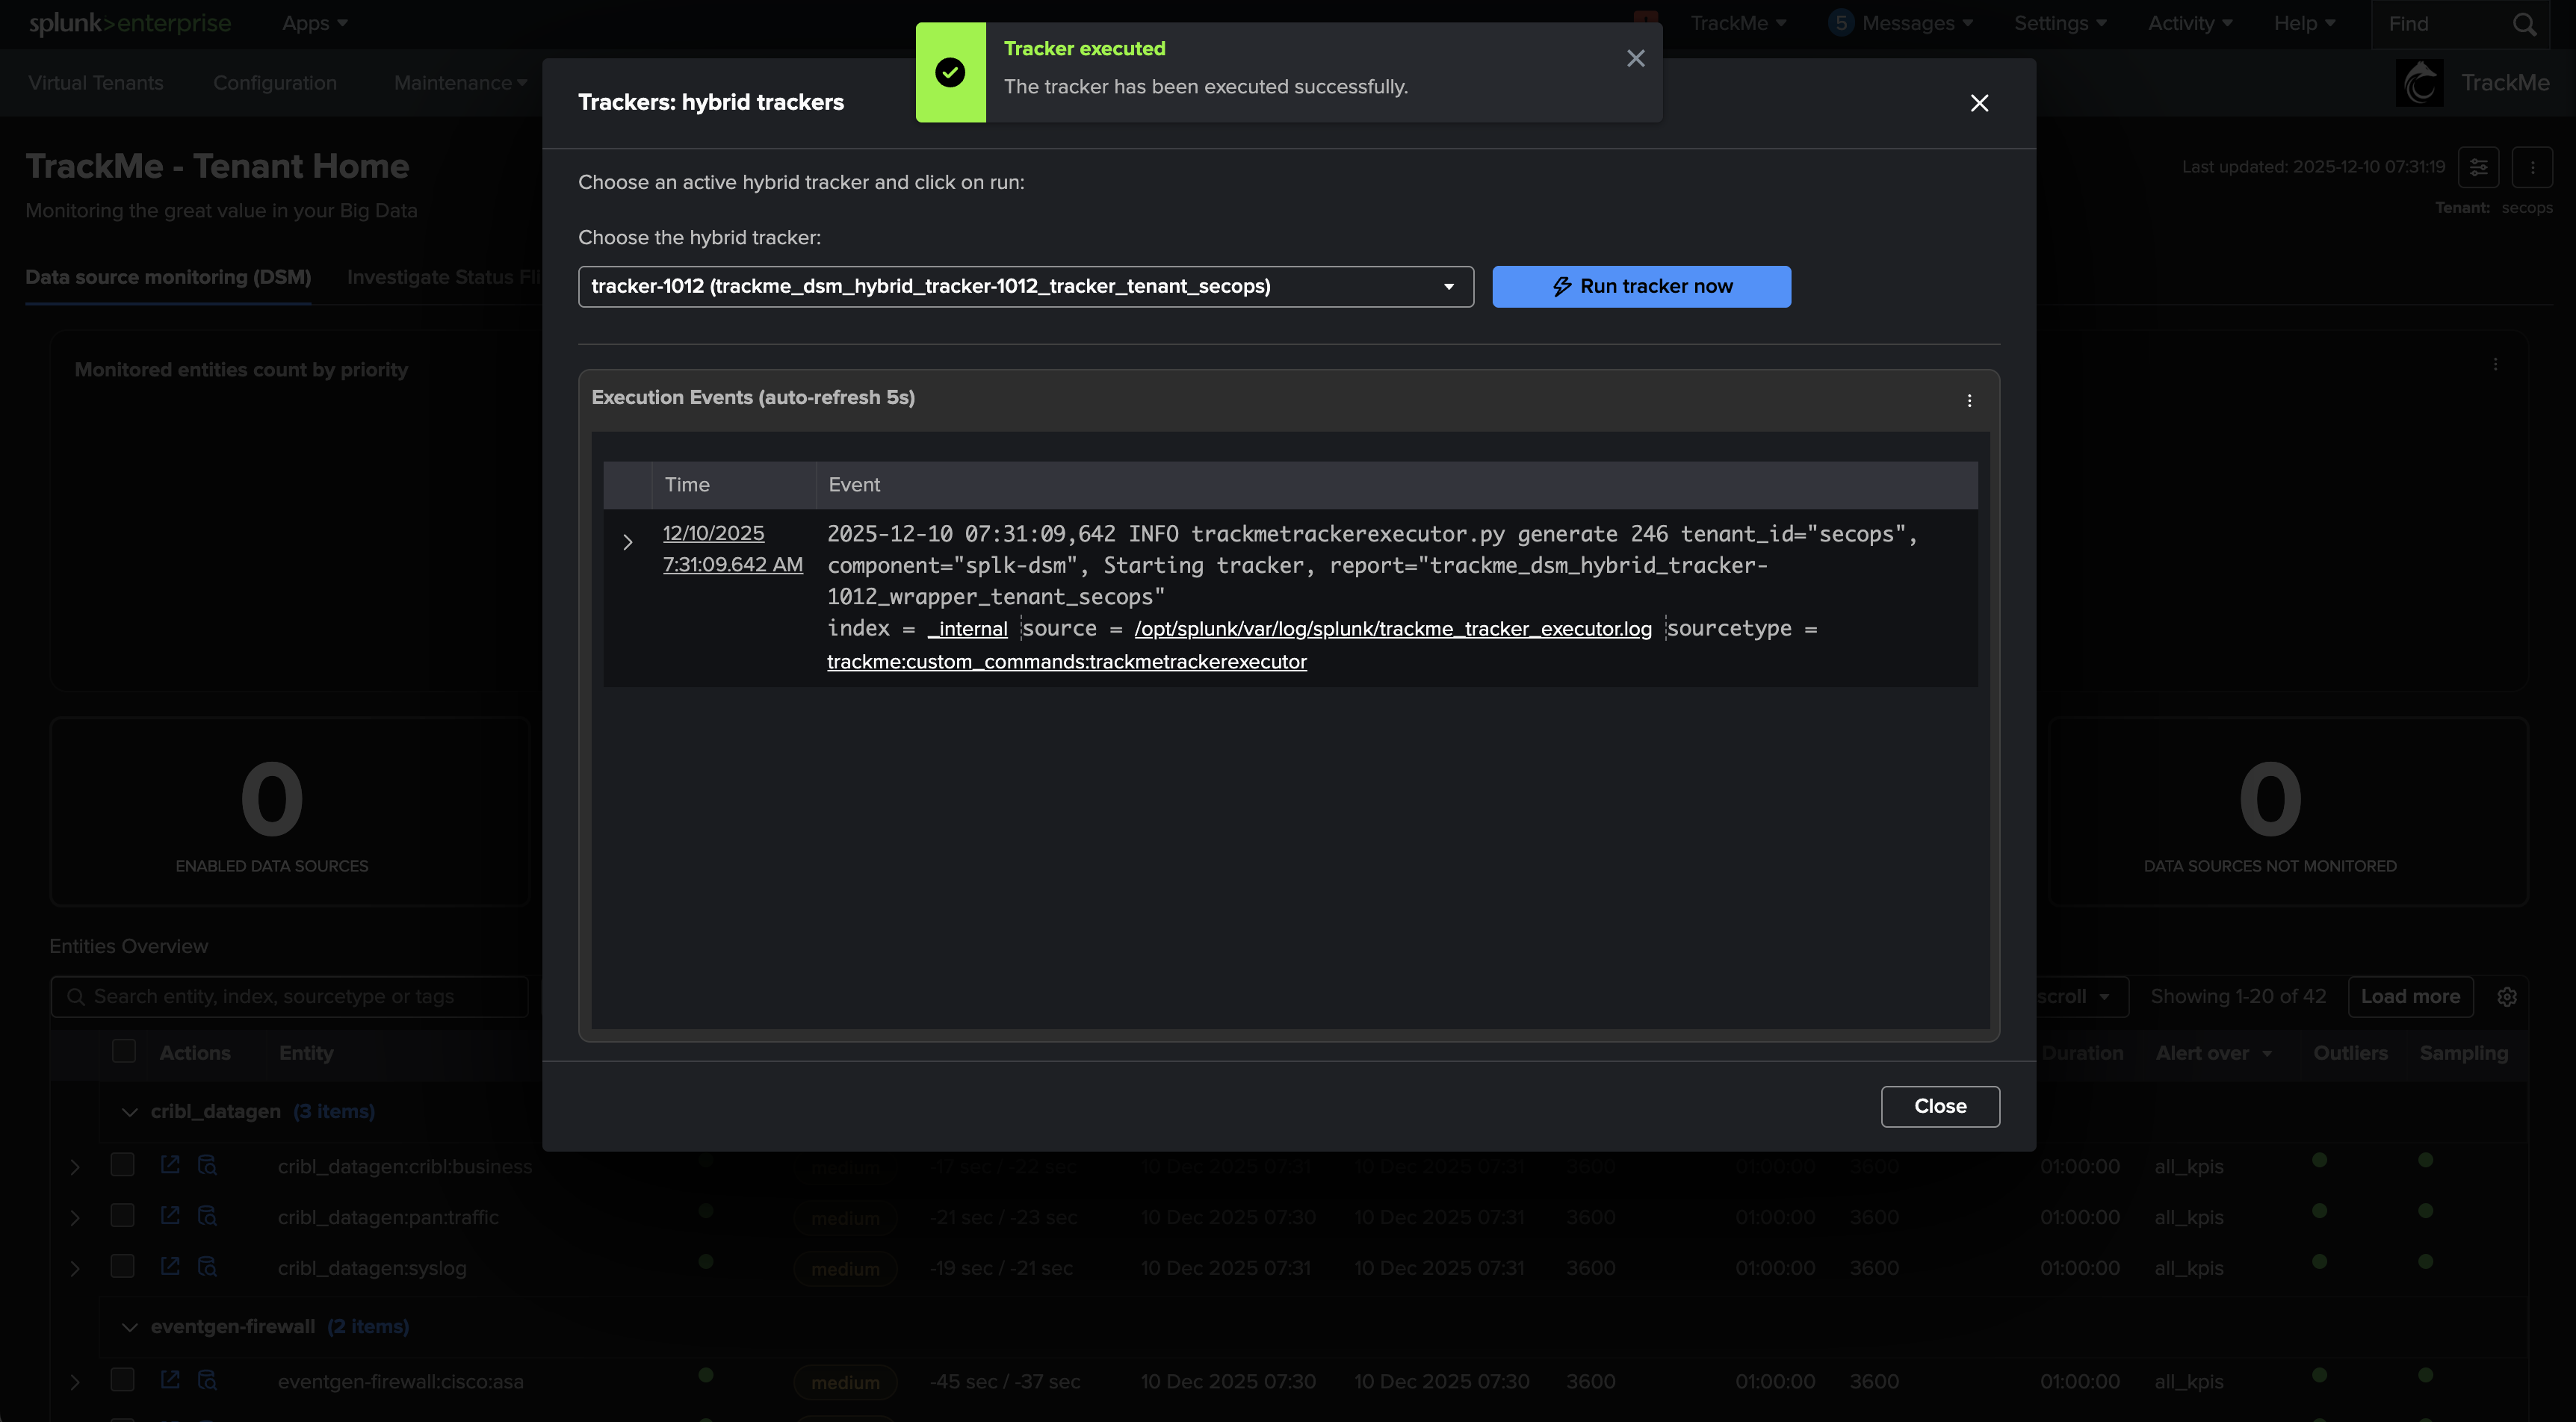
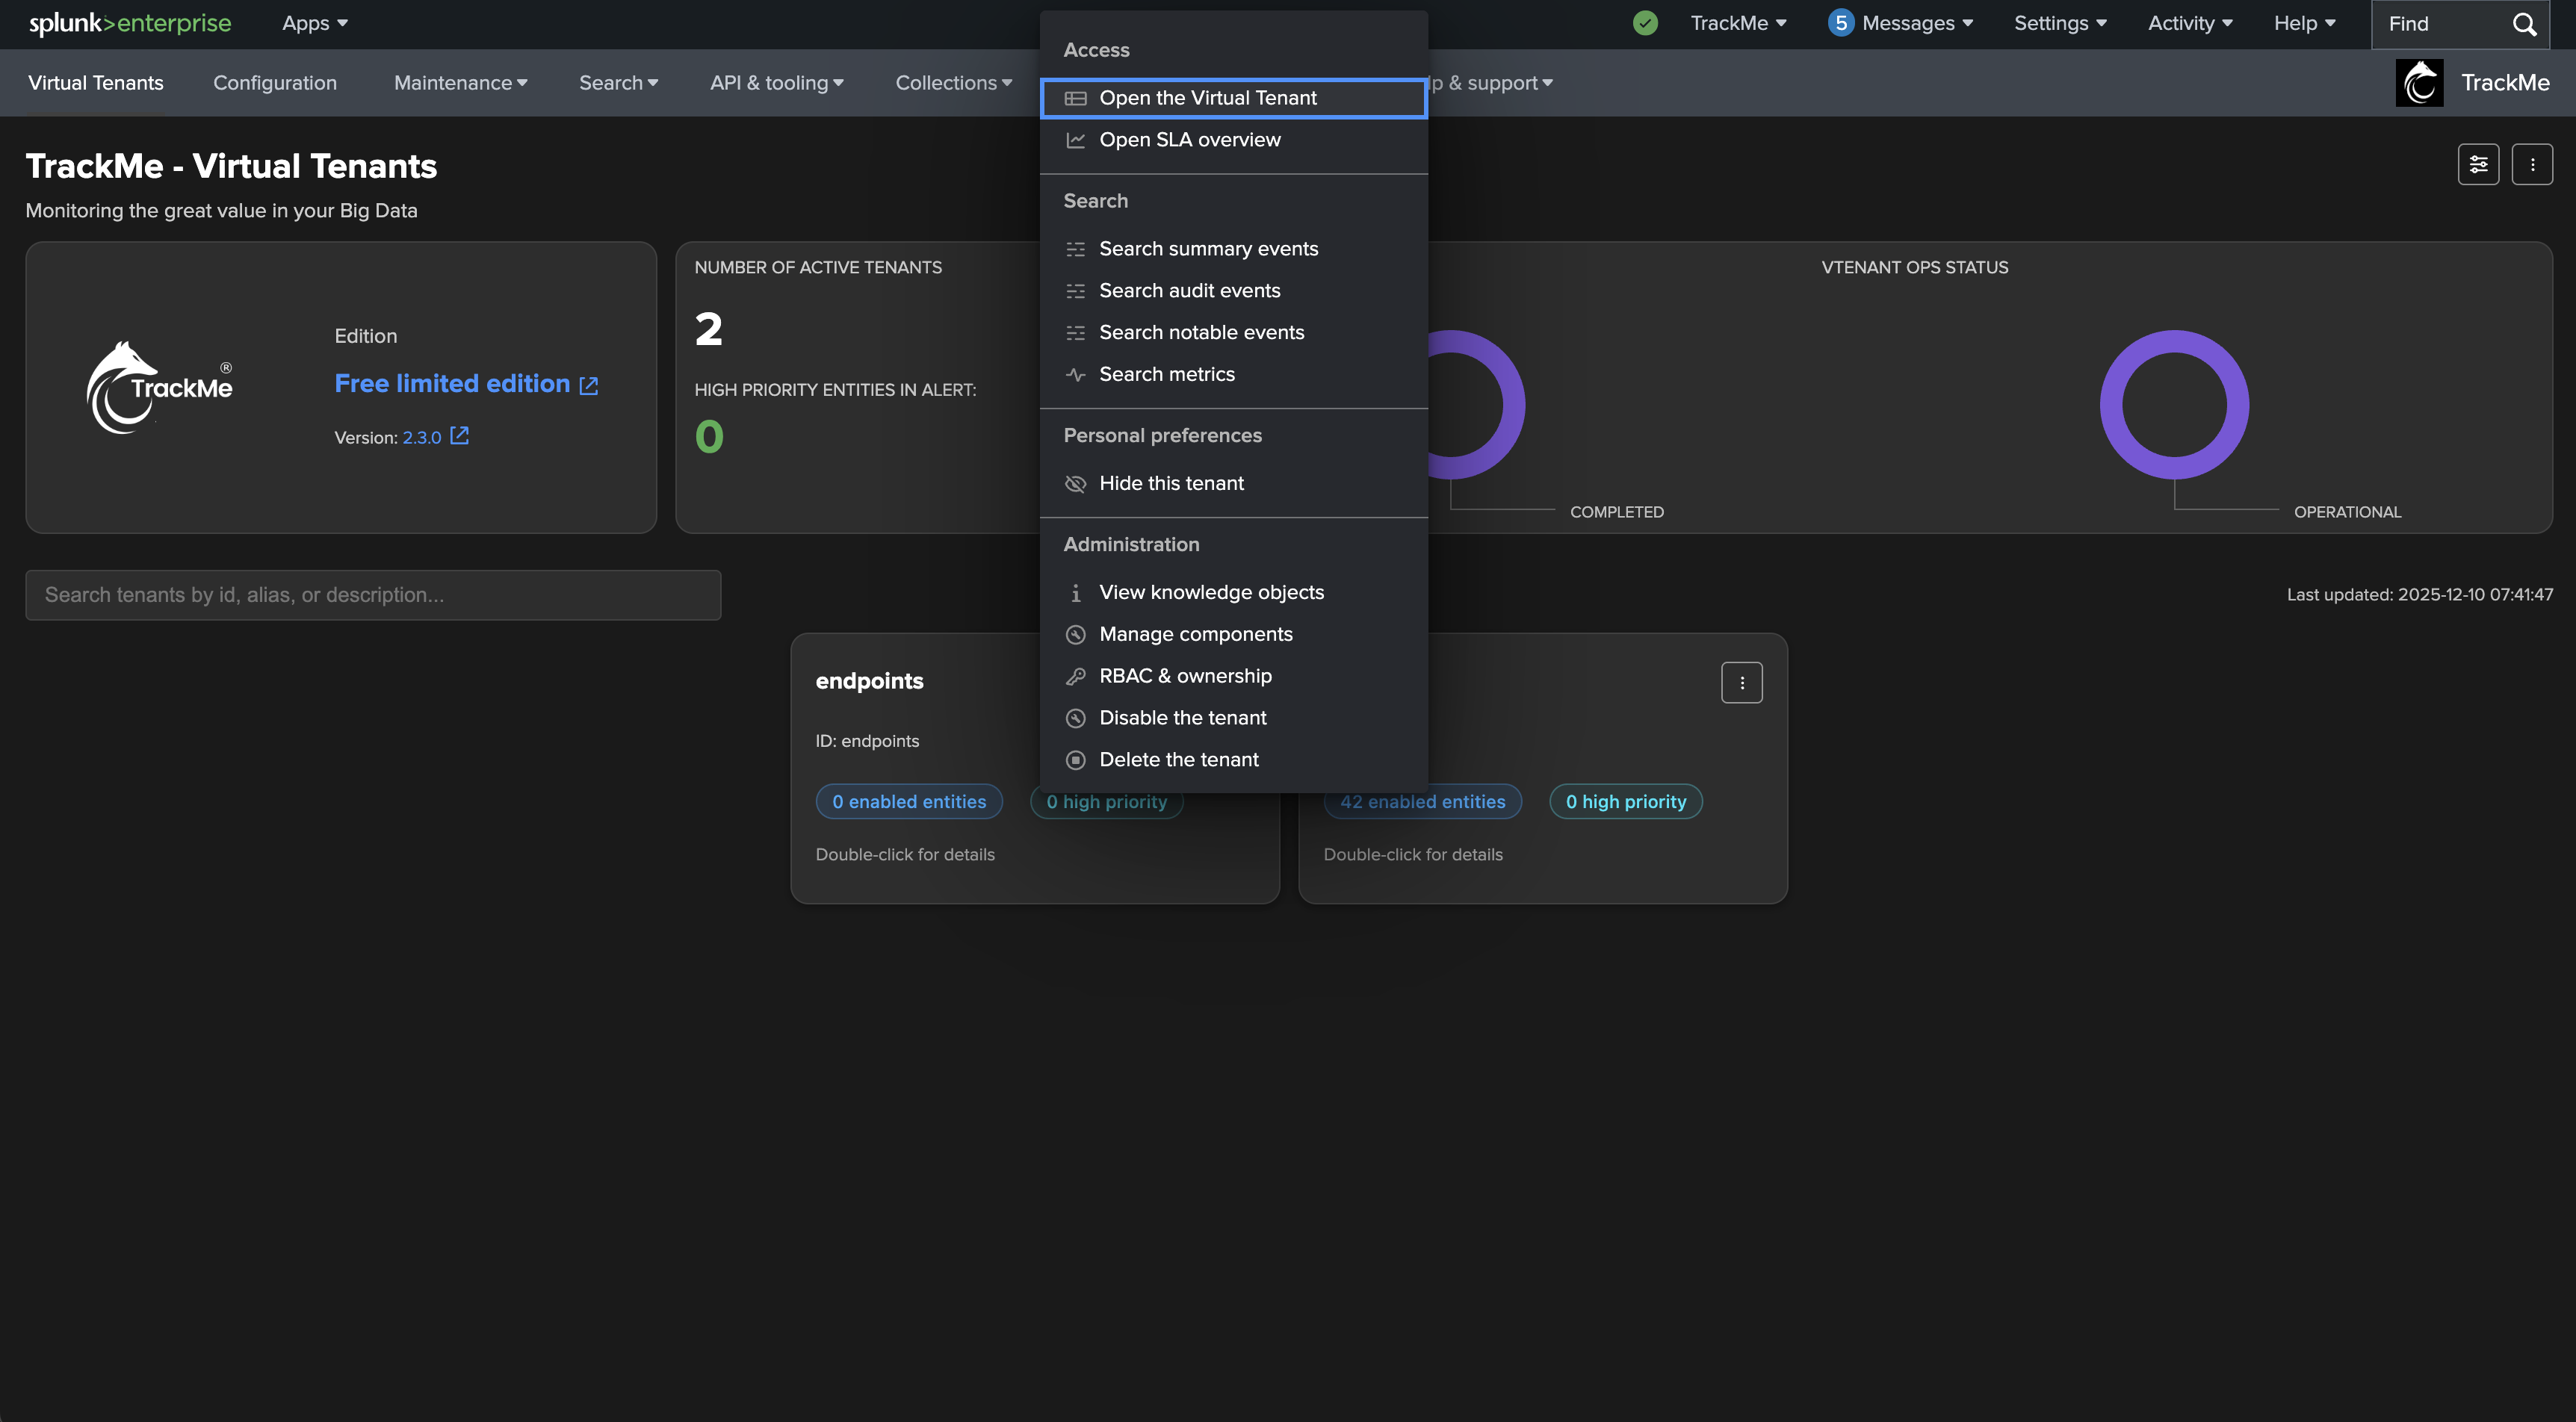
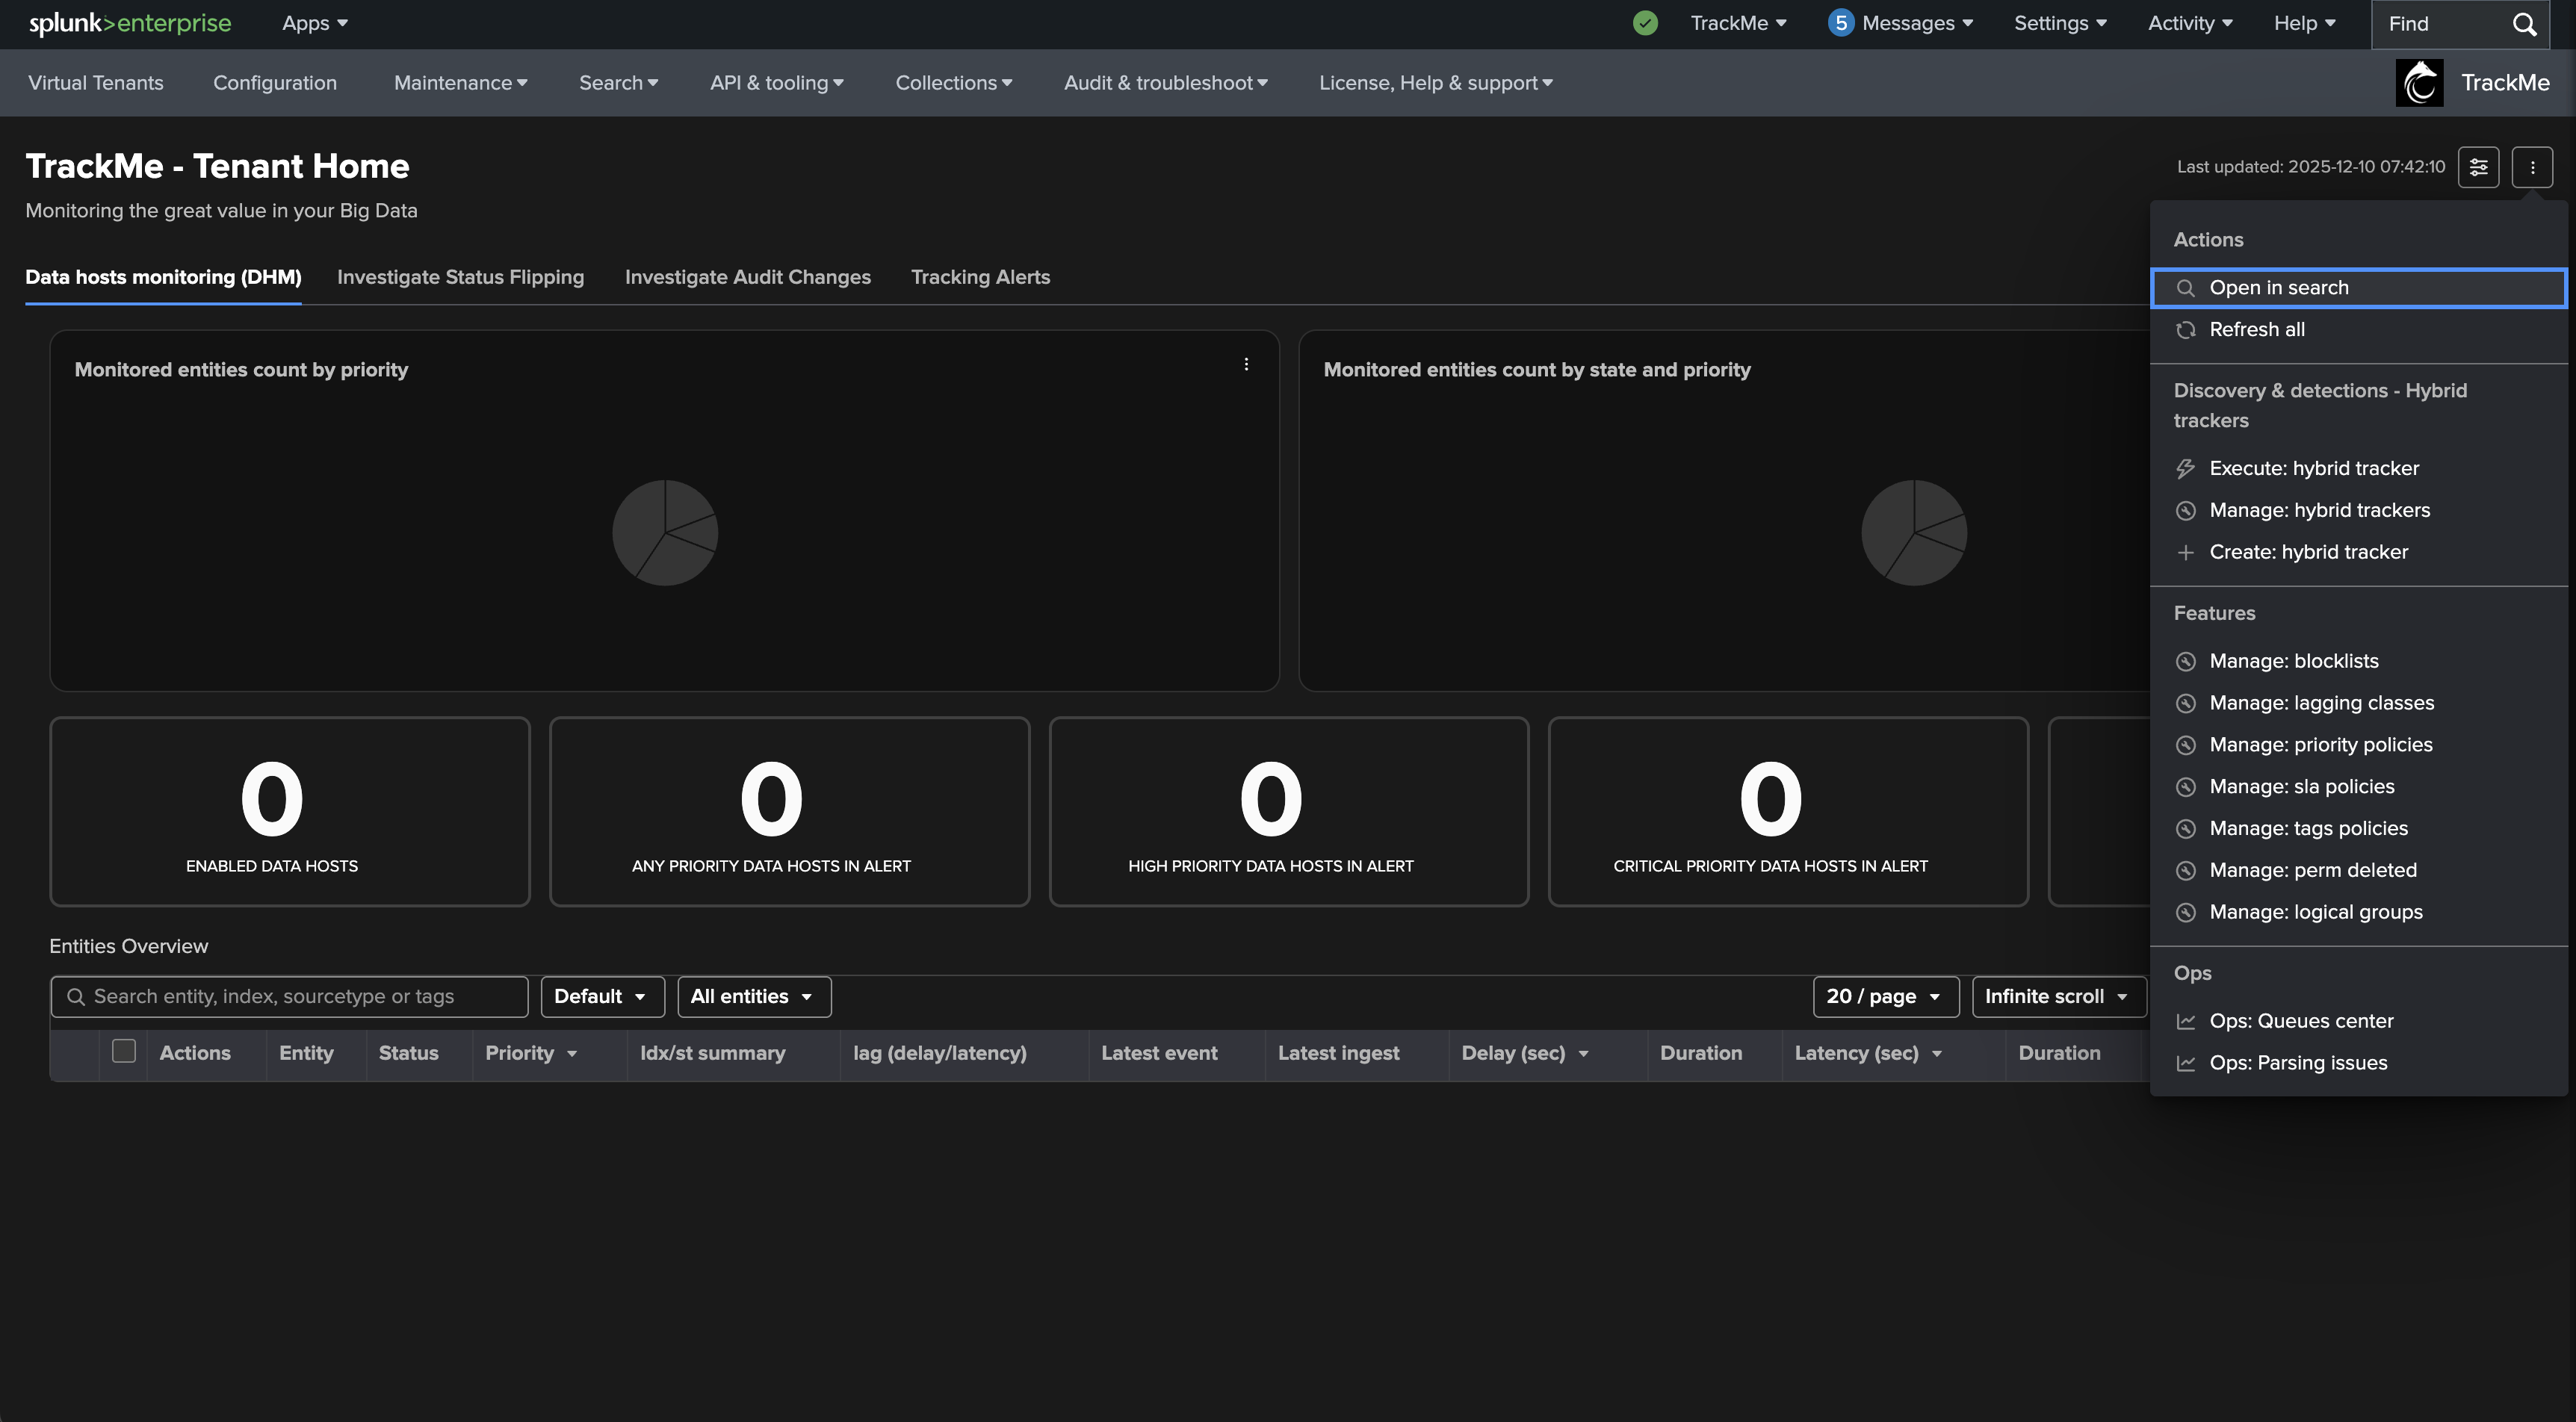
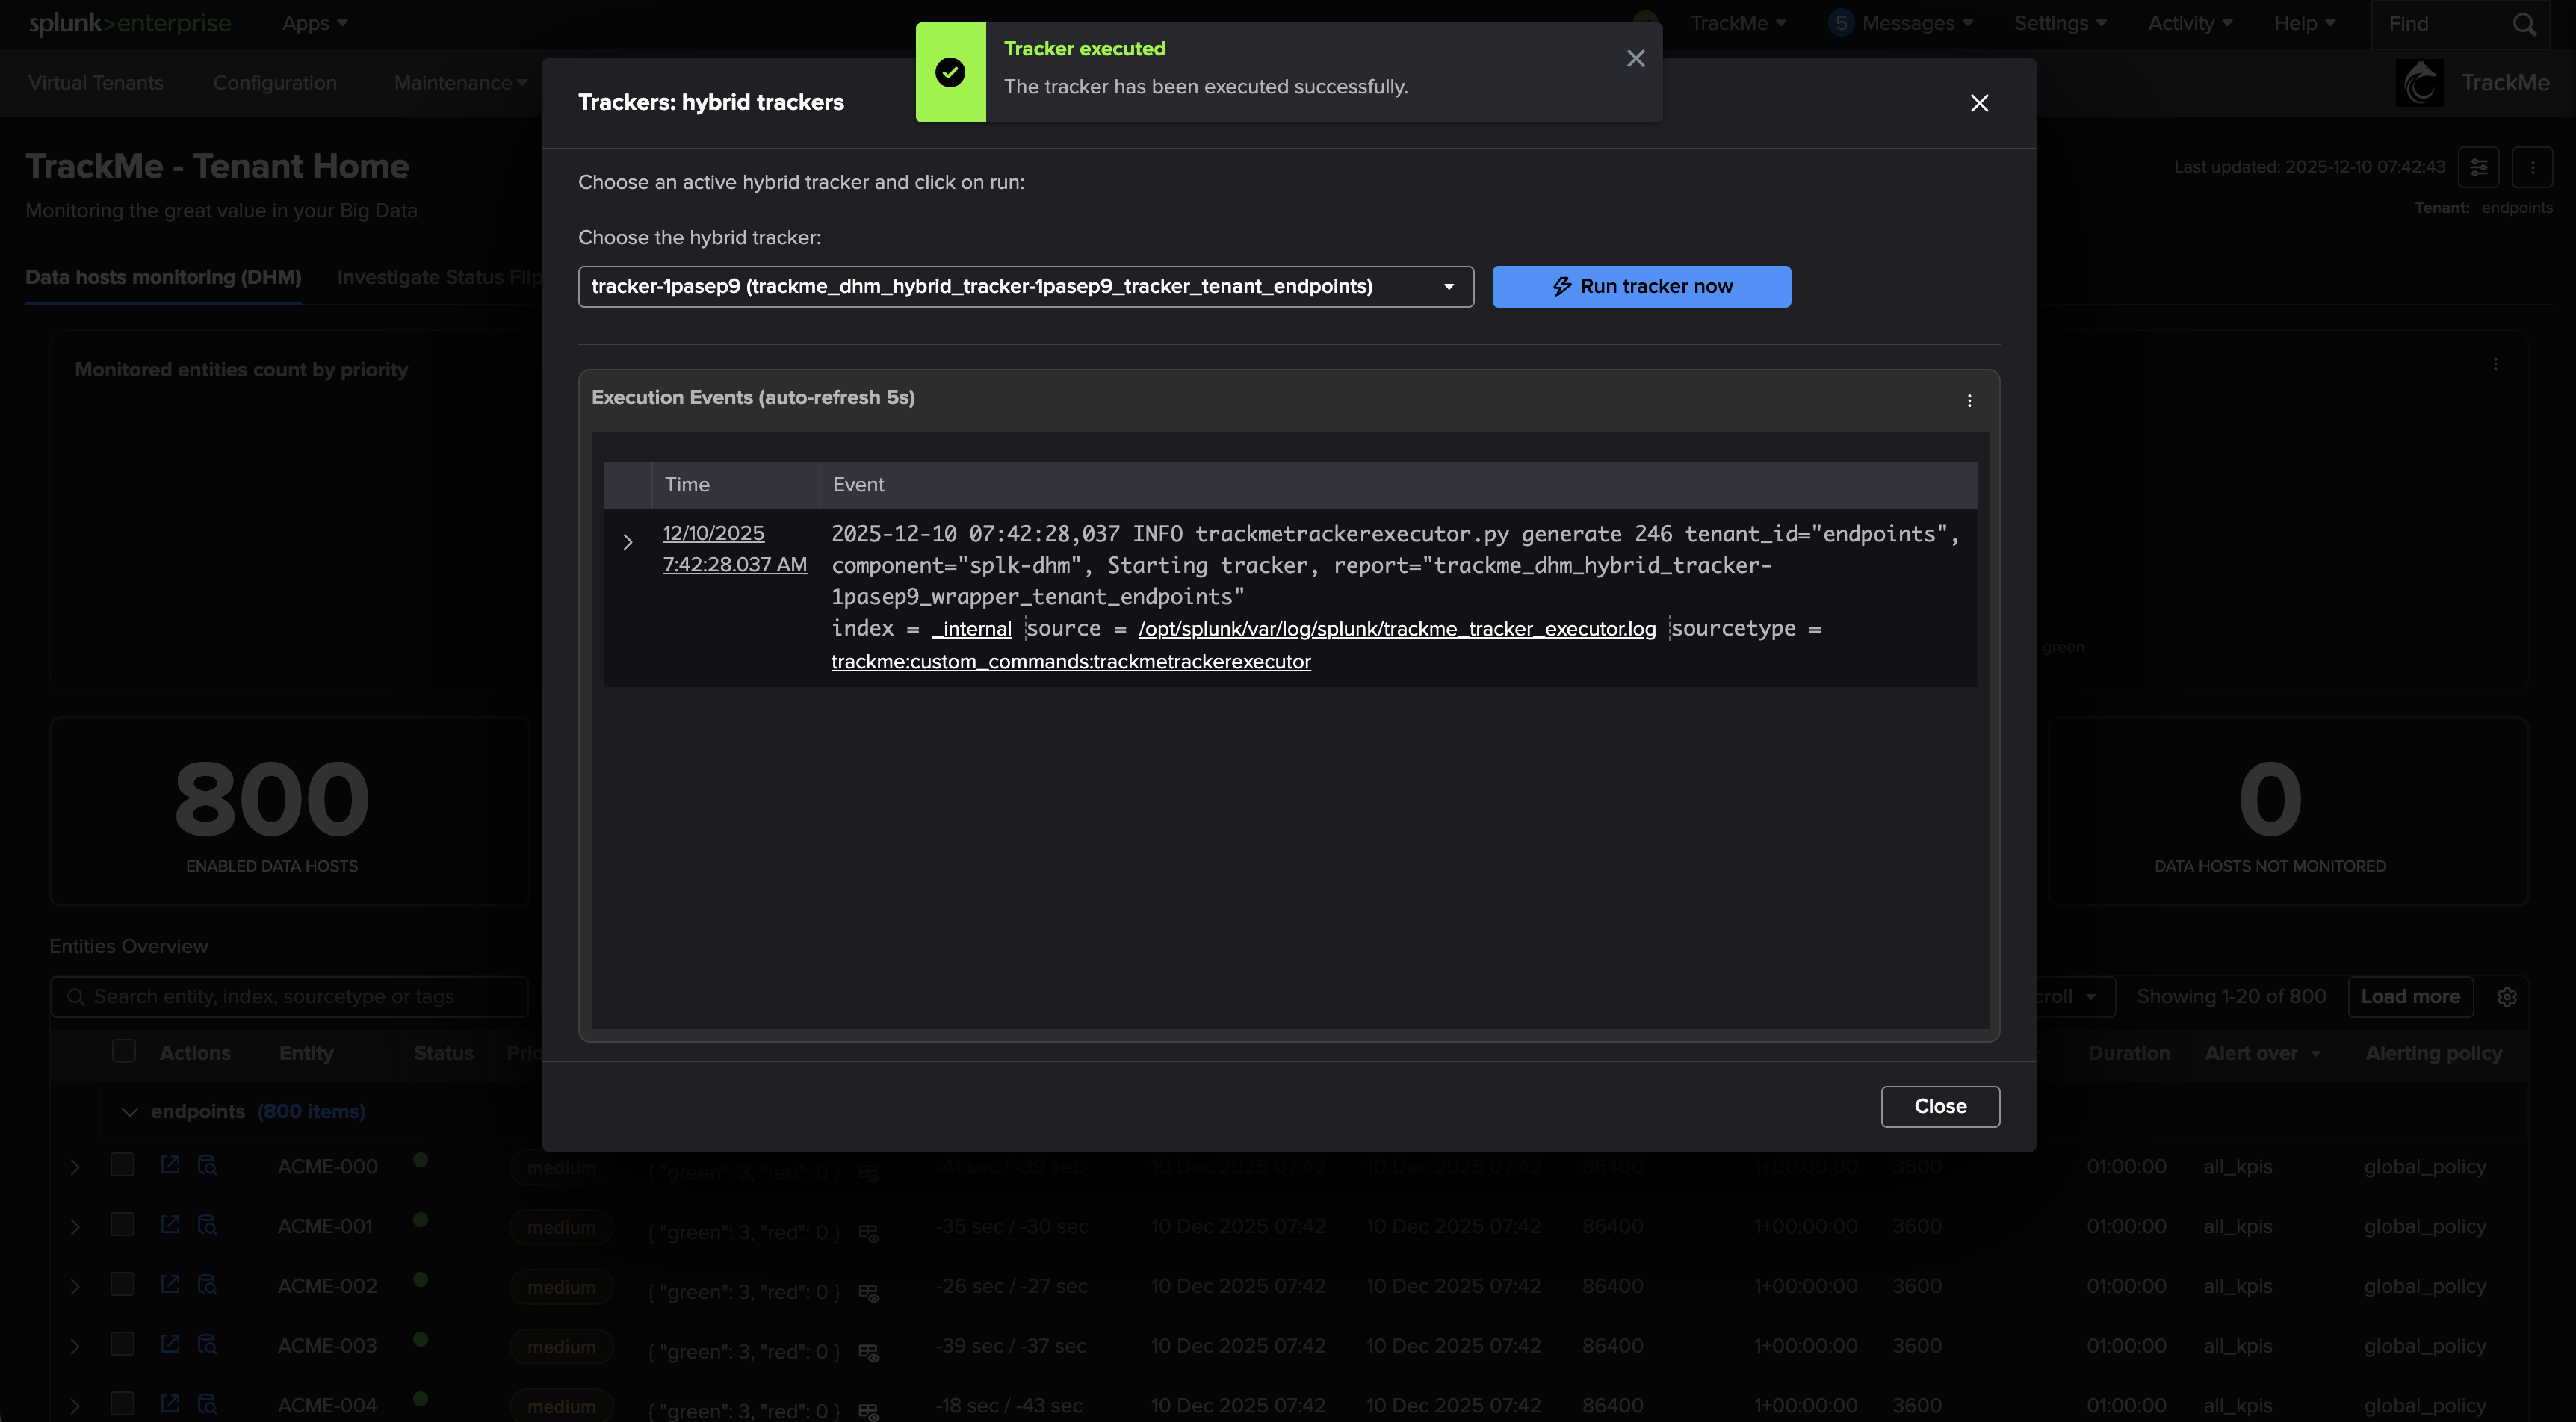
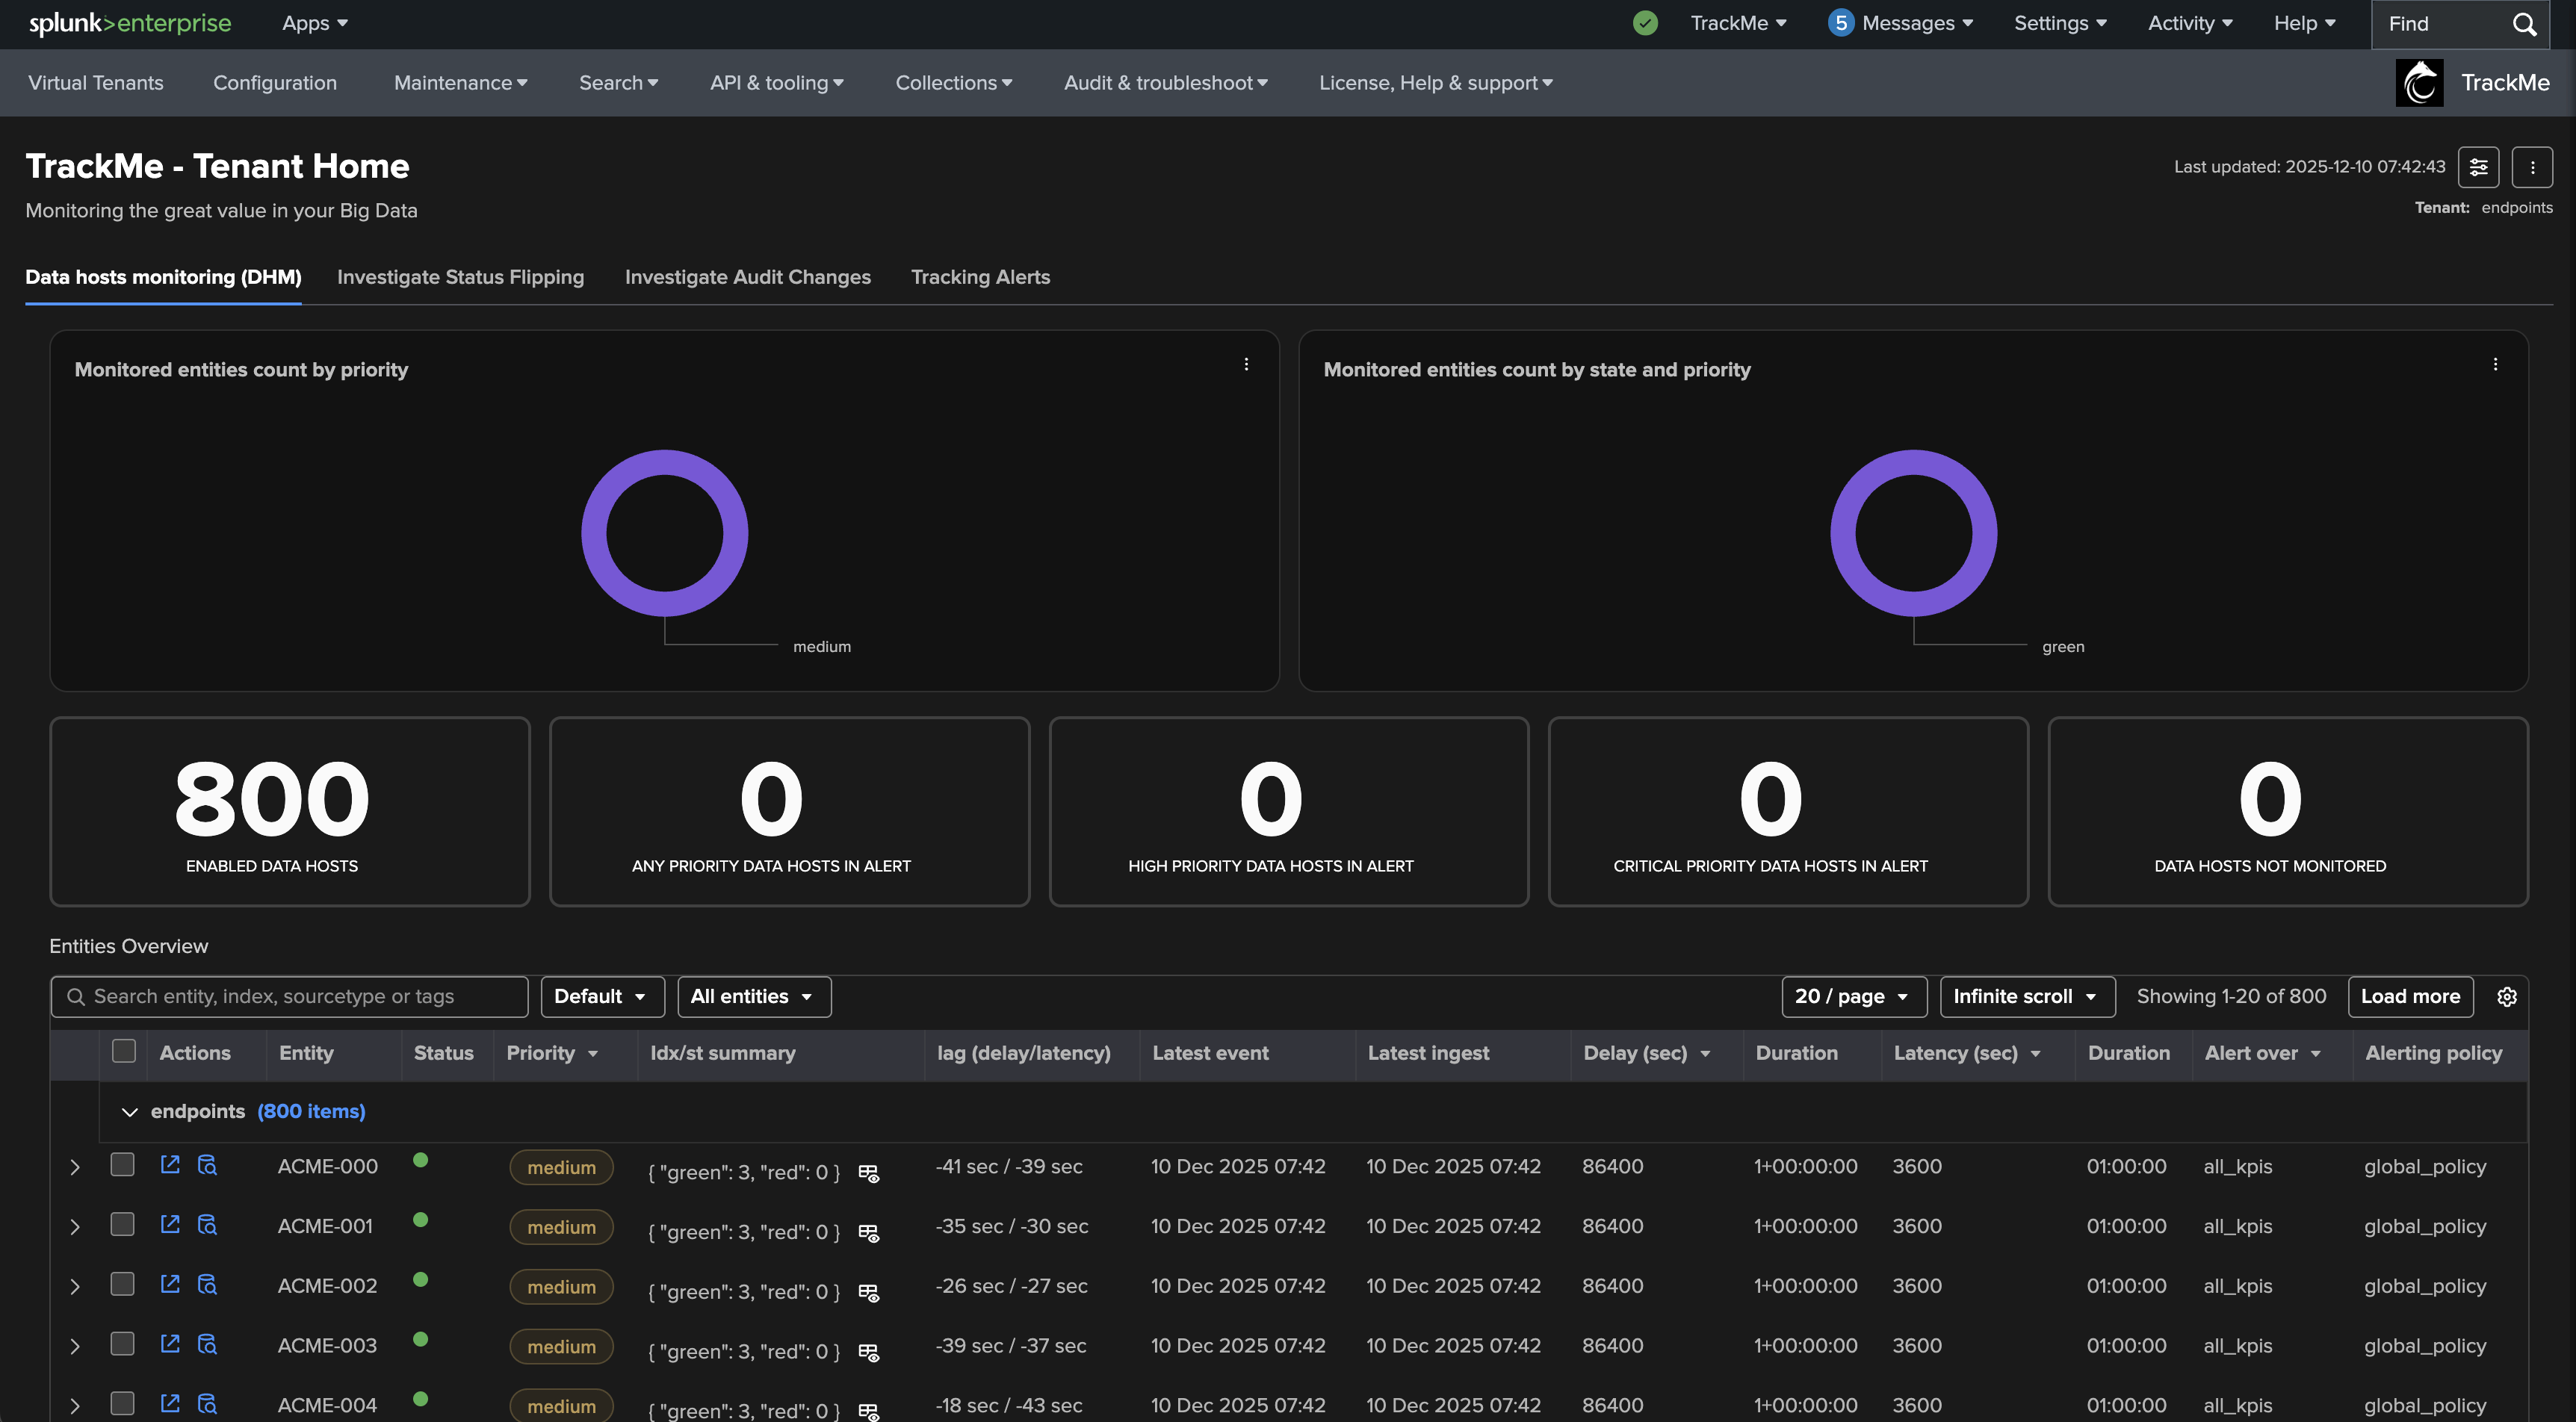
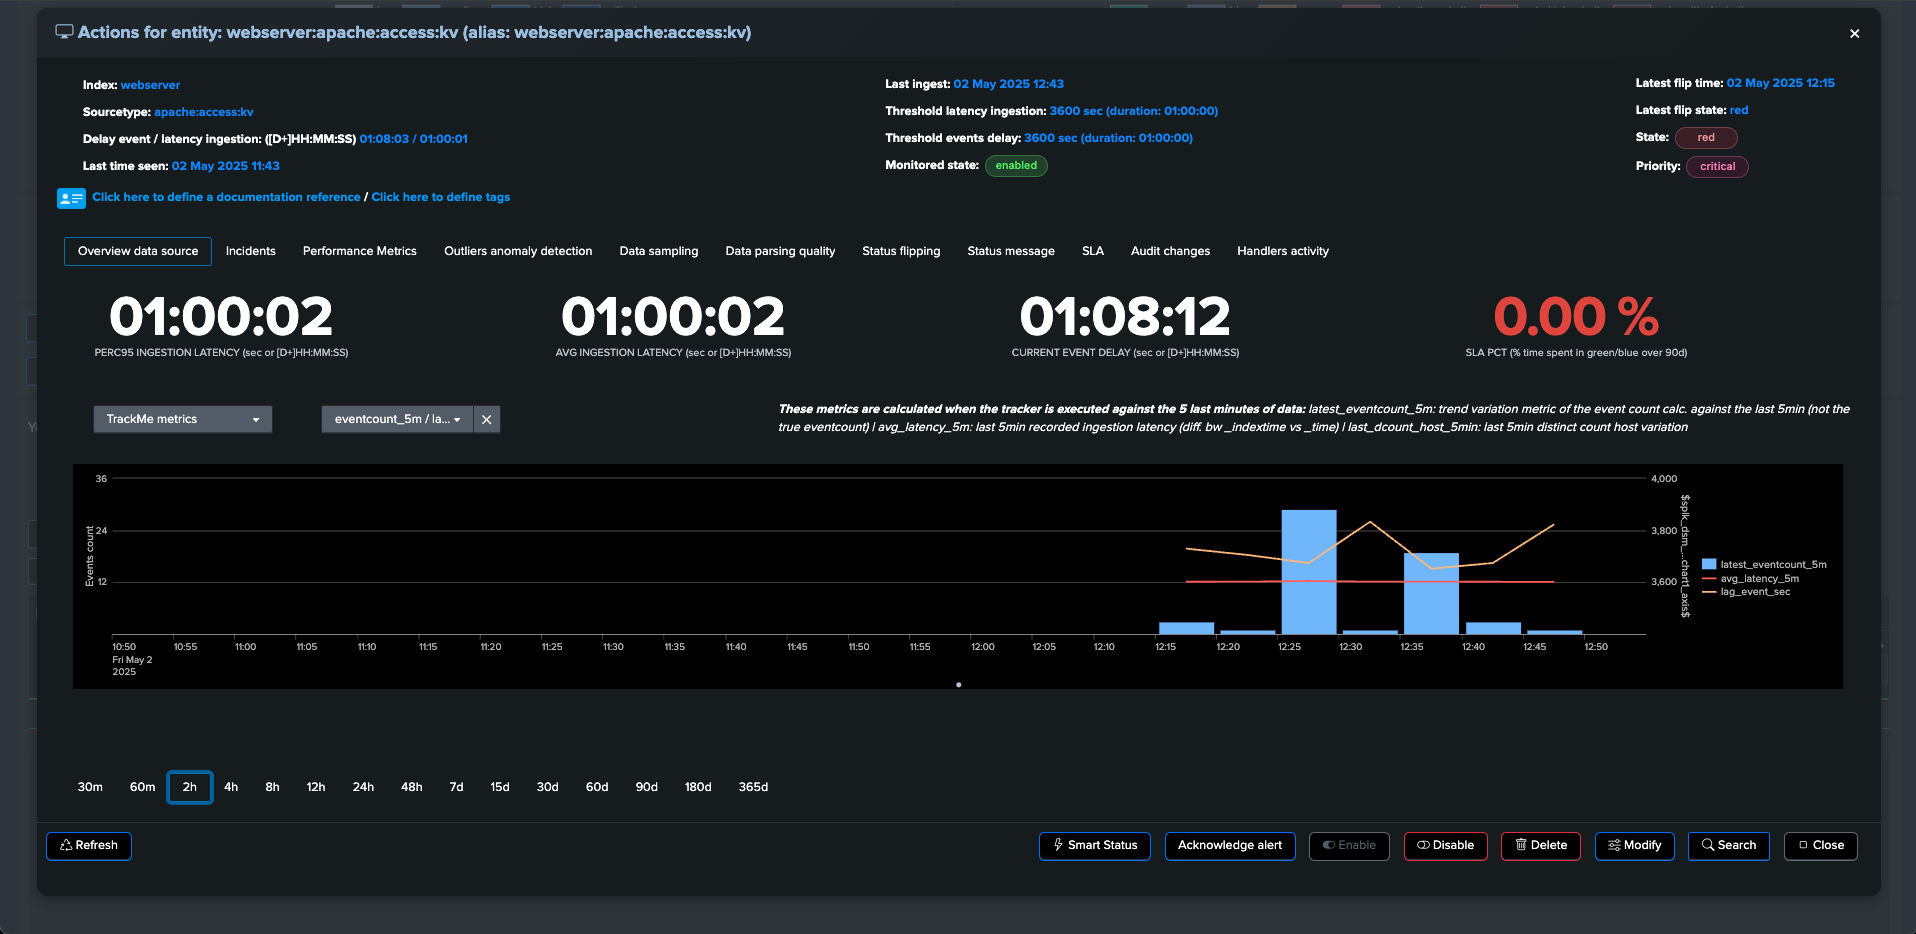
Once created, you can from the main menu selector request the immediate execution of the tracker:
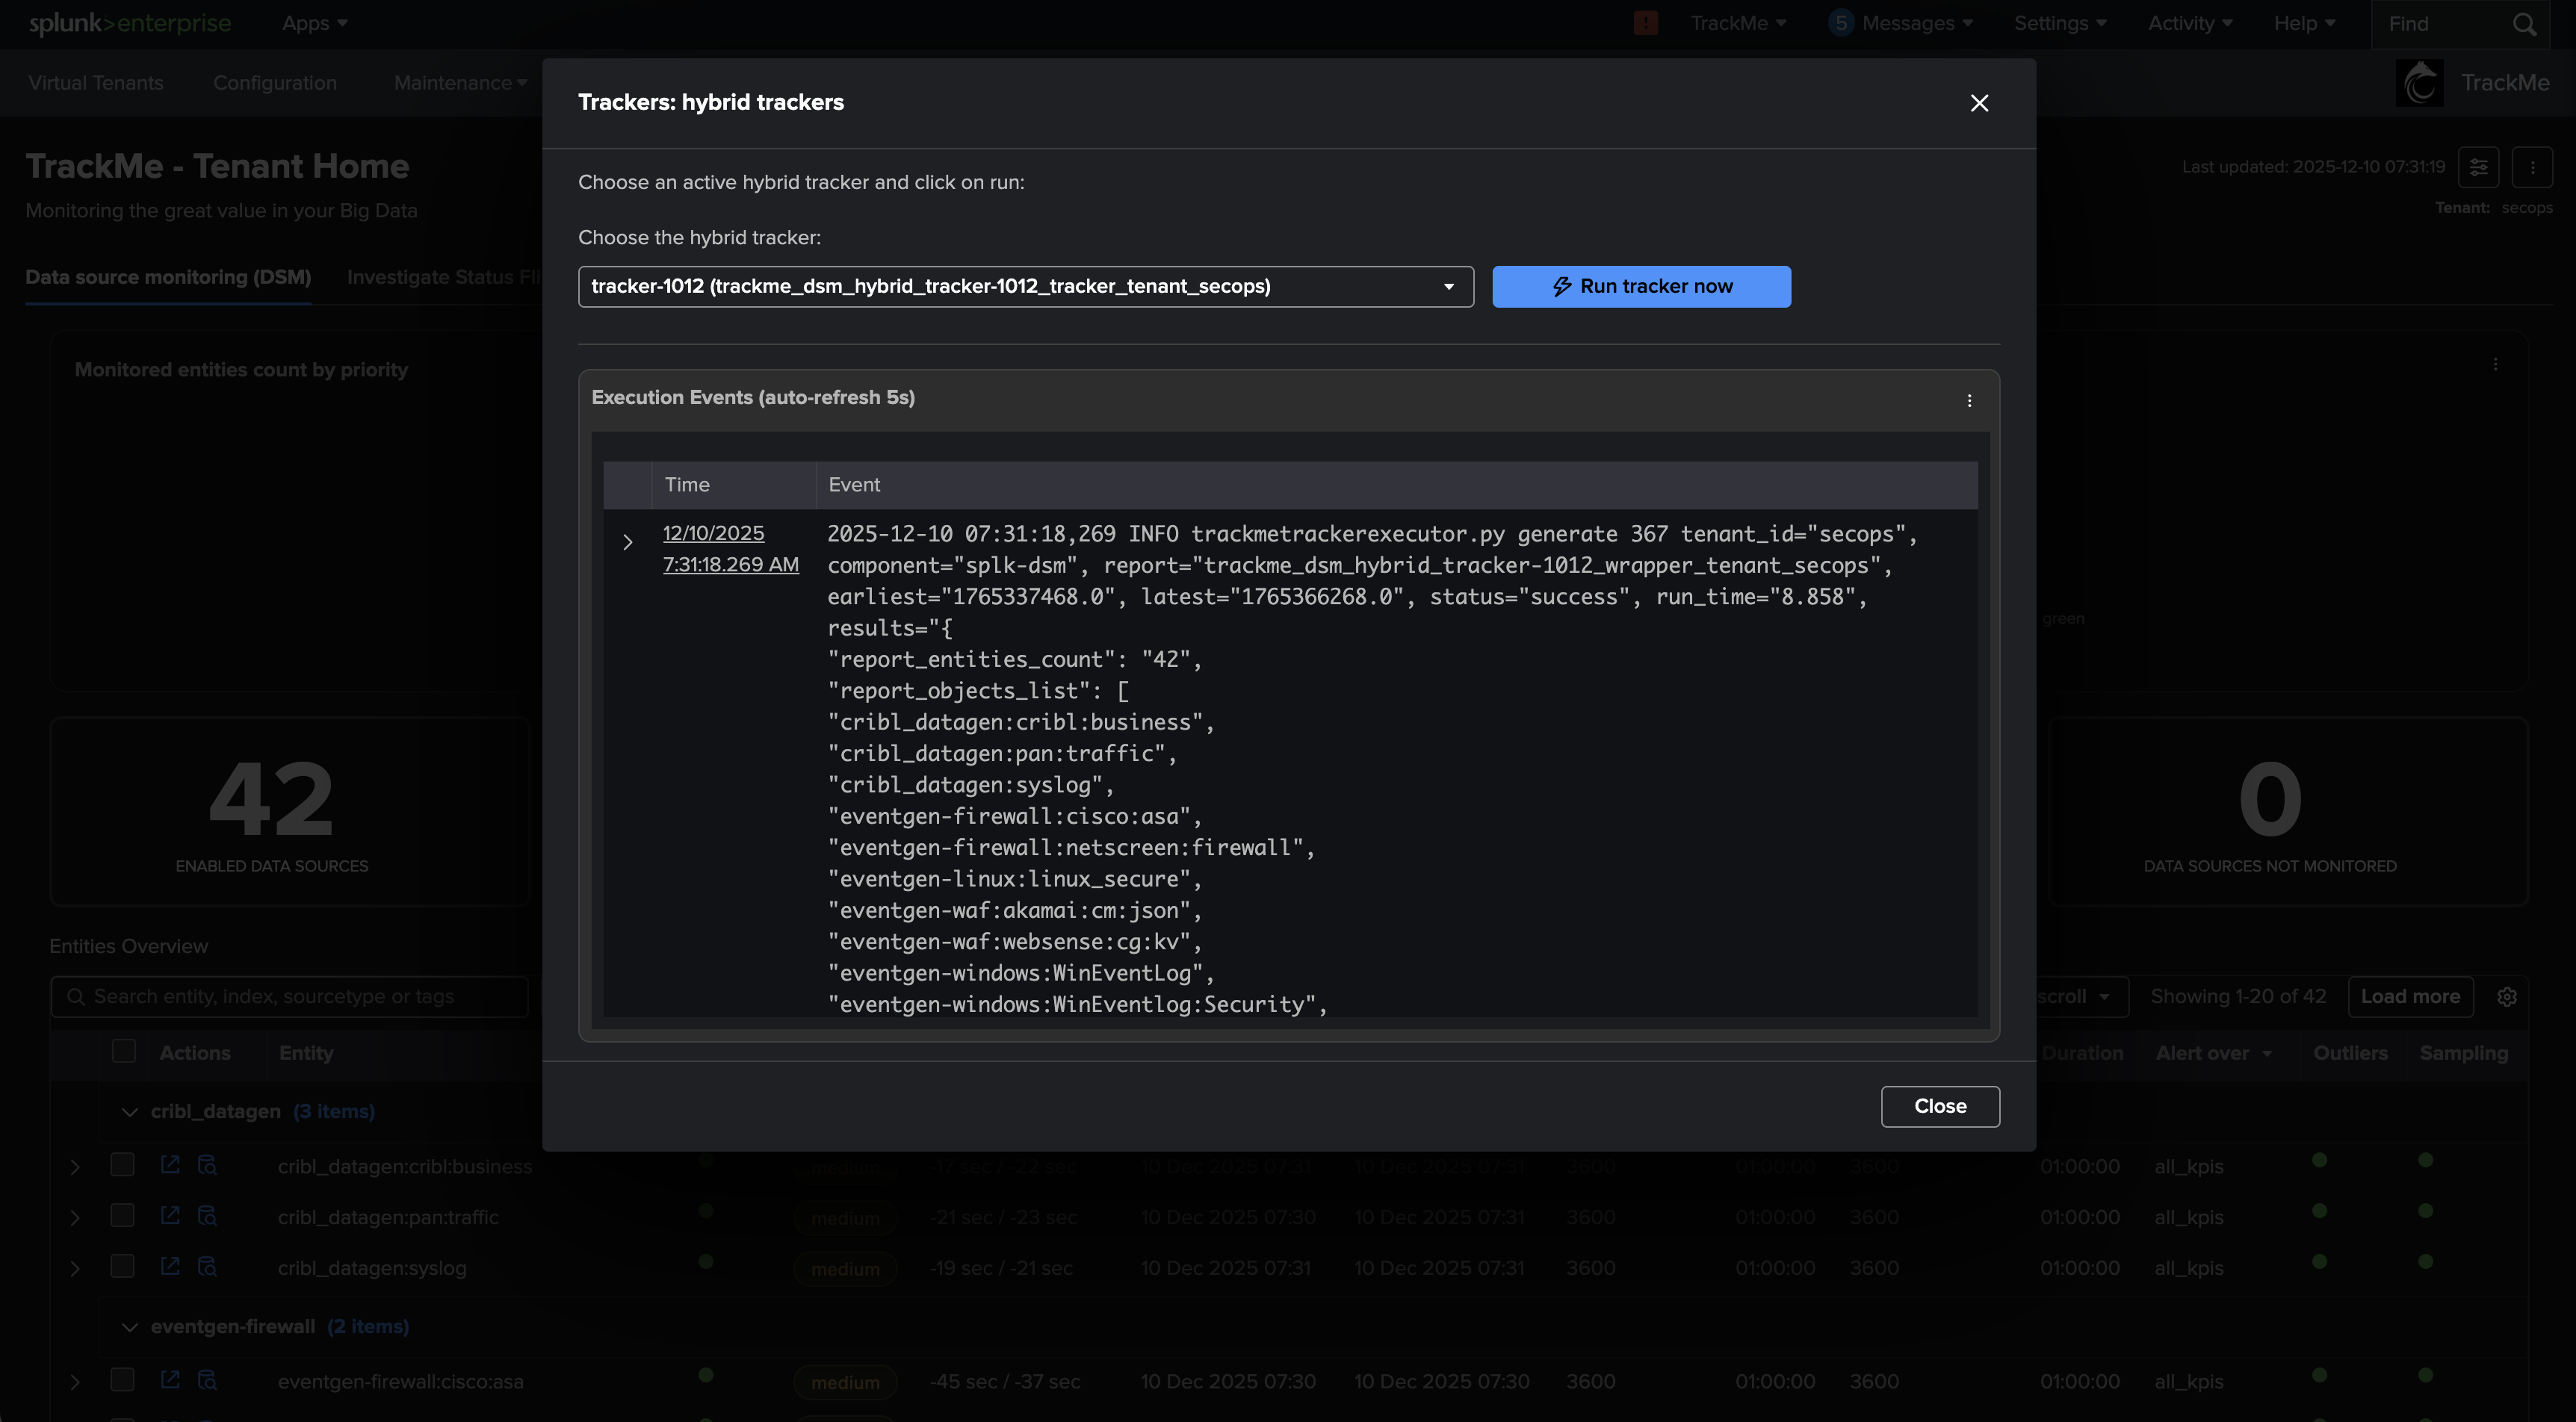
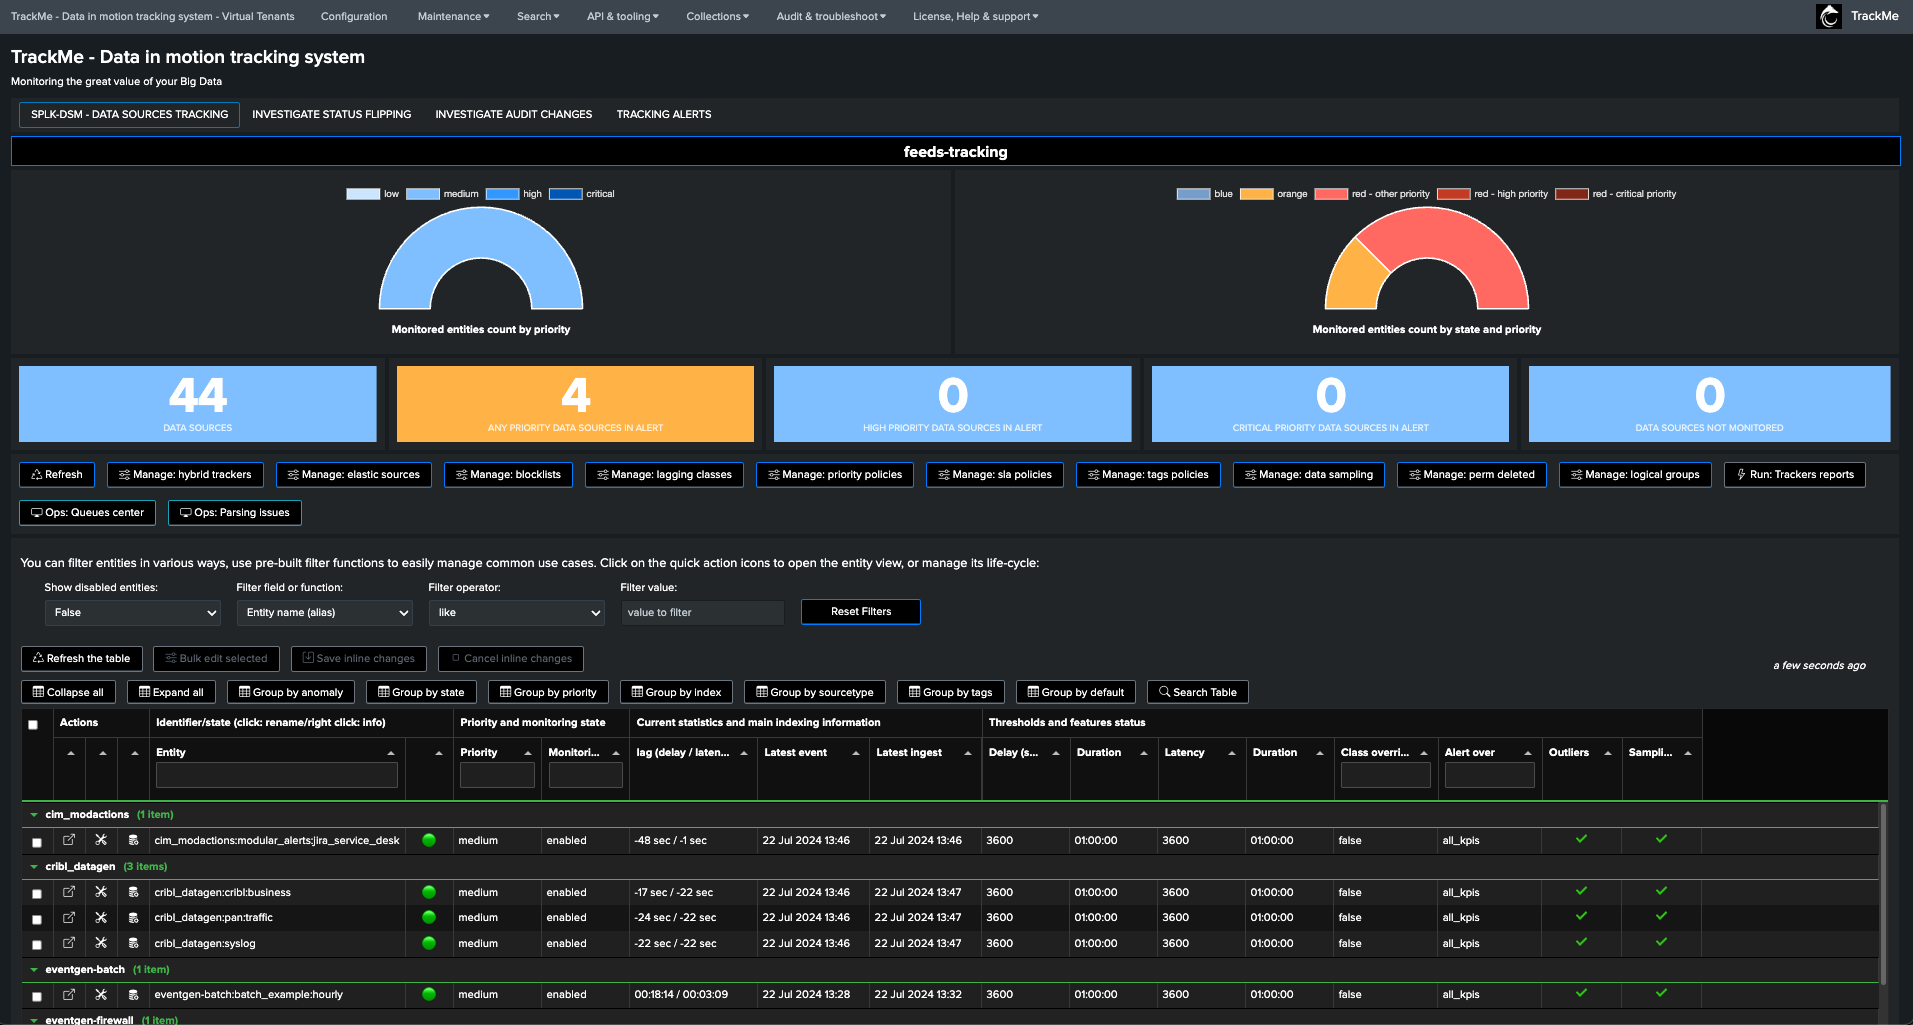
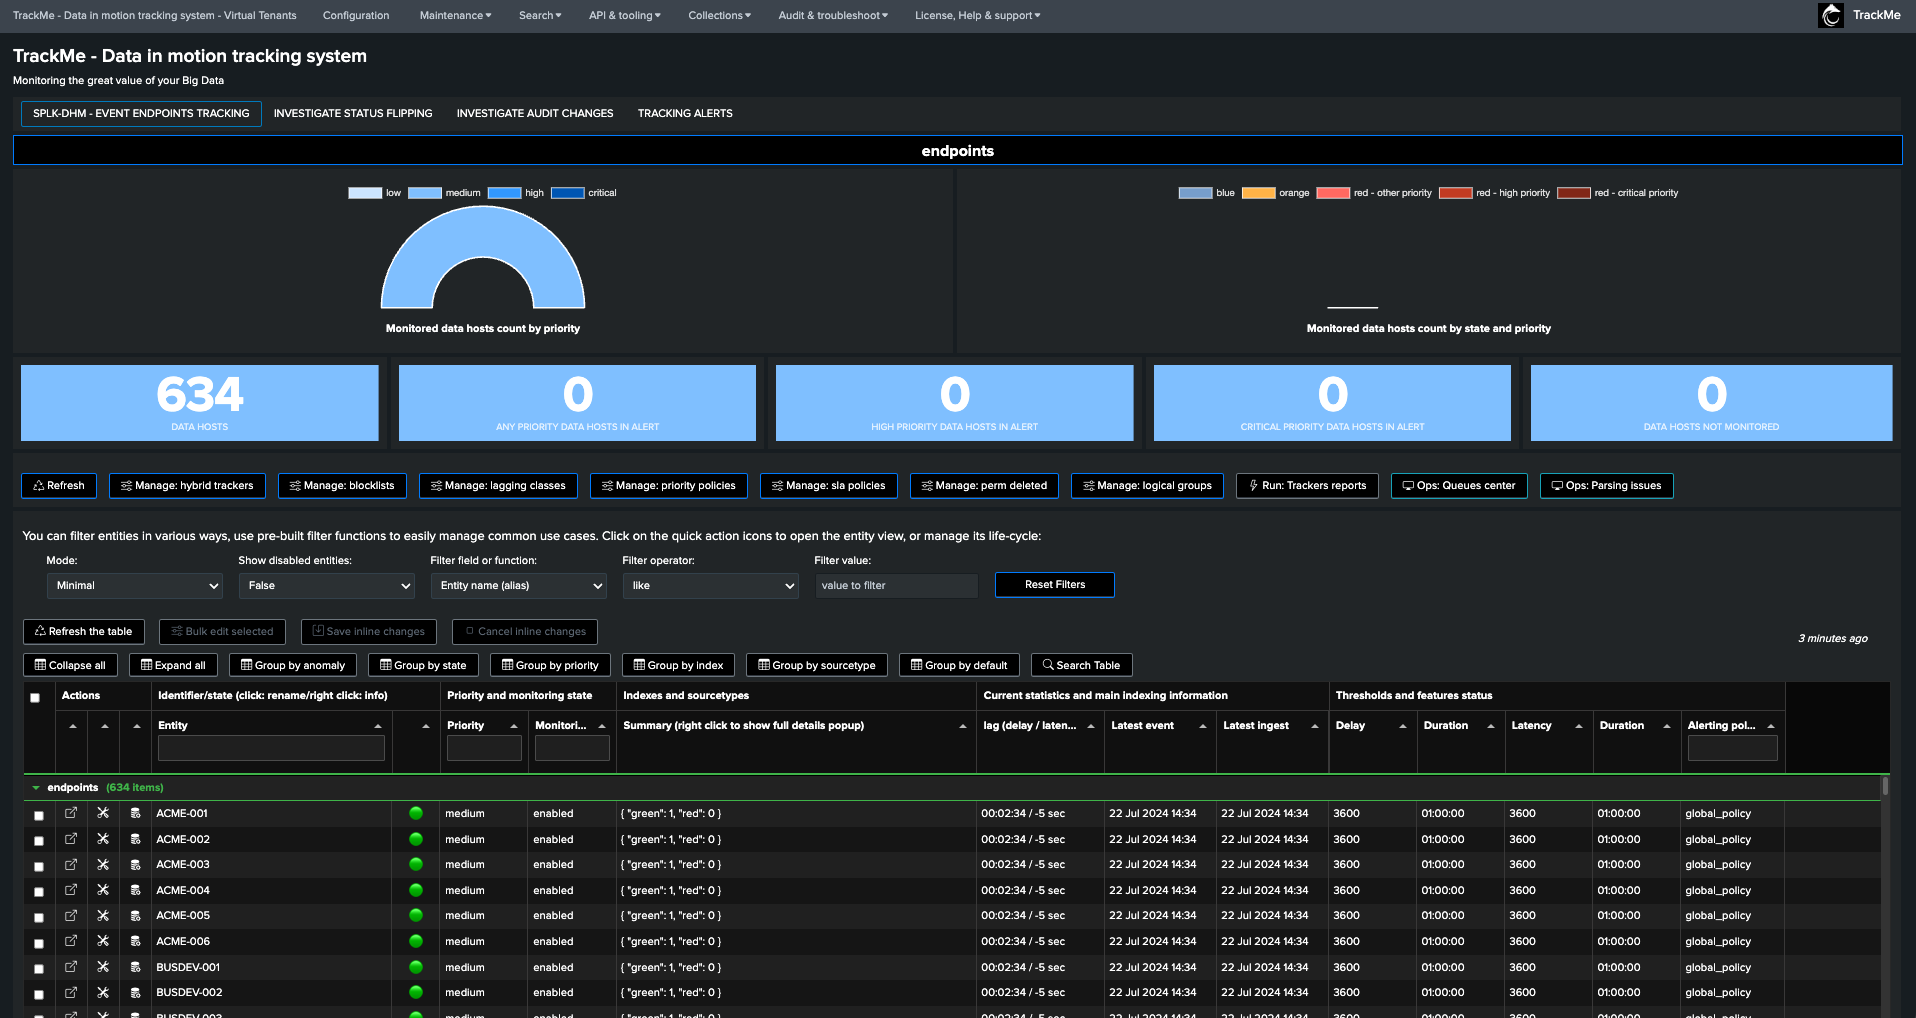
After the tracker for first executed, entities will be created and visible in the main user interface:

Step 2: Let’s create a Virtual Tenant for data host sources
We will now create a Virtual Tenant to start tracking hosts, we recommend to setup hosts tracking in a dedicated tenant, so we can easily manage various features such as disabling ML Outliers:
component:
splk-dhmtenant name:
endpoints
Repeat the same process for data hosts tracking:
We recommend being very strict with splk-dhm, notably we recommend restricting the scope as much as possible, and ensuring to allow only indexes that related to data generated by endpoints themselves.
You totally can start with a certain scope, so you can first monitor the costs of the associated backends in TrackMe, then gradually increase the scope as needed.
Finally you can also choose to include or not splunkd itself, if you wish to monitor the availability of Splunk UFs/UFs internals, which reflect a healthy connectivity and status of Splunk agents.


Step 3: Alerting and notifications
Hint
This quickstart was updated to use TrackMe’s new StateFul Alerting features:
Since TrackMe 2.1.11, a new concept of StateFul Alerting is available as the main alerting mechanism in TrackMe.
These features provides a powerful, flexible and easy alerting capabilities as well as enhanced Email delivery notifications.
For more information about this new concept, please refer to the Alerting Architecture & Third-Party Integration documentation.
About Alerting recommendations:
In a Production context, a true challenge is the massive number of entities, from hundreds if not not many thousdands of sources, hosts and so forth, it can be overwhelming to manage.
We recommend a selective approach which used in conjonction with TrackMe and Splunk capabilities allow you to tackle these challenges.
What we recommend is notably to leverage the
priorityconcepts, and alert only on properly qualified entities leveraginghighandcriticalpriorities.This approach allows you to focus on the most important entities, and to avoid alerting fatigue by progressively qualifying your alerting logic and maturity in TrackMe over time.
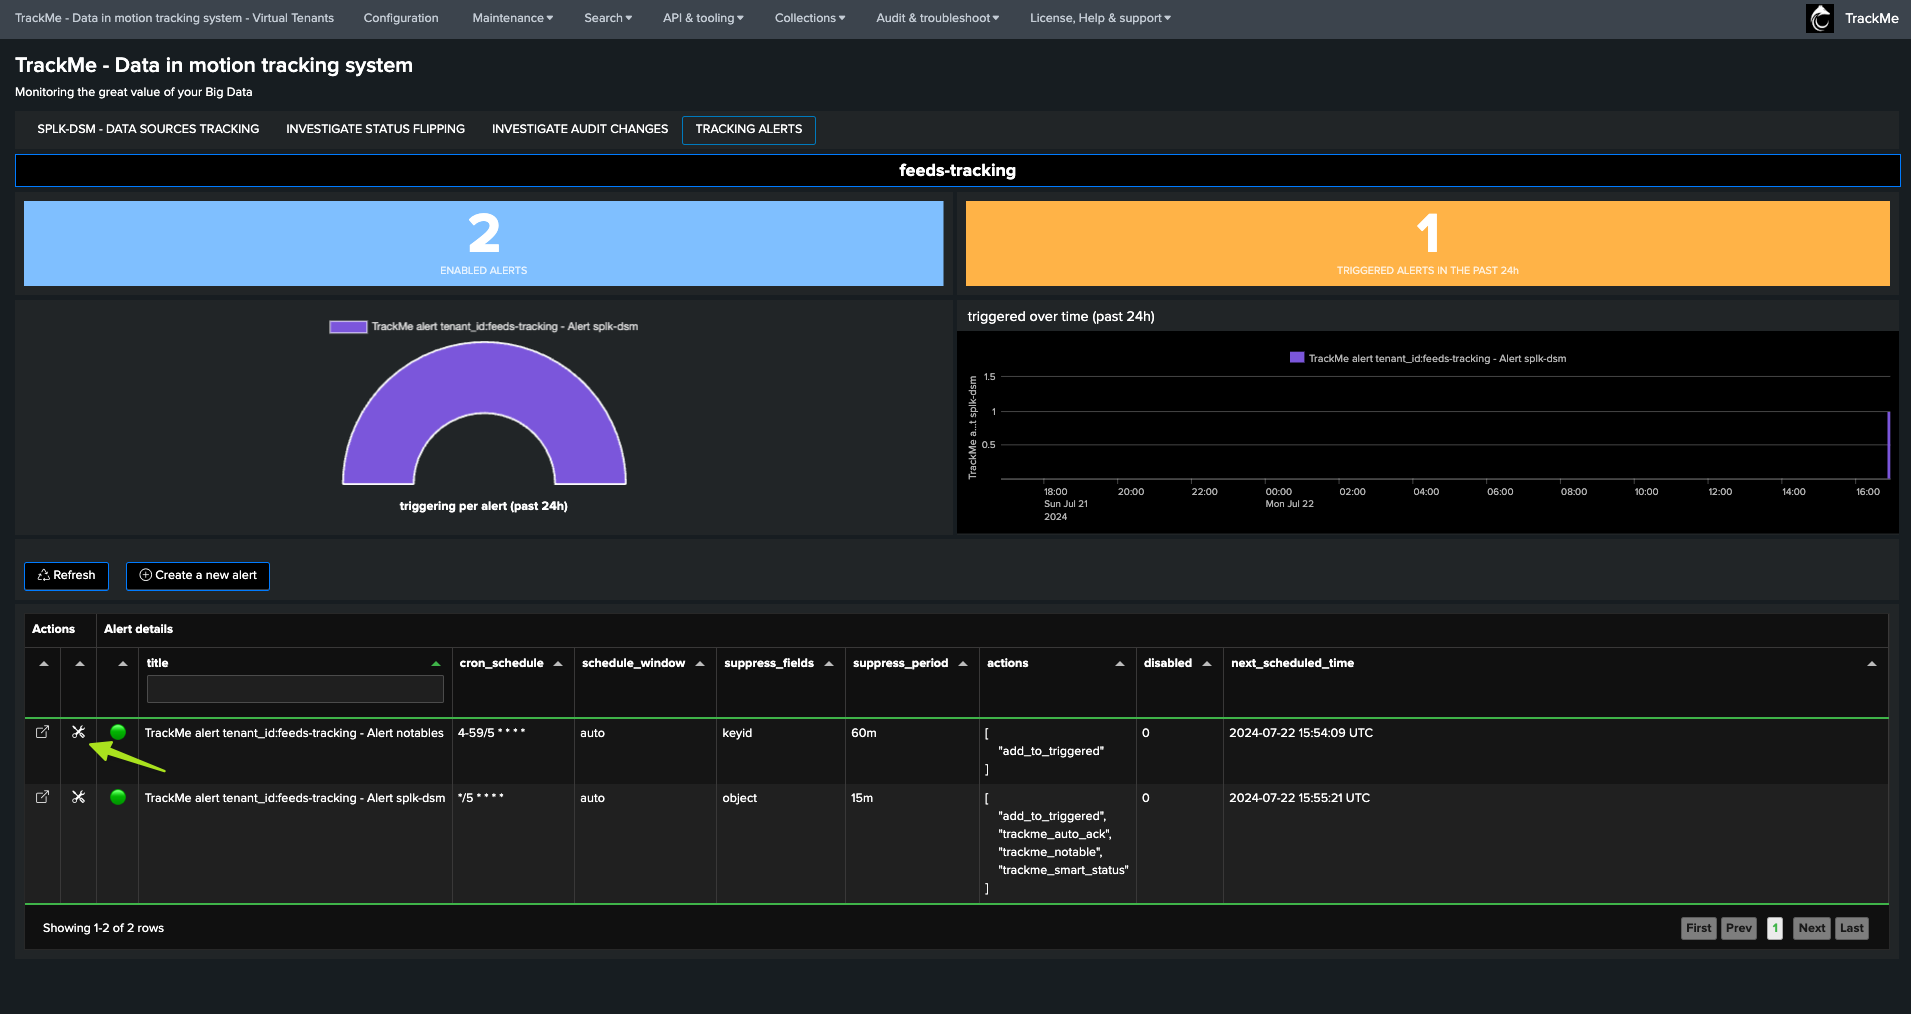
Access the Alerts creation wizard:
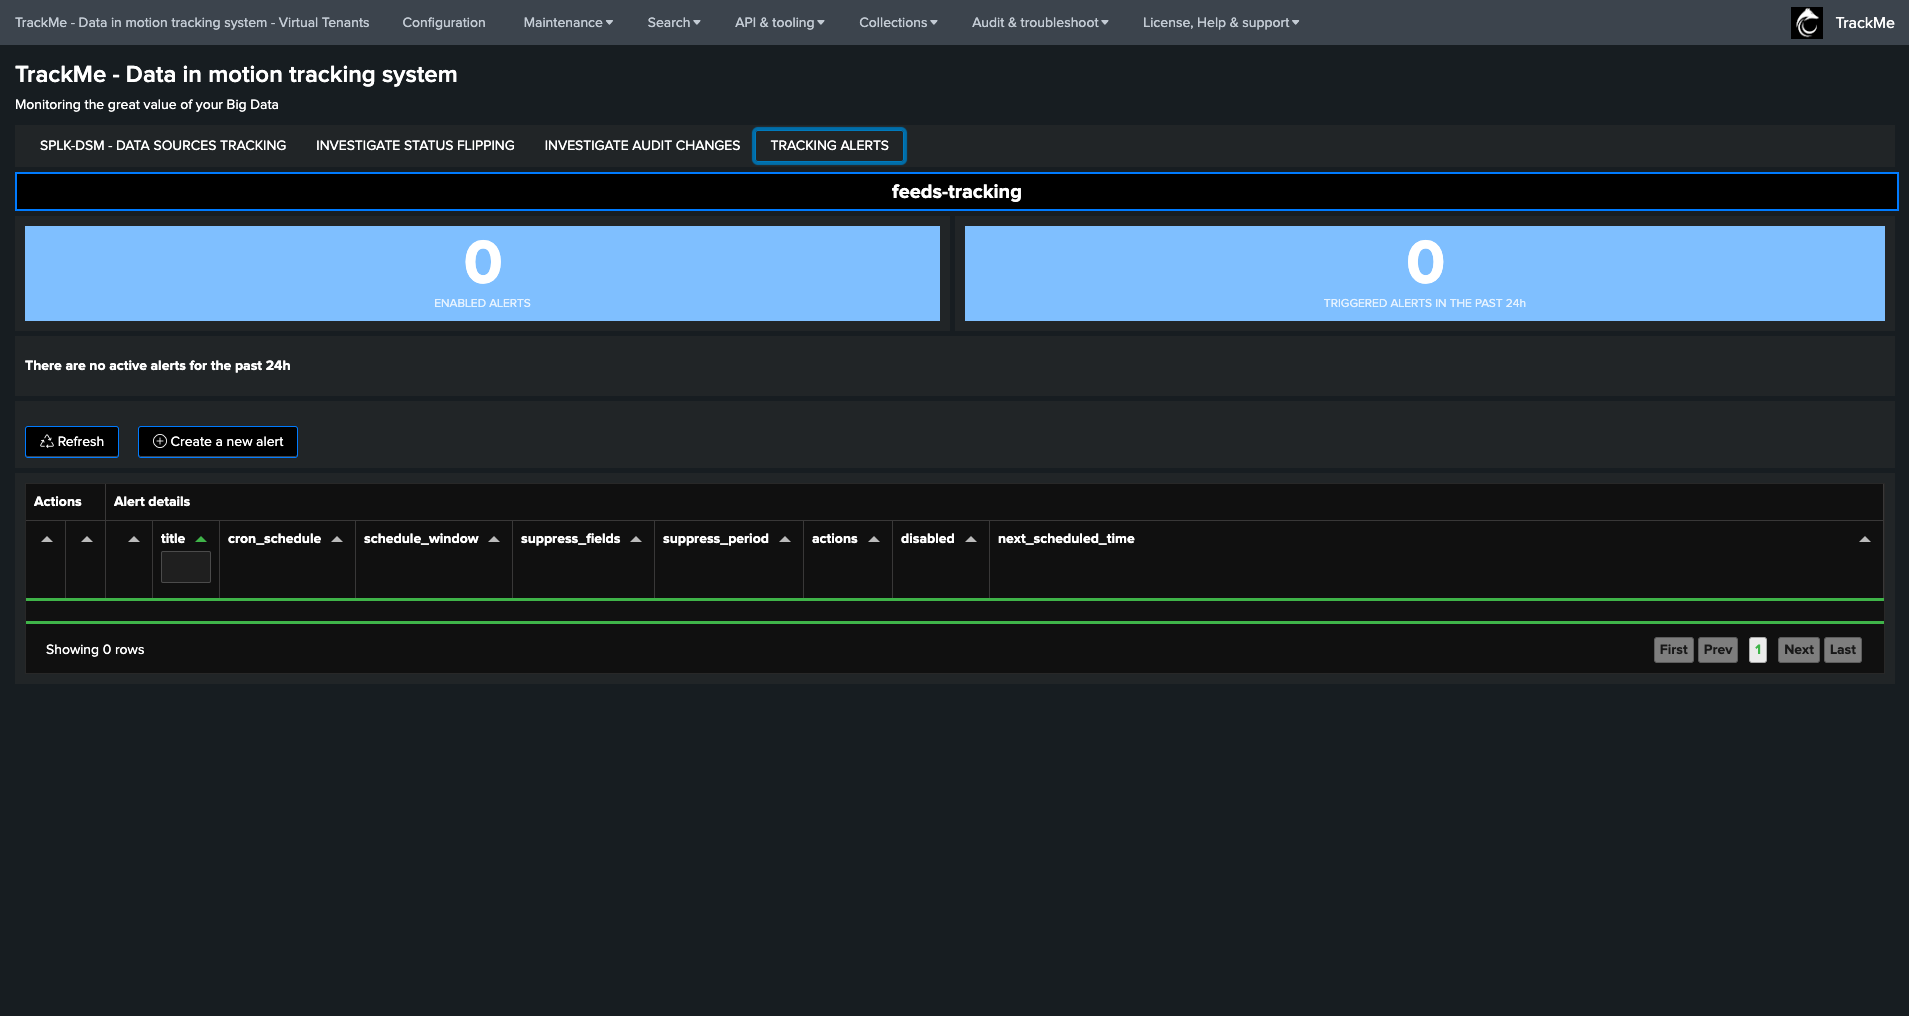
Welcoming screen for the alerts creation wizard:
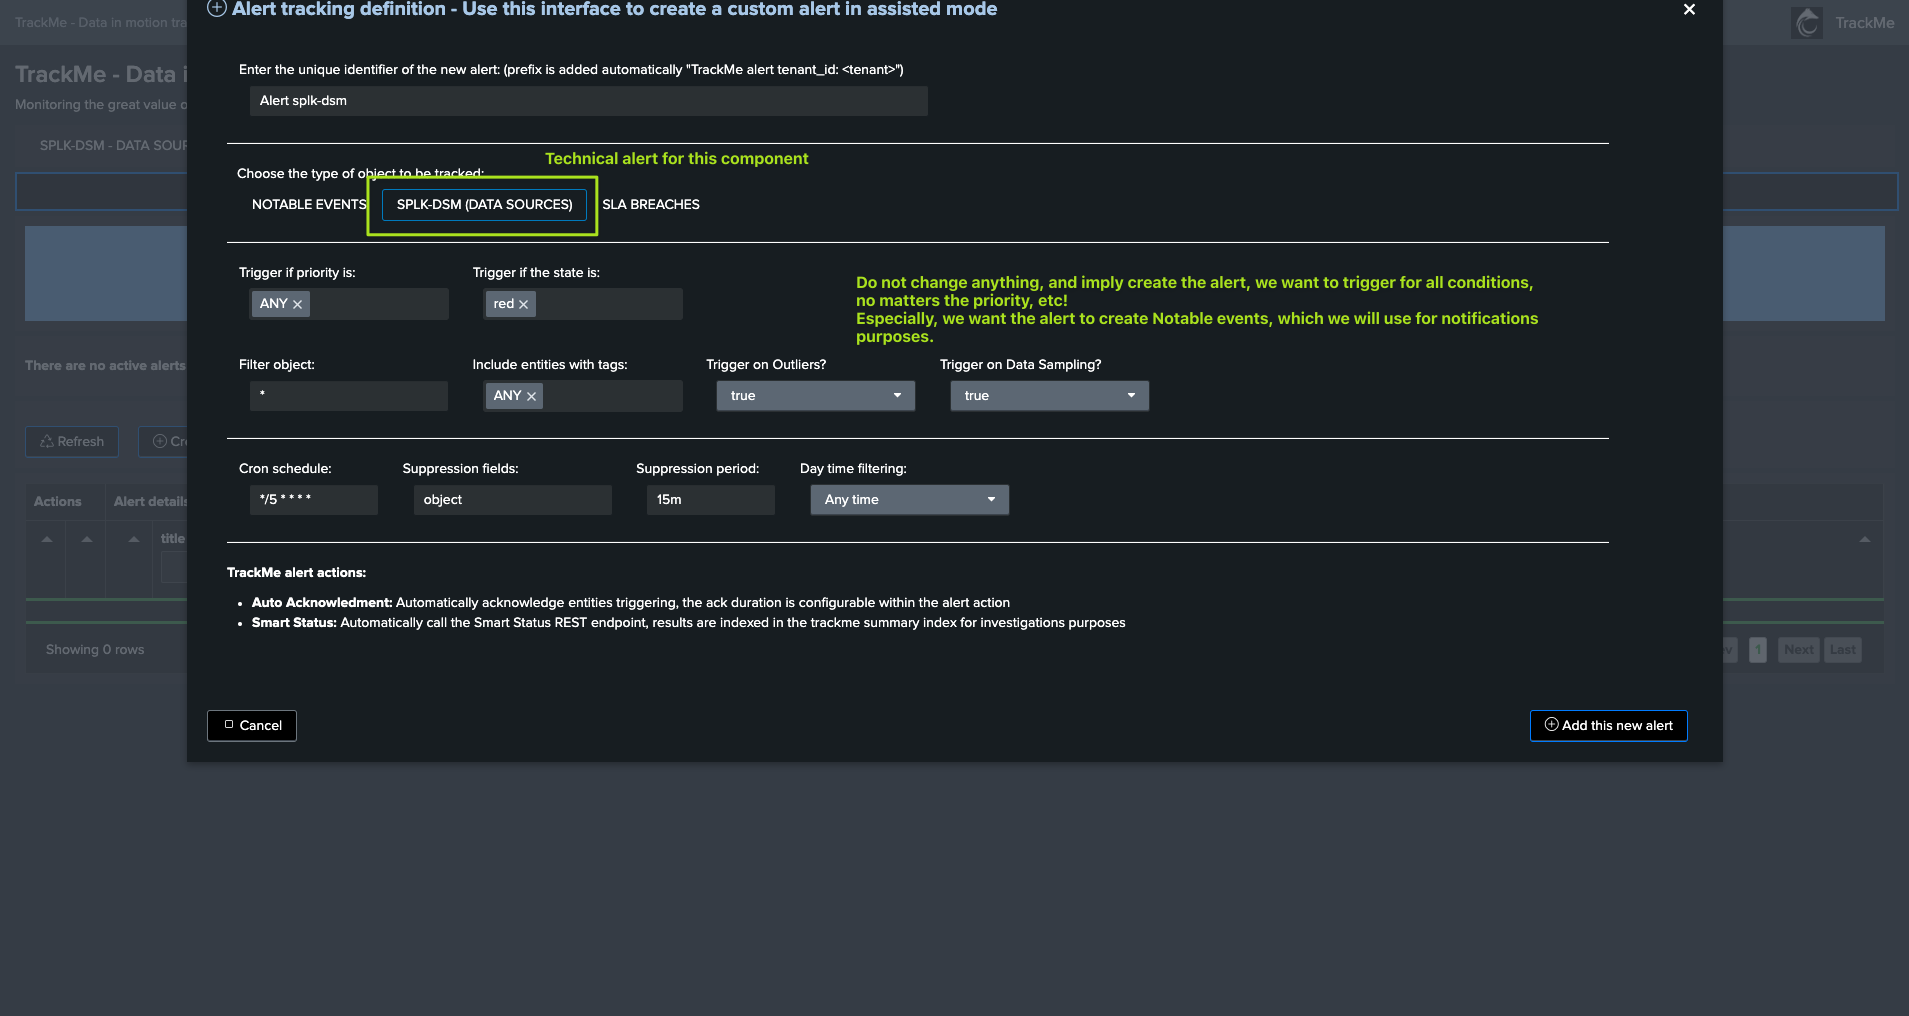
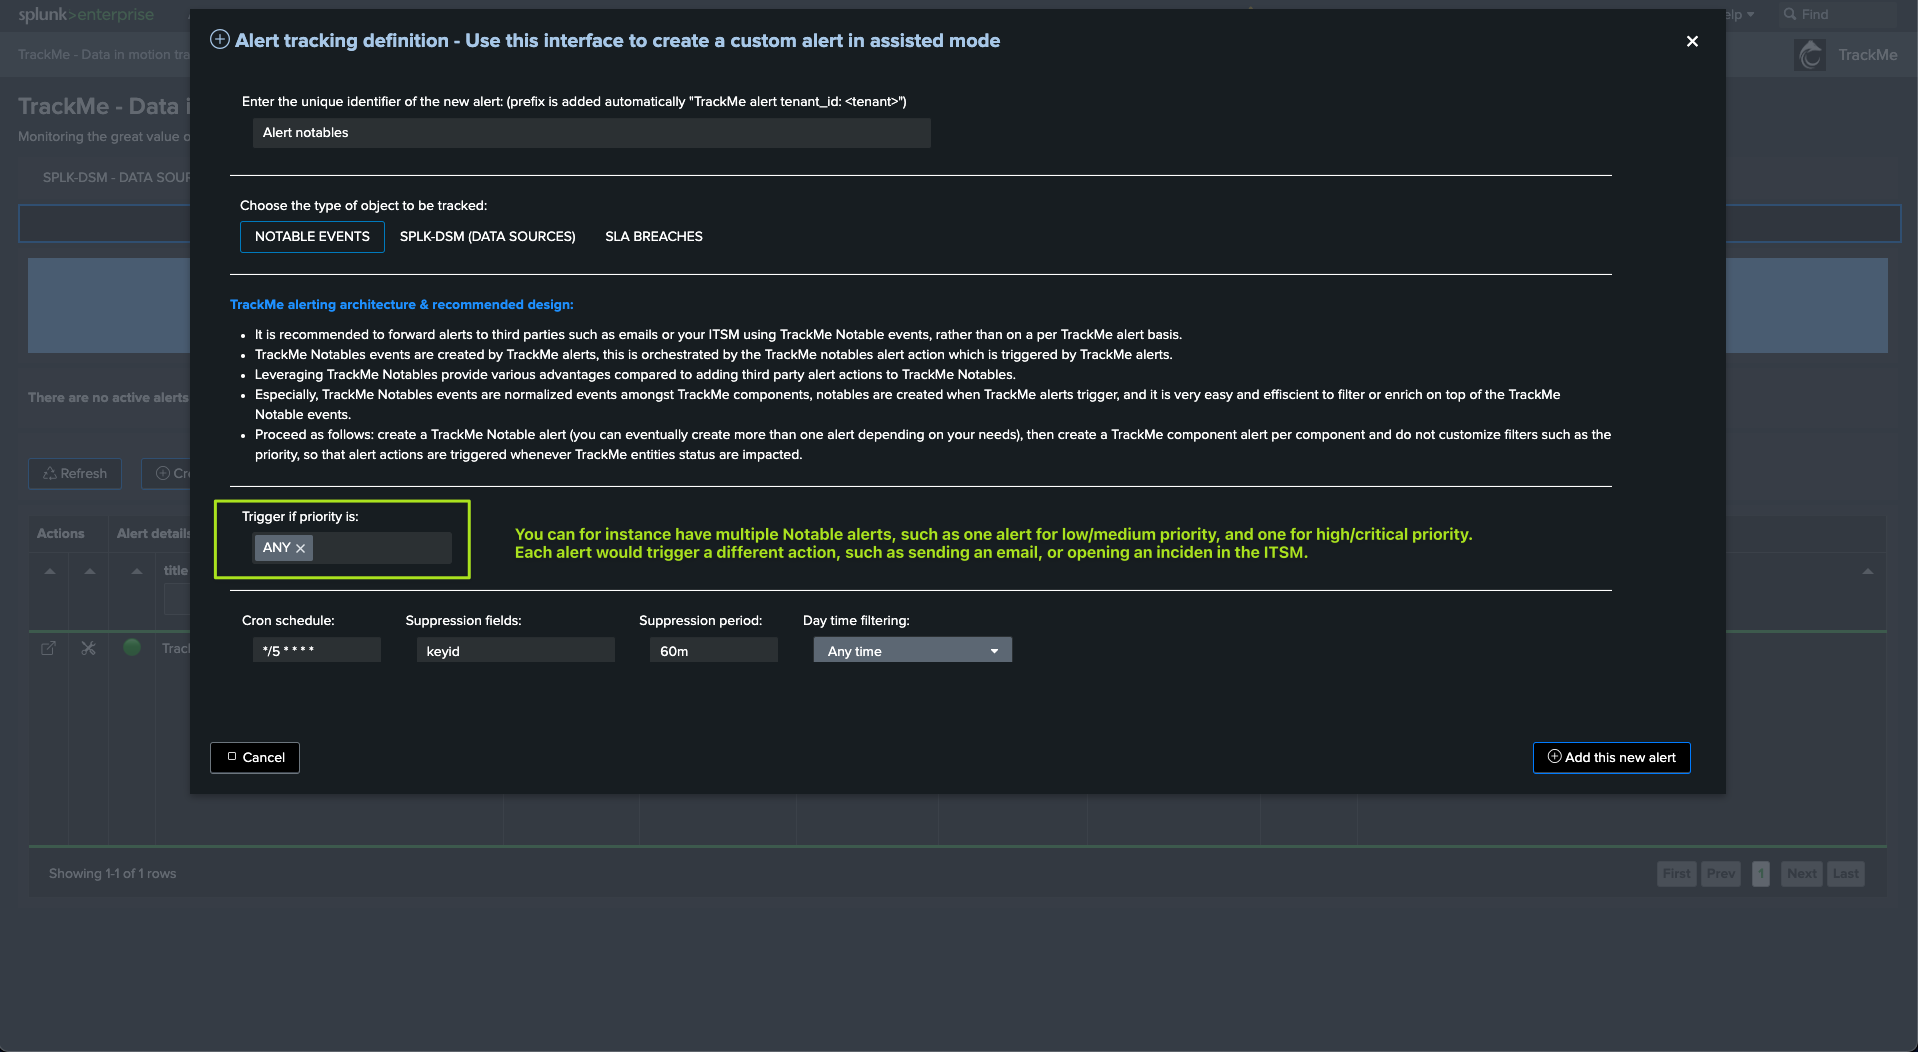
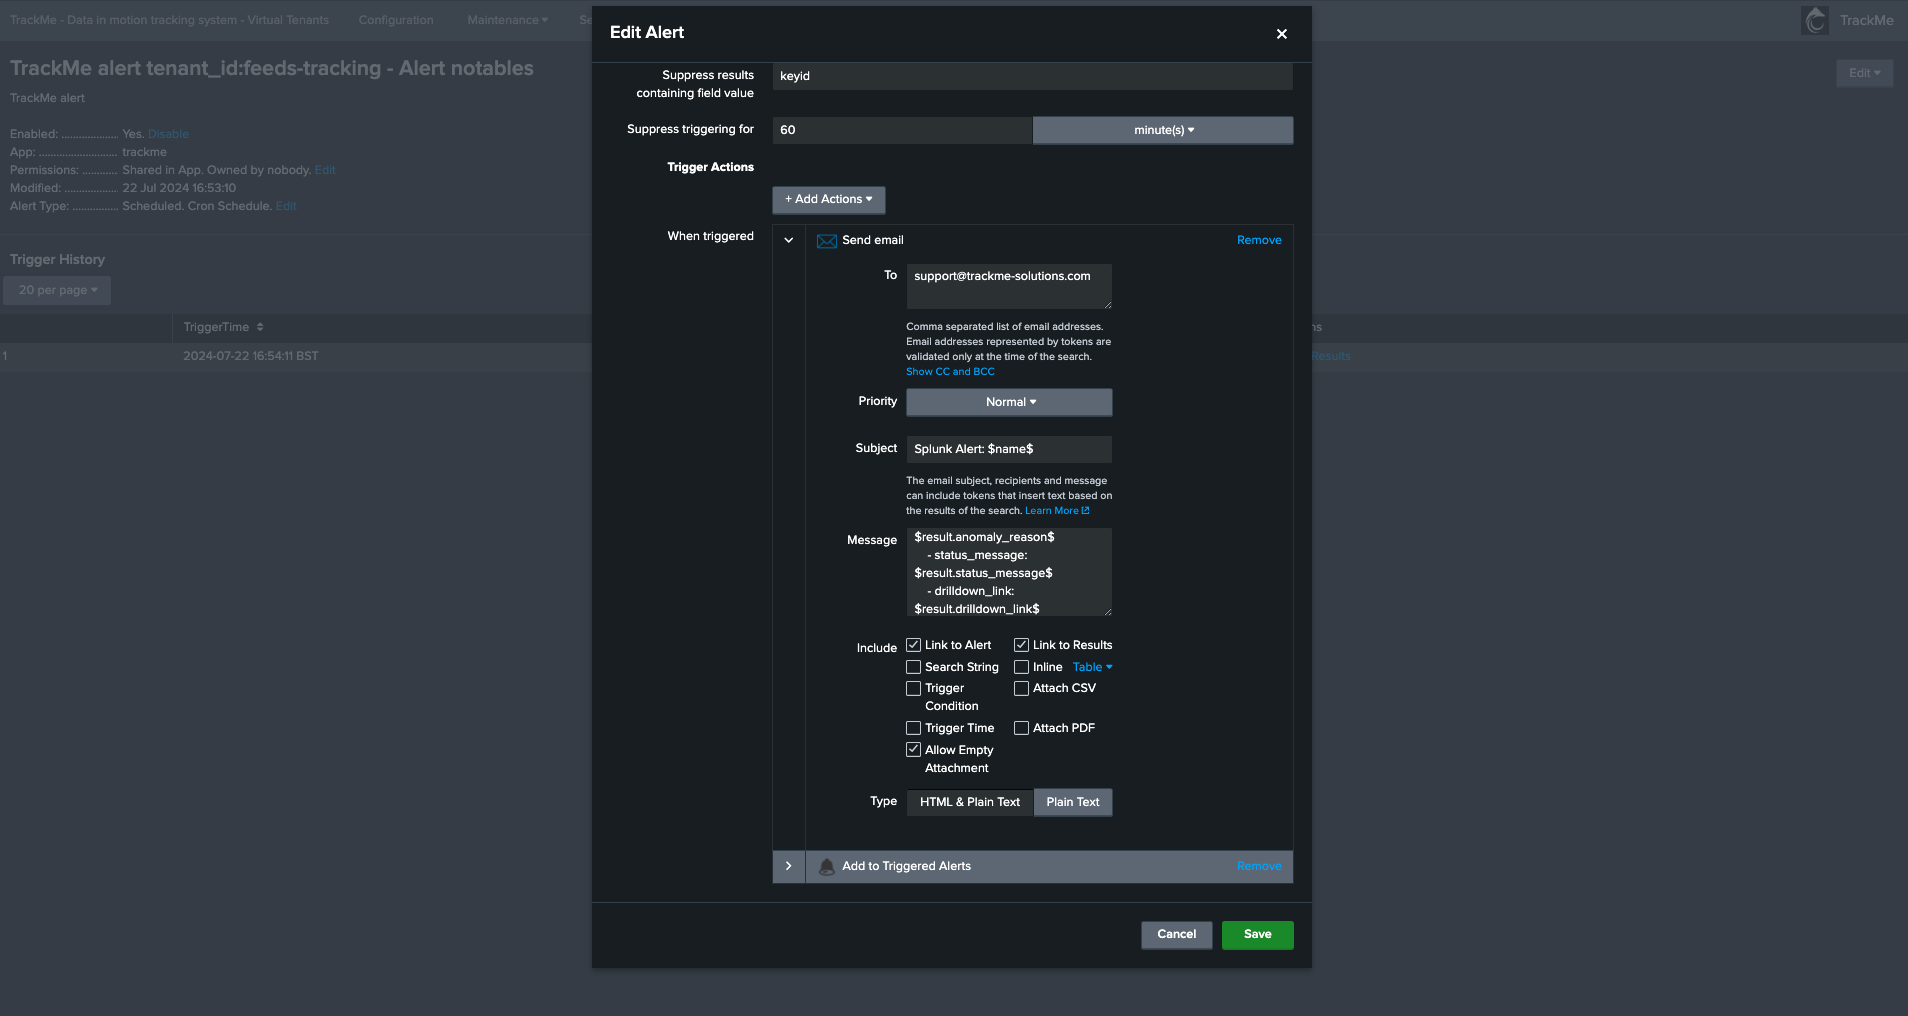
Choose the alerting mode, the defaults generates events and sends state aware Email notifications:
Define the priority levels selection for email notifications:
Review further options:
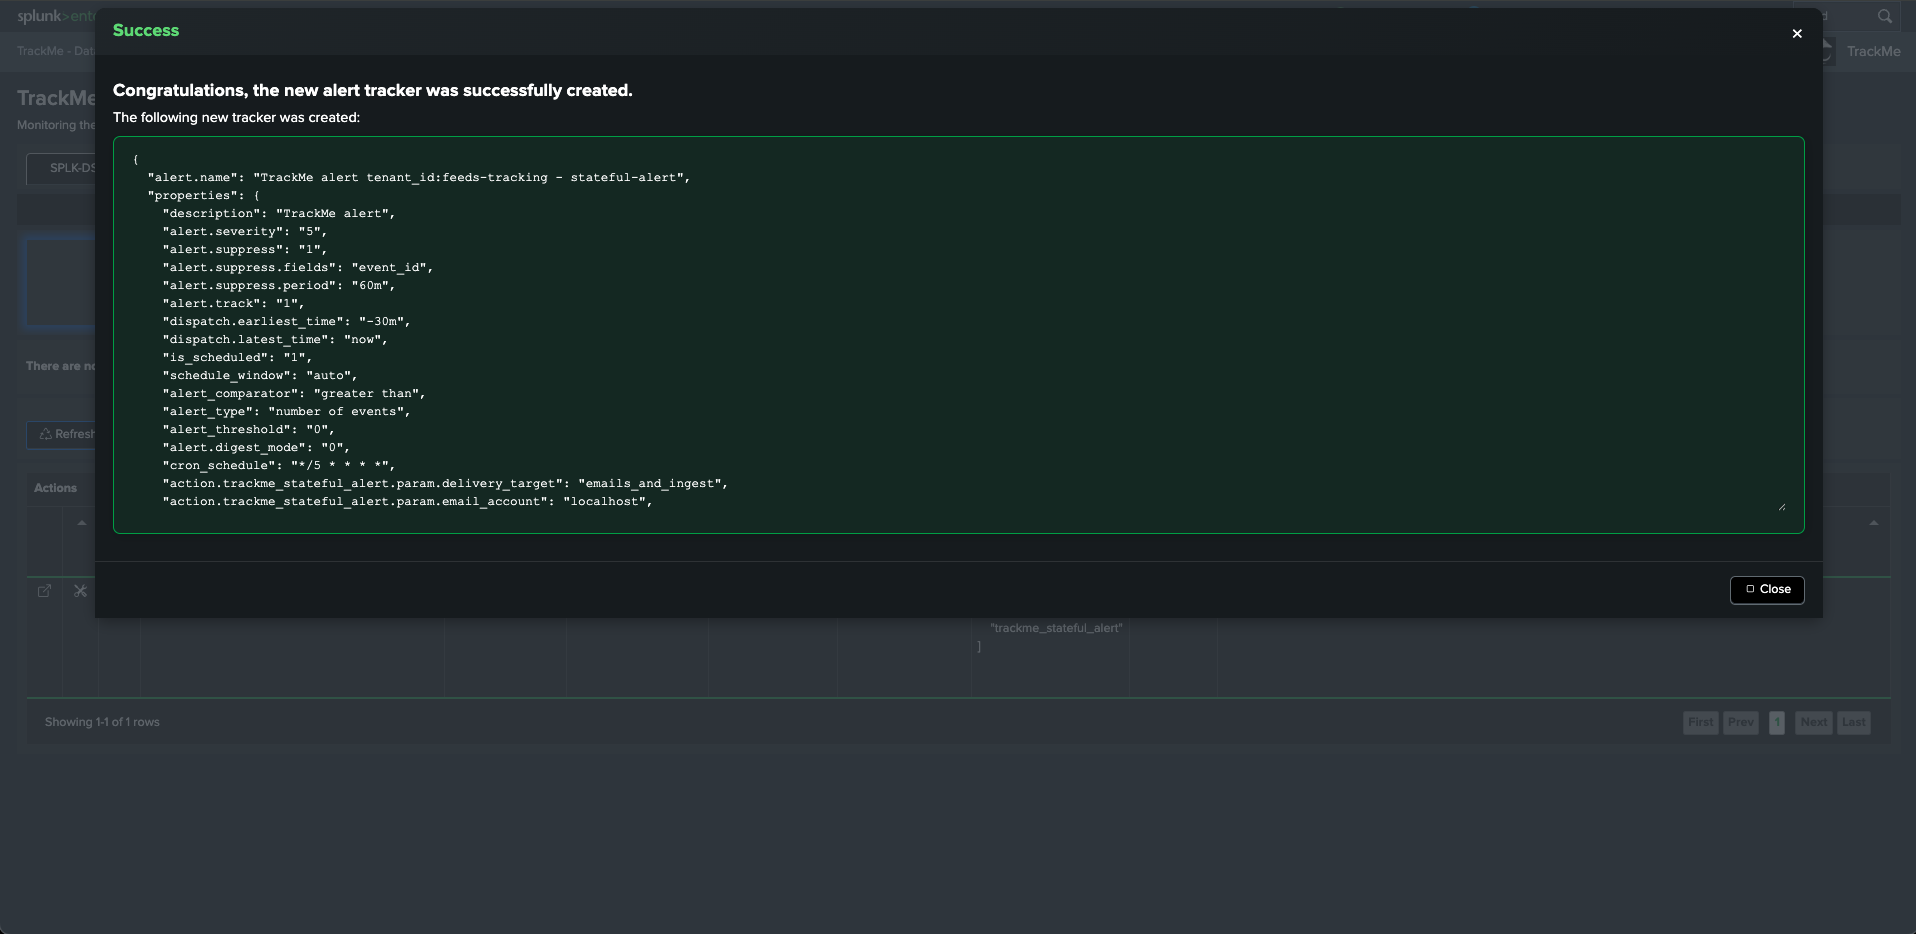
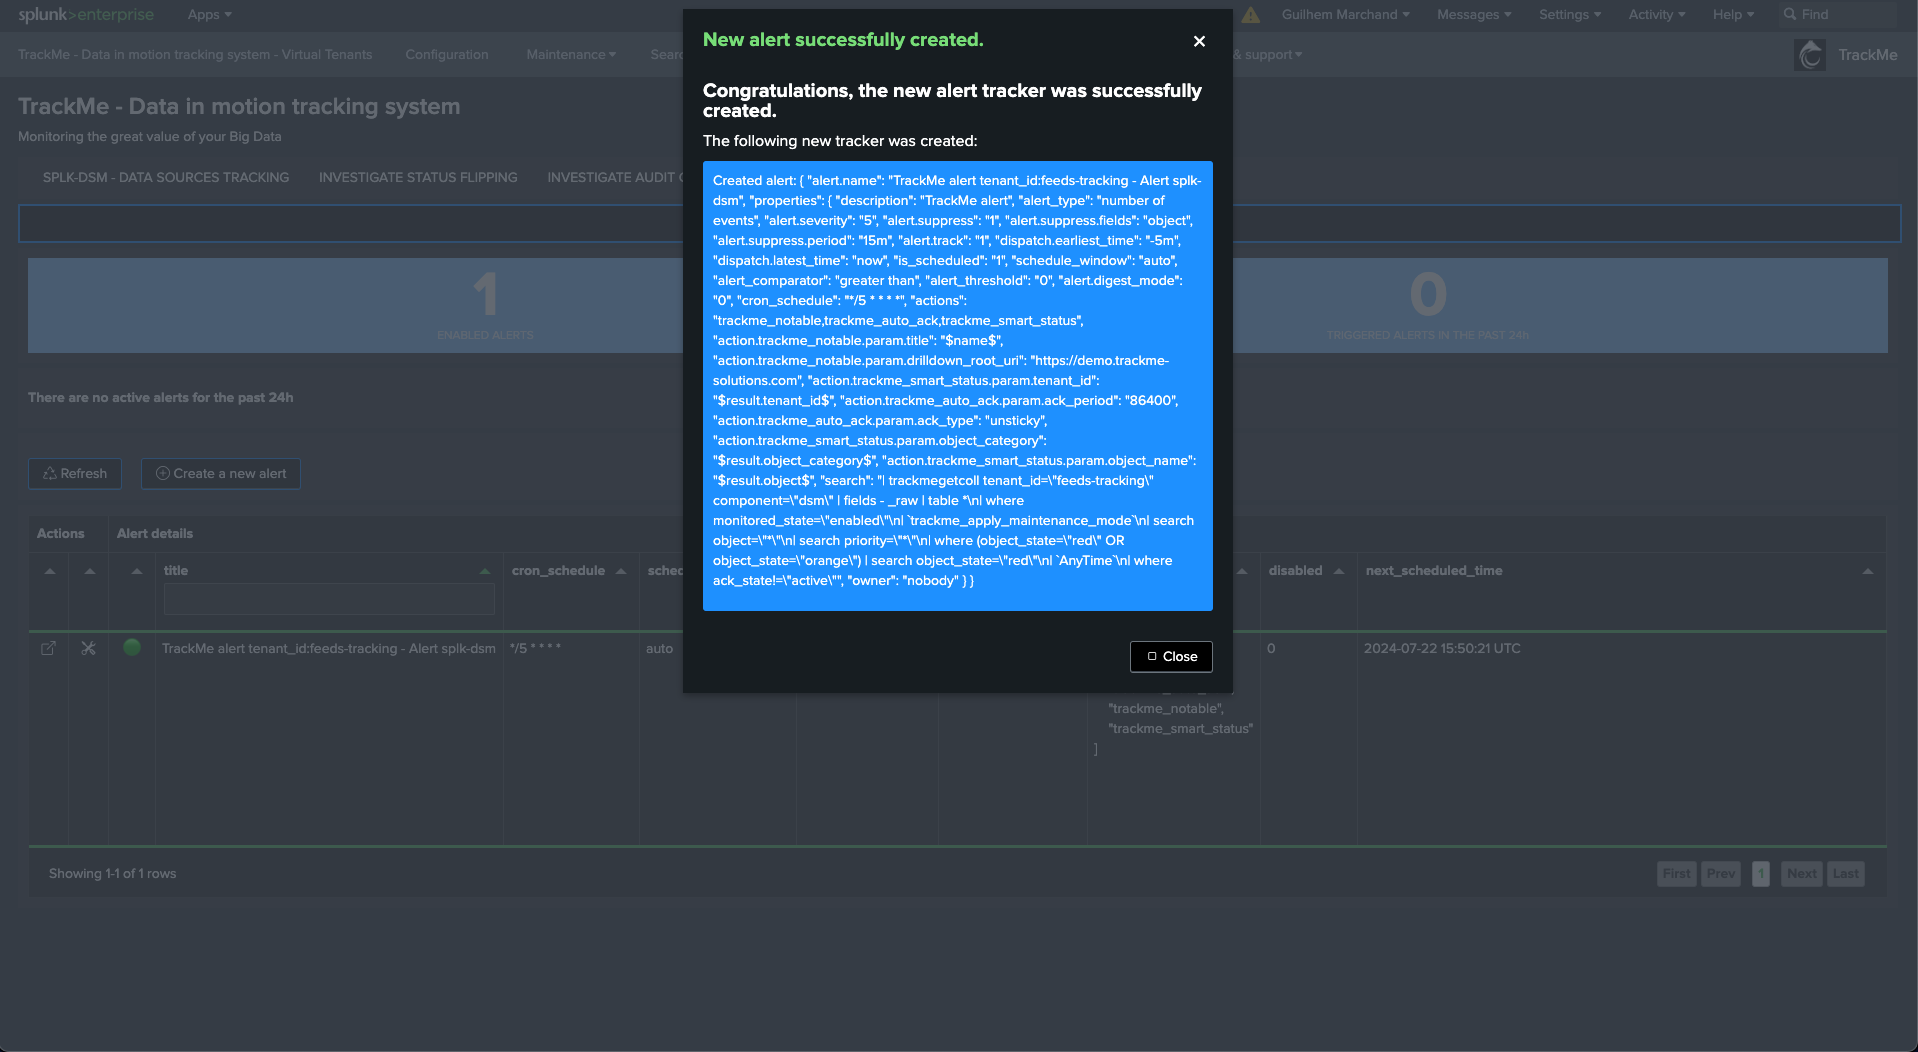
Validate the alerting creation:
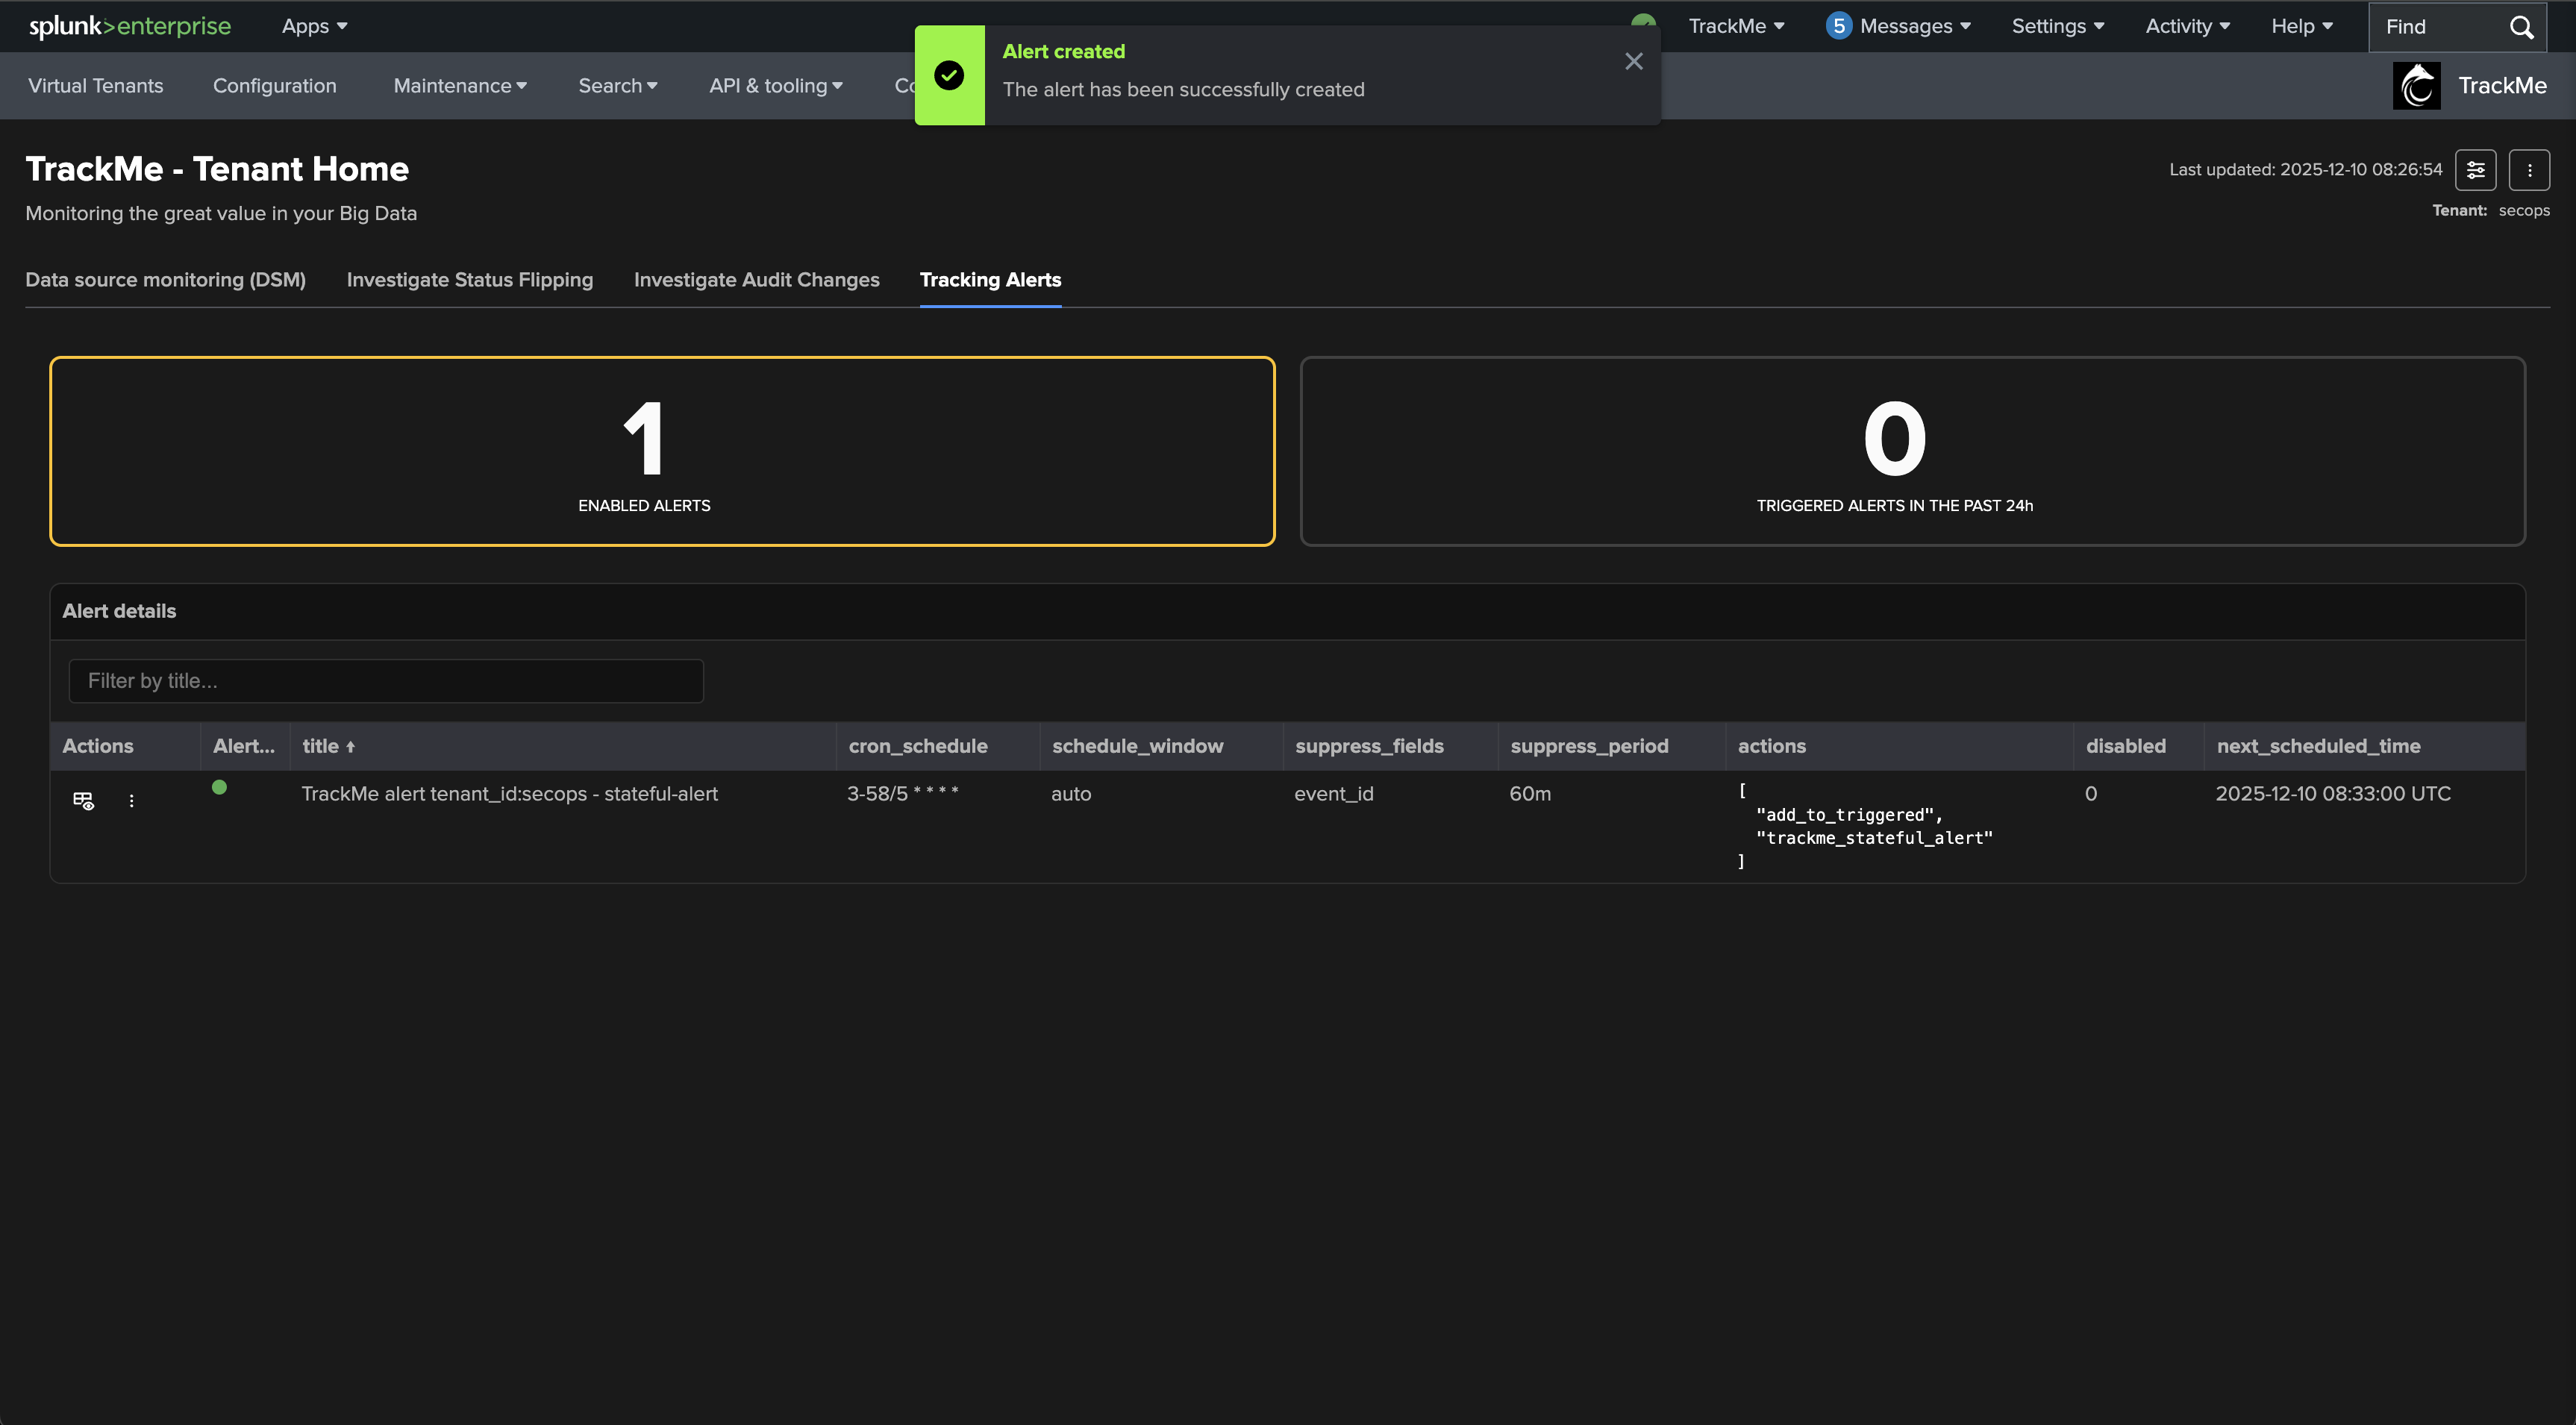
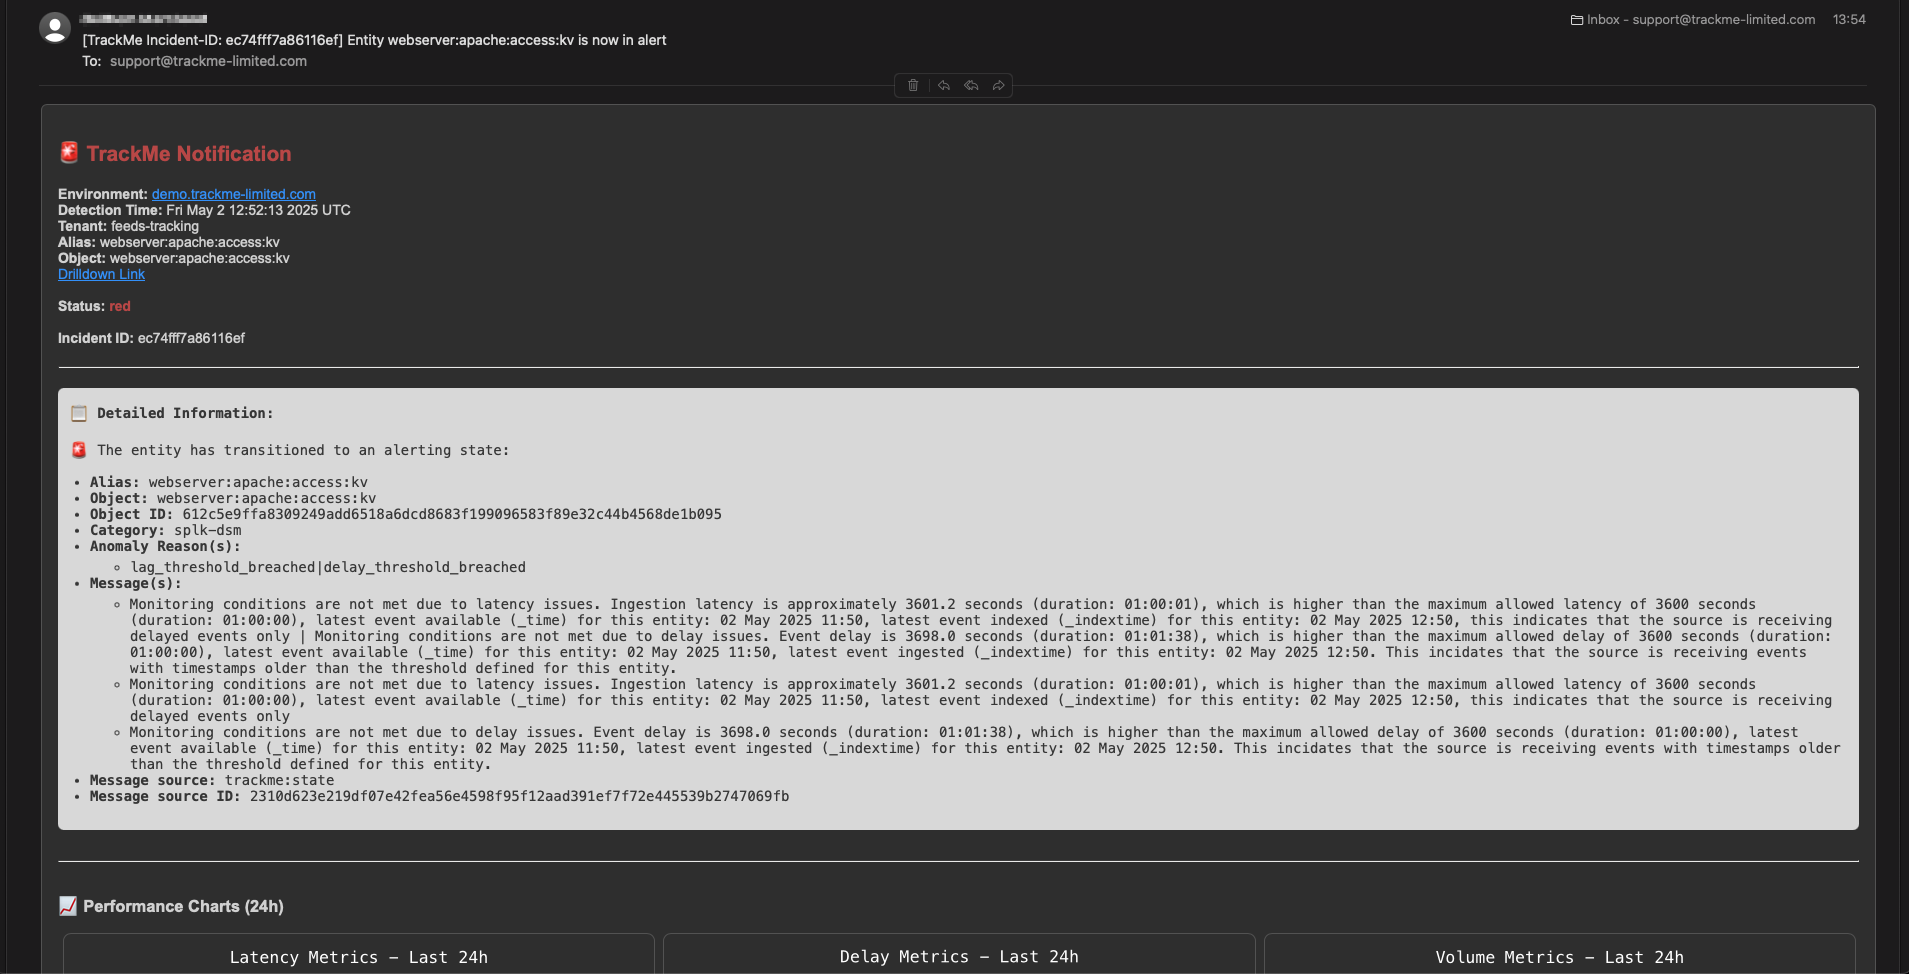
We are good to go now, if things are working as expected, any entity matching priority high or critical and currently in anomaly state, will trigger an alert!
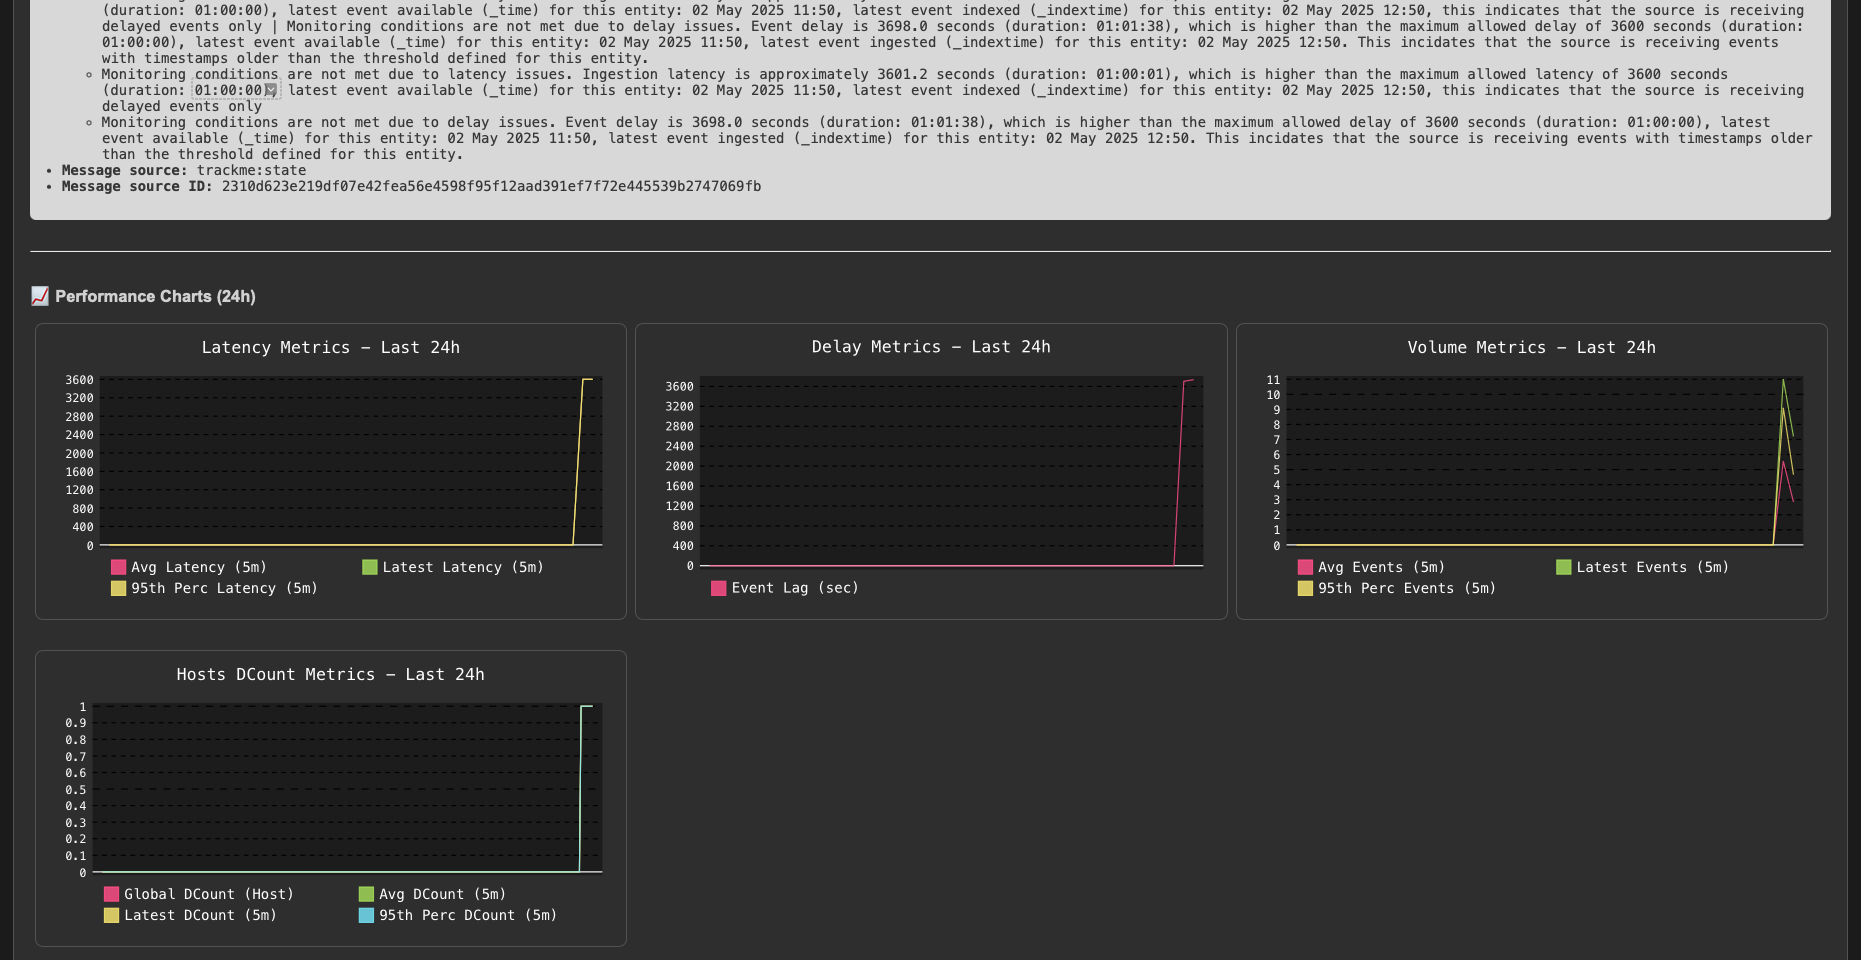
And if we did right, we also have an awesome Email notification!
Adapt to your preferences, repeat as needed, TrackMe is now Production ready!