Workload (splk-wlk) - Manage Workload tenants and trackers
Introduction to the Workload component
The TrackMe workload component (splk-wlk) is a licensed users restricted component which tracks the activity from any kind of scheduled search in your Splunk deployment, from reports to alerts and Data Model Acceleration. (DMA)
The Workload component tracks various use cases such as execution errors which can slightly affect the consistency of your Splunk use cases, providing powerful features to detect issues and track the performance of the Splunk scheduling activity.
For the User Guide, consult: Splunk Workload (splk-wlk)
Note
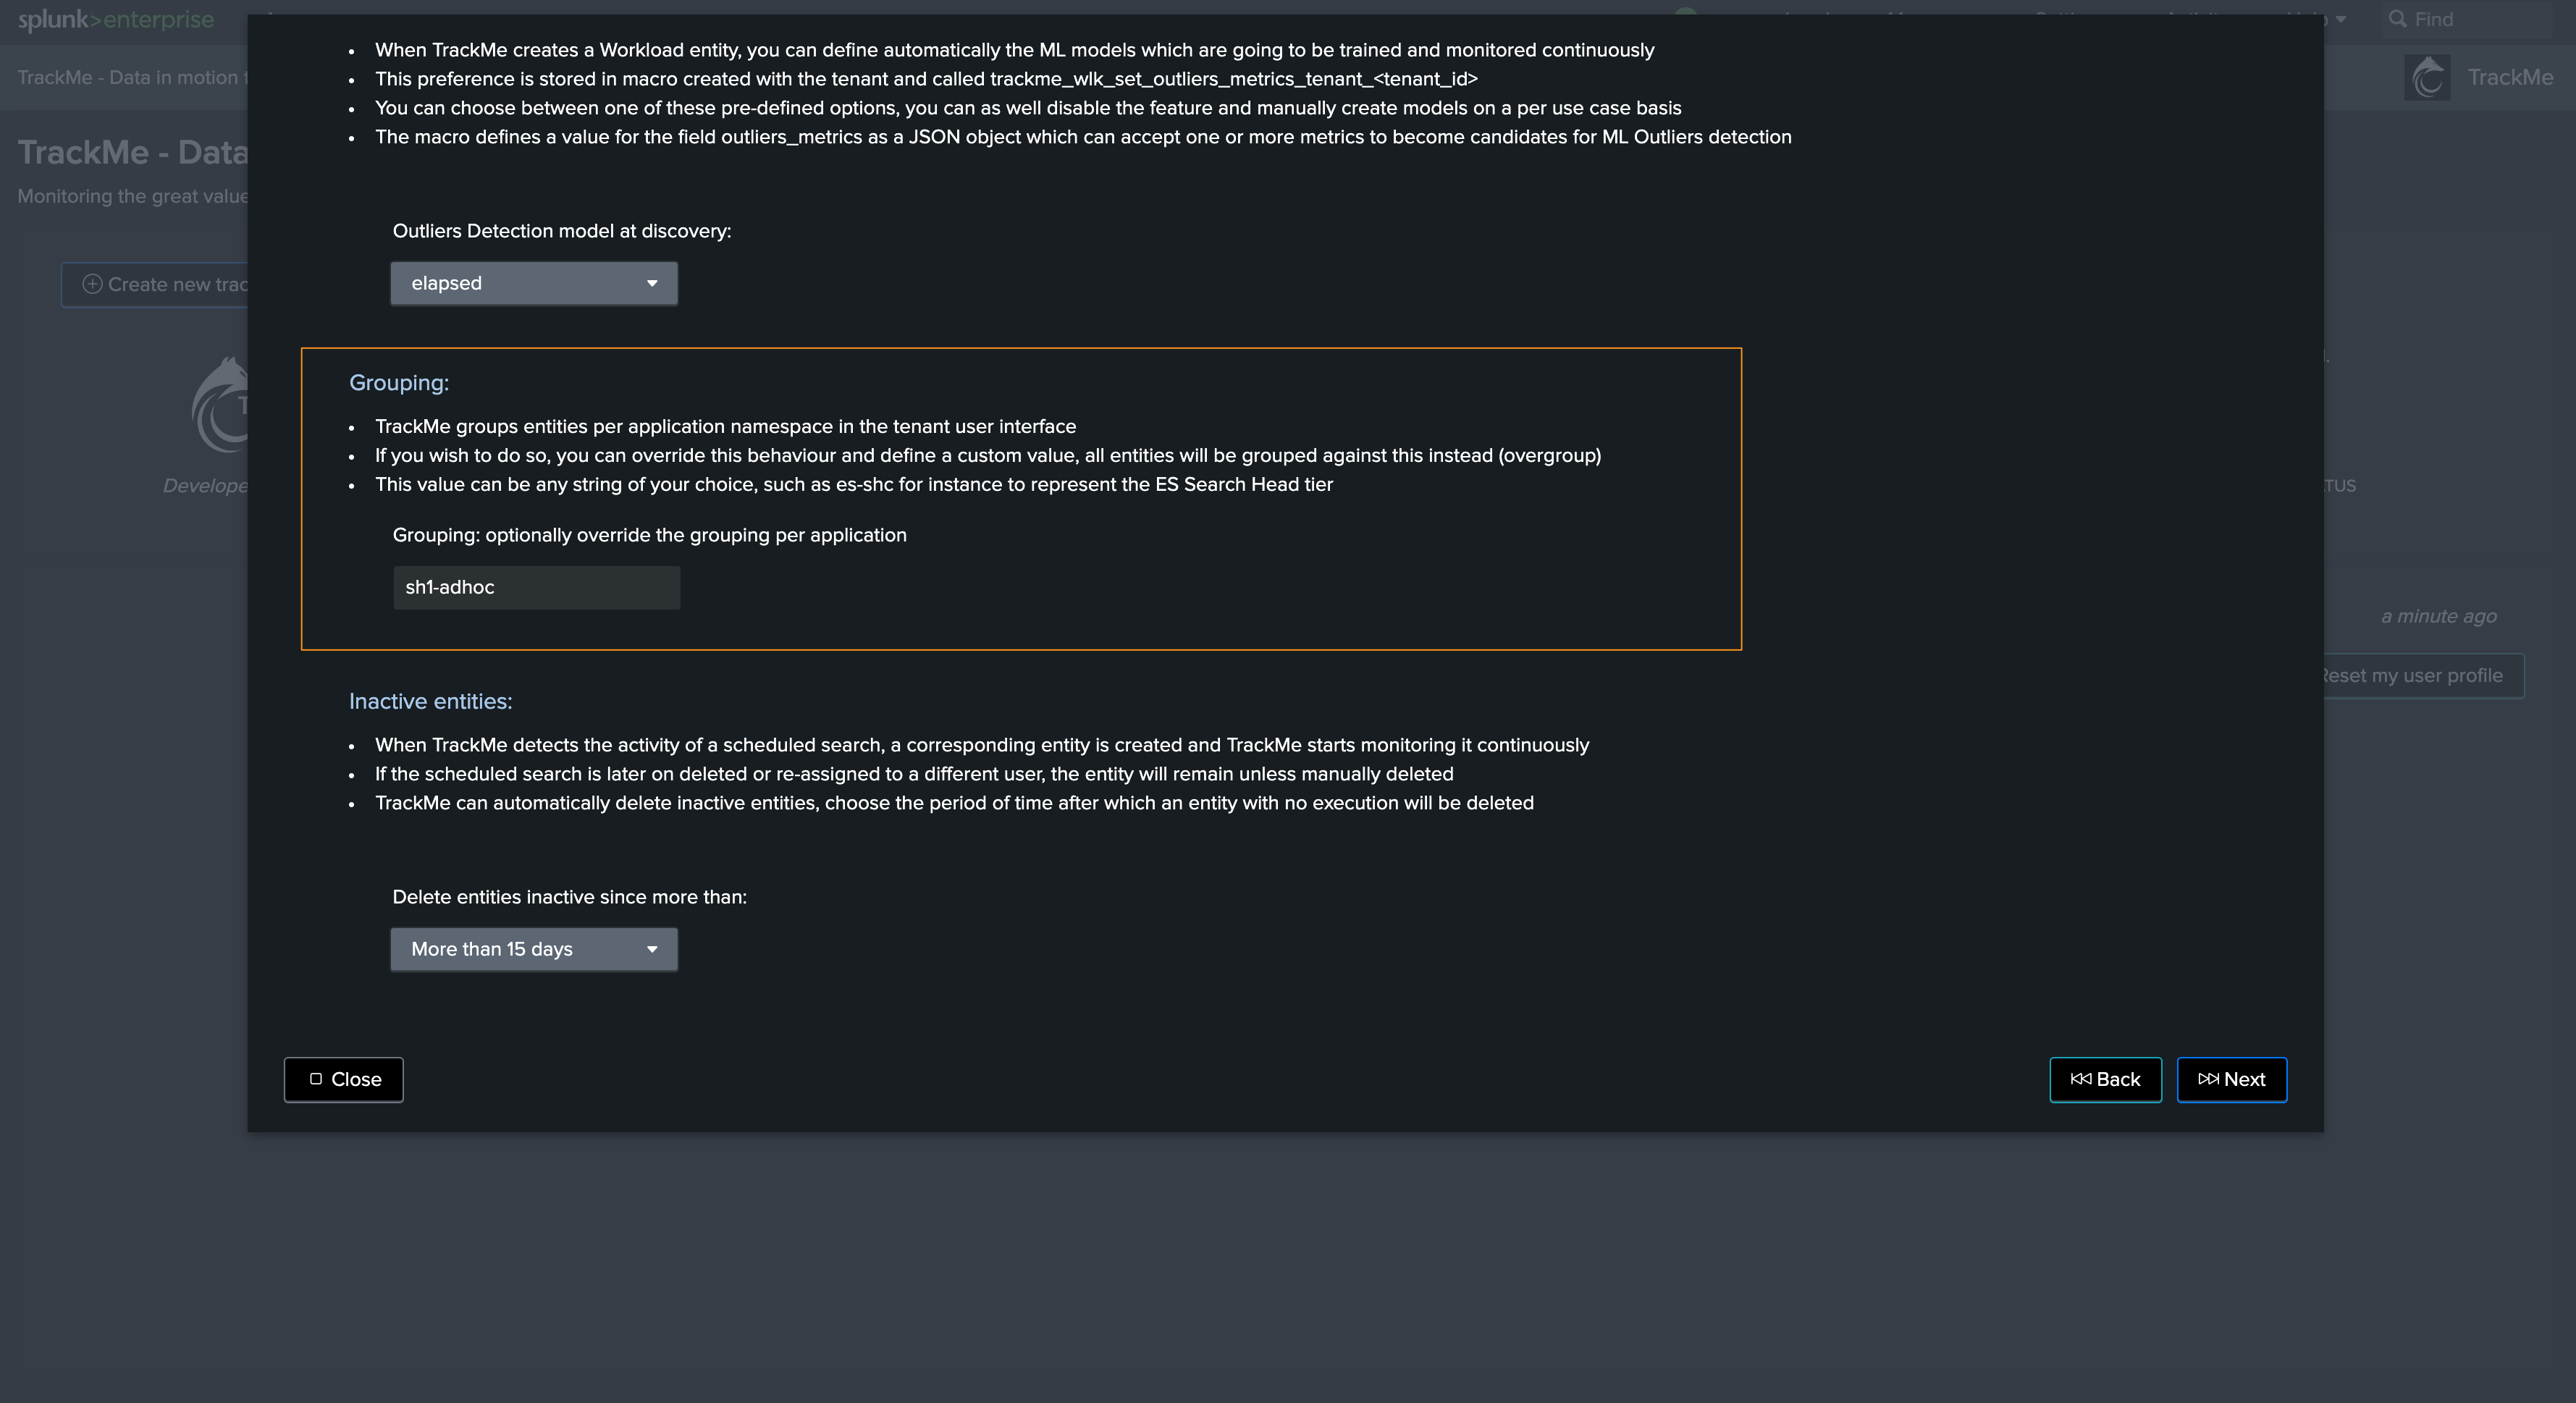
Grouping in the Workload component: group and overgroup
By default, the Workload component groups entities by
appwhich represents the Splunk application namespace hosting the scheduled report or alert.When creating the tenant and also later on when creating trackers manually, since TrackMe 2.0.70, you can optionally override this behaviour by setting up an
overgroupvalue.By doing so, the Workload will group entities based on a custom term instead of applications, this can be useful if for instance you want to have multiple Search Head tiers in the same tenant.
Refer to the Creating a Workload tenant to host multiple Search Head tiers with overgroup section for more information.
Note
Data collection enhancements in TrackMe v2.0.75
Since TrackMe 2.0.75, the Workload components has been enhanced to automatically support data collection overlap between execution, relying on the tracking of the last known metrics for a given account/group and type of metrics.
This allows TrackMe to look at multiple slices of times when tracking the Workload activity (scheduler, introspection, etc) and avoids missing any data point in case of Splunk delaying the execution of the workload trackers. (Splunk skew parameter, time_window and/or over busy scheduler)
This process is fully automated and transparent, the last seen metadata are stored in a KVstore called
trackme_wlk_last_seen_activity_tenant_<tenant_id>.
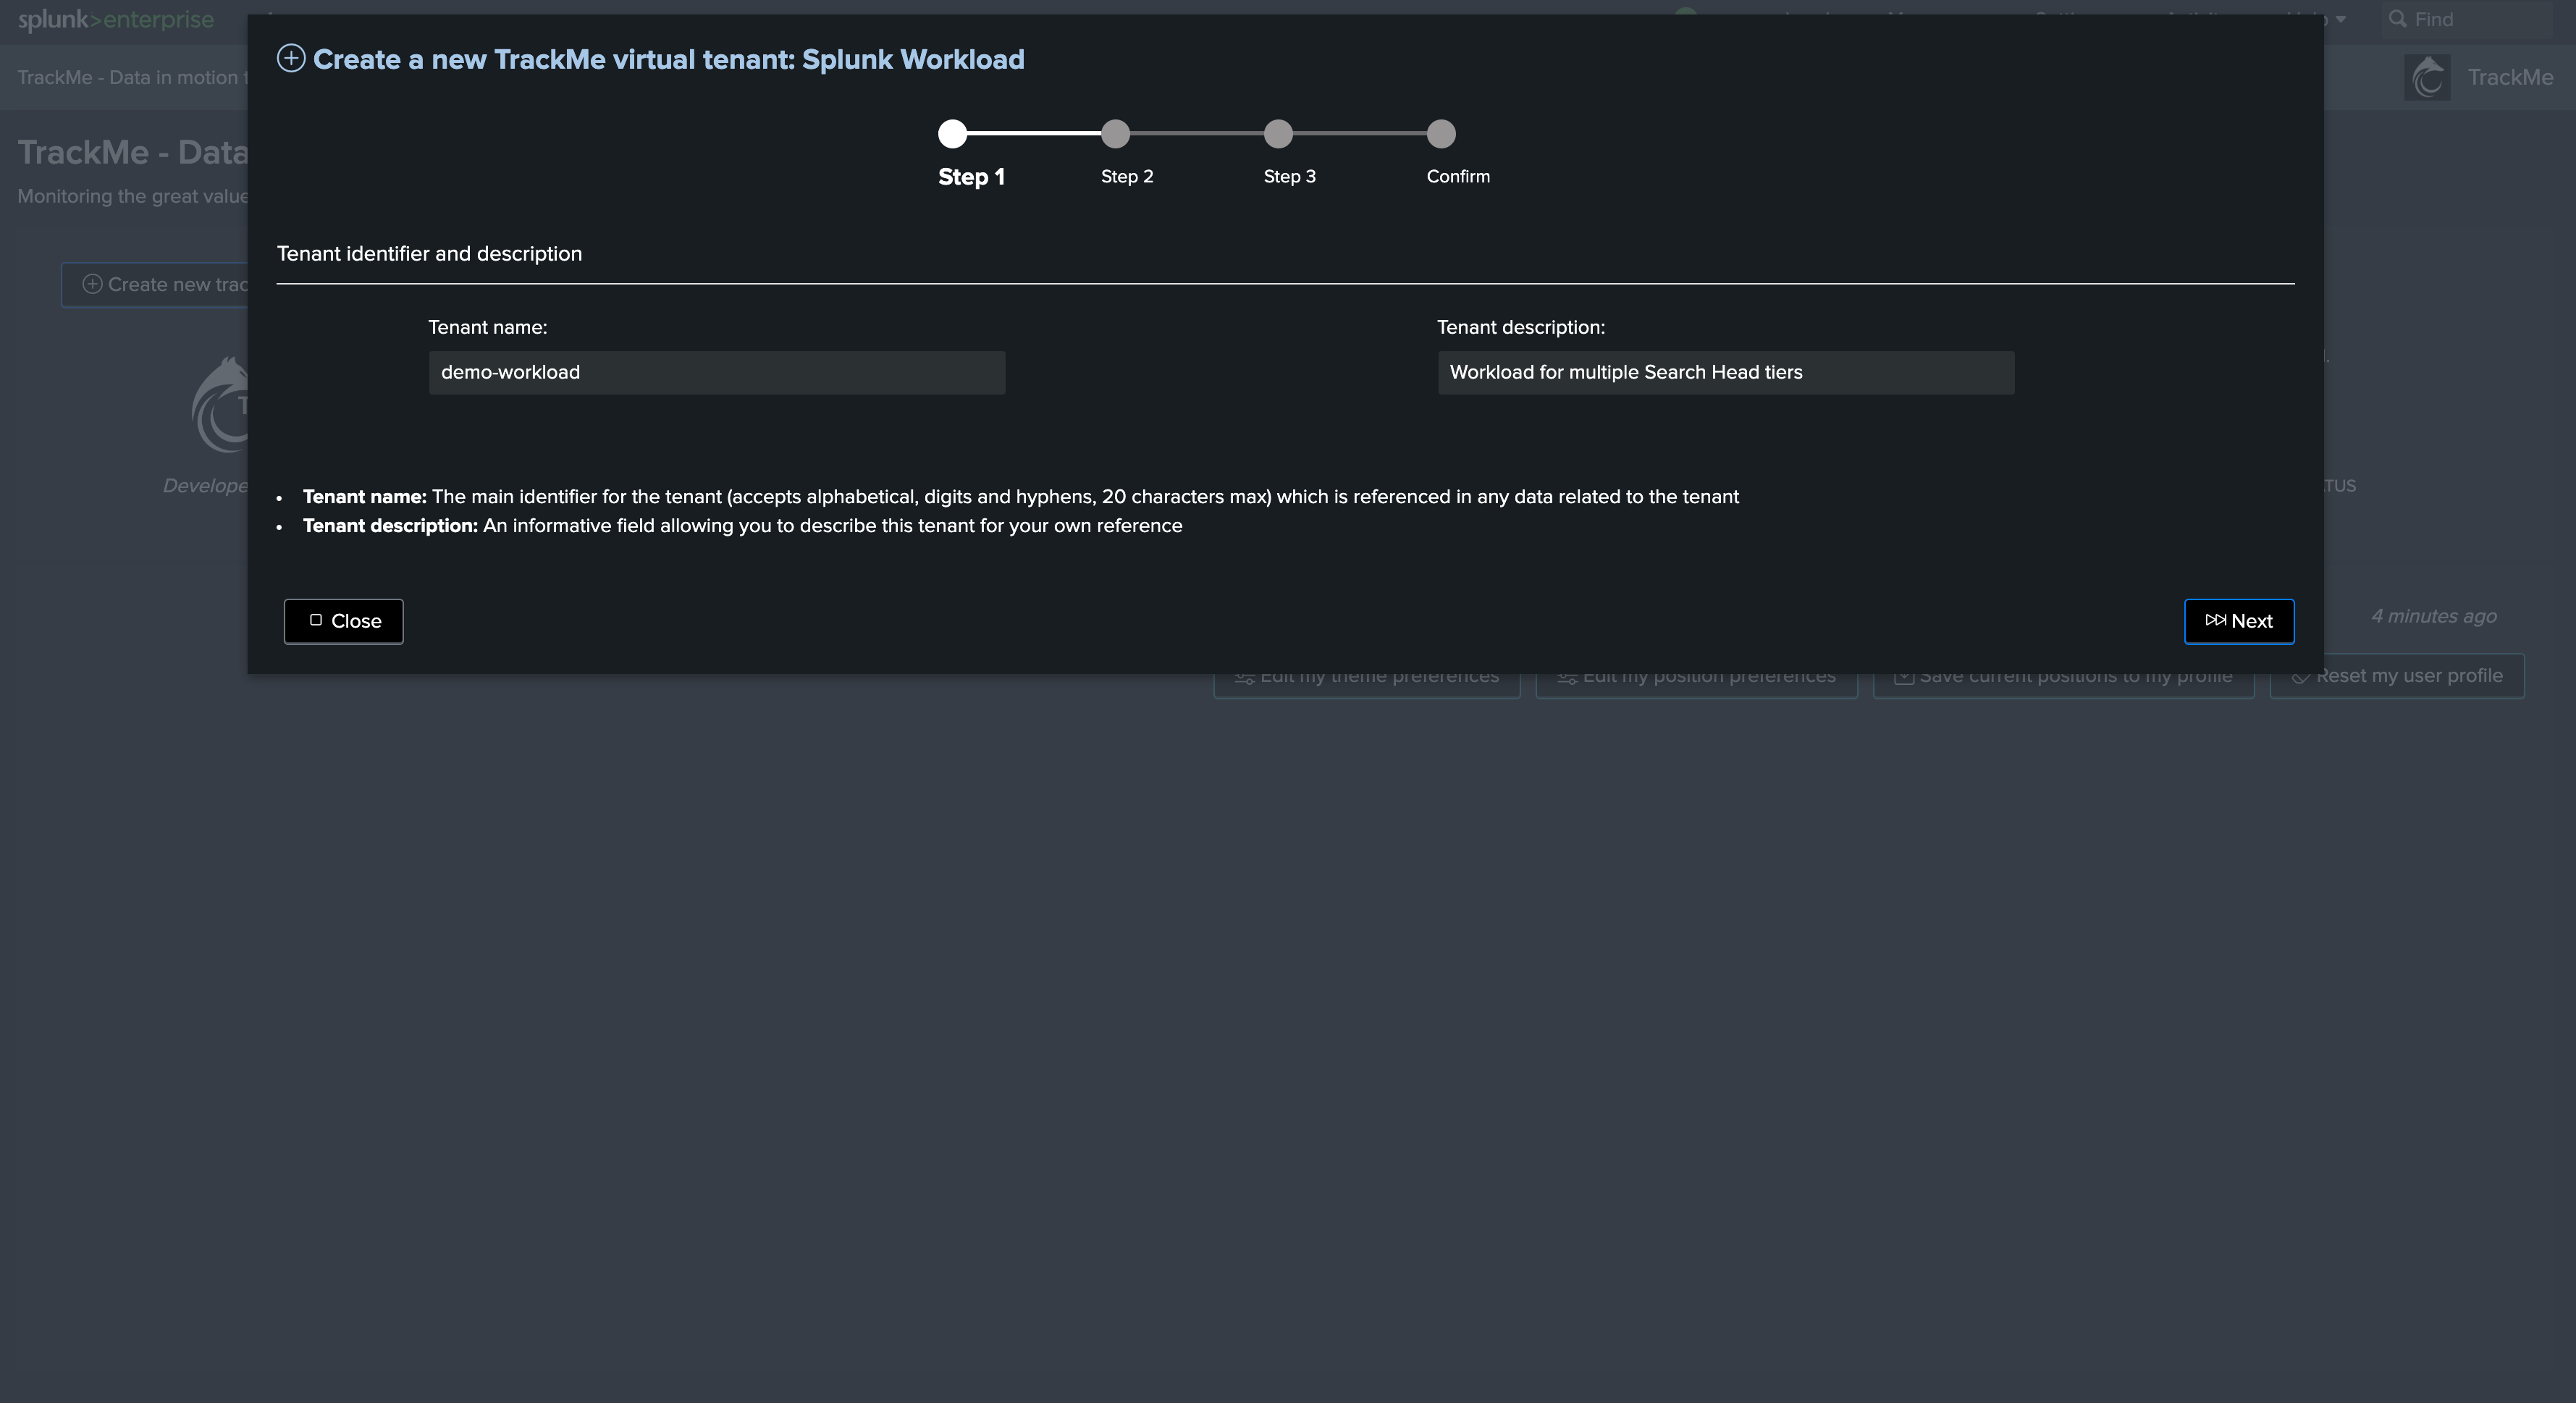
Creating and configuring a Workload Tenant
The creation and configuration of a Workload Tenant is guided through the wizard, click on the “create new tenant” and choose the associated component to start the configuration process:

Workload component in Splunk Cloud
Generally, in Splunk Cloud have two or more Search Head layers:
The ad-hoc Search Head tier, where TrackMe should be used (standalone or SHC)
The premium app Search Head tier, running Enterprise Security or ITSI (standalone or SHC)
In a nutshell, the configuration path is the following:
configure a TrackMe Splunk Remote Deployment which targets the premium app Search Head tier (this is required notably for the versioning tracking of scheduled searches, even through both Search Head tiers access the same indexing tier)
following these instructions to identify the Search Head tiers names as automatically defined per Splunk Cloud summary data, and recycle this information using a simple subsearch (see in the next sections)
create and configure the Workload tenant in TrackMe
Step 1: configure the remote Splunk Deployment
For more information about TrackMe’s Splunk Remote Deployments capabilities and configuration, consult: Splunk Remote Deployments (splunkremotesearch)
Proceed as following:
Create a bearer token in the premium app Search Head tier, it is good practice to associate the bearer token with a service account dedicated for that purpose
Identify the Splunk Cloud label per Search Tier, we will use this logic as a subsearch when creating the Workload tenant/trackers:
index=summary source="splunk-svc-consumer" earliest=-7d latest=now
| stats values(usage_source) as members by search_head_names
Hint
Using the search_head_names label with a subsearch to dynamically restrict the hosts
In Splunk Cloud, use the following subsearch technique to assign dynamically the list of Search Heads for that given Search Head tier
If Search Head members are re-created, the subsearch will automatically pick up the new hosts and you have no changes to perform yourself
for instance, if the target Search head tier is called “es” (Enterprise Security), we will use the following subsearch to filter out the hosts dynamically:
[ search index=summary source="splunk-svc-consumer" search_head_names="es" earliest=-24h latest=now | stats count by usage_source | table usage_source | rename usage_source as host | format | eval search = if(search="NOT ()", "host=*", search) ]
Once you have validated the connectivity, you can continue and start the configuration of the Workload tenant.
Step 2: create and configure the Workload tenant
Open the assistant wizard, and proceed as follows:
Select “Splunk Cloud” in the Splunk environment dropdown:
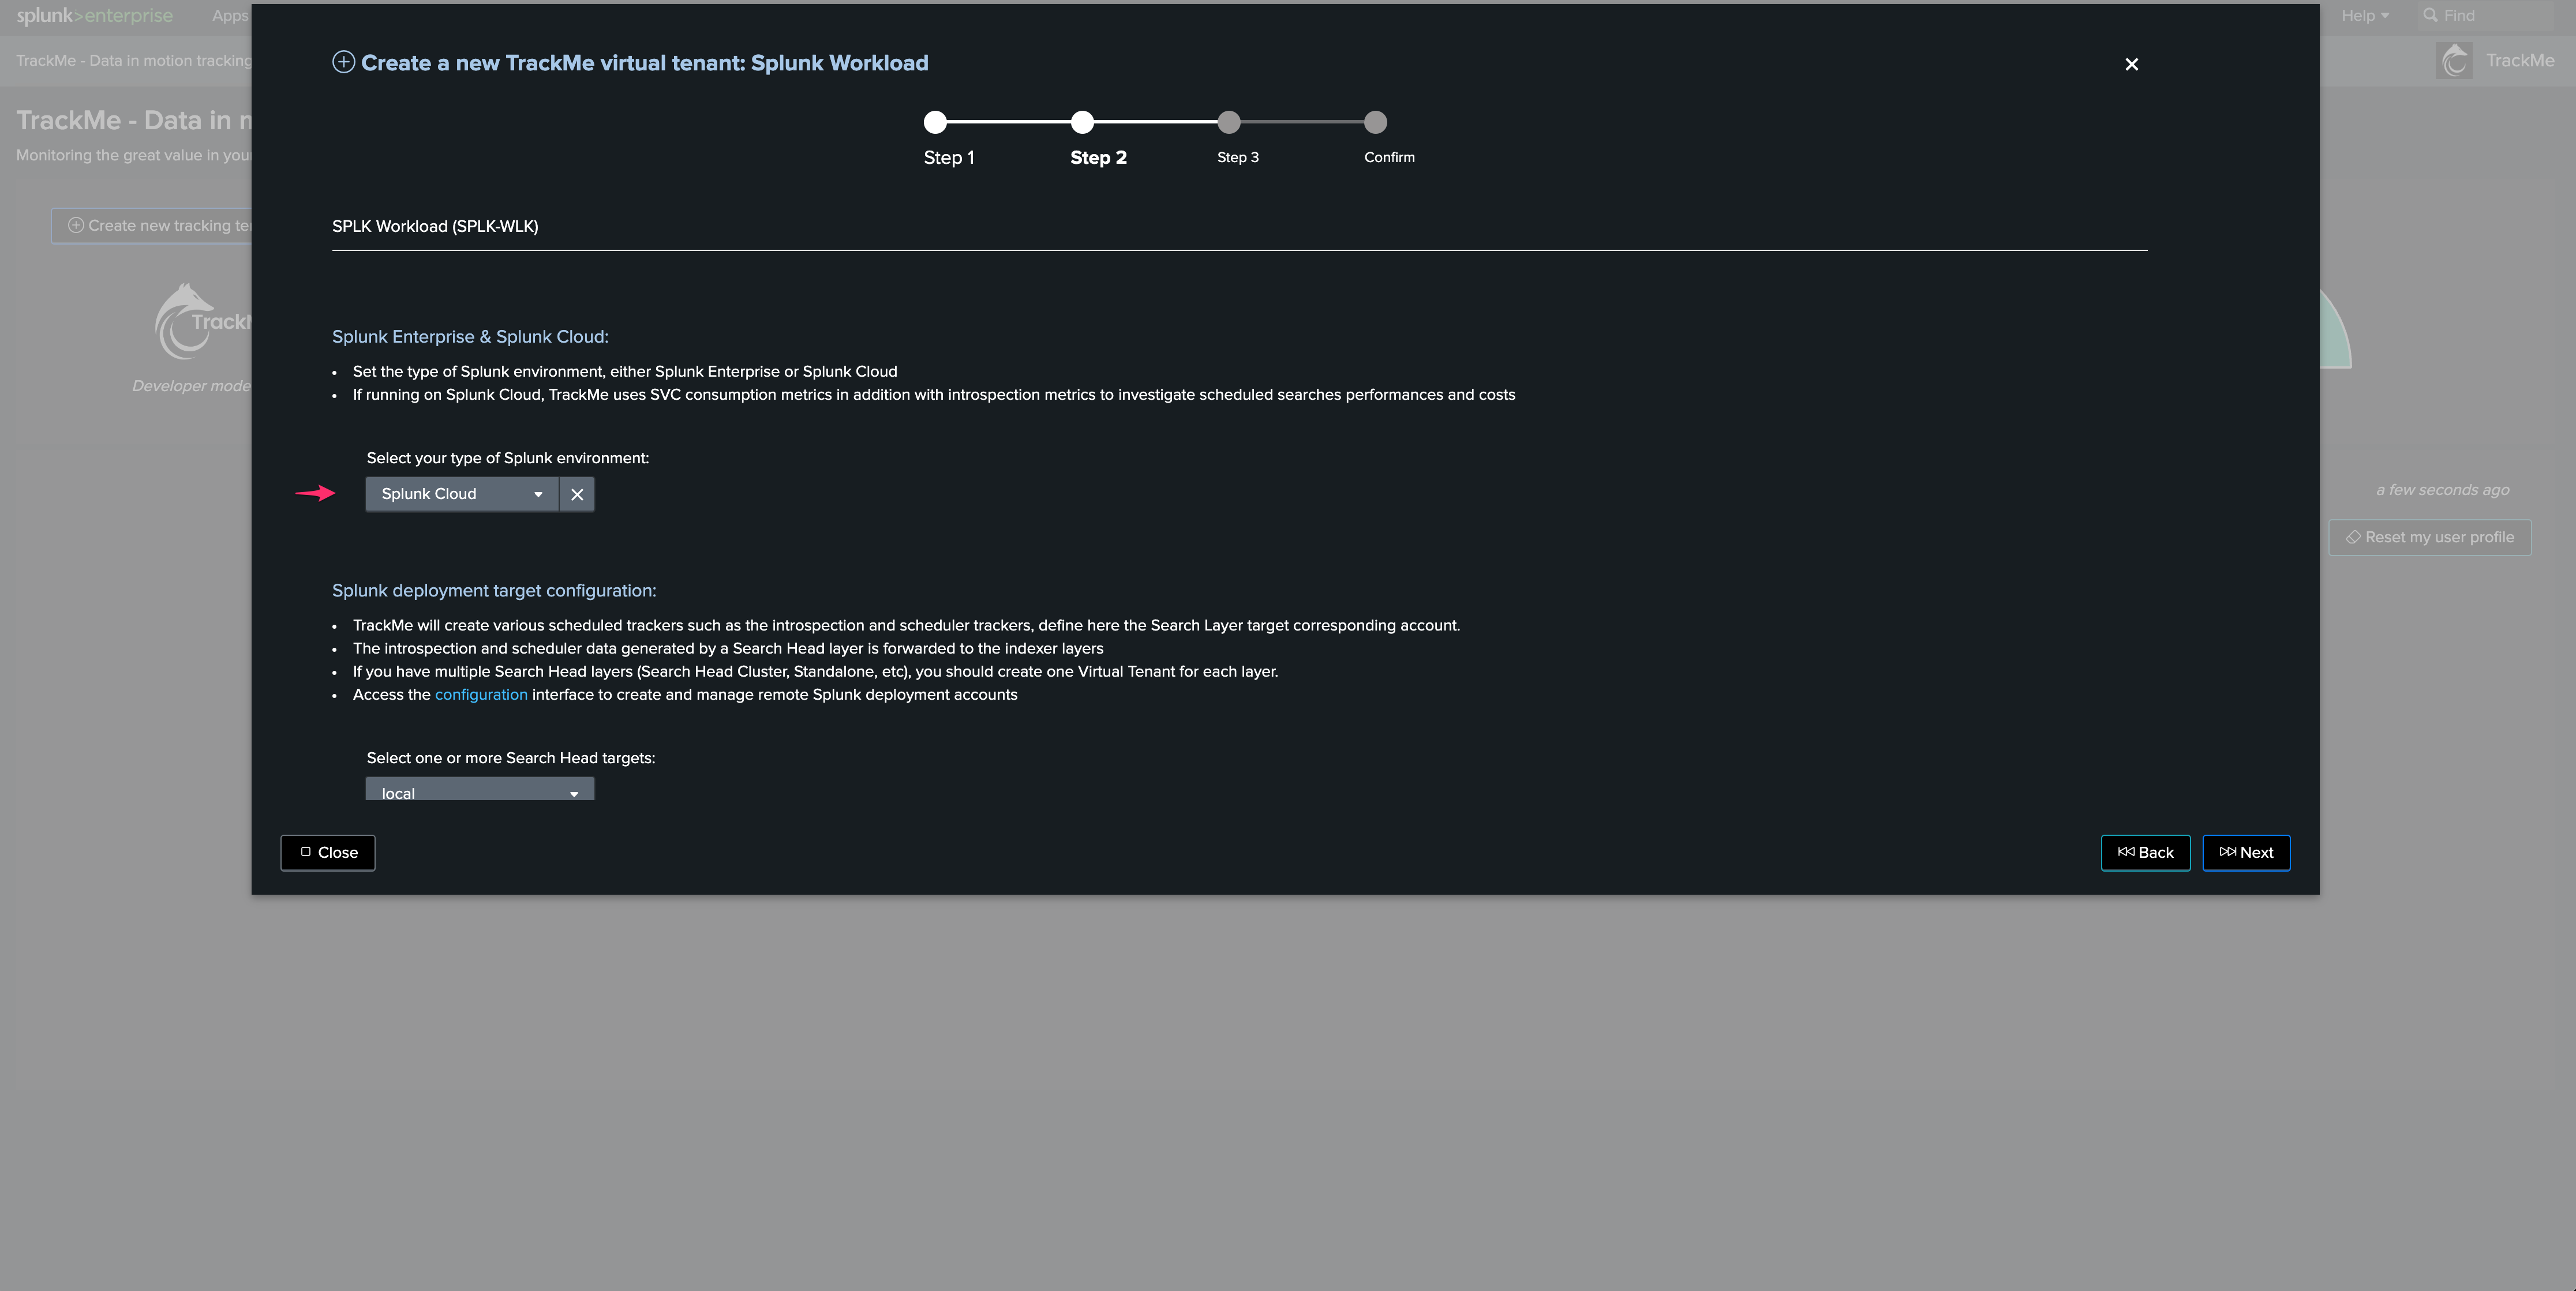
Select the Remote deployment target:
Set the search restrictions:
Hint
Search restrictions per Workload component
Since the release 2.0.57, you can define the search restrictions per component, to ease and improve the configuration process
You can directly validate that the search will return results by clicking on the search preview link
This opens a pre-populated search interface, it also sets the restrictions and calls splunkremotesearch if the search has to run against a remote Search Head tier
Complete the rest of the setup, it can take up to 5 minutes before entities start to be visible in the Workload tenant.
Workload component in Splunk Enterprise
If you are running Splunk Enterprise, then the setup slightly depends on your deployment:
If you have multiple Search Head tiers, you can use the same tag approach as documented in the Splunk Cloud setup above
You can also create a custom indexed or search time field on the Search Head tier level, which automatically identifies the Search Head tiers to be targeted
Use different combinations up to your preference
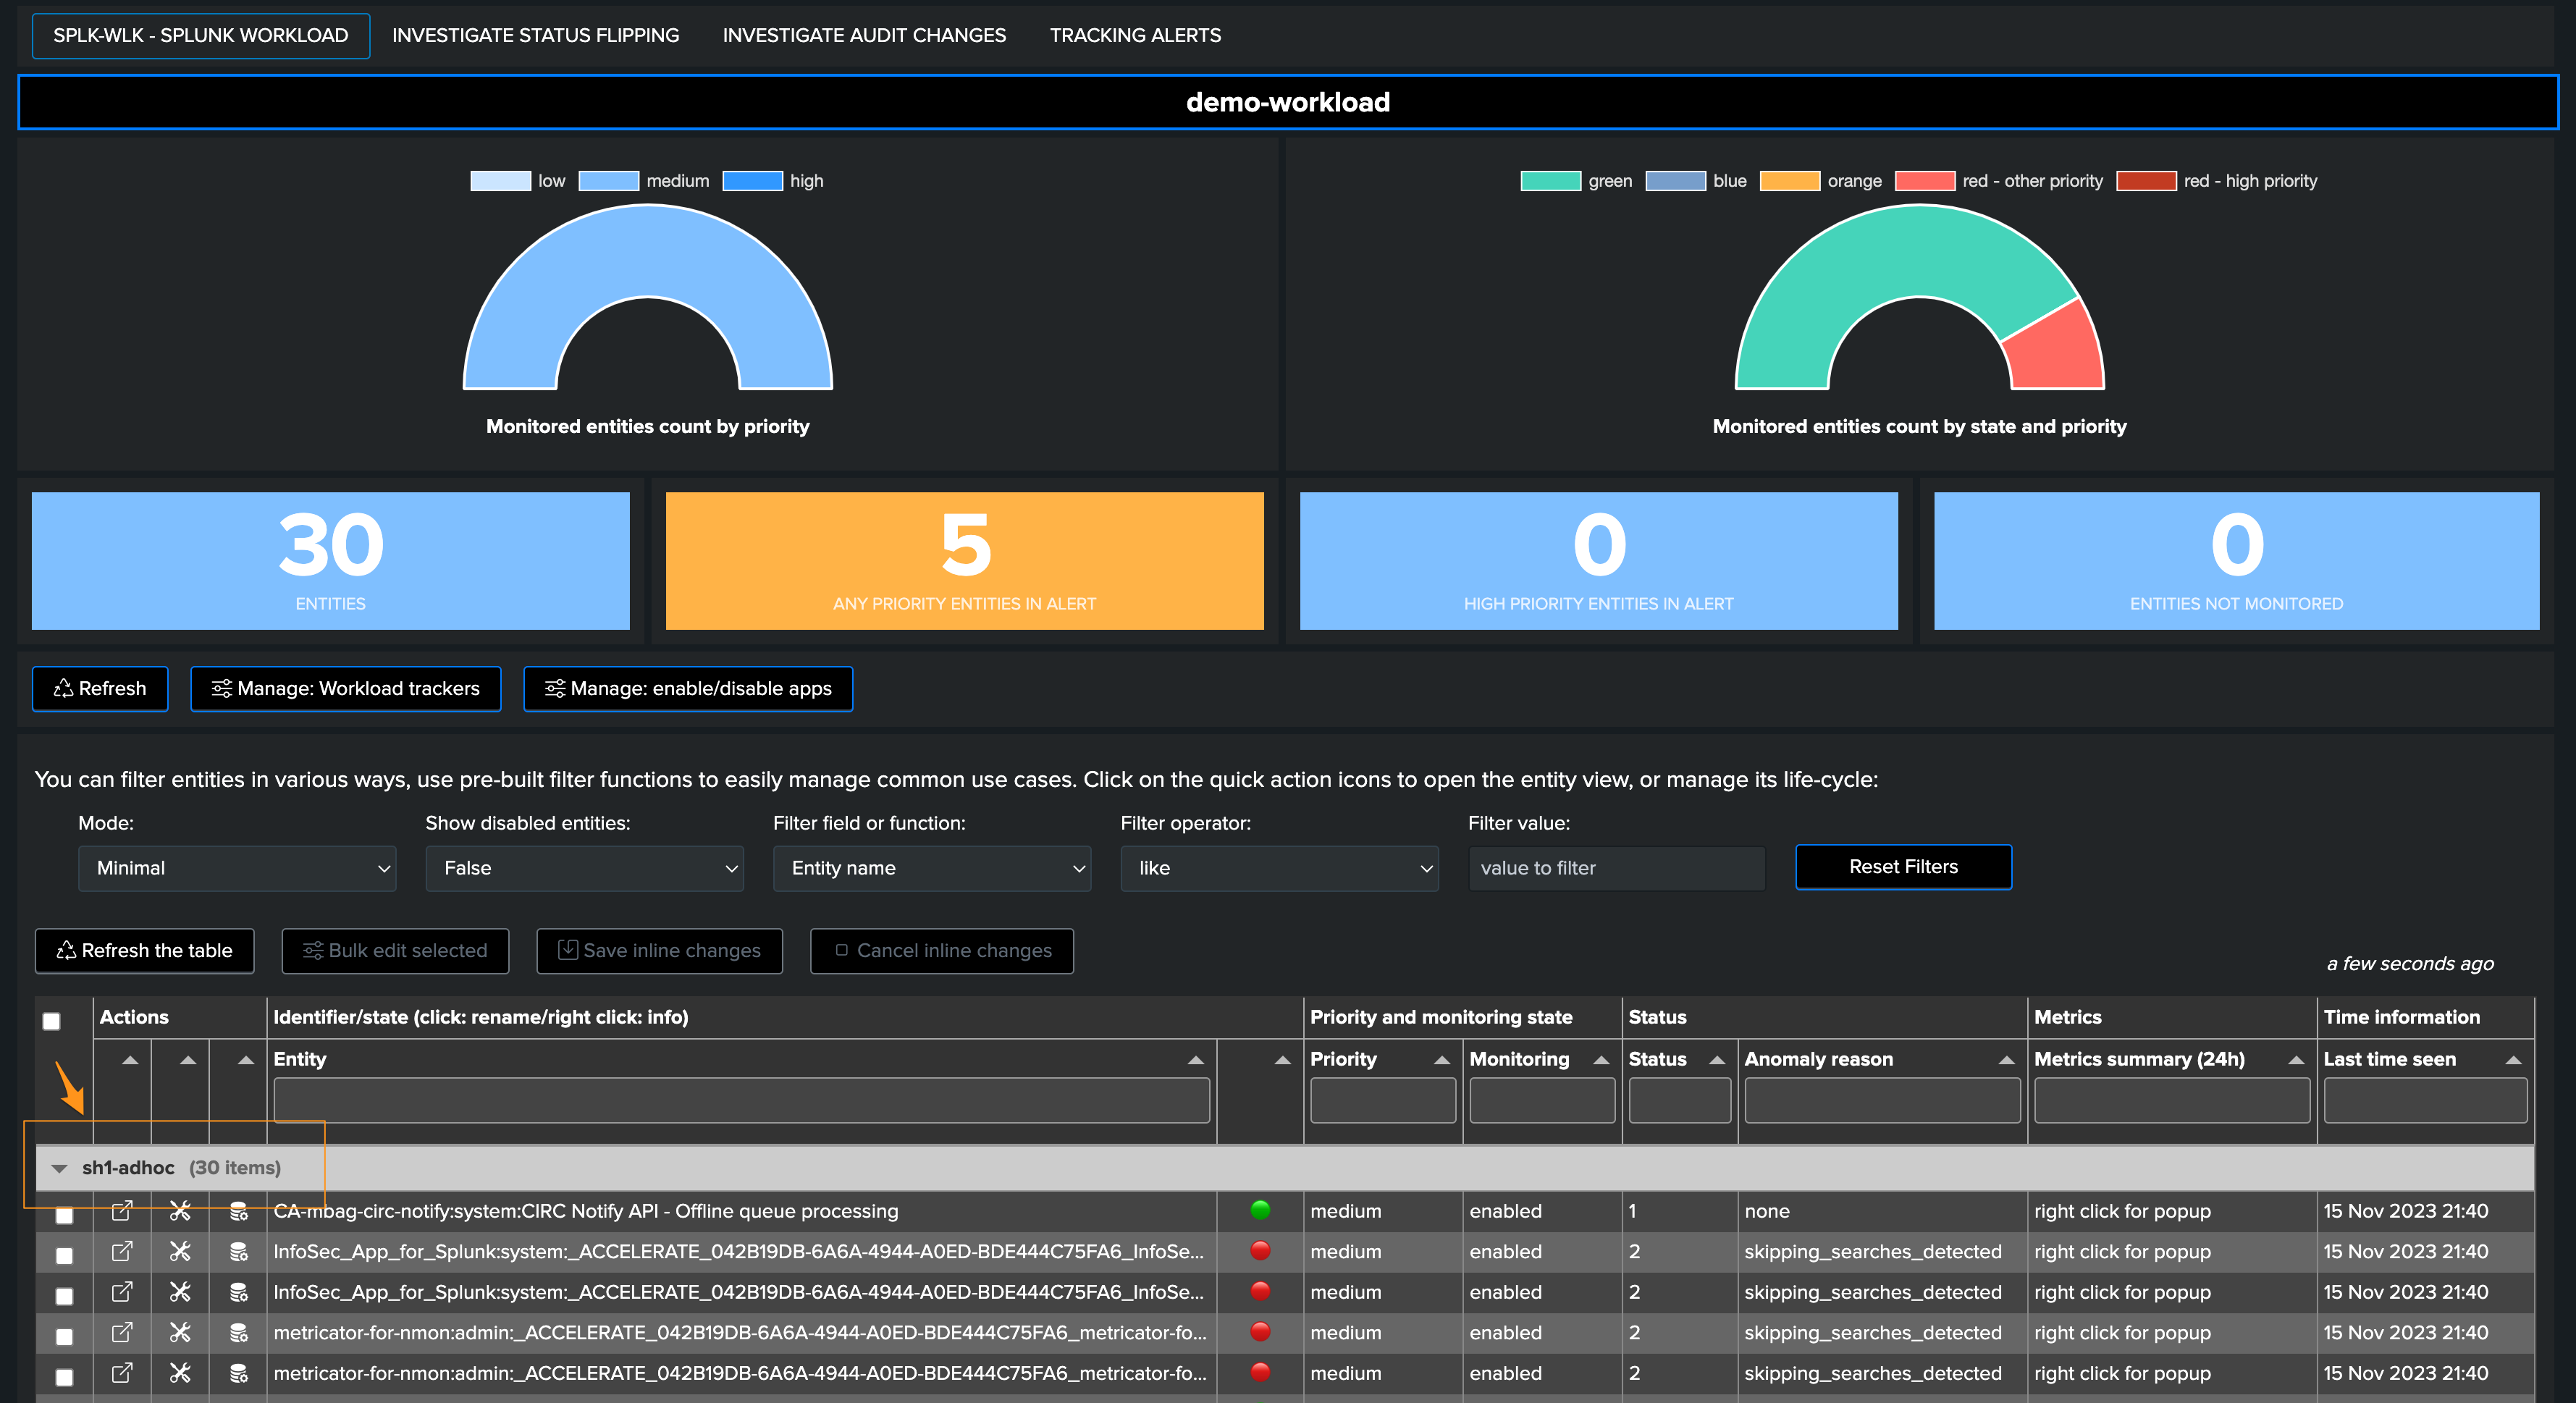
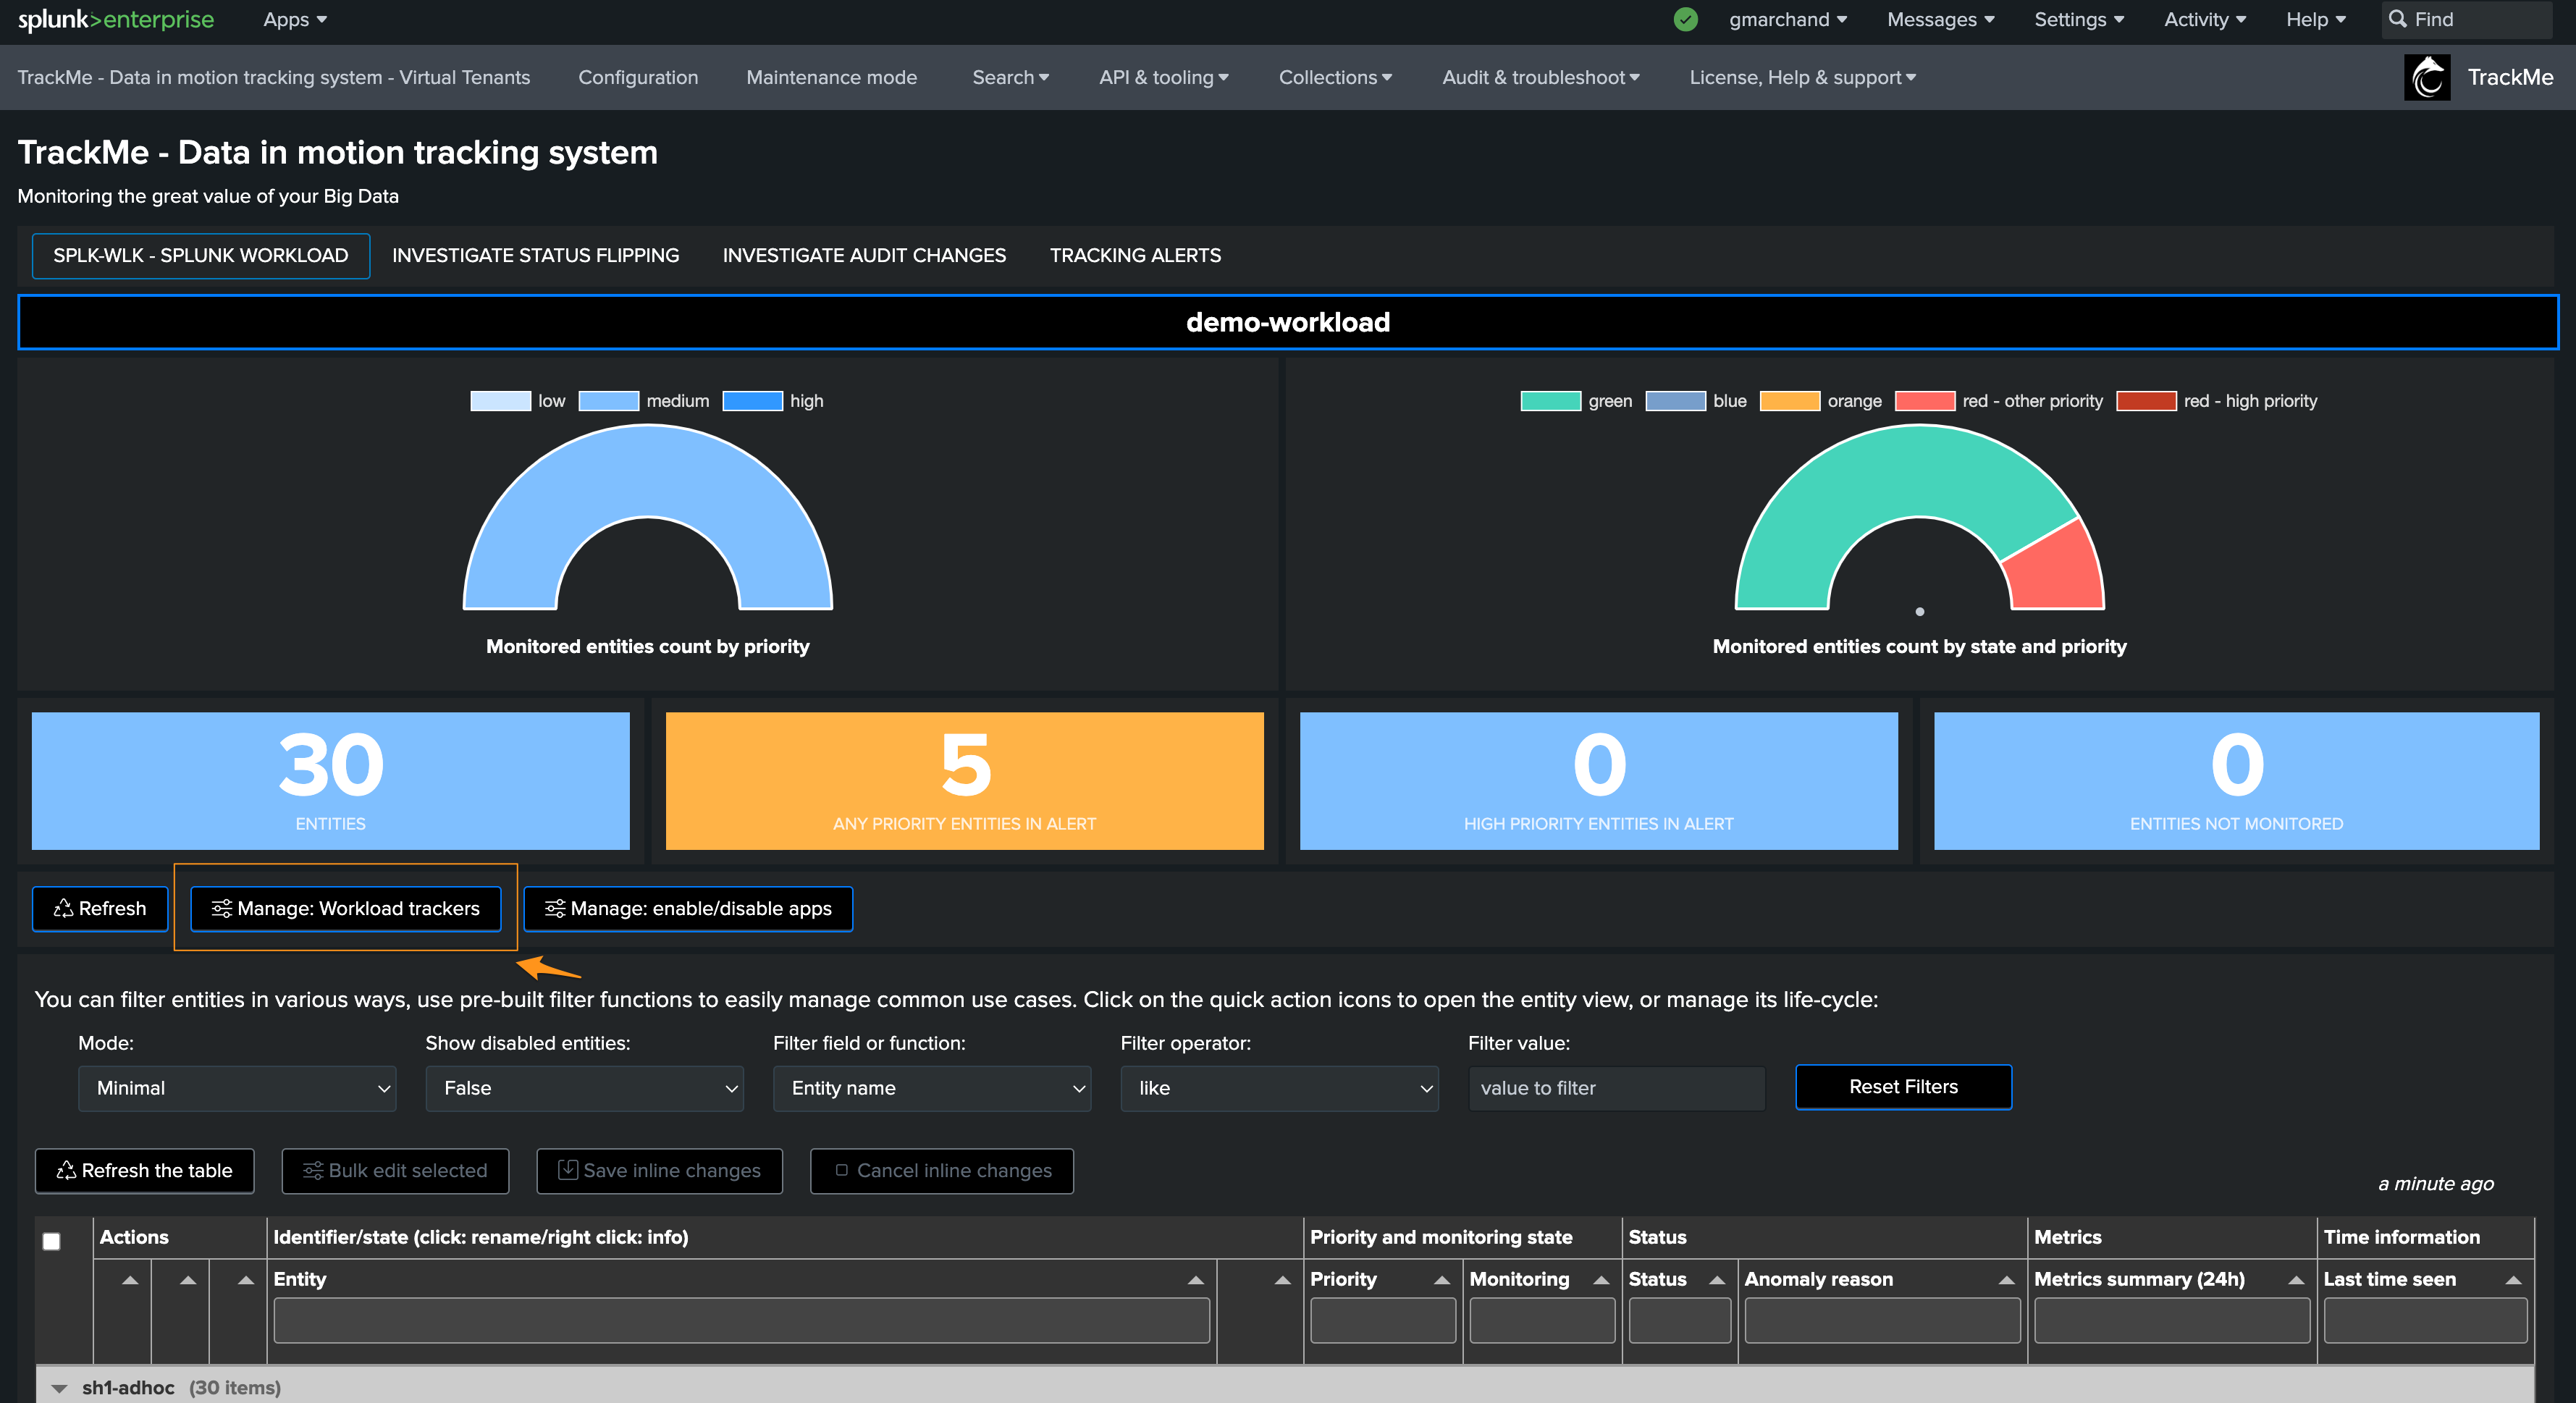
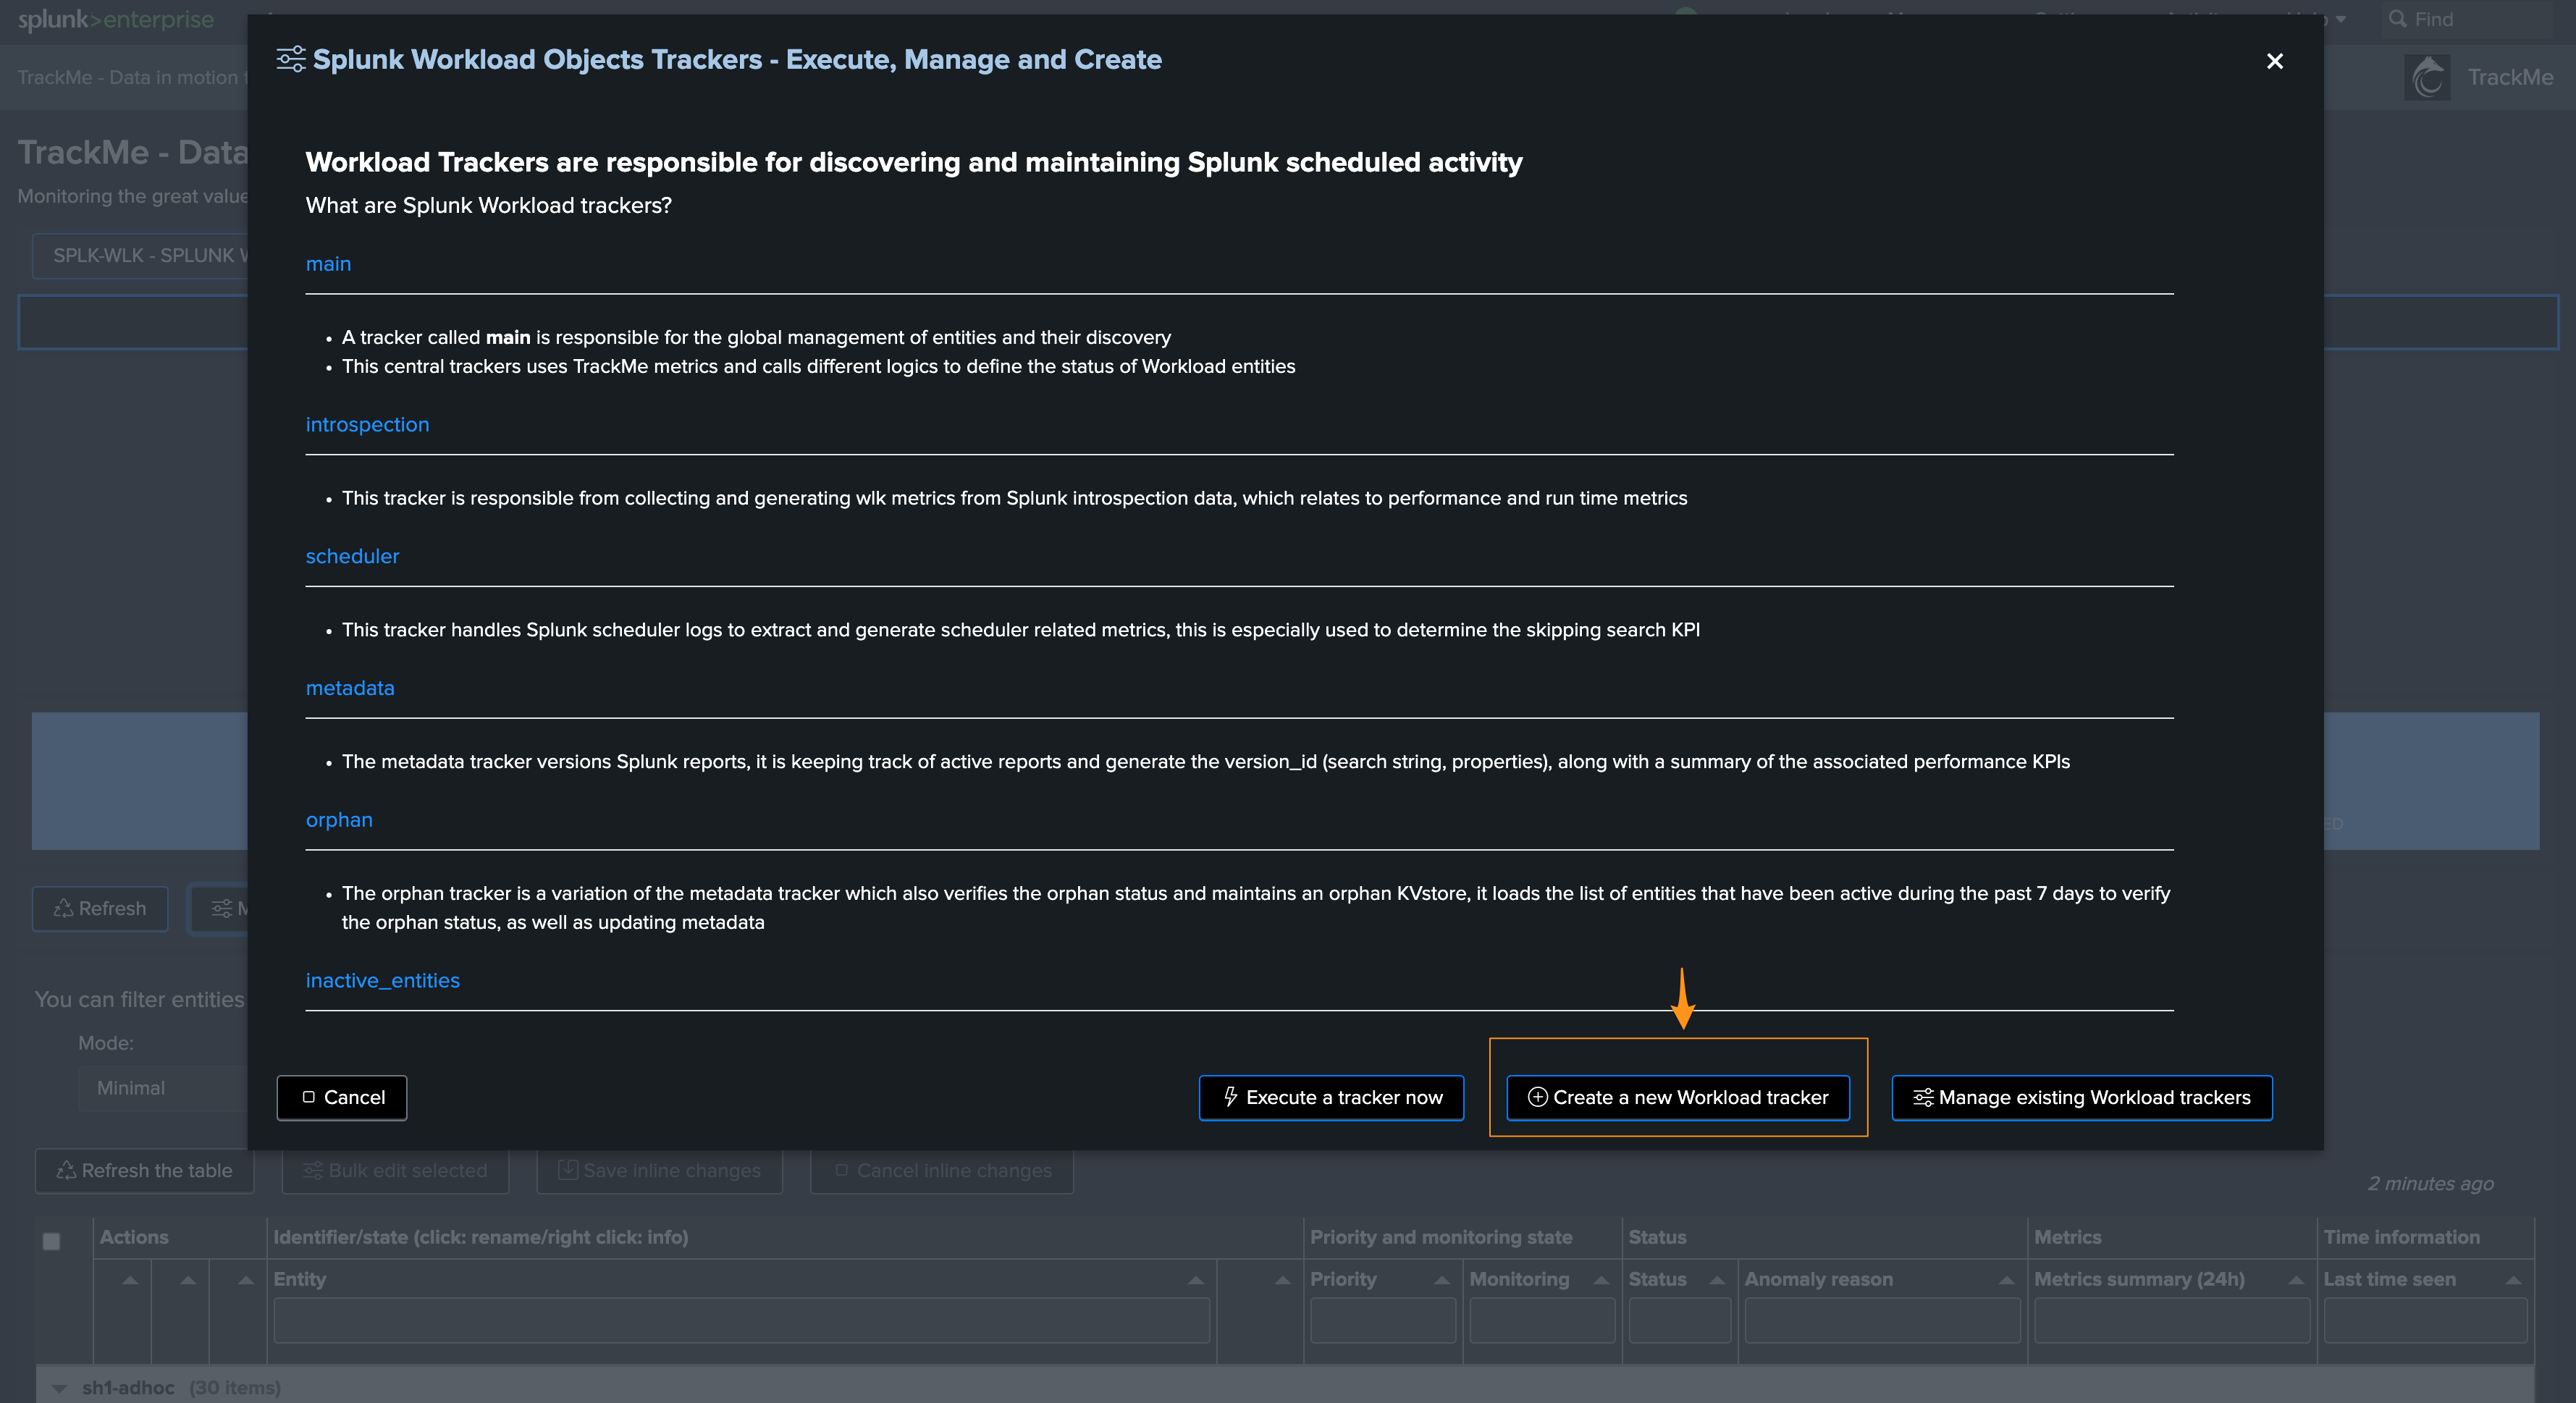
Managing Workload Trackers
There are a certain number of Workload trackers which are created automatically by the wizard, depending on your Splunk environment.
Through the trackers management user interface, you can eventually add new trackers if needed, either if you want to re-create the trackers or extend the tracking to additional context:

However, the general recommendation is to dedicate a Workload Tenant to a given Search Head tier.
The REST API UI also allows you to manage all types of Workload trackers:
Managing Workload detection
When a Workload Virtual Tenant is created, TrackMe automatically creates a macro which defines the main status definition behaviour for that tenant.
The macro is named as follows:
trackme_wlk_set_status_tenant_<tenant_id>
You can update this macro to modify how TrackMe defines the status of Workload entities, for instance these lines define the grace time period for the detection of delayed entities:
``` Calculate the delta in sequence between now and the last execution compared against the requested cron schedule sequence, add 1h of grace time, detect if the execution has been delayed ```
| eval status=if(cron_exec_sequence_sec>0 AND ( now()-last_seen > (cron_exec_sequence_sec + 3600) ), 2, status)
This also defines the level of skipping searches (percentage) which leads entities to turn orange or red:
``` If there are skipping searches, define two levels of alerting, less than 5% is 3 (orange), more is 2 (red) ```
| eval status=case(skipped_pct>0 AND skipped_pct<5, 3, skipped_pct>0 AND skipped_pct>=5, 2, 1=1, status)
The macro is part of the life cycle of the tenant’s knowledge objects, therefore it will be removed automatically if the tenant itself is deleted.
This macro is executed by the “main” tracker, which naming convention is the following:
trackme_wlk_hybrid_main_ce555e75db1643a_wrapper_tenant_<tenant_id>
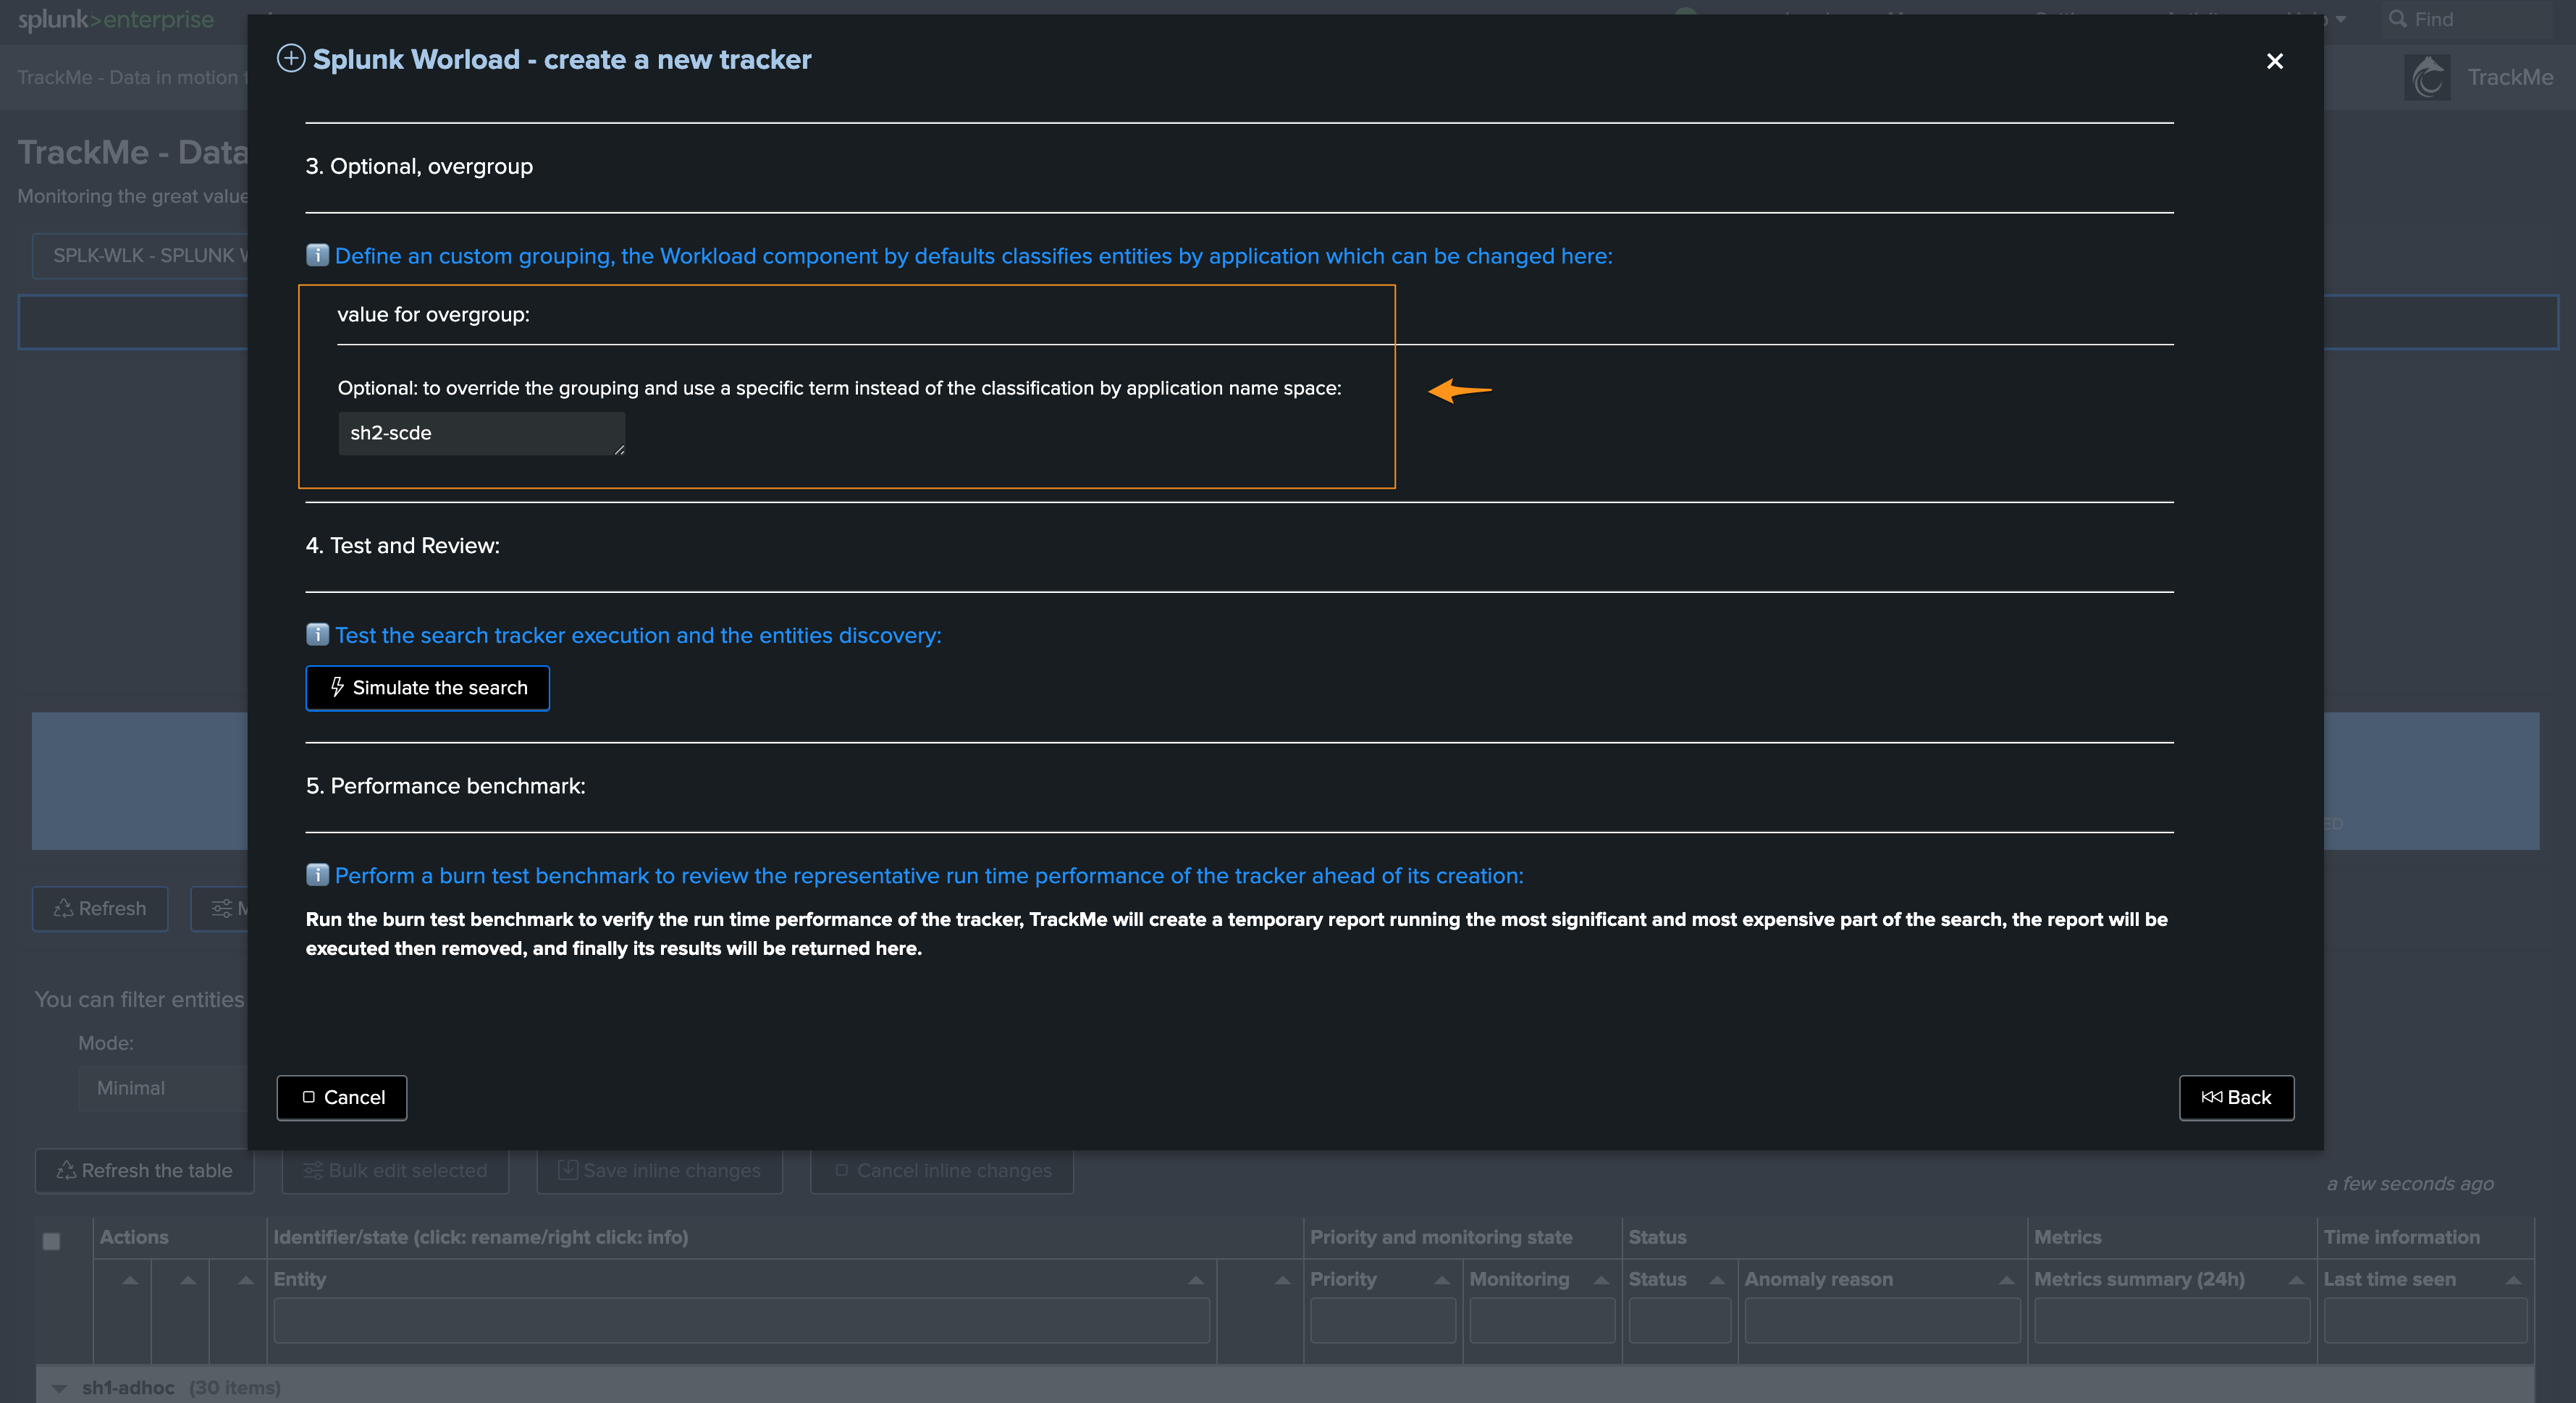
Creating a Workload tenant to host multiple Search Head tiers with overgroup
To create a tenant which hosts multiple Search Head tiers, you can use the overgroup feature, follow the steps below:
Step 1: Create the tenant with a first Search Head tier and the corresponding overgroup
We start by creating a brand new Workload tenant, where we define the first Search Head tier constraint, target (account) and overgroup value:
Define everything as needed (account, constraints, etc) then enter a custom value for the overgroup:
Once created and after 5/10 minutes, entities will be visible under the overgroup:
Step 2: In the Workload tenant, create the additional trackers for the second Search Head tier
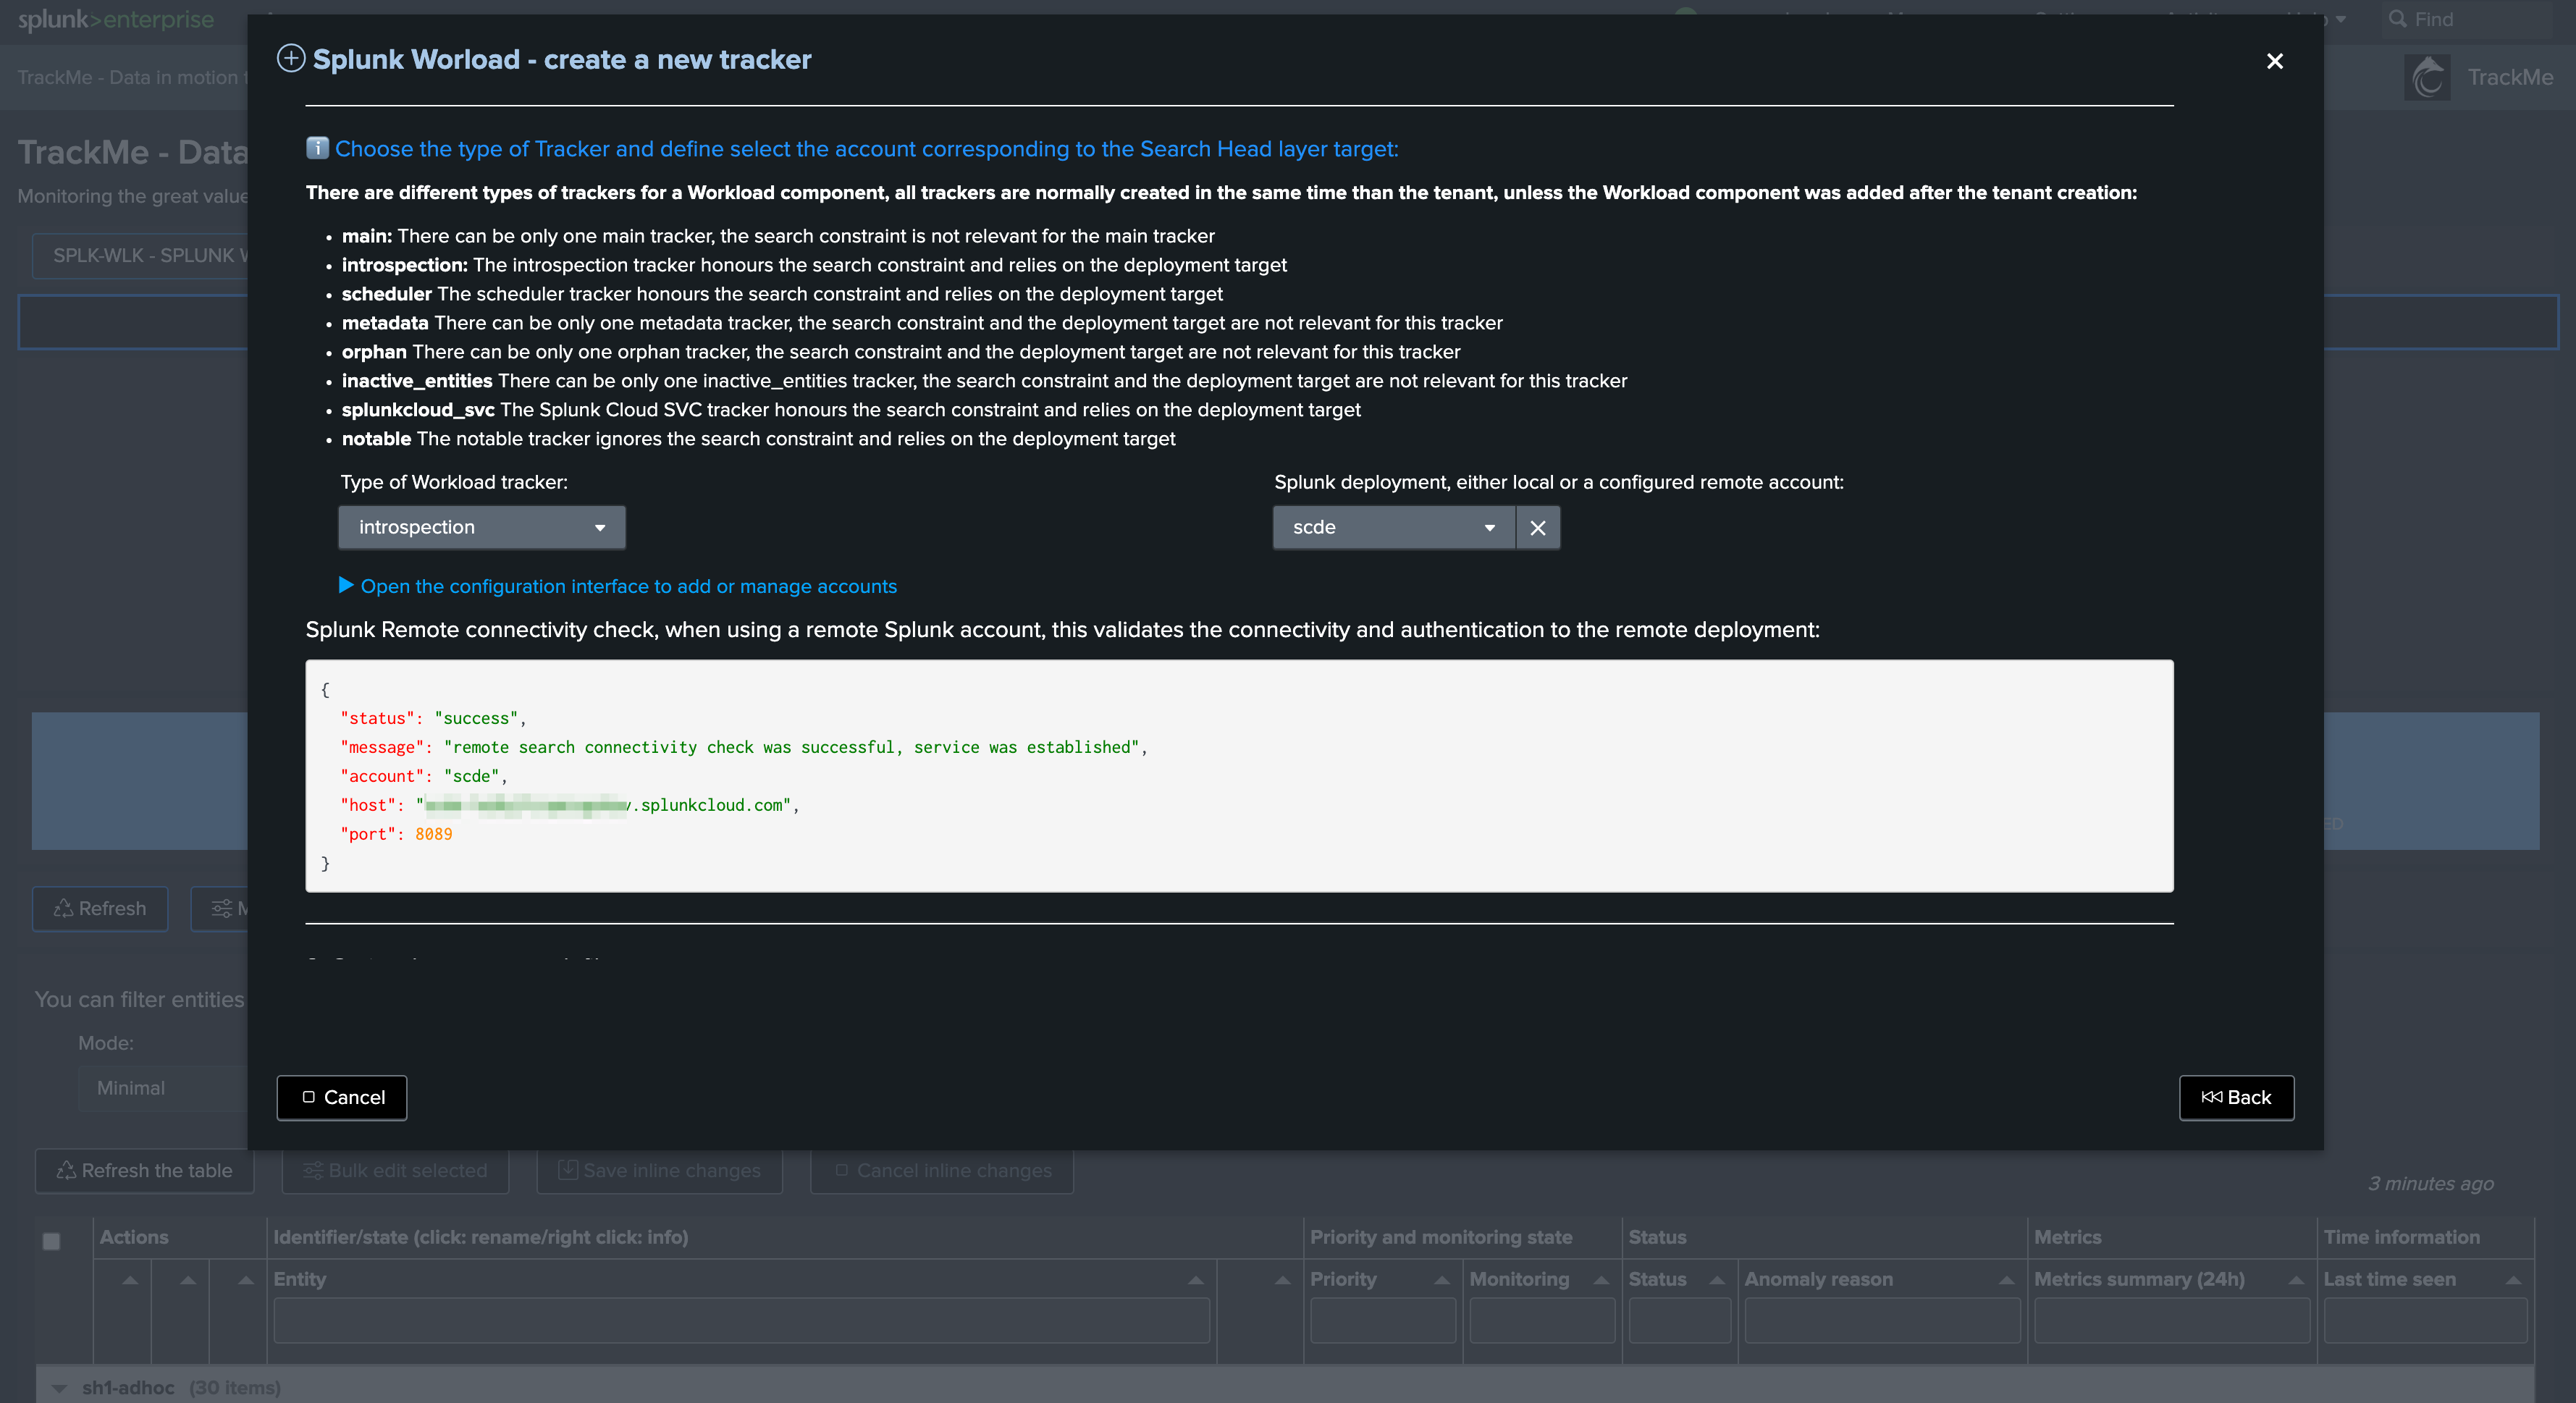
Now that the tenant is created, we can create the additional trackers for the second Search Head tier, the following types of trackers can be created:
scheduler
introspection
Splunk Cloud SVC (optional, for Splunk Cloud only)
Notable (optional, if you wish to track notable activity)
Note
Common trackers:
You do not need to create additional trackers for main, metadata and inactive entities
There can be only one copy of these trackers per tenant, and these trackers can manage entities accordingly as long as these entities refer to a different account than the one used when creating the tenant
Therefore, we can manage multiple Search Head tiers in a same tenant as long as each Search Head tier corresponds to a different account (which in fact will be the case systematically in the Workload component)
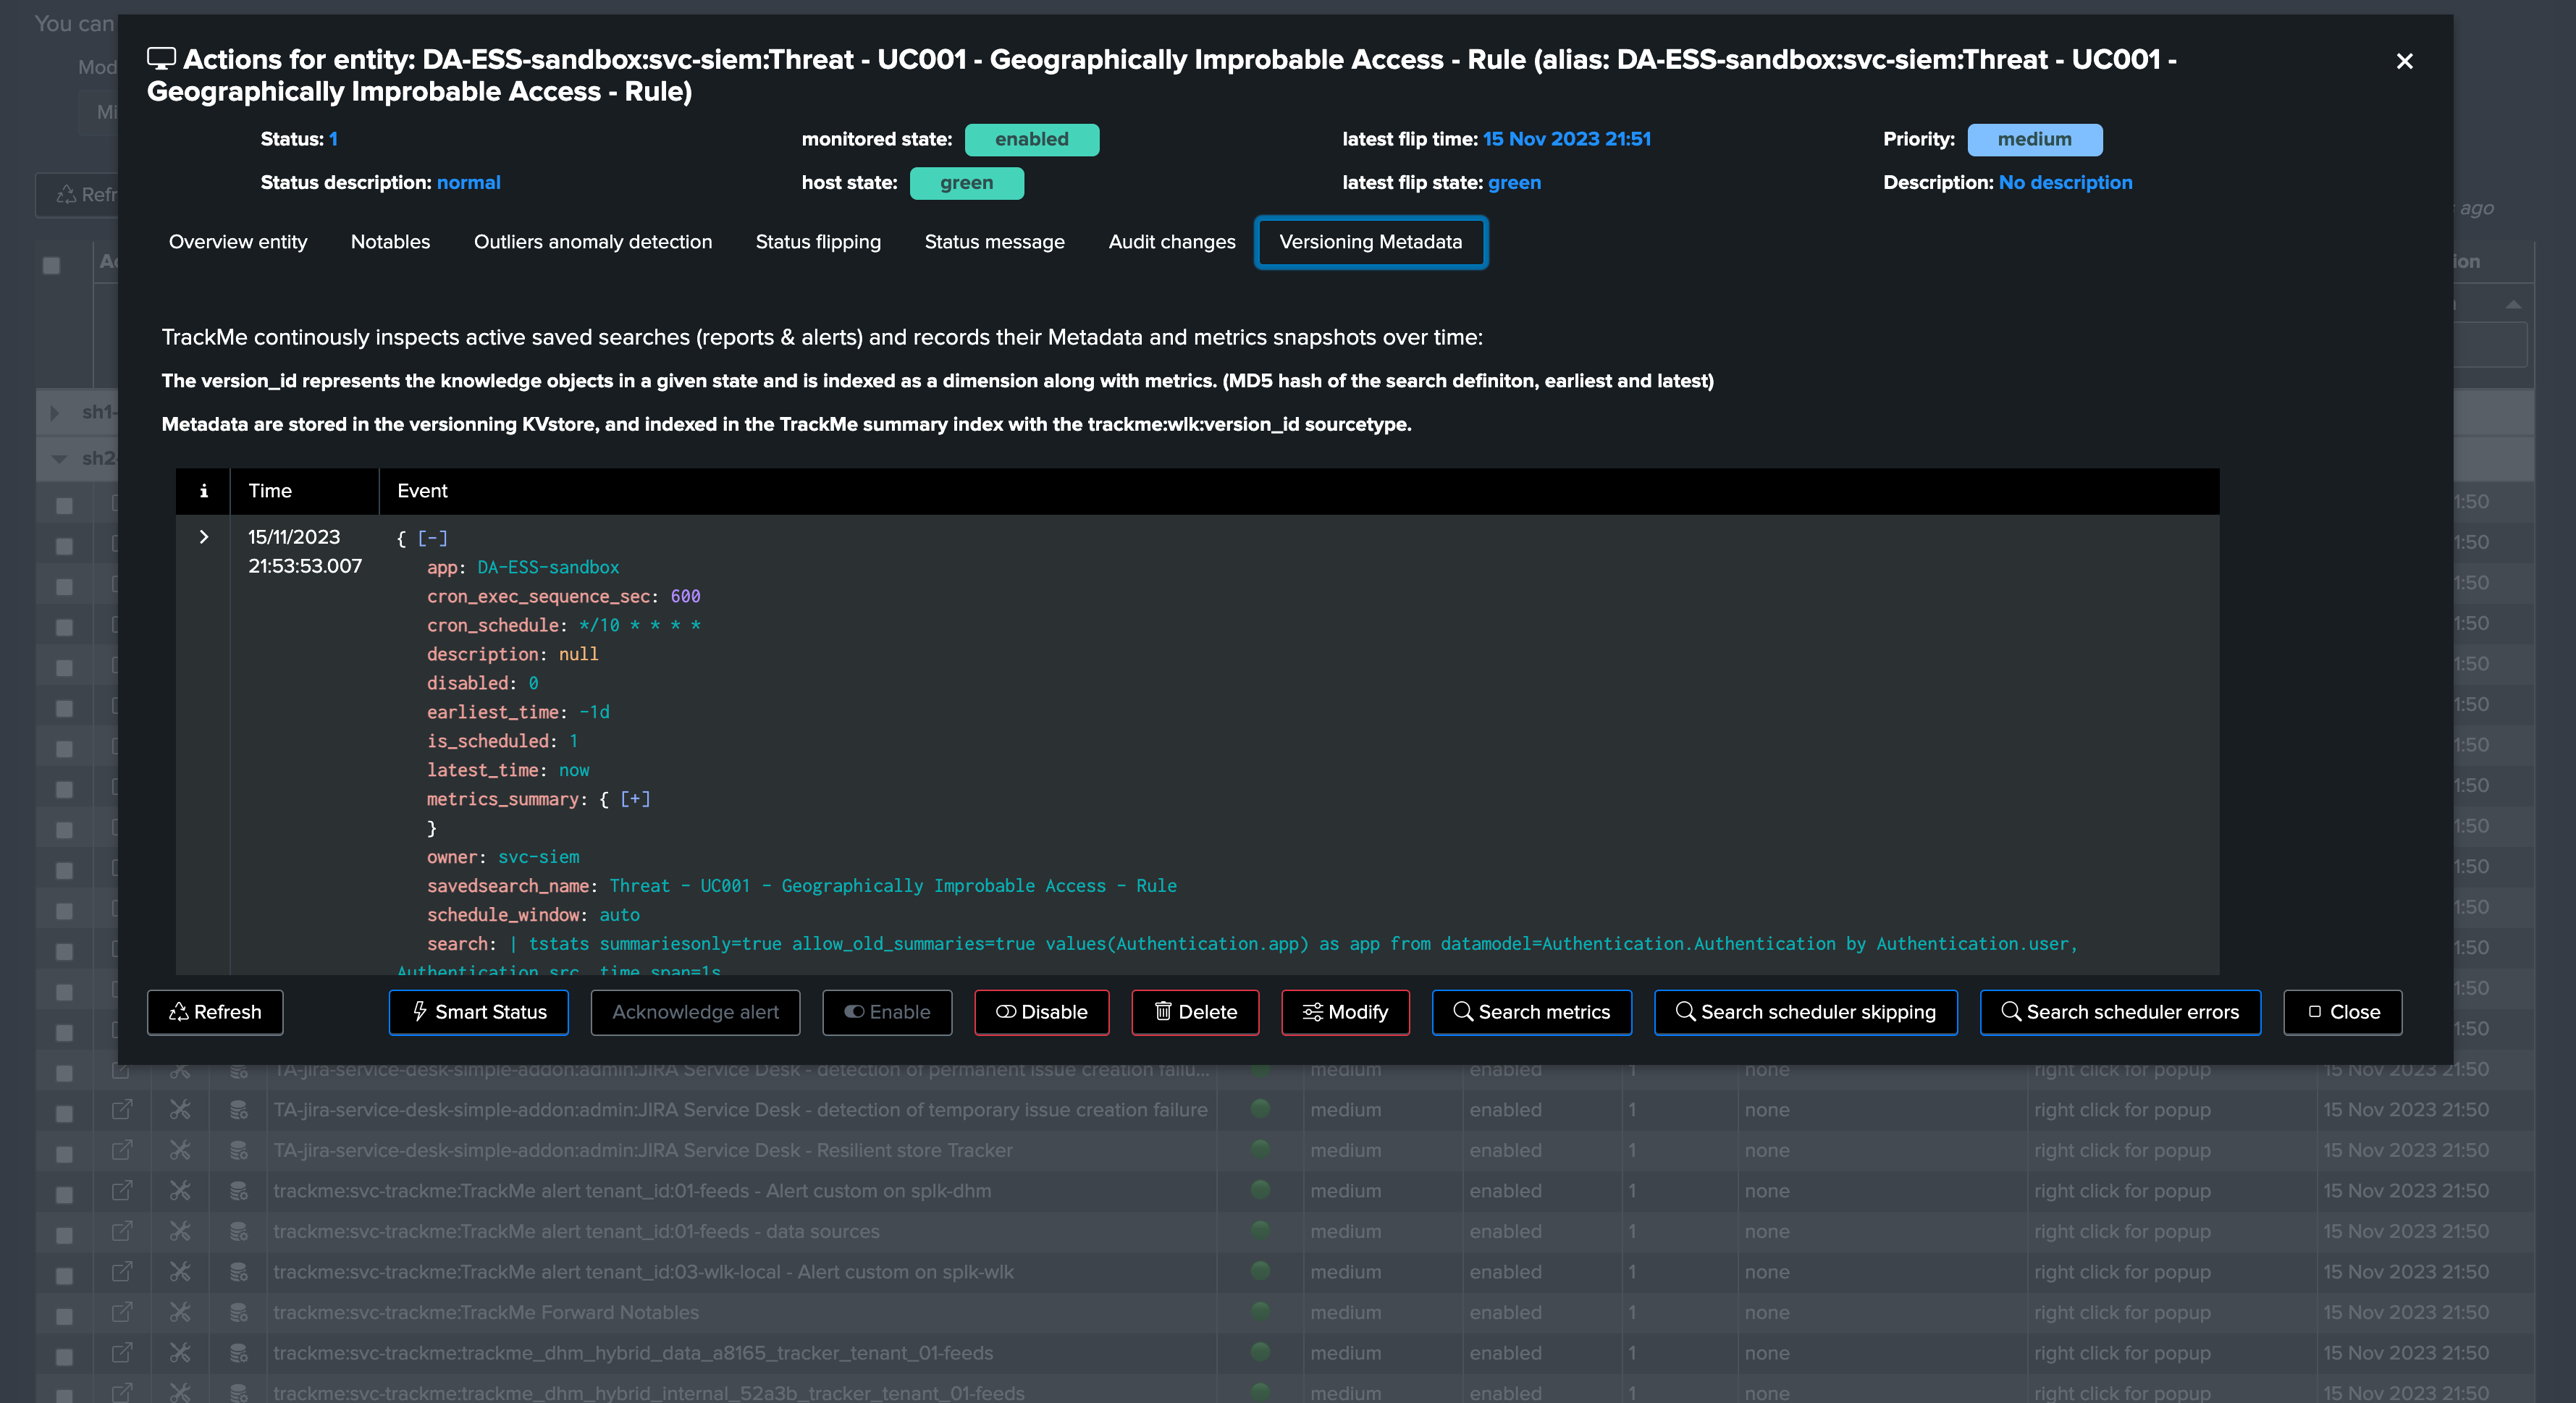
For instance, we will create trackers for a second Search Head tier targeting a remote account and will name the overgroup sh2-scde:
After 5/10 minutes, entities are now also created under the second overgroup as expected:
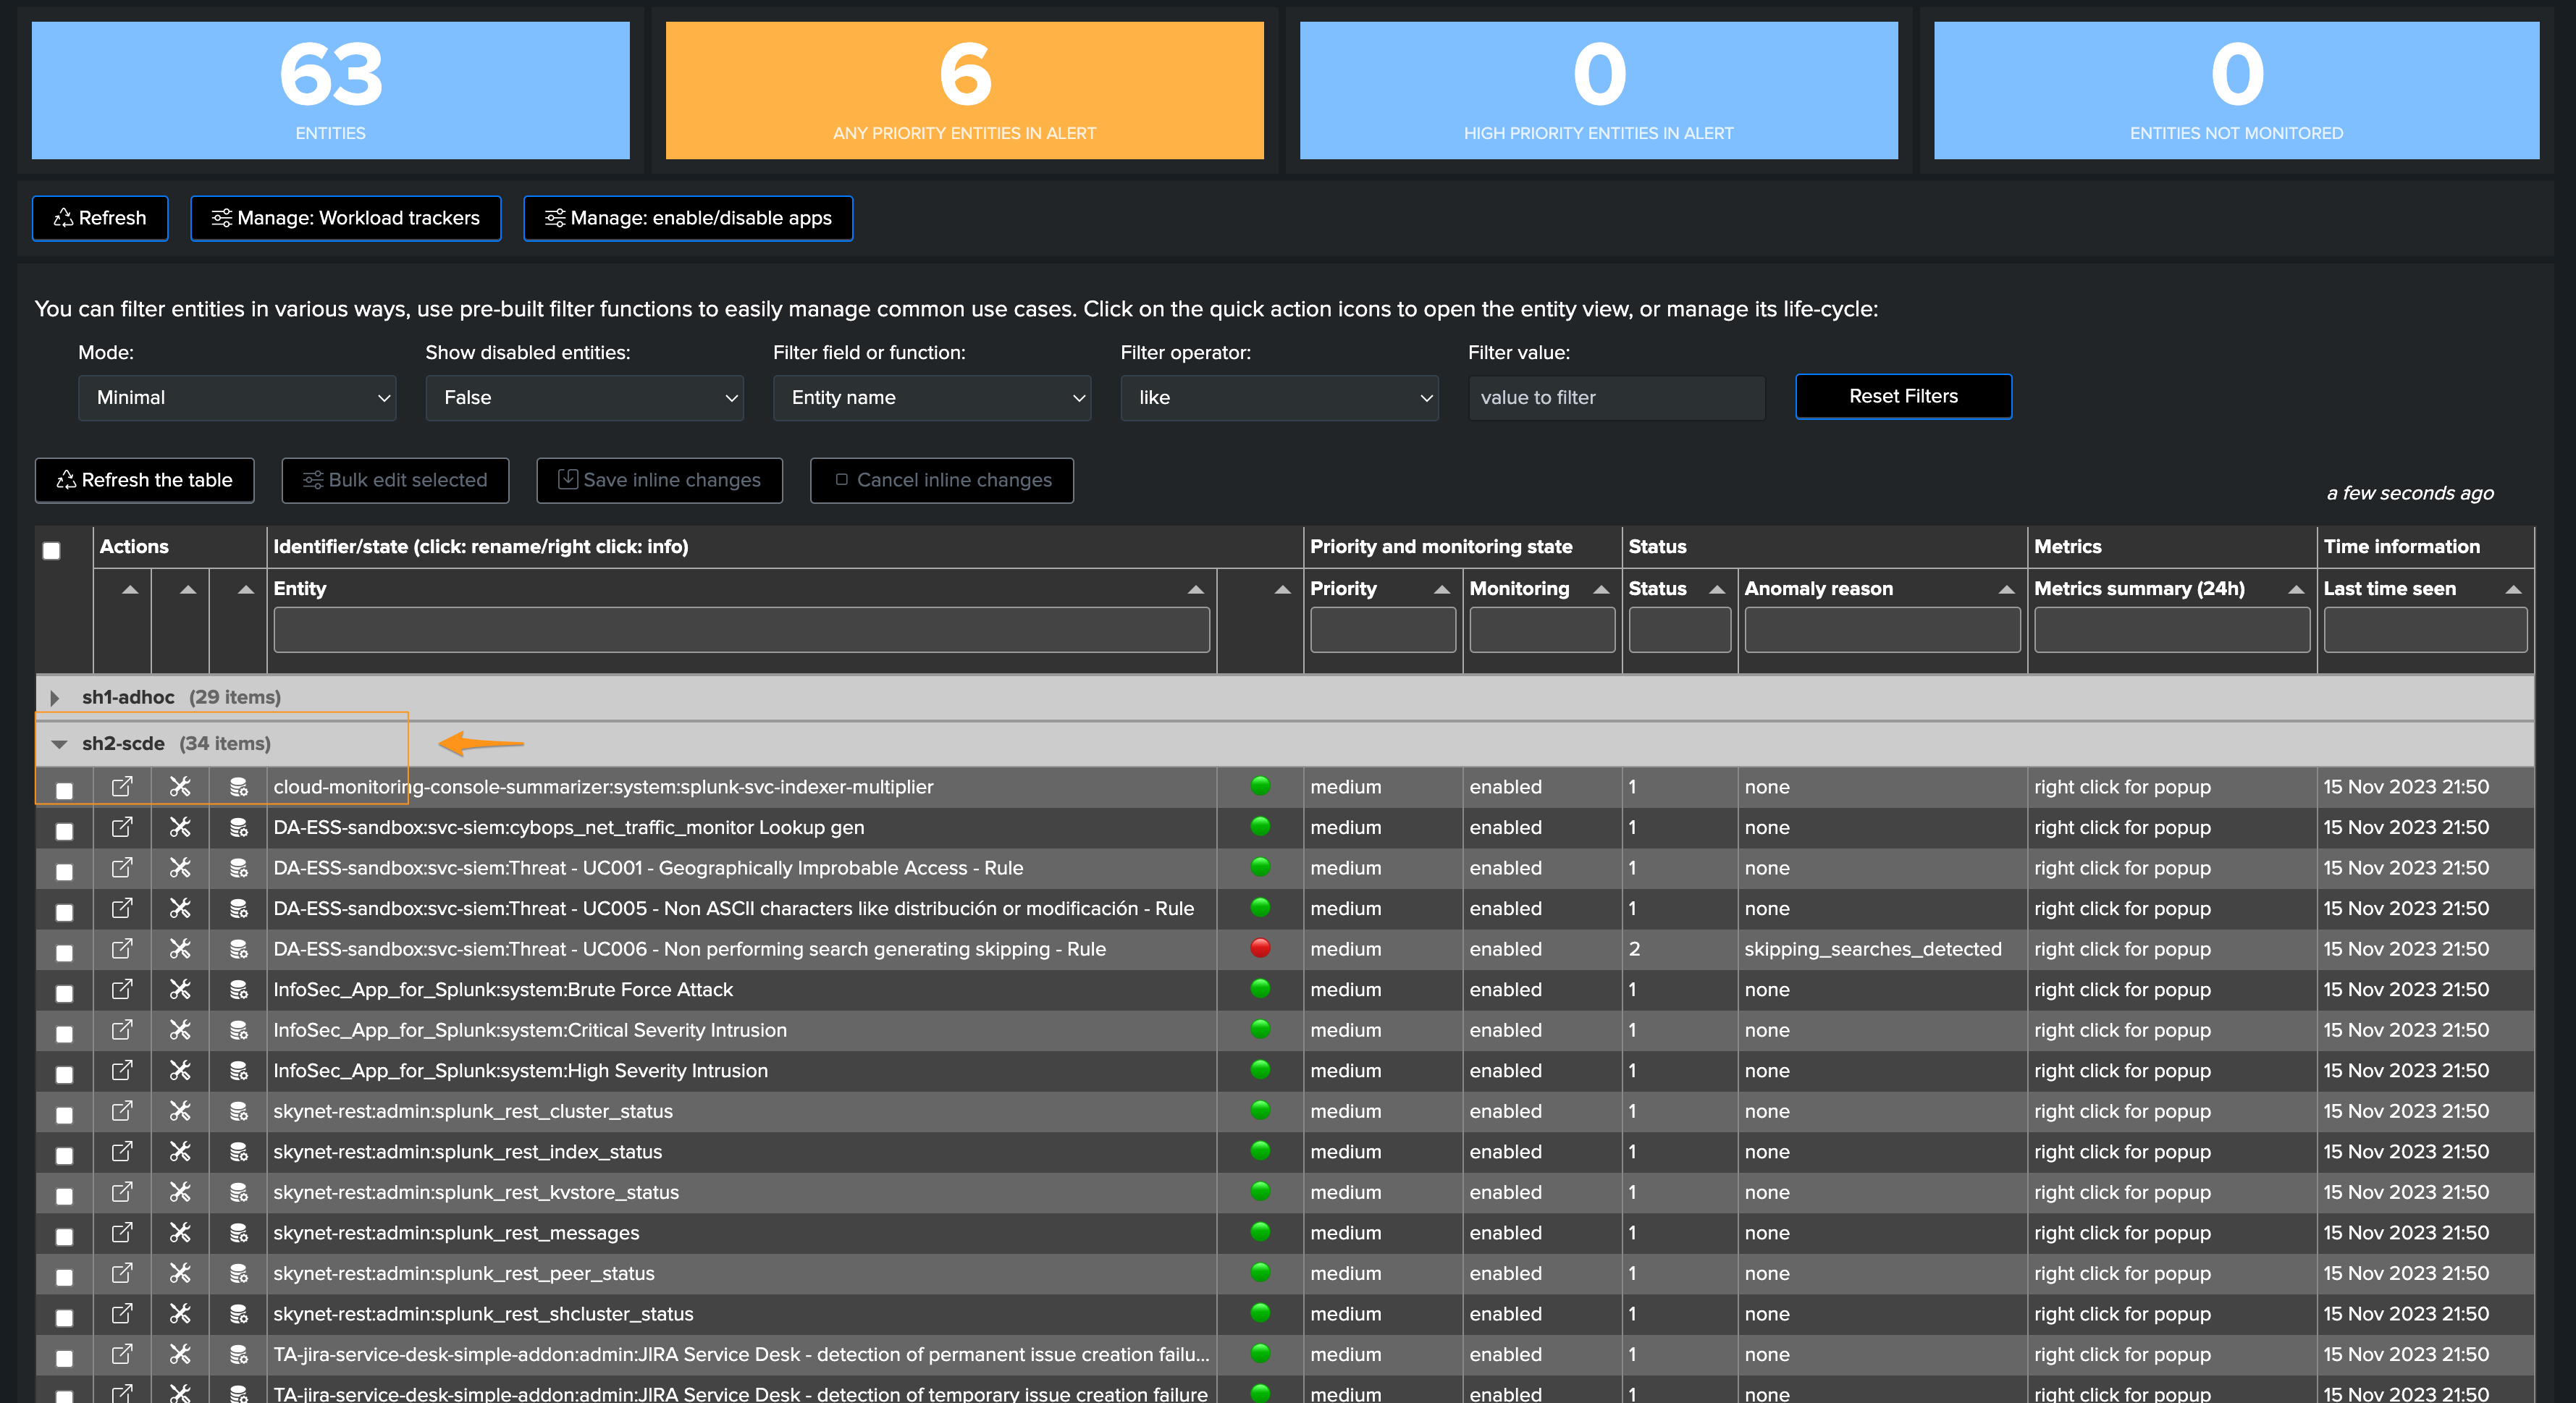
Metadata are managed transparently depending on their parent account, so TrackMe knows which Search Head tier to query for: